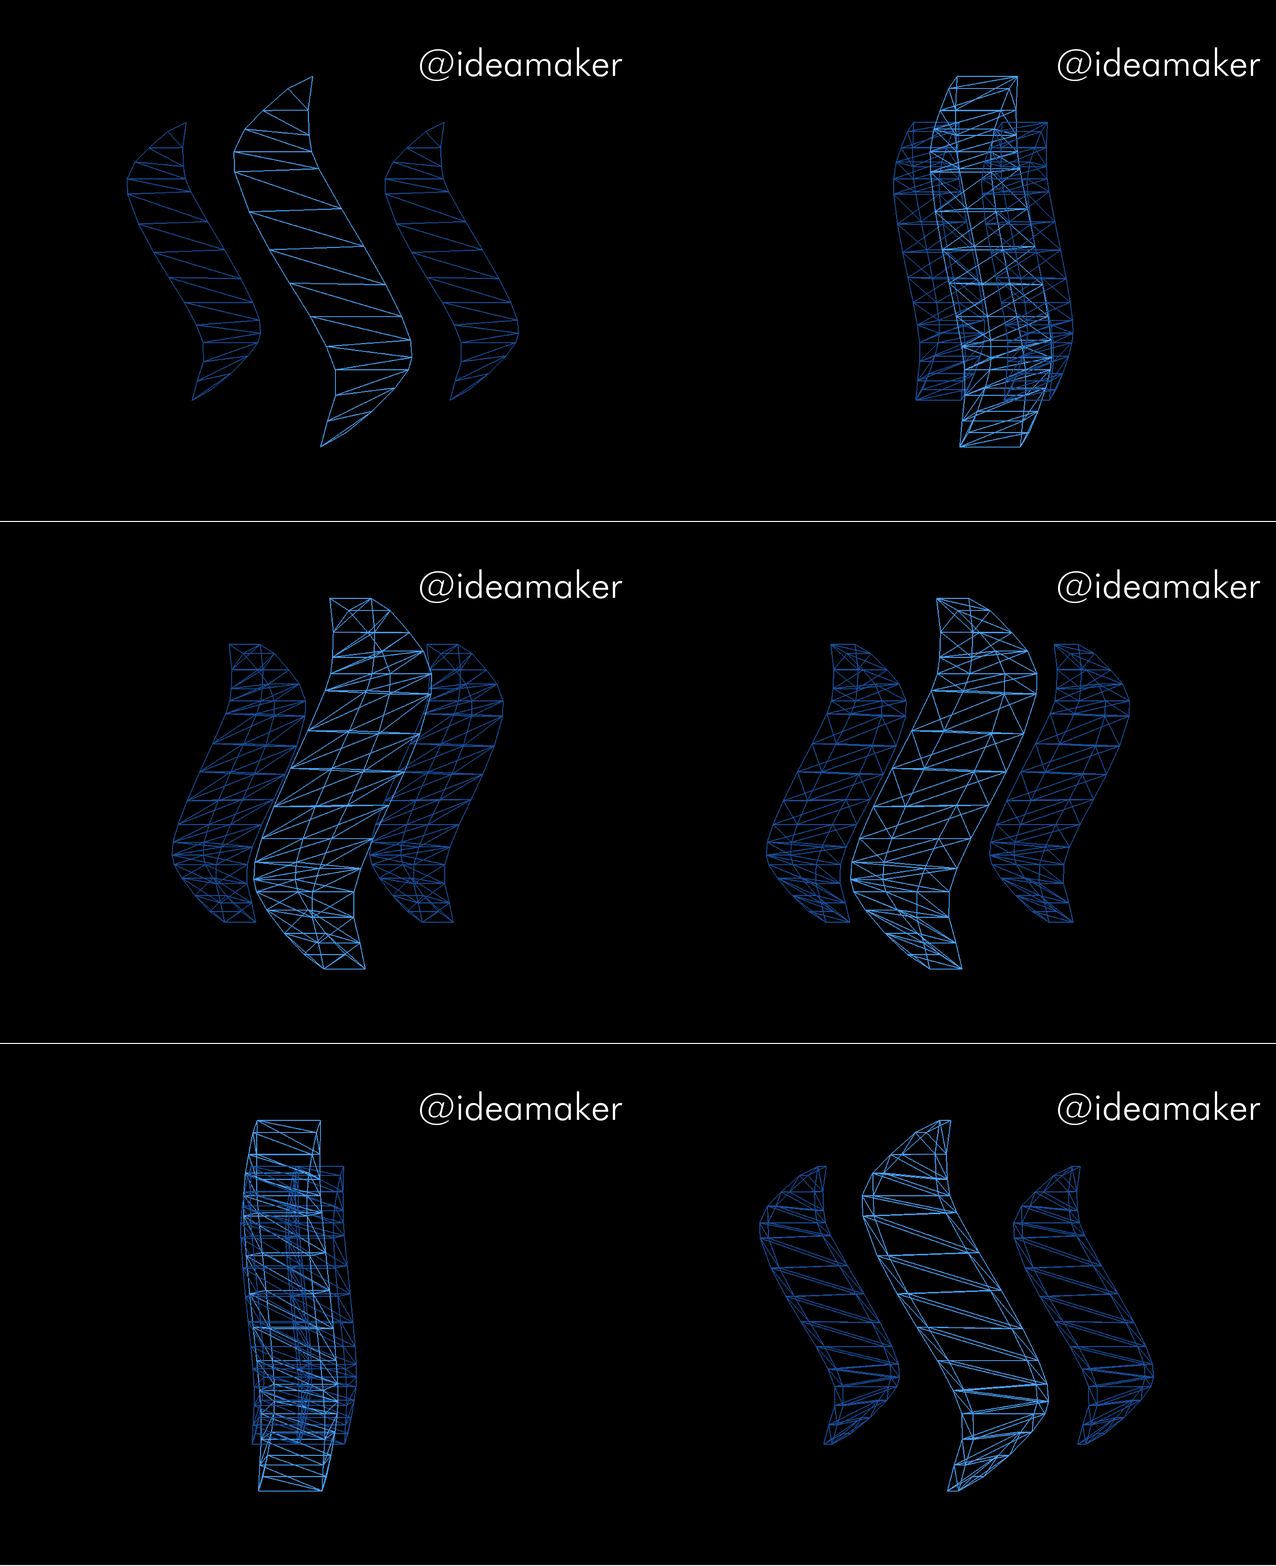
▲ ▲ ▲ Steemit logo in 3D [Full Tutorial!]
Hello, Steemians! Some of you ask me to make a full tutorial of my art work in previous post:
https://steemit.com/steemit/@ideamaker/steemit-logo-in-3d-128-lines-of-code

Let's go! ;-)
So here's the full source we use:
#include <glut.h>
#include <math.h>

float SecretSteemArray[] = {
 -0.0300,  0.7067, 0.0000,
 -0.1067,  0.6600, 0.0000,
 -0.0444,  0.5778, 0.0000,
 -0.1844,  0.5756, 0.0000,
 -0.0411,  0.4811, 0.0000,
 -0.2411,  0.5044, 0.0000,
 -0.0333,  0.4178, 0.0000,
 -0.2744,  0.4178, 0.0000,
 -0.0111,  0.3522, 0.0000,
 -0.2722,  0.3400, 0.0000,
  0.0589,  0.1989, 0.0000,
 -0.2267,  0.1867, 0.0000,
  0.1289,  0.0544, 0.0000,
 -0.1644,  0.0411, 0.0000,
  0.1967, -0.0933, 0.0000,
 -0.1022, -0.0867, 0.0000,
  0.2456, -0.2144, 0.0000,
 -0.0378, -0.2144, 0.0000,
  0.2733, -0.3056, 0.0000,
  0.0122, -0.3300, 0.0000,
  0.2778, -0.3722, 0.0000,
  0.0400, -0.4200, 0.0000,
  0.2667, -0.4200, 0.0000,
  0.0411, -0.5178, 0.0000,
  0.2256, -0.4889, 0.0000,
  0.0156, -0.6167, 0.0000,
  0.1544, -0.5789, 0.0000,
 -0.0056, -0.7156, 0.0000,
  0.0744, -0.6600, 0.0000,  //28
 -0.0300,  0.7067, 0.2000,
 -0.1067,  0.6600, 0.2000,
 -0.0444,  0.5778, 0.2000,
 -0.1844,  0.5756, 0.2000,
 -0.0411,  0.4811, 0.2000,
 -0.2411,  0.5044, 0.2000,
 -0.0333,  0.4178, 0.2000,
 -0.2744,  0.4178, 0.2000,
 -0.0111,  0.3522, 0.2000,
 -0.2722,  0.3400, 0.2000,
  0.0589,  0.1989, 0.2000,
 -0.2267,  0.1867, 0.2000,
  0.1289,  0.0544, 0.2000,
 -0.1644,  0.0411, 0.2000,
  0.1967, -0.0933, 0.2000,
 -0.1022, -0.0867, 0.2000,
  0.2456, -0.2144, 0.2000,
 -0.0378, -0.2144, 0.2000,
  0.2733, -0.3056, 0.2000,
  0.0122, -0.3300, 0.2000,
  0.2778, -0.3722, 0.2000,
  0.0400, -0.4200, 0.2000,
  0.2667, -0.4200, 0.2000,
  0.0411, -0.5178, 0.2000,
  0.2256, -0.4889, 0.2000,
  0.0156, -0.6167, 0.2000,
  0.1544, -0.5789, 0.2000,
 -0.0056, -0.7156, 0.2000,
  0.0744, -0.6600, 0.2000, //57
};

void resize(int width, int height) {
    glutReshapeWindow( 1000, 1000 );
}

void DrawTriangle(float xc, float yc, float zc, float xs, float ys, float zs, int i, int j, int k)
{
    glBegin(GL_TRIANGLES);
    glVertex3f( xc + xs * SecretSteemArray[3*i], yc + ys * SecretSteemArray[3*i+1], zc + zs * SecretSteemArray[3*i+2]  );
    glVertex3f( xc + xs * SecretSteemArray[3*j], yc + ys * SecretSteemArray[3*j+1], zc + zs * SecretSteemArray[3*j+2]  );
    glVertex3f( xc + xs * SecretSteemArray[3*k], yc + ys * SecretSteemArray[3*k+1], zc + zs * SecretSteemArray[3*k+2]  );
    glEnd();
}

void DrawPart(float xc, float yc, float zc, float xs, float ys, float zs)
{
    for(int i = 0; i <= 26; ++i)
        DrawTriangle(xc, yc, zc, xs, ys, zs, i, i+1, i+2);
    for(int i = 29; i <= 55; ++i)
        DrawTriangle(xc, yc, zc, xs, ys, zs, i, i+1, i+2);
    for(int i = 0; i <= 26; ++i){
        DrawTriangle(xc, yc, zc, xs, ys, zs, i, i+2, i+29);
        DrawTriangle(xc, yc, zc, xs, ys, zs, i+2, i+29, i+31); }

    DrawTriangle(xc, yc, zc, xs, ys, zs, 0, 1, 29);
    DrawTriangle(xc, yc, zc, xs, ys, zs, 27, 28, 57);
    DrawTriangle(xc, yc, zc, xs, ys, zs, 29, 30, 1);
    DrawTriangle(xc, yc, zc, xs, ys, zs, 56, 57, 27);
}
void Draw()
{
    glPolygonMode(GL_FRONT, GL_LINE);
    glPolygonMode(GL_BACK, GL_LINE);
    glColor3f(75/255.0 , 162/255.0 , 242/255.0 );
    DrawPart(0, 0, 0, 1, 1, 1);
    glColor3f(26/255.0 , 80/255.0 , 153/255.0 );
    DrawPart(-0.4, 0, 0, 0.75, 0.75, 0.75);
    DrawPart( 0.4, 0, 0, 0.75, 0.75, 0.75);
}
void renderScene(void) {

    glClear(GL_COLOR_BUFFER_BIT | GL_DEPTH_BUFFER_BIT);
    glEnable(GL_DEPTH_TEST);
    Draw();
    glutPostRedisplay();
    glutSwapBuffers();
}
void keyPressed (unsigned char key, int x, int y) {
    glRotatef(10.0f, 0.0f, 1.0f, 0.0f);
    glutPostRedisplay();
}

int main(int argc, char **argv) {
    glutInit(&argc, argv);
    glutInitDisplayMode(GLUT_DEPTH | GLUT_DOUBLE | GLUT_RGBA);
    glutInitWindowPosition(50, 50);
    glutInitWindowSize(1000, 1000);
    glutCreateWindow("Steemit 11/9/17");
    glClearColor( 0, 0, 0, 1);
    glutDisplayFunc(renderScene);
    glutReshapeFunc(resize);
    glutKeyboardFunc(keyPressed);
    glutMainLoop();
    return 1;
}
You should to have Glut and OpenGL installed on your PC. And besides have C++ IDE (Visual Studio is better for me).
So, first we do - look at main function.
Here we have some init work:
  glutInit(&argc, argv);
    glutInitDisplayMode(GLUT_DEPTH | GLUT_DOUBLE | GLUT_RGBA);
    glutInitWindowPosition(50, 50);
    glutInitWindowSize(1000, 1000);
    glutCreateWindow("Steemit 11/9/17");
    glClearColor( 0, 0, 0, 1);
We init Glut and set window size and position. Then we create window and clear background by black color.
Then we declare callbacks:
    glutDisplayFunc(renderScene);
    glutReshapeFunc(resize);
    glutKeyboardFunc(keyPressed);
These functions OpenGl and Glut will use for our application. Display function - for draw, Keyboard function - for processing keyboard etc. We declare these functions and should implement them.
I just say: "Hey, you can use my function functionname to do this" ;-)
Finally we run the loop of our application. Yeah, it's endless by default loop where we draw something and receive some events from mouse or keyboard.
glutMainLoop();
Then we look at renderScene function:
void renderScene(void) {

    glClear(GL_COLOR_BUFFER_BIT | GL_DEPTH_BUFFER_BIT);
    glEnable(GL_DEPTH_TEST);
    Draw();
    glutPostRedisplay();
    glutSwapBuffers();
}
Here we make some prepare work (read about Depth test on wikipedia, please) and the main call here is Draw();
After we just ask OpenGL to redraw the screen by lines:
 glutPostRedisplay();
 glutSwapBuffers();
Let's look at Draw();
void Draw()
{
    glPolygonMode(GL_FRONT, GL_LINE);
    glPolygonMode(GL_BACK, GL_LINE);
    glColor3f(75/255.0 , 162/255.0 , 242/255.0 );
    DrawPart(0, 0, 0, 1, 1, 1);
    glColor3f(26/255.0 , 80/255.0 , 153/255.0 );
    DrawPart(-0.4, 0, 0, 0.75, 0.75, 0.75);
    DrawPart( 0.4, 0, 0, 0.75, 0.75, 0.75);
}
Here we enable 'wireframe mode' :
    glPolygonMode(GL_FRONT, GL_LINE);
    glPolygonMode(GL_BACK, GL_LINE);
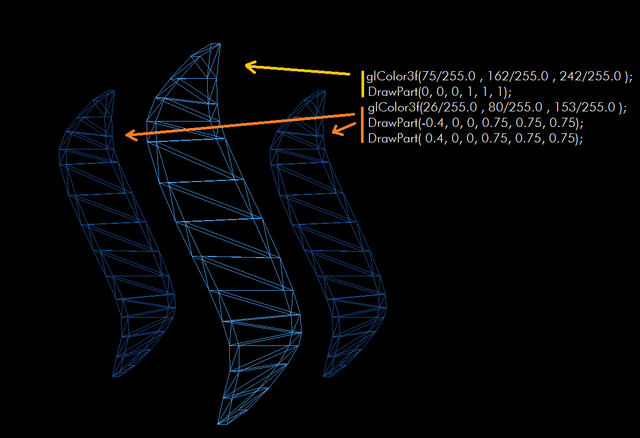
and then we draw three figures one with color glColor3f(75/255.0 , 162/255.0 , 242/255.0 );
and another two with color glColor3f(26/255.0 , 80/255.0 , 153/255.0 ); . Do you see it in lines?
    glColor3f(75/255.0 , 162/255.0 , 242/255.0 );
    DrawPart(0, 0, 0, 1, 1, 1);
    glColor3f(26/255.0 , 80/255.0 , 153/255.0 );
    DrawPart(-0.4, 0, 0, 0.75, 0.75, 0.75);
    DrawPart( 0.4, 0, 0, 0.75, 0.75, 0.75);
Do you get the idea what parts of scene we draw here? ;-)

Actually the shape of figures are the same so we just call the same function DrawPart() with different scale and translate parameters :-)
DrawPart function is the most interesting ;-)
Here we should to draw a figure of not so trivial shape. Let's have a look on code:
void DrawPart(float xc, float yc, float zc, float xs, float ys, float zs)
{
    for(int i = 0; i <= 26; ++i)
        DrawTriangle(xc, yc, zc, xs, ys, zs, i, i+1, i+2);
    for(int i = 29; i <= 55; ++i)
        DrawTriangle(xc, yc, zc, xs, ys, zs, i, i+1, i+2);
    for(int i = 0; i <= 26; ++i){
        DrawTriangle(xc, yc, zc, xs, ys, zs, i, i+2, i+29);
        DrawTriangle(xc, yc, zc, xs, ys, zs, i+2, i+29, i+31); }

    DrawTriangle(xc, yc, zc, xs, ys, zs, 0, 1, 29);
    DrawTriangle(xc, yc, zc, xs, ys, zs, 27, 28, 57);
    DrawTriangle(xc, yc, zc, xs, ys, zs, 29, 30, 1);
    DrawTriangle(xc, yc, zc, xs, ys, zs, 56, 57, 27);
}
Trust to functions names here and believe that we draw maaany triangles here :-)
Homework: how much triangles we draw here?
In CG (Computer Graphics) it can be very convenient to draw complicated figures by triangles.
It's dominating approach in CG. I follow it in this code.
The most interesting things happens here and in DrawTriangles() function.
We send scale and translate parameters there and besides 3 indexes.
Actually this is 3 vertices of our model.
So by this call DrawTriangle(xc, yc, zc, xs, ys, zs, i, j, k) we say:
"Hey, could you please draw a triangle which we get if connect i-th, j-th and k-th vertices?"
Where is our model?
That's a good question. Meet the SecretSteemArray:
float SecretSteemArray[] = {
 -0.0300,  0.7067, 0.0000,
 -0.1067,  0.6600, 0.0000,
 -0.0444,  0.5778, 0.0000,
 -0.1844,  0.5756, 0.0000,
 -0.0411,  0.4811, 0.0000,
 -0.2411,  0.5044, 0.0000,
 -0.0333,  0.4178, 0.0000,
 -0.2744,  0.4178, 0.0000,
 -0.0111,  0.3522, 0.0000,
 -0.2722,  0.3400, 0.0000,
  0.0589,  0.1989, 0.0000,
 -0.2267,  0.1867, 0.0000,
  0.1289,  0.0544, 0.0000,
 -0.1644,  0.0411, 0.0000,
  0.1967, -0.0933, 0.0000,
 -0.1022, -0.0867, 0.0000,
  0.2456, -0.2144, 0.0000,
 -0.0378, -0.2144, 0.0000,
  0.2733, -0.3056, 0.0000,
  0.0122, -0.3300, 0.0000,
  0.2778, -0.3722, 0.0000,
  0.0400, -0.4200, 0.0000,
  0.2667, -0.4200, 0.0000,
  0.0411, -0.5178, 0.0000,
  0.2256, -0.4889, 0.0000,
  0.0156, -0.6167, 0.0000,
  0.1544, -0.5789, 0.0000,
 -0.0056, -0.7156, 0.0000,
  0.0744, -0.6600, 0.0000,  //28
 -0.0300,  0.7067, 0.2000,
 -0.1067,  0.6600, 0.2000,
 -0.0444,  0.5778, 0.2000,
 -0.1844,  0.5756, 0.2000,
 -0.0411,  0.4811, 0.2000,
 -0.2411,  0.5044, 0.2000,
 -0.0333,  0.4178, 0.2000,
 -0.2744,  0.4178, 0.2000,
 -0.0111,  0.3522, 0.2000,
 -0.2722,  0.3400, 0.2000,
  0.0589,  0.1989, 0.2000,
 -0.2267,  0.1867, 0.2000,
  0.1289,  0.0544, 0.2000,
 -0.1644,  0.0411, 0.2000,
  0.1967, -0.0933, 0.2000,
 -0.1022, -0.0867, 0.2000,
  0.2456, -0.2144, 0.2000,
 -0.0378, -0.2144, 0.2000,
  0.2733, -0.3056, 0.2000,
  0.0122, -0.3300, 0.2000,
  0.2778, -0.3722, 0.2000,
  0.0400, -0.4200, 0.2000,
  0.2667, -0.4200, 0.2000,
  0.0411, -0.5178, 0.2000,
  0.2256, -0.4889, 0.2000,
  0.0156, -0.6167, 0.2000,
  0.1544, -0.5789, 0.2000,
 -0.0056, -0.7156, 0.2000,
  0.0744, -0.6600, 0.2000, //57
};
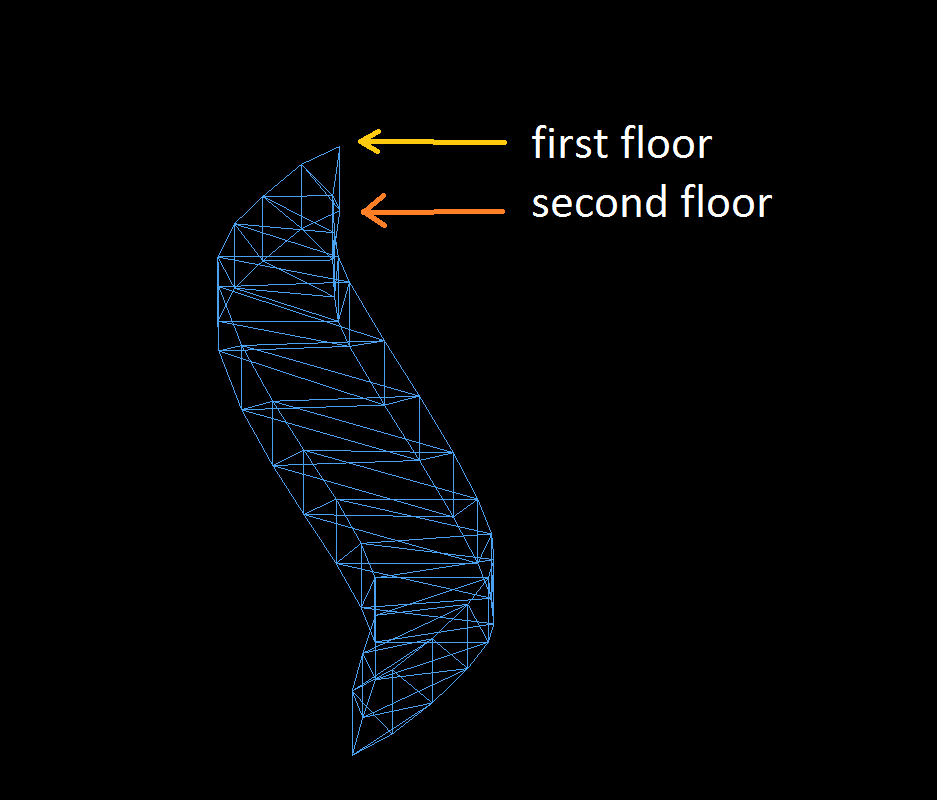
It contains 58 vertices - 3 dimensional points. From the index 0 to 28 we have first floor of model. And from 29 to 57 - second:

On the picture above vertices are connected, but I haven't clarified the logic of connecting them in triangles yet.
Let's look on DrawPart code one more time. We divide drawing and connecting process on three main parts.
First and second parts:
for(int i = 0; i <= 26; ++i)
        DrawTriangle(xc, yc, zc, xs, ys, zs, i, i+1, i+2);
    for(int i = 29; i <= 55; ++i)
        DrawTriangle(xc, yc, zc, xs, ys, zs, i, i+1, i+2);
By this code we draw the faces up and down of figure.
Third part:
for(int i = 0; i <= 26; ++i){
        DrawTriangle(xc, yc, zc, xs, ys, zs, i, i+2, i+29);
        DrawTriangle(xc, yc, zc, xs, ys, zs, i+2, i+29, i+31); }

    DrawTriangle(xc, yc, zc, xs, ys, zs, 0, 1, 29);
    DrawTriangle(xc, yc, zc, xs, ys, zs, 27, 28, 57);
    DrawTriangle(xc, yc, zc, xs, ys, zs, 29, 30, 1);
    DrawTriangle(xc, yc, zc, xs, ys, zs, 56, 57, 27);
By this code we draw a side part and patch 4 triangles which are not included in main cycle.
(That's not so elegant, but I have no time to think up another solution).
Conclusion
Actually in my code you can comment "wireframe mode" and after that you'll get correct full solid model of logo:

Hometask: read some tutorial about lighting in OpenGL and make a good one for this model :-)
It seems that's it :-) Hope that my tutorial haven't been so long and boring for you.
I want your comment ! How do I get your opinion otherwise?
Thank you for your attention! Follow @ideamaker for more!
Thank you for the good writeup. It in fact was a amusement account it.
Look advanced to more added agreeable from you!
However, how could we communicate?This is a topic that's near to my heart... Best wishes! Exactly where are your contact details though?
great job it's an amazing idea and hard work I love your Idea and you work thank's to share this way with us and this codes upvote and follow , what's the language that you have used ?
Thanks for reply. It's C++.
@ideamaker thnx for putting this information all with each other..