SLC S22 Week6 || Java Graphical Programming with Swing
Assalamualaikum my fellows I hope you will be fine by the grace of Allah. Today I am going to participate in the steemit learning challenge season 22 week 6 by @kouba01 under the umbrella of steemit team. It is about Java Graphical Programming with Swing. Let us start exploring this week's teaching course.

Write a class SimpleFrame that displays a window. Assign it a title and a minimum size.
Here is a Java program which displays a window. It assigns it a title and minimum size.

Explanation of the code

The SimpleFrame class extends JFrame, so it can create a graphical window. In the constructor, the title of the window is set with setTitle, and a minimum size is established with setMinimumSize. The default close operation is also set to exit the application with setDefaultCloseOperation.

The getContentPane method returns the content pane of the JFrame. The layout manager for the content pane is set to BorderLayout, which organizes components into five regions: NORTH, SOUTH, EAST, WEST, and CENTER. A JLabel is created with the text "This is a simple frame!" and centered horizontally using the setHorizontalAlignment method. The label is then added to the center region of the layout.

A JButton labeled "OK" is created and added to the south (bottom) region of the layout. This positions the button below the label within the window.

The window size is set to 400x300 pixels using setSize. To center the window on the screen, setLocationRelativeTo(null) is called. Finally, setVisible(true) makes the frame visible.

Inside the main method, SwingUtilities.invokeLater ensures that the graphical user interface is built and updated on the Event Dispatch Thread. It is a best practice in Swing applications to maintain thread safety.
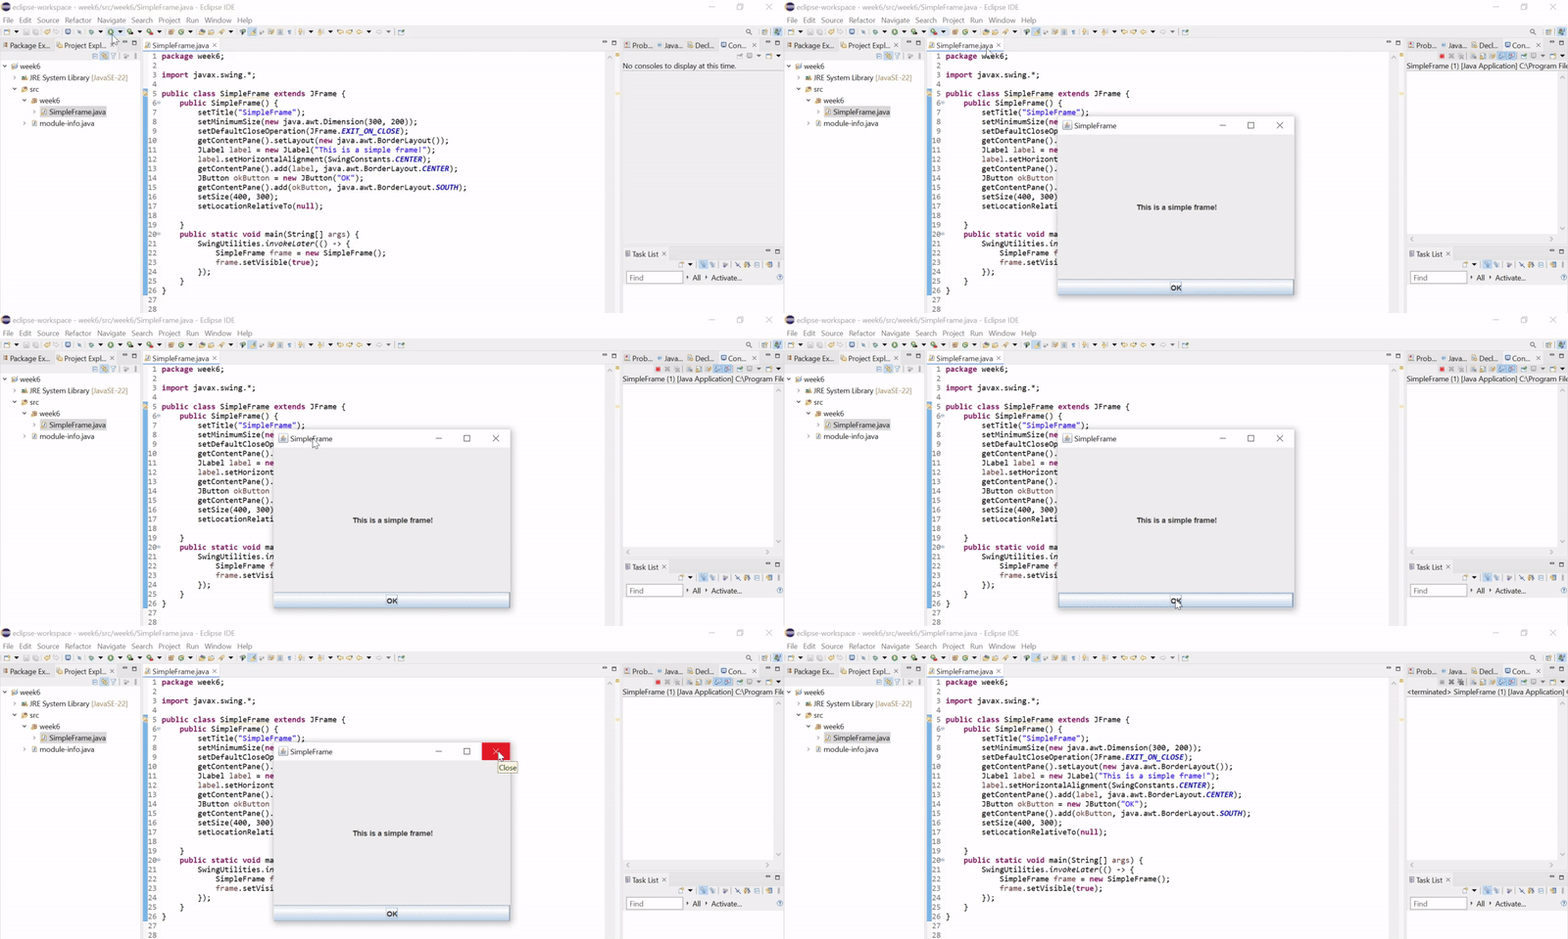
The output of the program, is same as it was required by the teacher. It has a window with the minimum size and title. The window shows a text in the center of the window in the label. The button is also implemented but without any logic for the actions.
Create a new JFrame named "Discovery" and include the following components
Here is a Java program which creates a new JFrame named Discovery. This program adds different components such as a button, a text field and text area.

Explanation of the code

The Discovery class is the extension of JFrame and therefore the main window itself. In the constructor, it sets the title of the window using setTitle("Discovery"). The layout is set to FlowLayout, which places components in a row and wraps them when there is not enough space.

A JButton is created with the text "Button". The background color is set to blue, and the text color is changed to white. The button is also made non-functional (no action listener is added). A tooltip is also added using the setToolTipText method.

A JTextField is created with initial text and a width of 20 characters. The setEditable(false) method makes the text field non-editable. A border is created using BorderFactory.createLineBorder with a black color and a thickness of 2 pixels, and it is applied to the text field using setBorder.

A JTextArea is constructed with initial text, 5 rows, and 20 columns. Line wrapping is enabled using setLineWrap(true), and wrapping at word boundaries is ensured with setWrapStyleWord(true). The text area is added to a JScrollPane to enable scrolling if the text is larger than what fits in the visible area.

The setSize method sets the window size to 400x300 pixels, and setLocationRelativeTo(null) centers the window on the screen. The default close operation is set to exit the application using setDefaultCloseOperation(JFrame.EXIT_ON_CLOSE), and the frame is made visible with setVisible(true).
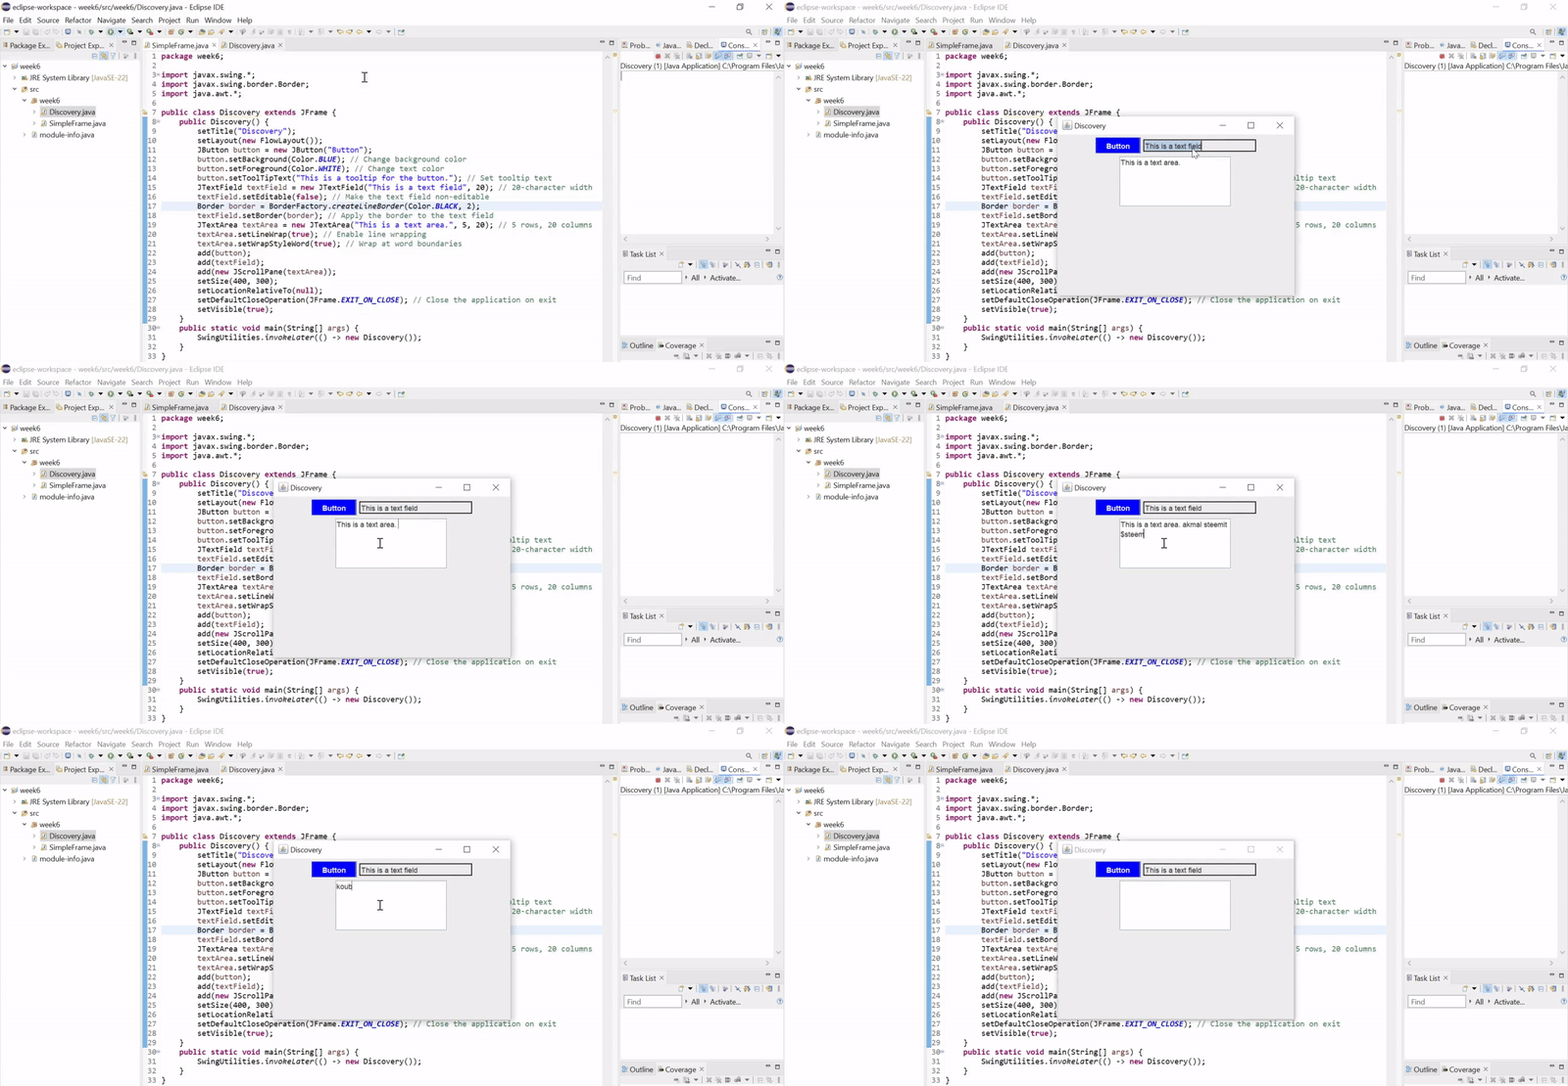
When I am running this program it is working without errors and it is creating a simple window with the button. The text and the background colour of the button is changed. The text is of white colour and the background has blue colour. It has a non-editable text field which has a border of black colour. The text area is editable and it supports the wrapping and it also has a scroll bar.
Associating Actions with Buttons - The goal is to create a window with a button labeled "Test" that, when clicked, displays "Test click" on the standard output.
Here is the Java program which creates a window with a button labeled "Test" that, when clicked, displays "Test click" on the standard output.

Explanation of the code

The main application window is created by subclassing the JFrame class, which provides all the functionality needed to design a GUI. In this example, the JFrame is titled "Button Actions Example" using the setTitle method. The layout manager employed is FlowLayout, which simply places the components (in this case, buttons) one after another in a row and automatically wraps them as soon as it runs out of space. The layout manager helps ensure that the components are positioned correctly within the window, particularly when the window is resized. FlowLayout simplifies the placement for this example. Code:

The first button placed in the JFrame is named "Test." The JButton class is used to create this button. To specify what happens when the button is clicked, an ActionListener is assigned to the button with the addActionListener method. For brevity, a lambda expression is used instead of declaring a separate class or implementing a named interface. The lambda expression (e -> System.out.println("Test click")) defines the action to be done, which is printing "Test click" to the console. The button is then added to the JFrame with the add method. Code:

Instead of having to make several buttons, the computer makes an array of strings with the labels of the buttons ("One," "Two," and "Three"). The computer then iterates over the array using a for loop, creating a new button for each label. Each button has an ActionListener attached to it, which will update the title of the JFrame to be the same as the label of the button when clicked. The setTitle method is called inside the listener to achieve this. This approach is scalable, as adding more buttons only requires extending the array of labels without modifying the core logic. Each button is added to the JFrame using the add method during each iteration of the loop. Code:

After all components, or buttons have been added several properties of the JFrame are configured in order to fully complete the application window. The method setSize(400,200) sets width and height in pixels. Then the method setLocationRelativeTo(null) should ensure that a window opens exactly in the middle of the screen. The call to setDefaultCloseOperation(JFrame.EXIT_ON_CLOSE) is made to assure that the whole application terminates, when the close button of a window is selected. Finally the setVisible(true) method allows the JFrame to be visible for the user.
Swing is not thread-safe. This means it does not allow GUI components and their behavior to be handled from any given thread other than a dedicated thread to avoid inconsistencies.

The main method creates the JFrame and makes sure it gets displayed on the Event Dispatch Thread (EDT) using SwingUtilities.invokeLater. In Swing programming, this is good practice because GUI-related tasks get executed properly without the risk of thread interference. The lambda expression ButtonActions::new creates a new instance of the ButtonActions class and sets up the GUI.
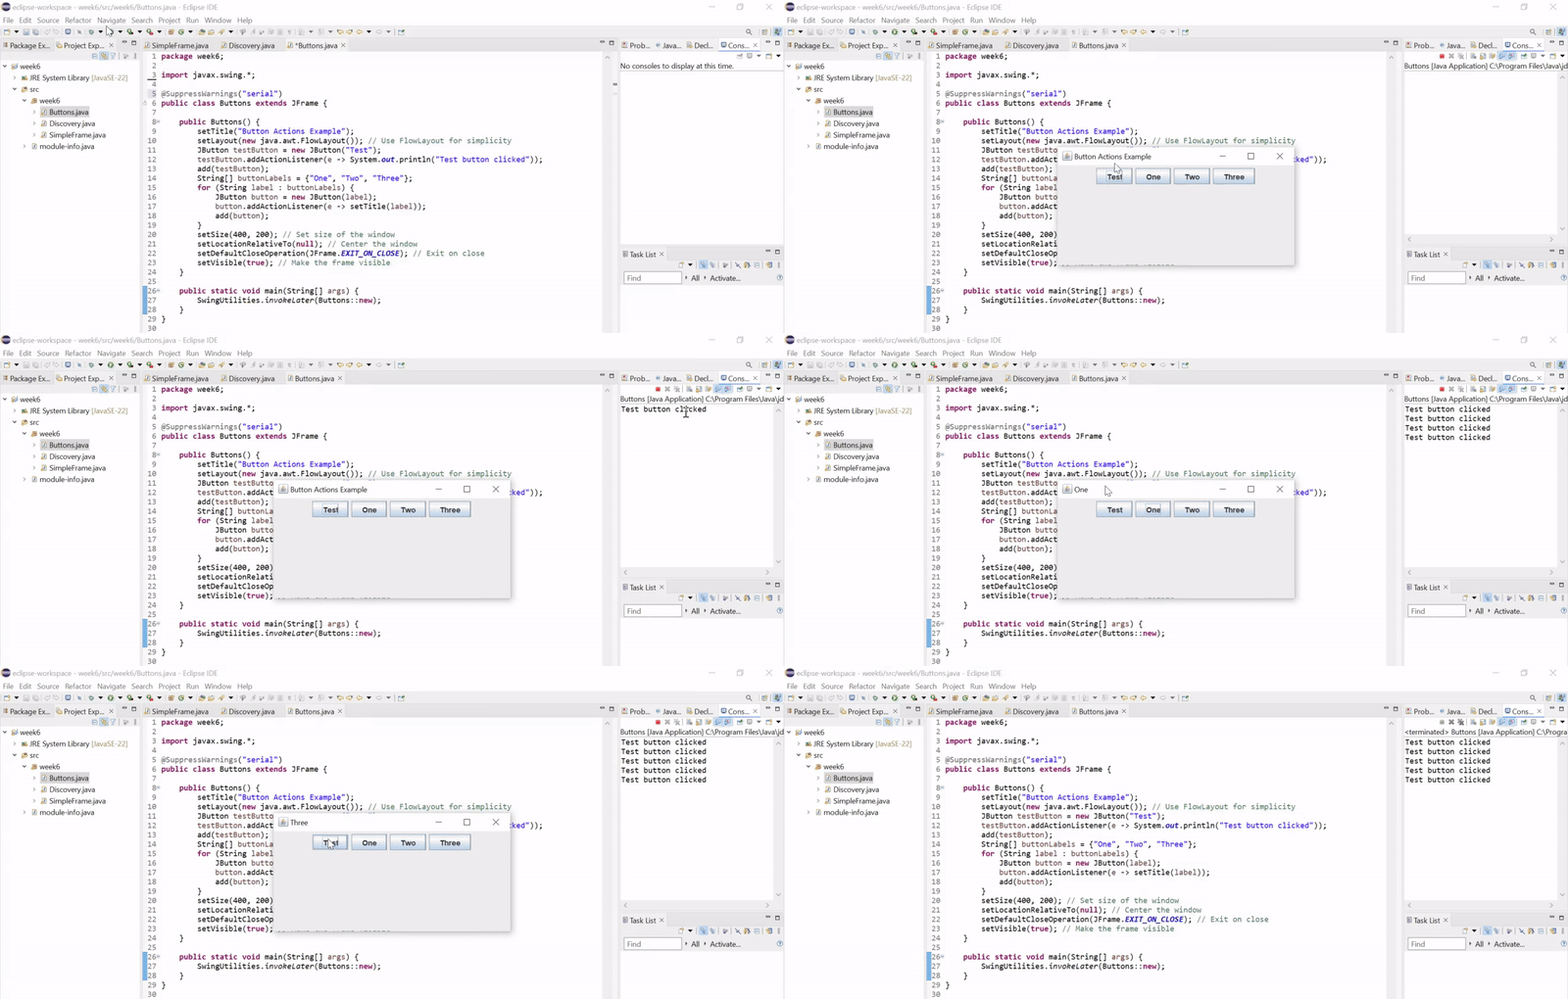
When run, the application displays a window with the title "Button Actions Example". Within the window, there are four buttons: "Test," "One," "Two," and "Three." Clicking the "Test" button prints "Test click" to the console, demonstrating basic button functionality. Clicking any other button will result in changing the title of the window to that which is contained on the button selected. The dynamics of the application are obtained because the use of an array to hold labels, and then going through a loop that iterates for each of these labels. Further buttons can also be easily incorporated without modifying the core design of the program itself. Thus, the program follows best practices for Swing by creating a GUI, which is executed on the EDT, hence smooth and consistent.
Redo Exercise 3, but use the AbstractAction class instead of the ActionListener interface.
Here is the Java program similar to the previous but with the use of AbstractAction class instead of the ActionListener interface.

Explanation of the code
The AbstractAction class is an alternative to handling actions in Swing components. It implements the Action interface, which is more flexible than ActionListener and supports additional features such as enabling or disabling actions and sharing action properties across multiple components. We will make use of AbstractAction to define the behavior of each button and dynamically add the actions to the buttons.

Similar to Exercise 3, a JFrame is created as the main application window. The title of the window is initially set to "Button Actions Example," and the layout manager is FlowLayout to arrange the buttons sequentially. This setup ensures that all components are placed neatly within the frame.

The AbstractAction class is extended to define a custom action for the "Test" button. Within the overridden actionPerformed method, the logic for handling the button click is implemented. In this case, the action prints "Test click" to the console. The advantage of using AbstractAction is that properties like the button's name, icon, or tooltip can be set directly in the constructor.

To control the "One," "Two," and "Three" buttons, an array of labels is used. For each label, an instance of AbstractAction is created dynamically within a loop. The actionPerformed method of each action updates the window's title to match the label of the button. This way, it is easy to add new buttons by extending the array of labels, and the code demonstrates scalability and reusability.

Once all components are added, the window is configured to make it functional and user-friendly. It is set at 400x200 pixels in size, and the setLocationRelativeTo(null) method centers the window on the screen. The setDefaultCloseOperation(JFrame.EXIT_ON_CLOSE) ensures that the application terminates when the window is closed, and the setVisible(true) method makes the window visible.

To ensure thread safety, the GUI is created and displayed on the Event Dispatch Thread (EDT). This is achieved using the SwingUtilities.invokeLater method, which schedules the creation of the JFrame on the EDT.
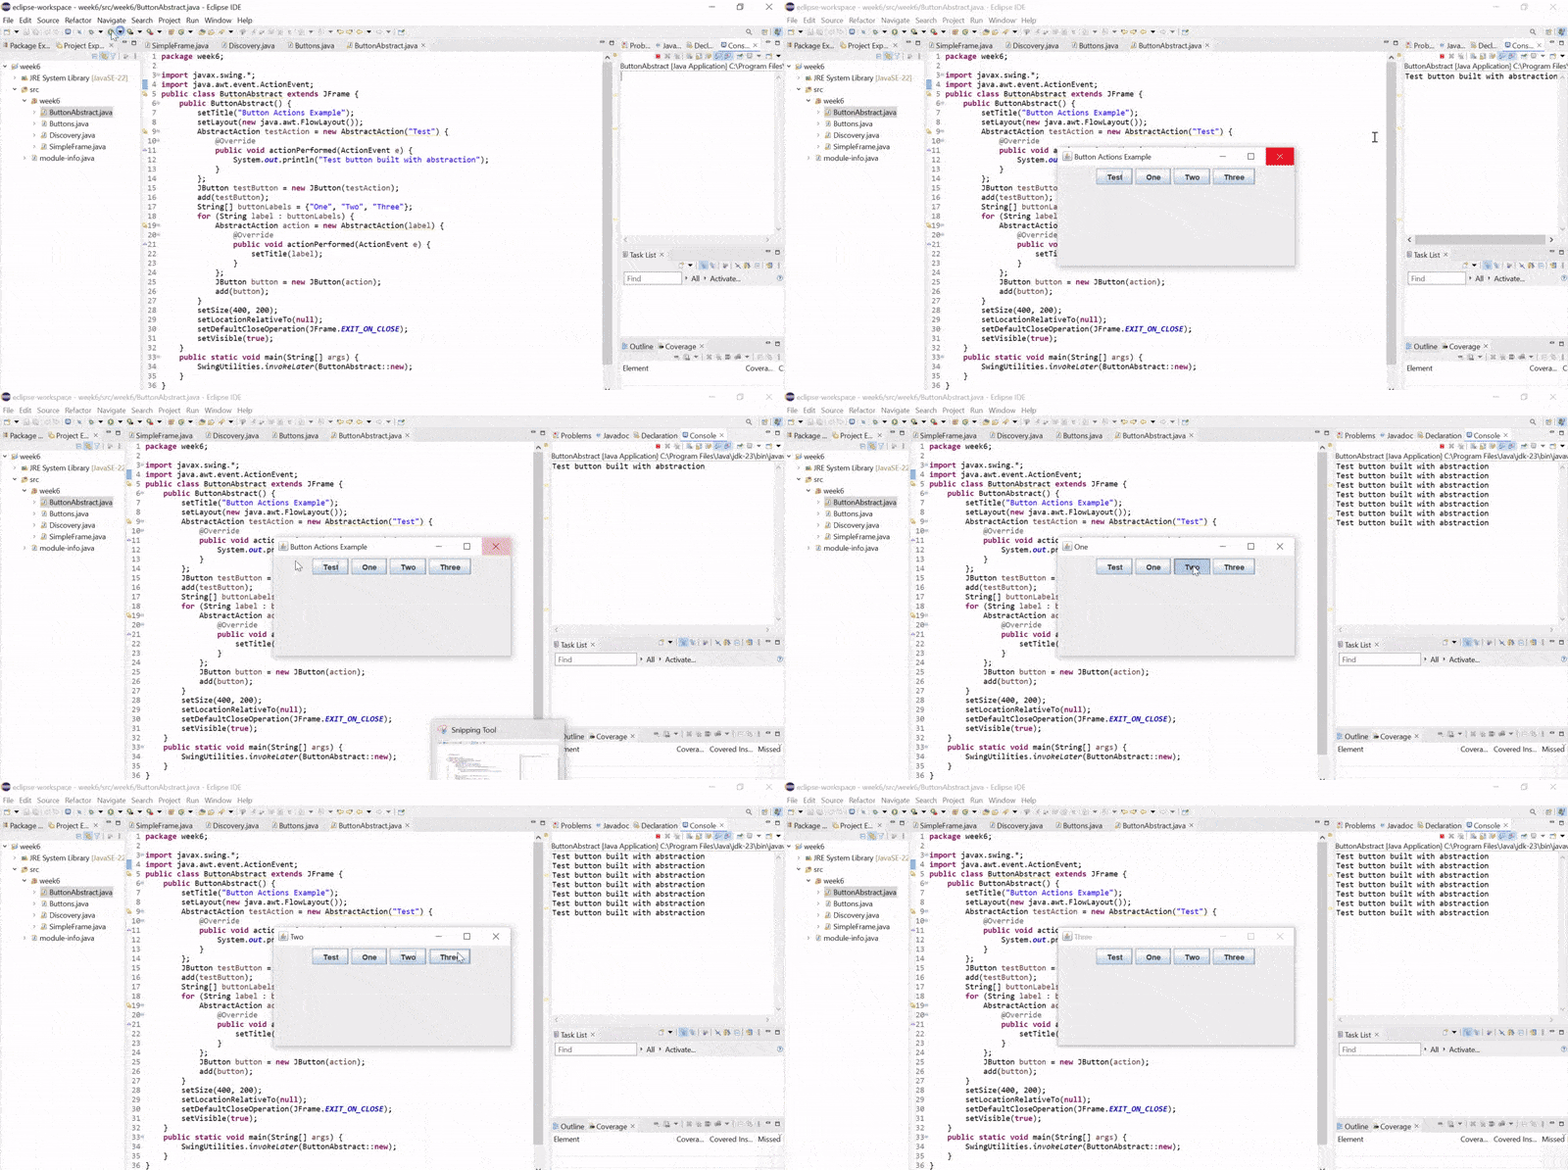
When I am running the program it is working same as with the previous logic. The buttons "Test," "One," "Two," and "Three" are created efficiently, and each has its behavior defined using an instance of AbstractAction. The AbstractAction class allows to reuse properties for multiple buttons if required. For example, the same action could be used for several buttons. Adding new buttons is as easy as adding new labels to the buttonLabels array. The program follows Swing best practices by creating the GUI on the Event Dispatch Thread (EDT). The logic of each button's behavior is well-organized and separate since it is encapsulated in the AbstractAction class.
Create a window containing a button titled "Add." Each click on this button should add a numbered button to the window. When any of the added buttons is clicked, it disappears.
Here is the Java program which creates a window which has two buttons. Add button creates button on the screen with the counting number after each creation the counting is incremented. The reset button will reset all the screen to the fresh view.


Explanation of the code

To create a window that can dynamically add and remove buttons, we begin by setting up a JFrame. The layout is set to FlowLayout to arrange the components in a single row, wrapping them when necessary. This layout ensures that the "Add" and "Reset" buttons, as well as dynamically added buttons, are neatly organized within the window. The title of the JFrame is set to "Event Listeners Example," and the default close operation is configured to terminate the application.

The first thing added to the JFrame is the "Add" button. Each time it is clicked, it creates a new button with an incrementing number label (e.g., Button 1, Button 2, etc.). A counter variable (buttonCounter) tracks the number of buttons created. The ActionListener for the "Add" button adds a new button to the frame, dynamically revalidates the layout to display it, and repaints the frame to ensure proper rendering.

The "Reset" button is placed next to the "Add" button and provides functionality to remove all dynamically added buttons at once. When clicked, it iterates over all components in the JFrame and removes those labeled as numbered buttons (e.g., "Button 1," "Button 2"). After removing the buttons, the layout is revalidated, and the frame is repainted to reflect the changes.

Once the "Add" and "Reset" buttons are implemented, we finalize the JFrame by setting its size to 400x300 pixels and centering it on the screen. The setVisible(true) method is called to make the window visible to the user.

As with any Swing application, all GUI-related work is performed on the Event Dispatch Thread (EDT). The main method schedules the creation and display of the JFrame on the EDT using the SwingUtilities.invokeLater method.
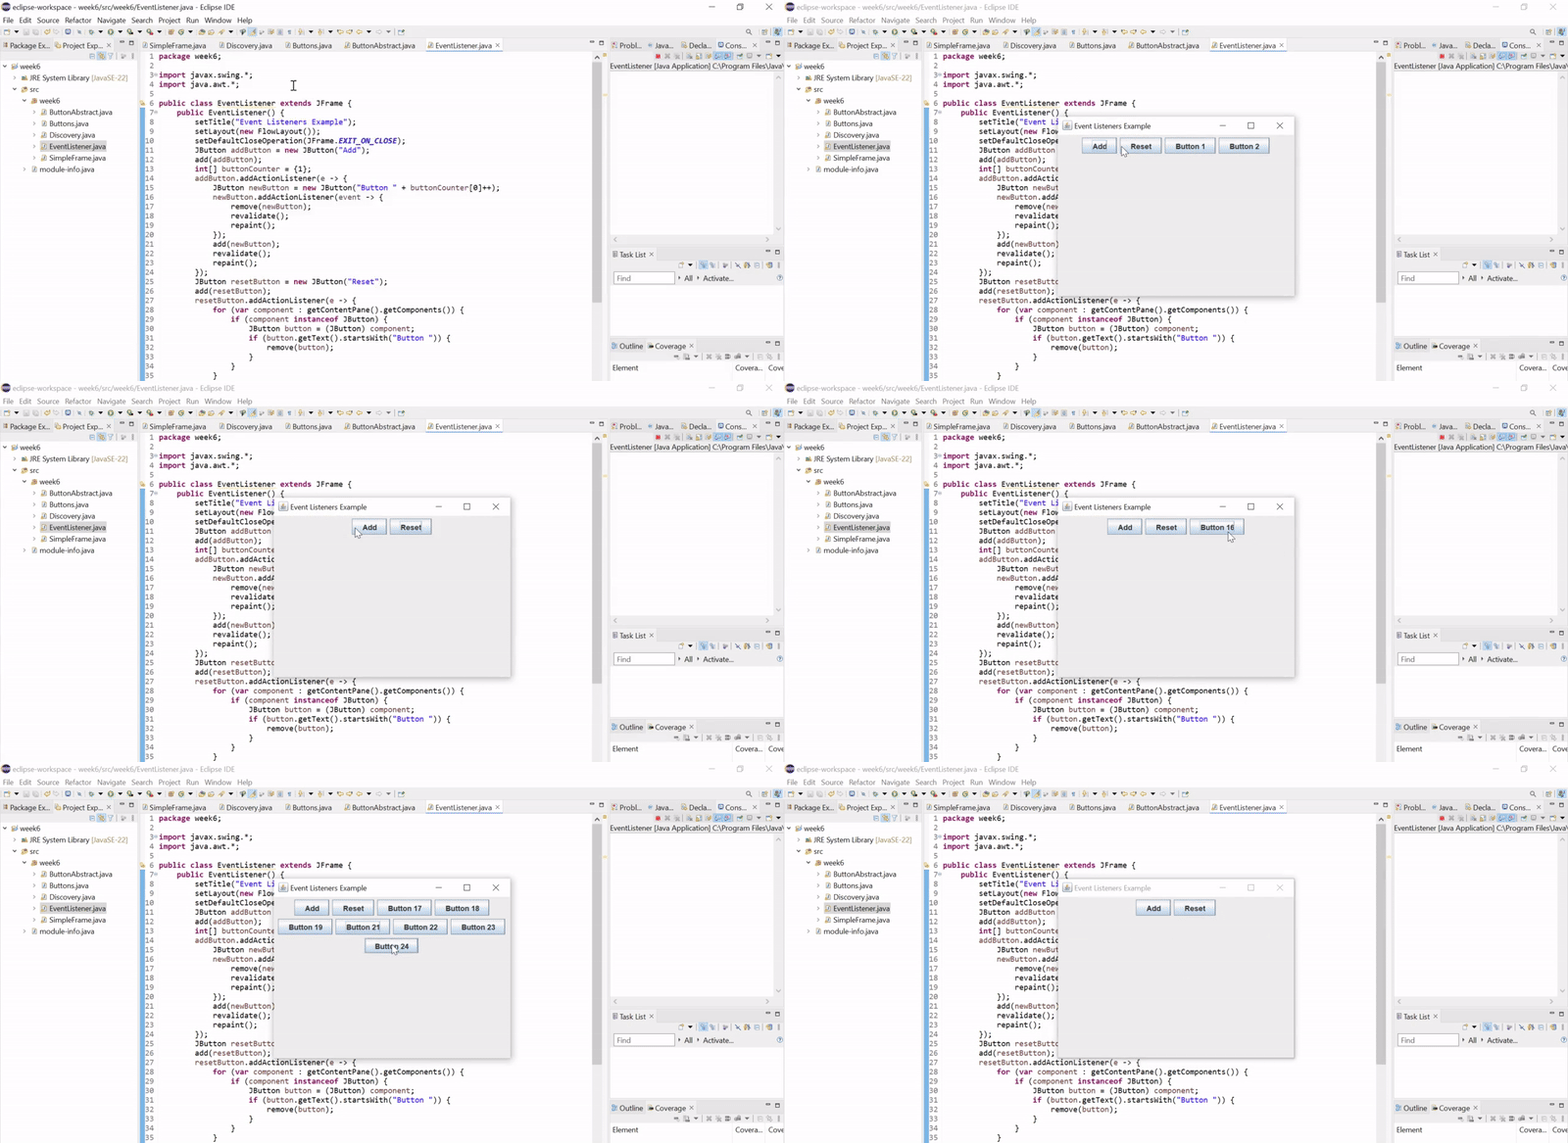
When I run the program it runs smoothly. Clicking the "Add" button dynamically creates a numbered button (e.g., "Button 1," "Button 2"). Clicking any dynamically added button removes it from the JFrame. It just deletes all the dynamically added buttons at once. Only "Add" and "Reset" buttons are left in the window. The program does support any number of buttons, since layout and behavior are dynamic. All the GUI-related actions run on the Event Dispatch Thread (EDT) so that the execution is thread-safe as well.
Write a program to compute the factorial of an integer entered in a text field. If the integer is 17 or greater, prompt the user to re-enter the value with an appropriate dialog message.
Here is the Java which creates a user interface for the factorial calculator and perform the functionality as well.


Explanation of the code

The class begins by instantiating a new JFrame object, called "Factorial Calculator," a FlowLayout, to arrange the components horizontally in a straightforward and readable manner. The components added are the input field a text field where the user can type an integer, a button that will compute it, and a label that displays the result of the factorial calculation. The frame is made visible and sized appropriately.

A JTextField is added to allow the user to input the number whose factorial is to be calculated. The text field is initialized with a default width of 10 characters. Input validation is done later when the button is clicked, ensuring the input is a valid integer.

A JButton labeled "Calculate" is added. When clicked, it triggers an action to compute the factorial of the number entered in the text field. If the number is 17 or greater, a dialog is displayed using JOptionPane to inform the user to re-enter the value. Otherwise, the button's label updates to match the entered number followed by an exclamation mark (e.g., "5!"), and the result is displayed in the label.

The factorial result is shown using a JLabel. At first, it is empty. After computation, the answer will be displayed dynamically.

An ActionListener is added to the button. On clicking:
- It reads the text in the input field.
- It checks whether the input is a number.
- If so, it checks if the number is less than 17. If not, a
JOptionPane.showMessageDialogasks the user to re-enter a smaller number. - If so and within range, the factorial is computed using a helper method.
- The label of the button is set to display the input number followed by an exclamation mark, for example, "5!".
- The result is displayed in the label.

The factorial of a number is calculated with the help of a helper method that performs an iterative calculation. The method guarantees efficient computation without exceeding the limits of long for numbers less than 17.

The JFrame is finalized by setting its size to 400x200 pixels and centering it on the screen. The setVisible(true) method is invoked to make the window visible to the user.

As with all Swing applications, the GUI is created and invoked in the Event Dispatch Thread (EDT) using SwingUtilities.invokeLater.
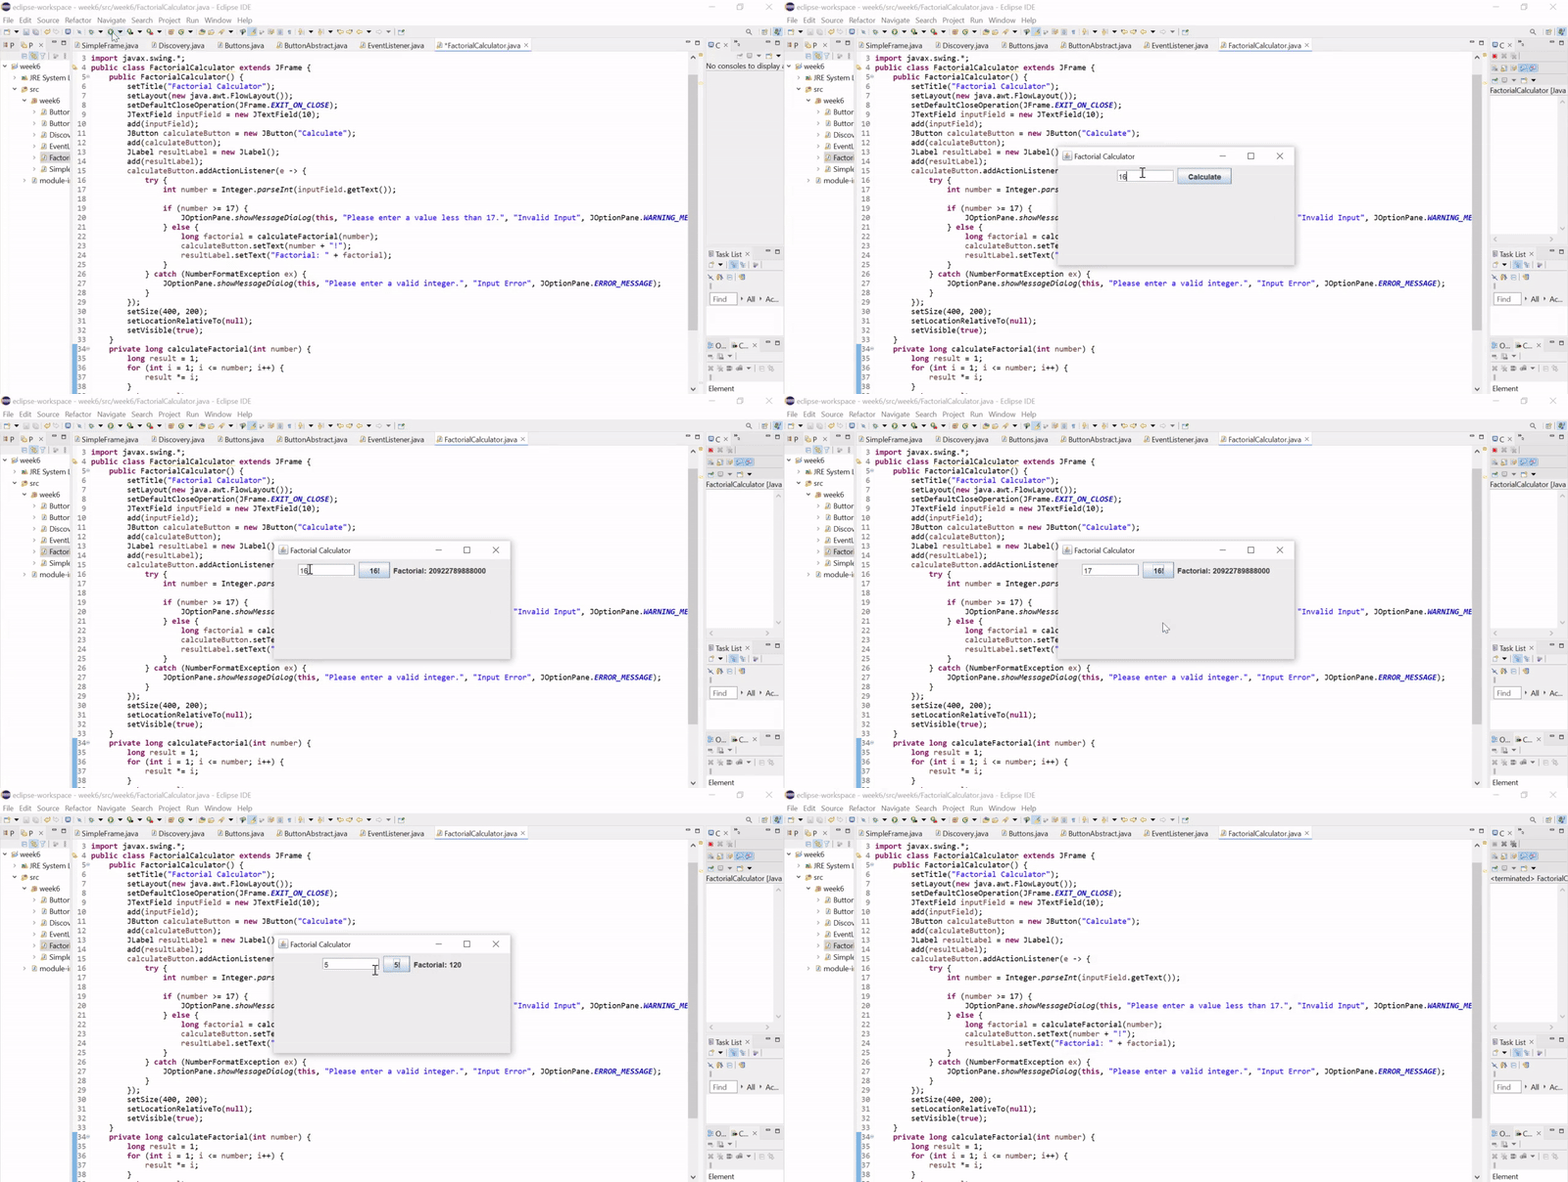
Makes sure that input is a valid integer and asks the user to re input if it's invalid or too big. Updates the label of the button corresponding to the number being calculated (e.g., "5!"). Displays the calculated factorial in a below the button. The program uses dialog (JOptionPane) to display error messages and warnings. Numbers less than 17 are computed safely within the range of a long.
Design the following layout by considering the panels and layout managers required.
- I. GUI Mockup


Explanation of the code
To create the graphical interface, we designed the layout using a combination of JPanel and layout managers. The main window (JFrame) is divided into three parts:
- Input Panel: It contains three editable text fields, namely birth year, first name, and last name. These are placed horizontally using a
FlowLayout. The labels are provided before each text field for an easy interface to the user. - Output Panel: Consists of an uneditable text field containing calculated results. The background color for the text field is set to blue (
setBackground(Color.BLUE)) and the text is white for visible contrast. - Button Panel: This panel consists of two buttons, "Age?" and "Reverse," laid horizontally. These buttons are used to perform different actions on getting clicked; these actions will be implemented in the logic section.
The BorderLayout of JFrame manages the layout structure. The input panel is set at the top with BorderLayout.NORTH, the output panel is set in the center with BorderLayout.CENTER, and the button panel is set at the bottom with BorderLayout.SOUTH.
- II. Event Handlers


The logic behind the buttons is implemented using event listeners. These event listeners capture user input and cause a specific activity to take place.

The "Age" button calculates the age based on the birth year entered by the user. On clicking, the program retrieves the current year by calling Calendar.getInstance() and subtracts the entered birth year from it. If the entered year is invalid-for example, if it is larger than the current year or not numeric-an appropriate error message is shown in the blue output field. Otherwise, the calculated age is shown.
The program handles exceptions such as invalid numeric input using a try-catch block and it ensures robustness.

The "Reverse" button reverses the user's full name, that is a combination of the first and last names entered in the respective text fields. When the button is clicked the program retrieves the names, concatenates them into a single string, and reverses the string using a StringBuilder. The reversed result is then displayed in the blue output field. This functionality ensures that the interface provides dynamic and interactive features.
Having the layout and button functionality, we integrate everything together into the AgeCalculator class. This class initializes all the components, sets up the layout, and attaches event handlers to the buttons. The main method starts the application by invoking SwingUtilities.invokeLater so that the GUI is created on the Event Dispatch Thread.
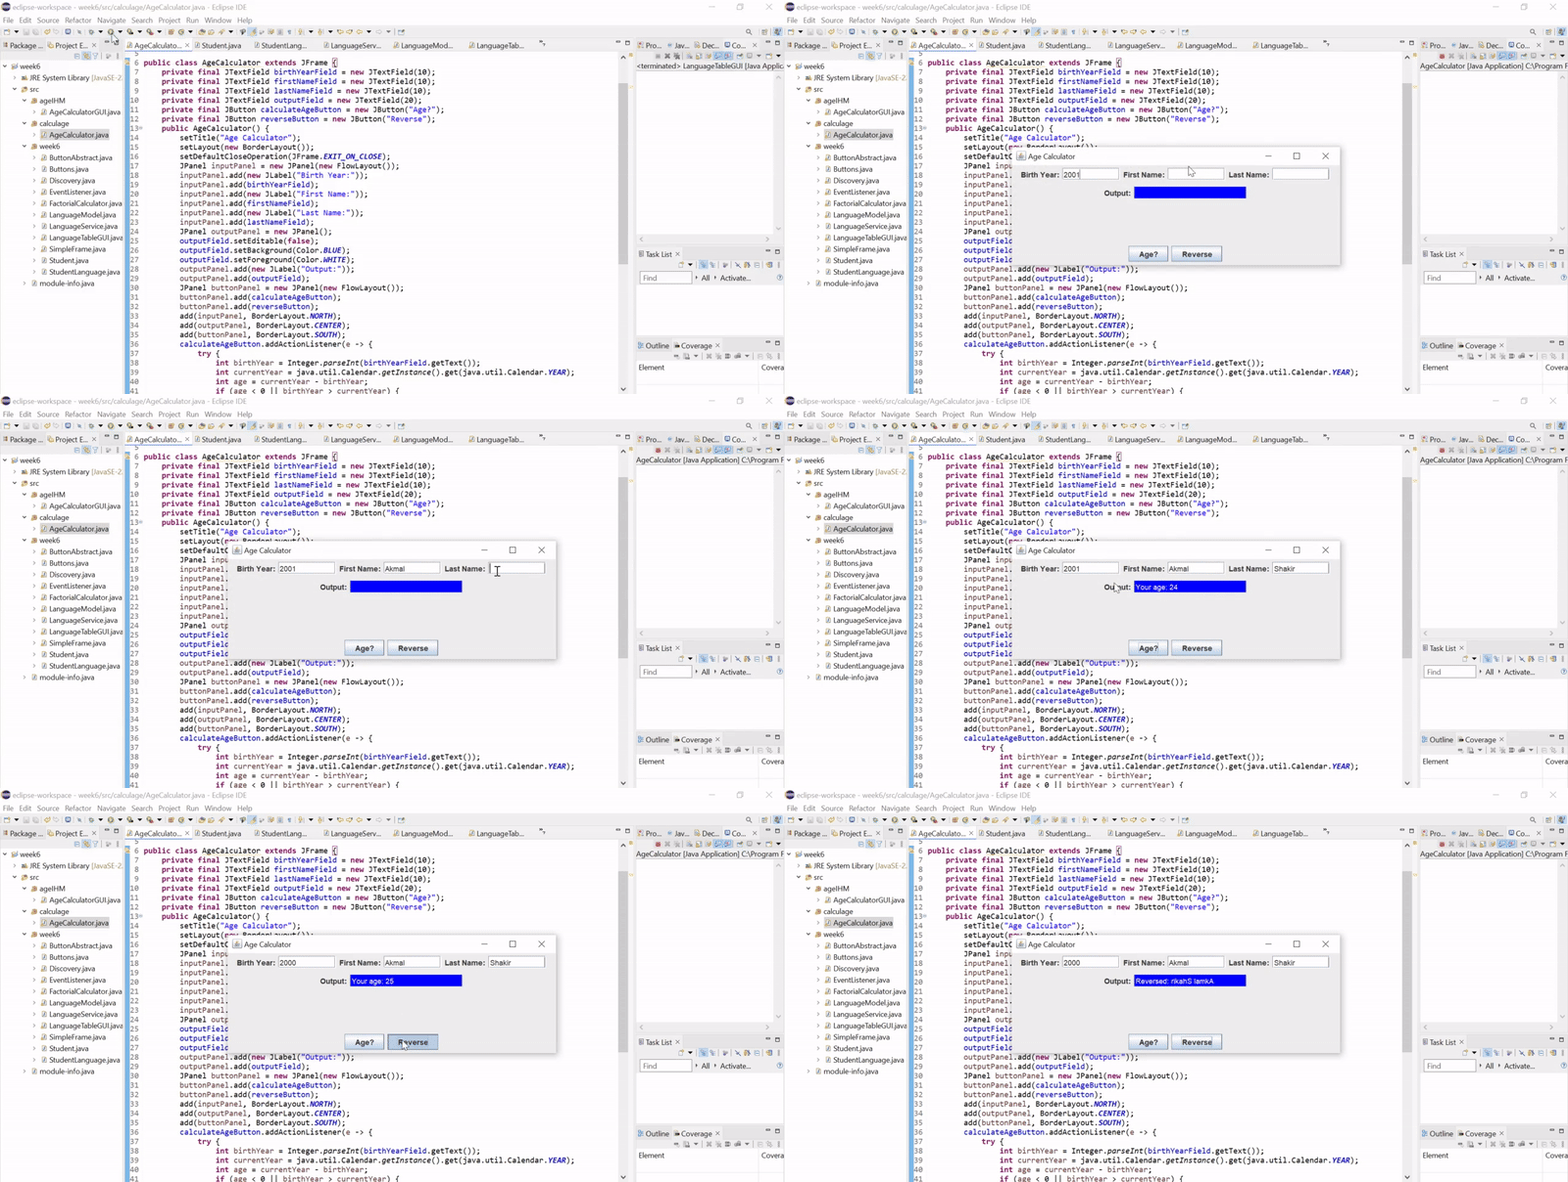
When I am running the program it is giving the error free output in the form of the age calculator application with three white input fields which are editable and one blue field which is non-editable. The program has robust handling of invalid or non-numeric input. It dynamically updates the output field in response to button actions. It organizes components into logical panels for readability and usability. The layout and event handlers are modular making the program easy to extend.
Create a GUI application to display the data table in a JTable. Sort the data alphabetically by favorite language. Display the favorite language "Java" in red and the others in blue.
- Student Class

The Student class defines a student with attributes name and firstName. These attributes are initialized via the constructor.
- StudentLangauge

This class represents a Student object paired with their favorite programming language. It includes a constructor to initialize the attributes and getter methods to retrieve their values.
- LanguageService

The LanguageService class implements the Singleton design pattern to provide a single instance of itself. It contains a hardcoded list of StudentLanguage objects and methods to retrieve them.
- LanguageModel

The LanguageModel class extends AbstractTableModel and is responsible for linking the data with the JTable. It implements key methods to handle table data and headers.
- GUI

The GUI application creates and displays the table using the LanguageModel. It also colors the favorite language "Java" in red and others in blue using a custom cell renderer.
In the
LanguageModelclass, it usesList.sort()to sort the data alphabetically according to the favorite language.A
DefaultTableCellRendereris employed to customize the "Favorite Language" column in appearance.- The word "Java" will appear in red.
- Other languages will be displayed in blue.
The table headers ("Name,", "First Name,", "Favorite Language") are declared in the
headersarray ofLanguageModel. TheBorderLayoutcenters the table in the GUI.The
LanguageServiceguarantees that only one instance of the class is created to manage the list ofStudentLanguageobjects.
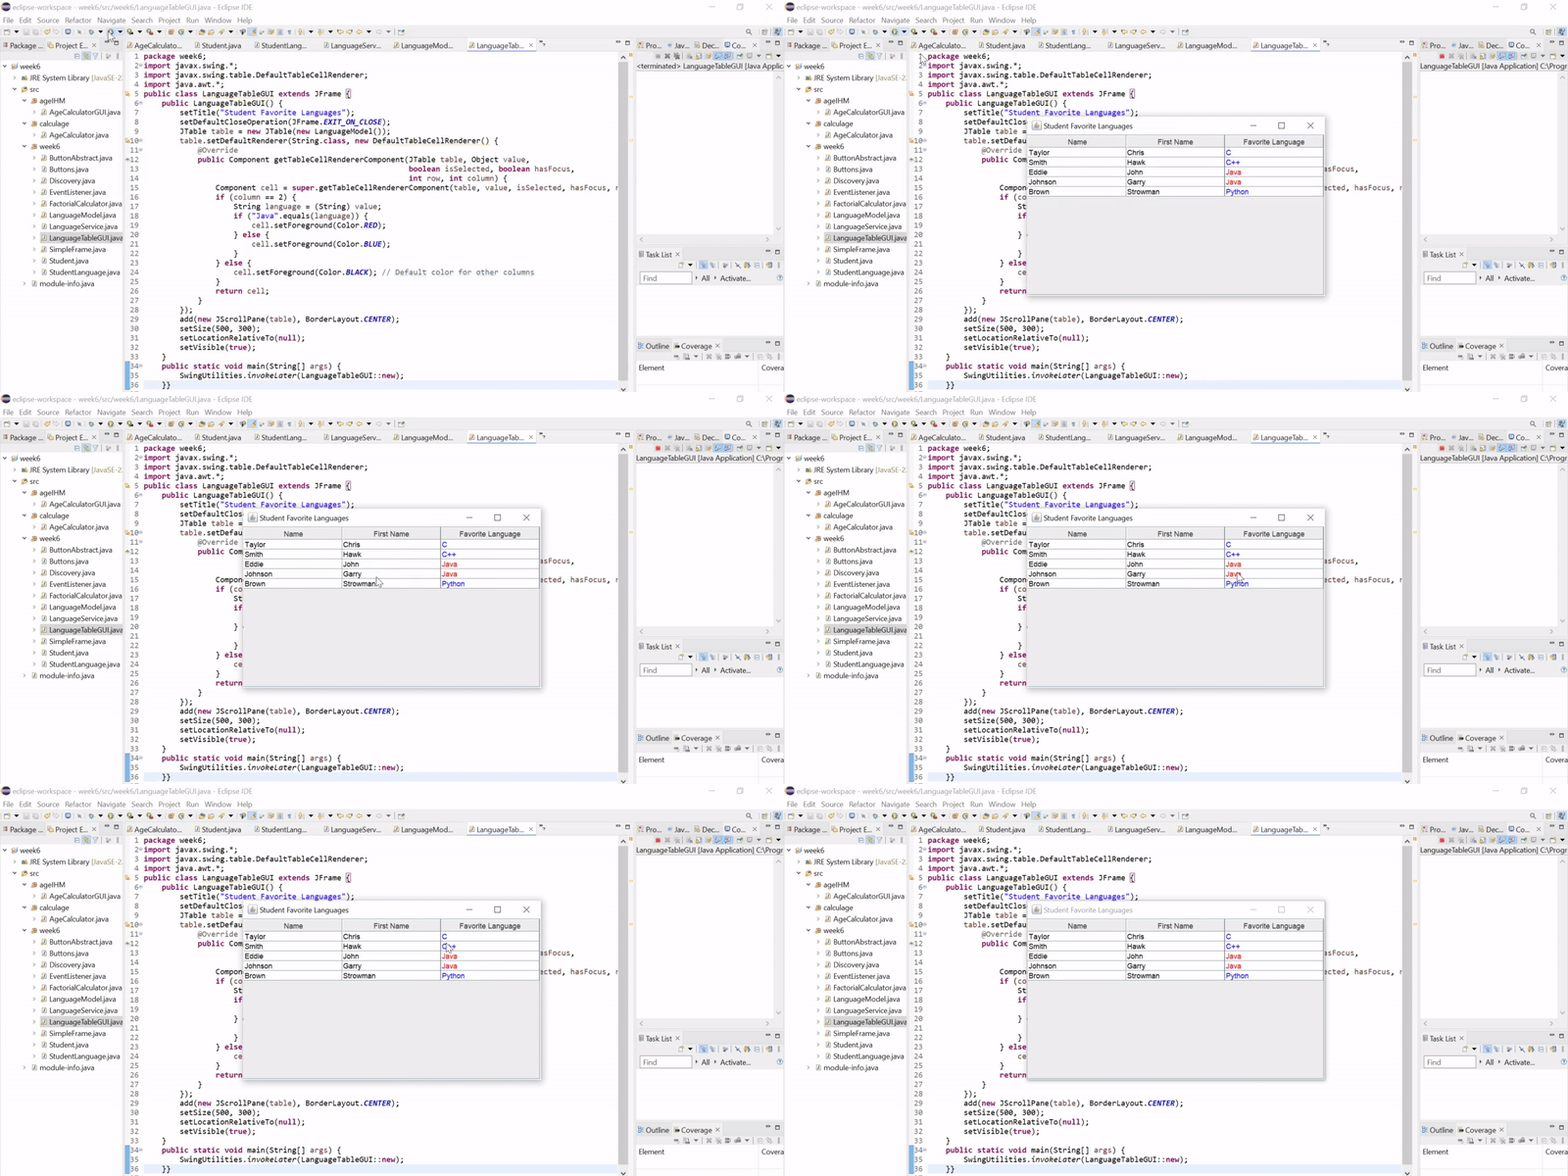
When I run the program the output is coming out in the form of the JTable and the data of the students is looking aligned in the columns. The table displays students' names, first names, and favorite programming languages. The favourite languages are highlighted in color red for "Java", and blue otherwise. The favourite language column of the table is sorted alphabetically. This is the reason at the top there is c language and at the end python.
I invite @wilmer1988, @josepha, @chant to join this learning challenge.
Upvoted! Thank you for supporting witness @jswit.