My First Miniquad / Drone Build
Alright, so I've been procrastinating for the past week or so and I've finally decided to actually write this post I've been promising for a while now. Please note that all of the links in this post are links to the original items I used in this build, but I'm in no way encouraging anyone to order from these links as I've had quite some shipping problems with Banggood.com (https://steemit.com/story/@tadejgasparovic/banggood-com-sucks).
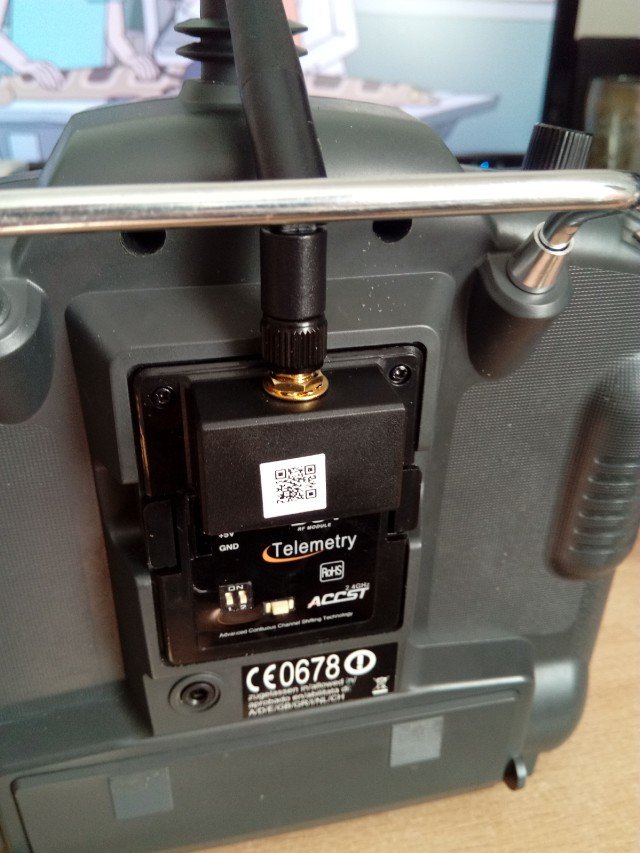
So a couple of weeks ago I got hooked on miniquad FPV racing / freestyle flying and decided to get myself a quad. I wanted to build it myself since I like building my own stuff and I wanted to get the whole experience from start to finish. I've done a bit of research (although as you'll see not quite enough) and decided on a relatively cheap solution. First it was the transmitter. I own a Turnigy 9x transmitter, but that wasn't going to work with the quadcopter. Usually quadcopters connect to the receiver over a single wire connection which requires your receiver to support PPM or SBUS (or any other serial protocol) and the original Turnigy 9x receiver doesn't support either of those. I didn't really like the idea of buying a whole new transmitter since I liked my current one so I decided to flash it with the ER9x firmware (https://steemit.com/howto/@tadejgasparovic/my-attempt-at-flashing-the-turnigy-9x-transmitter-with-the-er9x-firmware) and get myself a FrSky DJT module ( https://goo.gl/hyJXwu ) that can easily plug into the back of my transmitter as a replacement for the current module.
The next thing I had to get was a cheap and good pair of FPV googles. I definitely wasn't planning on spending more than ~$150 on them since I was only getting into the hobby. I took me a while, but I've finally decided on the Quanum Cyclops V2 FPV Goggle from HobbyKing ( https://goo.gl/QdaUMj ) as it seemed to be the best value for money and as much as I've got to test it it performs really well.
The last and most important thing was the quad. As I said, I wanted to get the full experience. So I scavenged YouTube for the best, cheap FPV Miniquad build. It took a bit of time and picking the best parts from different builds but I finally got it done. I've used the following parts:
- Martian II Carbon Fiber Frame ( https://goo.gl/d6prHe )
- Racerstar 4-in-1 20A ESC ( https://goo.gl/xjp9Dm )
- Matek Systems PDB-XT60 ( https://goo.gl/yWtURC )
- OMNIBUS Betaflight F3 AIO V1.1 Flight Controller ( https://goo.gl/fyG7c2 )
- 4X Racerstar Racing Edition 2205 2300KV Brushless Motors ( https://goo.gl/71fWjE )
- Micro 20x20mm VTX-OSD V1 ( https://goo.gl/u5b32S ) (!!! BAD CHOICE !!!)
- Eachine 1000TVL 1/3 CCD 110 Degree ( https://goo.gl/N37q1t )
- Eachine Battery Straps ( https://goo.gl/A8rMj6 )
- Charsoon DC-4S 2-4S Li-poly/Li-ion Battery Balance Charger ( https://goo.gl/qppP55 ) (!! Might not be the best choice !!)
- DYS 5042 5 Inch 3 Blade Propeller ( https://goo.gl/TbMtjc ) (I ordered 6 pairs)
Alright, so that's a pretty long list of things. Essentially from what I've been able to test (which wasn't very much!!) all the parts seem to be working just fine except for two. The VTX and the charger. I've made the big mistake of not reading any reviews and just going with that I found in YouTube build videos. This was a BIG mistake on my part and I encourage you to read the reviews before ordering anything! So essentially the reviews for both items were very bad. The charger is supposed to work just fine, but the power supply that comes with it supposedly burns out after 30 seconds of use. I found this to be false, but seeing how many people have had this problem I would not encourage you to buy this charger. Even though mine was working fine I still got myself a 4 button Turnigy charger from HobbyKing just to be safe ( https://goo.gl/trvBjQ ). The VTX on the other hand definitely lived up to the reviews. It heated up very fast (even on the low power setting) and would definitely burn out if the power setting was any higher. It also includes an OSD which, in my case, was obsolete since the flight controller I used already had it integrated and was super easy to setup through Betaflight. And the final reason why I would NOT suggest anyone to get this VTX is the fast that the range is absolutely awful!! The transmitter doesn't put out nearly as much power as it's supposed to! The majority of power goes into heat which is never a good thing. The range I got on this VTX was about 5 meters MAX. even after upgrading to a better antenna. What I would suggest is to get the following VTX as it has good reviews ( https://goo.gl/NjjeLU ). I'll get this one myself although not from Banggood due to previous bad experiences.
Alright, so this was pretty much all I needed to start the build, but I later ordered some additional parts to upgrade the antenna on the quad as well as the FPV goggle.
- Turbowing 5.8G 8dBi RHCP Mushroom FPV Antenna ( https://goo.gl/E9RkxP ) (RP-SMA)
- SMA Male To RP-SMA Female RF Coaxial Adapter Connector ( https://goo.gl/VXvbHp ) (I ordered the antennas before the FPV goggle; I only realized the FPV goggle has an SMA connector later)
- DANIU 10cm PCI U.FL / IPX to RP-SMA Female Jack Pigtail Cable ( https://goo.gl/8NksrV )
And as the last part of the build I needed some batteries. I settled on two Turnigy Graphene 1300mAh 4S 65C batteries since they weren't much more expensive than the equivalent Turnigy Nano-Tech betteries and they have less of a voltage sag as well as a longer life span ( https://goo.gl/uio1Gr ).
Alright, so after waiting for the packages to arrive (https://steemit.com/story/@tadejgasparovic/banggood-com-sucks) and "minor" customs fees I was ready to start the build. I started by upgrading my Turnigy 9x transmitter. This was a rather painless and easy process. I first opened up the module, de-soldered the antenna connections and proceeded to open up the whole transmitter to be able to remove the antenna. I had some issues with properly fitting the module since my Turnigy 9x was a newer version that had some extra plastic around the pins that connect to the module, but that was an easy fix. I used some pliers to break off the plastic protection and the module was able to fit perfectly flat with the transmitter.
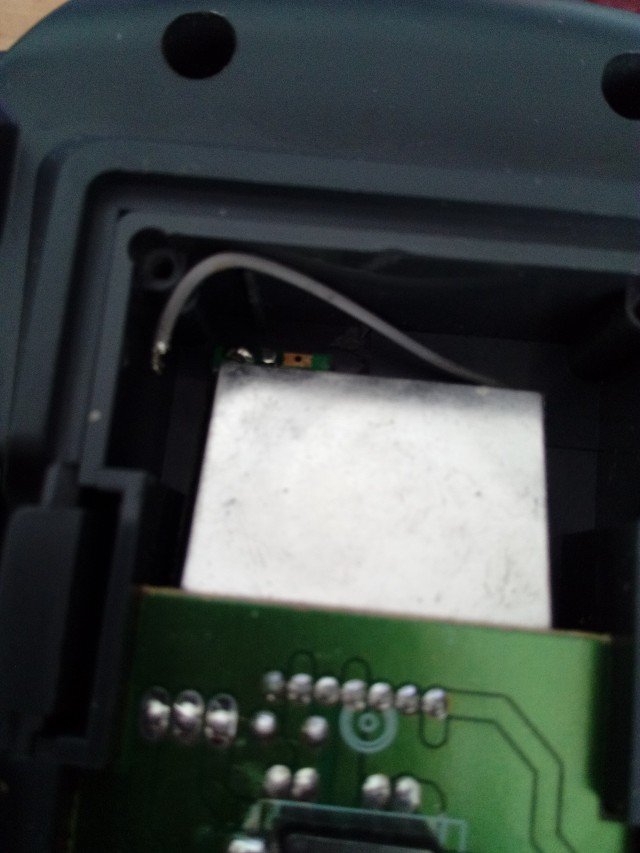
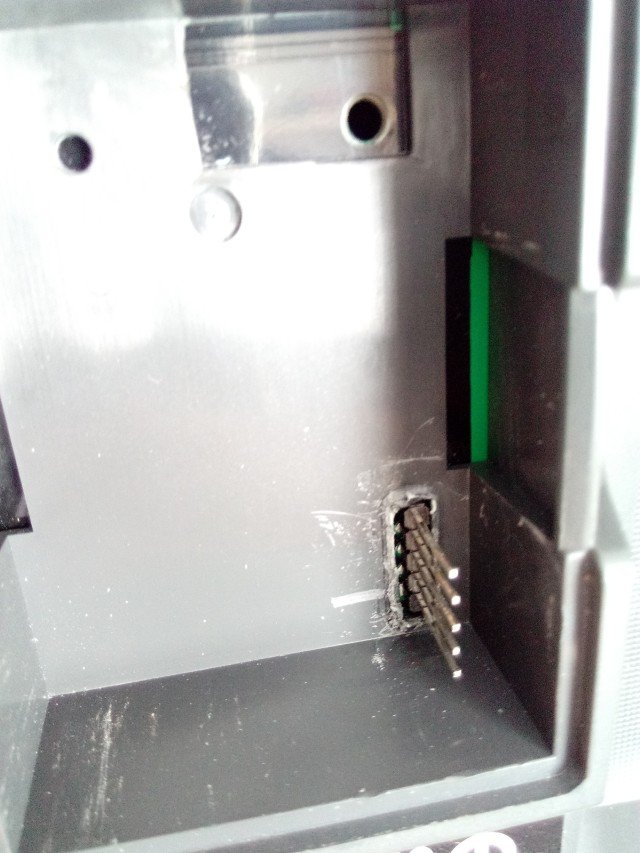
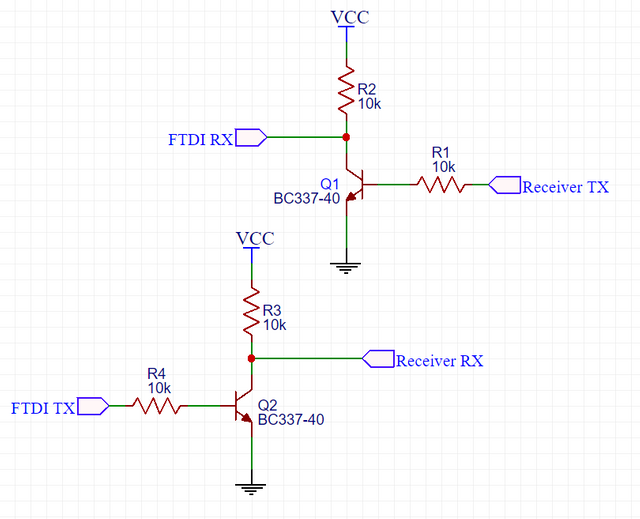
The next step was to flash the D8R-II Plus receiver that came with the module to be able to get a CPPM signal (I know I could just buy a different receiver, but I was trying to keep the price as low as possible). The process was relatively straight forward, but I had some issues using my FTDI programmer. The problem was that the FrSky receiver uses inverted RX and TX (meaning a binary 1 is sent as 0 and vice-versa) so you have to use their "special" programming cable. In an ideal situation I could use FT_Prog to invert RX and RX signals on my FTDI, but as it turned out mine was a Chinese clone meaning I could not flash settings to it, so to get this working I had to improvise. I put together this very simple circuit to invert the RX and TX signals and it worked flawlessly.
Finally I was ready to start building the actual miniquad. I started with the frame assembly. I assembled the bottom plate and added the motors. Then I started building the stack. The stack is basically the main part of your quadcopter. It contains the PDB (Power Distribution Board) and the flight controller and in my case, since I was using a 4-in-1 ESC, it also contained the ESCs. This was all a relatively painless process although it did take a lot more time than I anticipated since I was checking everything multiple times just to make sure everything is properly connected.
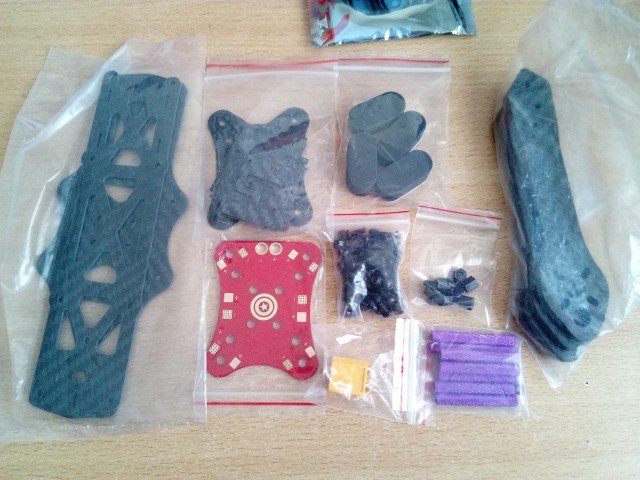
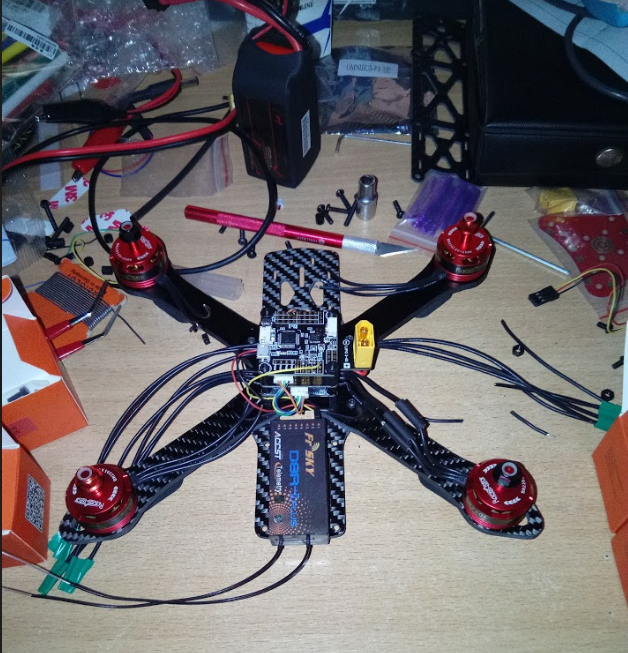
This is what it looked like after about 6-7 hours.
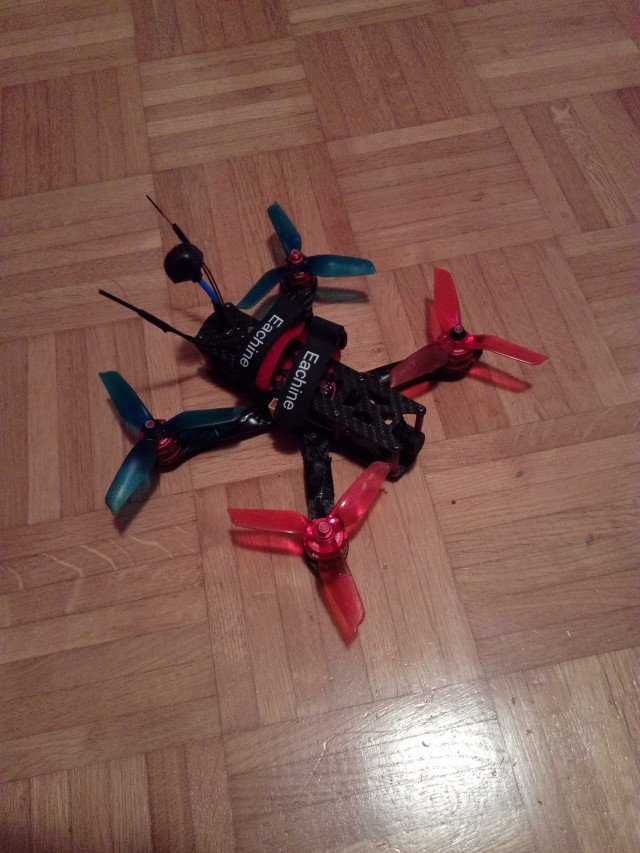
Next, I connected the motors to the correct ESCs, added the FPV camera in the front and built the top plate. This was pretty straight-forward. I zip-tied the VTX and screwed the pigtail to the top plate. I've also used some zip-ties to angle the receiver antennas at an angle and to prevent them from getting stuck in the propellers. At this point I was ready to configure the quad via Betaflight which basically means I setup the ARM switch and the OSD. Really nothing special to cover here. So this is what the finished quad looked like.
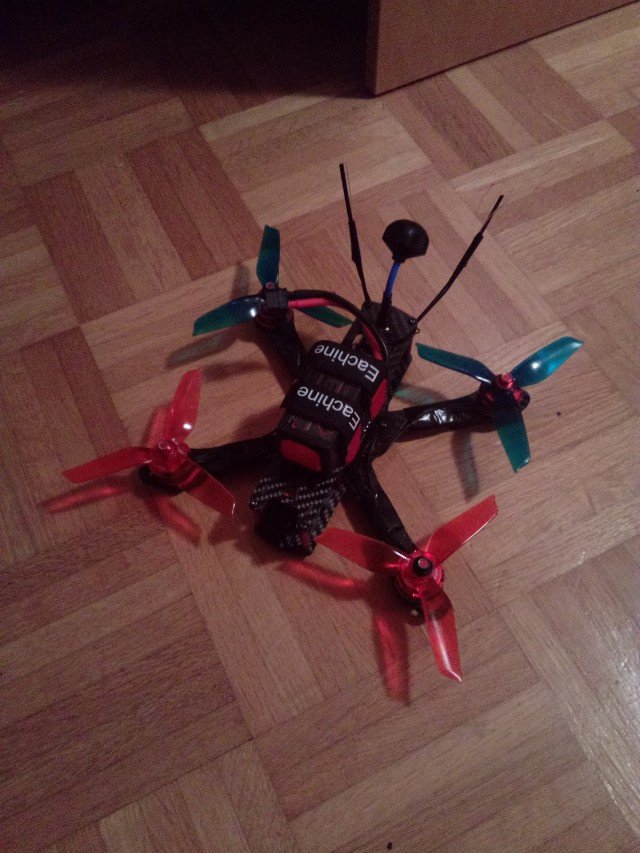
I was surprised by how beautiful it looks! Definitely not bad for my first build!
So you might be wondering how it flies. Well, it does fly, but if you want to know the full story of my first two flights keep an eye out for the next post (Spoiler: it doesn't end well)!
Ok, so here's what I would do differently if I was building this quad again. I would go for 4 separate ESCs instead of the 4-in-1 ESC because it only occurred to me later that if I burn out an ESC I'll have to replace all 4 of them instead of just replacing 1. I would also get a better VTX since this one is complete garbage. I'll be getting a new one soon. And if my budget would allow for this, I would get parts from reputable sources instead of getting cheap Chinese knockoffs as they would perform a lot better and would most likely have a longer lifespan, but for a beginner quad I think I've done a pretty good job. Do you think I could've improved something or done something differently? Let me know in the comments!
If you like what you've read and want more similar content please upvote, follow, comment and resteem!
Really impressive the way that you work hard to write a good post. Keep it up!
Spamming comments👌👌👌👌 is frowned upon by the community.👌👌👌👌
Congratulations @tadejgasparovic! You have completed some achievement on Steemit and have been rewarded with new badge(s) :
Click on any badge to view your own Board of Honor on SteemitBoard.
For more information about SteemitBoard, click here
If you no longer want to receive notifications, reply to this comment with the word
STOPLooks good for a home made drone, I got a mate that made his own as well and I will one day get/make my own! Matter of getting some money towards it and the time.
Thanks for the article. It is very interesting. I write about drones, too. Maybe you are interested: @tobstar2
The only reason for time is so that everything doesn't happen at once.
- Albert Einstein