Discover How Green Screens Work and How to Get Perfect Lighting?
Will you join me in learning about green screens today because I think green screens make a live stream look much higher quality and they allow us to give our videos a lot more room in the background?
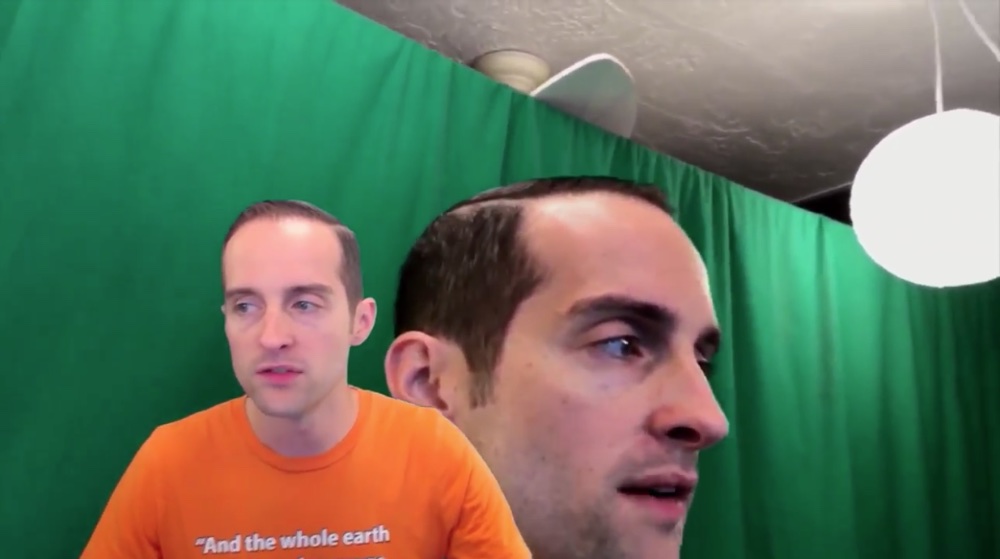
Green screen setup tutorial featuring how to get perfect lighting and position!
You see, if I didn't have this green screen behind me, then my face and my picture would take up a lot more room, and then there's a lot of things I couldn't do like if I had some big obnoxious background behind me, I couldn't just move my face around like this because it'd take up too much of the picture.
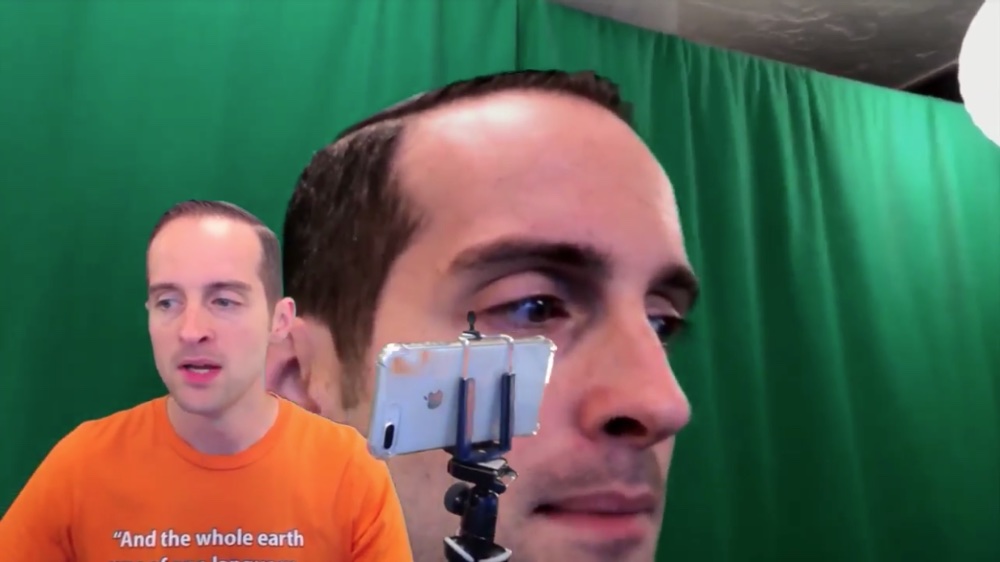
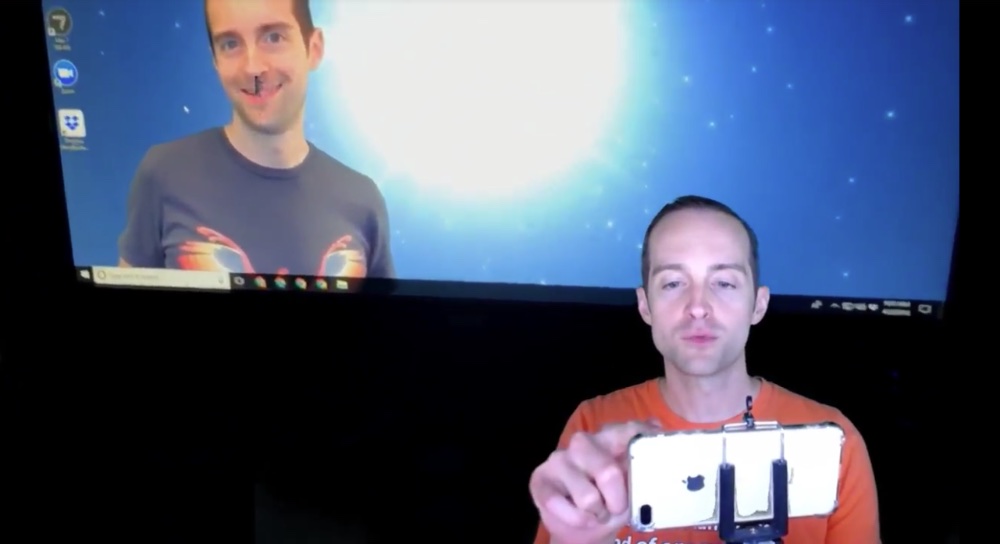
Having a nice green screen like this allows a lot of flexibility and what I'm doing, I'm showing you at the same time both the green screen and where I'm on the screen with the Chromakey, and you can see using Wirecast Go, the opposite view from my iPhone where I'm actually filming. You can see the actual background, plus you can see what it looks like at the same time.
Getting a green screen set up just right was one of the most challenging things I've done in order to get it to look good. I think it finally looks good now. When you look at the color of my face, I think the lighting's nice on it with the Chromakey in place. Getting all that setup can be challenging and yet it's really worth it.
It allows us to take our videos to the next level. Those of us, we get our green screen set up, we do our videos online, it looks professional. It's one of those mental things. We associate green screens with watching people on the news or watching high-quality TV productions or movies where green screens are frequently used to produce the total effect.
For example, if you have seen a lot of animation and there is some actor that's in there, the actor is on a green screen, and then the animation is occurring in place of the green screen here.
How do we get all this set up?
What I will show you in this part of the "Complete Live Streaming Course," is how to get a green screen completely set up. To begin, I will give you an overview of what it looks like here with my iPhone now where I will show you inside the studio how the green screen fits in.
One of the most critical things to do with a green screen is to get the lighting set up properly. If the lighting is not set up properly, it's just a disaster because your face will be looking weird, your hair, your eyes, it screws everything up.
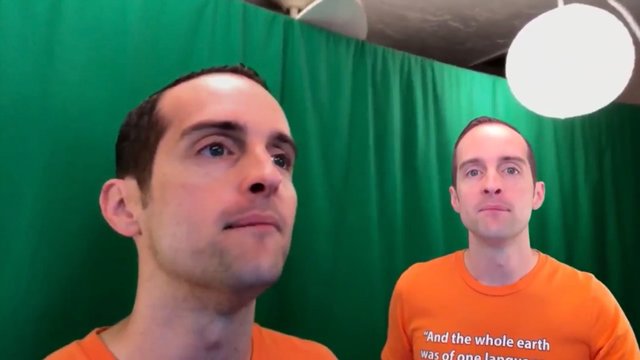
I had about six months where I just kept buying new lights and nothing would work. My face looked all ghostly or super white, and today when you look at the green screen it finally looks good.
I think it does. The green screen finally looks good.

The key to getting all that set up is positioning the lights correctly, choosing the right light bulbs, and you do that by understanding how everything works, how the green screen works, and I will show more detail about this later.
The green screen basically works by taking a color out. This means the software, Wirecast, takes out green from the color. It essentially just deletes it and it becomes transparent.
Why green?
Green does not naturally occur in human skin. That's why the green screen is the choice because, for example, if you use black and you take the black out, then that will strip out hair, strip out things like eyes potentially.
If you use blue, the same thing with blue eyes. Green is the right color to use in terms of putting it on a human being for deleting that color.
Now, how do we get it to look good though?
What you will notice when I show you my lighting up here, I've got all these lights up and these need to be positioned exactly, so that the lighting will perfectly position the green screen to not have that many shadows.
The green screen needs to be pretty evenly lit in order to work properly. If you have just got a big light in front of you, lots of times that green screen will not be lit evenly, and then the green screen won't look good. There will be parts of it that don't fade out completely. There will be parts of it that then if you fade those out all the way, then your face will start to look weird.
If it's too sensitive certain shirts you wear will set it off, and then you will look like you are not wearing a shirt or you are a floating head. If you can see my videos, I've made almost all these mistakes with it.
So, I've done this.
I will give you just a quick look at the lighting because I've got a whole other section in the "Complete Live Streaming Course" on lighting.
You can see that what I've done with the lighting is I've spaced the lights out to try to be even.
You can see the intention is that the lights light everything up where I'm directly in the middle. The intention is to minimize the shadows.
Now, this is just a green curtain bought off Amazon. I will show exactly which one this is in one of the other videos. I've just got a green curtain essentially that I bought. These are pretty cheap, and then you will notice it's got some shadows in it, but it's pretty evenly lit.
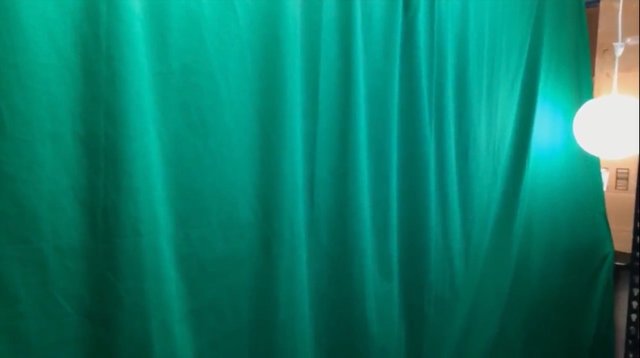
You notice there's not a bunch of big dark spots and light spots in it.
Now, if I turn these lights off and try to do this, then you will see a completely different story. You will see the computer lighting.
It's still pretty well lit.
But if I show you the green screen back on the computer you will see it actually does a pretty good job with the green screen, which I think is really impressive.
It does a pretty good job with the green screen even in the dark.
Now, the problem with that is you can see these spots that aren't faded out correctly on the green screen. You can see over on these corners.
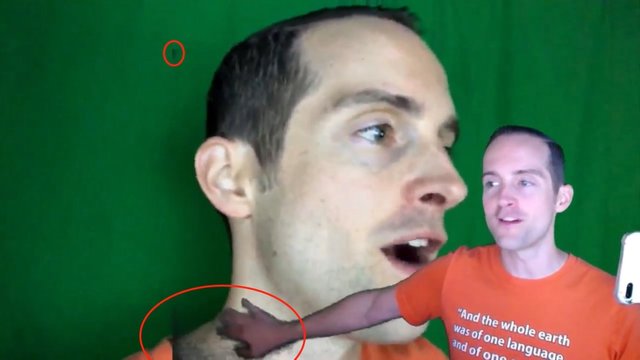
This is what happens if you don't have your lighting very good on it.
You will have these messed up spots on it that then ruin the whole thing.
As you can see on many of my videos the whole thing has been ruined by weird spots on the green screen.
If I turn a different light on then everything changes again. It's amazing that I've got this Chromakey set up pretty well. It's working pretty good even with this lighting not done well.
Now, you will notice there are some white spots now and you can see those are lights behind the green screen.
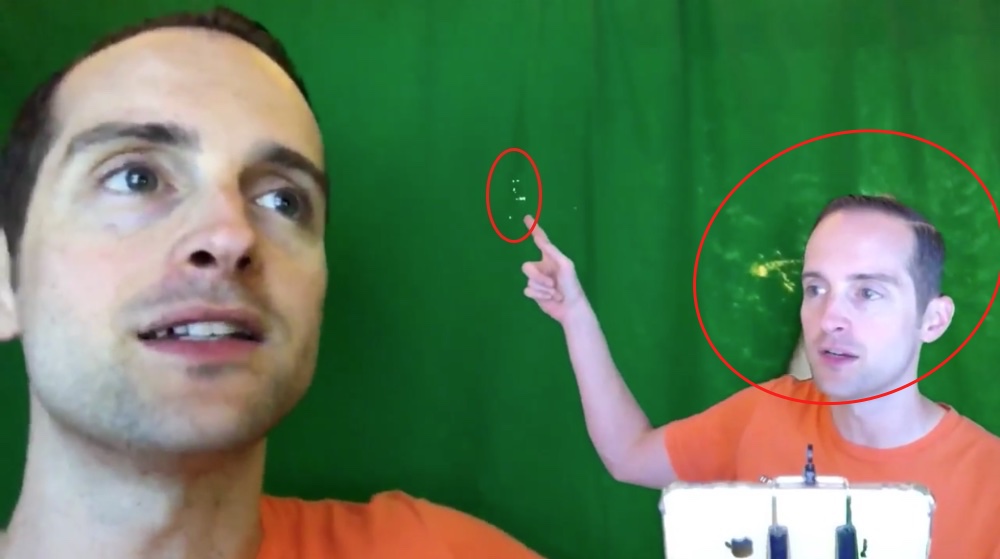
If you want to light a green screen, ideally all the lights need to be in front of it. You don't want any lights or anything like sunlight coming in from behind it because that then distorts the green screen.
Get that lighting right with it and just take the time to get it tested out.
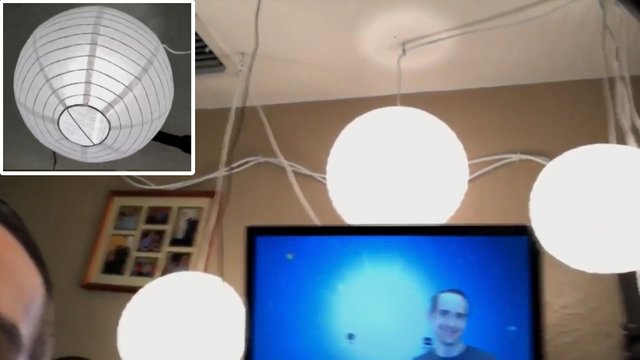
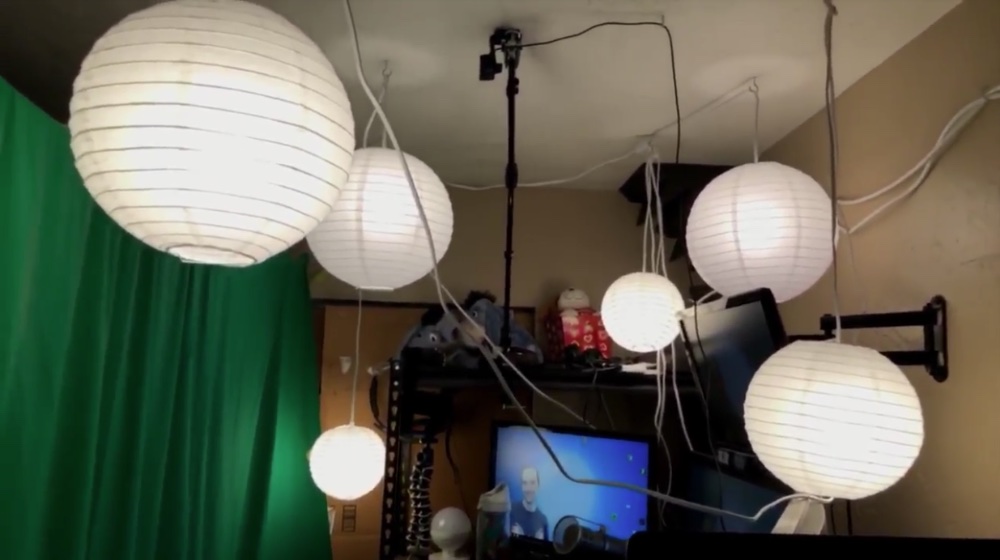
Now, I've got these lanterns.
These are little paper lights like you may get for a party or you might see at a restaurant. I've got these paper lanterns up here and they are hung into the ceiling.
I'm hanging them into the ceiling up here, and then I tested them in different positions to get the lighting exactly right.
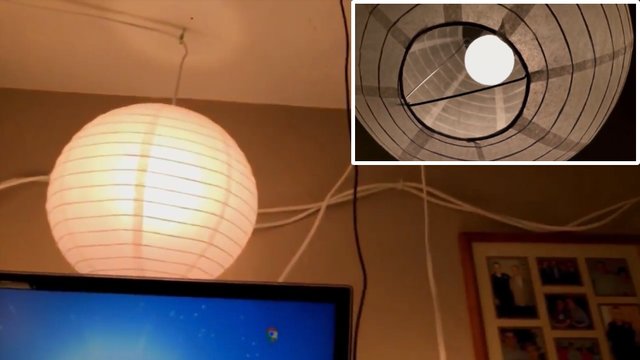
Then, the secret I've got inside these lanterns, is "Reveal Light Bulbs."
I've discovered that Reveal Light Bulbs work well with my particular skin tone. If you have got light bulbs that are too bright or don't work with your skin tone, then that messes up the green screen.
This may be more of an issue for lighter skin, however, I haven't tried it on darker skin, so what would I know?
The "Reveal Light Bulbs" work really good with my particular skin and were one of those things I tried out of desperation.
I bought light bulbs, tons of different lighting setups. The "Reveal Light Bulbs" plus the paper lanterns are an ideal green screen lighting solution.
Once you have got the green screen lit correctly it's pretty easy after that to have it work properly. If it's not lit, you can put a ton of effort into trying to get it to work right, like changing the Chromakey color and it still won't work.
You will put on a different shirt one day and everything will go wrong. What I hope to communicate is these are the basics of how to get a green screen set up.
Here's another thing you might want to know.
How do you hang this up?
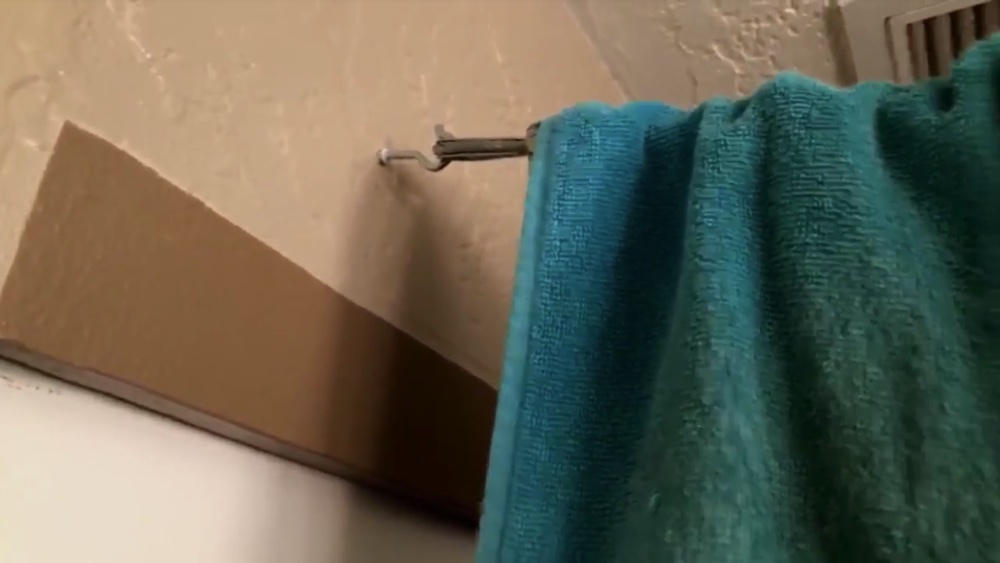
Well, I think the best solution is to get it hung up into the wall like this. I've got this screwed into the wall with a steel cable on here so that then it's hung up into the wall.
This is my bedroom right behind this green screen.
I'm in my bedroom in my house right here and I've literally got half the bedroom as my filming office.
Then, I've got this steel cable hung up in the opposite wall.
Now, this is another one of those things I learned the hard way, if you get one of those setups where you have got stands, guess what?
If you have got big dogs and they run in and knock it down, which happens, or if you bump into it or if you lean over too much and knock it down, it's really annoying. The ideal way to do these green screens is to get them hung up into the wall. That way, it's sturdy and steady, it stays up there. It doesn't just fall down if you bump into it.
When it hangs up like this, it makes it easier for it to not get all wrinkled. Even with it hanging up like this I can just pull it over to reduce some of the wrinkles in it, but if you have got one that's suspended behind you, then you can't walk through it either.
The nice thing is that I can just walk through it and now I'm in the back of my bedroom over here and I can push this curtain aside without knocking my whole studio setup down.
This way I've got my green screen in a good position where I'm able to just quickly use it every day without having to set it up and take it down.
With the green screen, you want it to just be in a stable position. Keep it there where it's at because again, if you have to change anything, then you have ruined your whole setup with it. You might have to change your Chromakey and that can be really annoying.
Here's something else that can be helpful with the green screen.
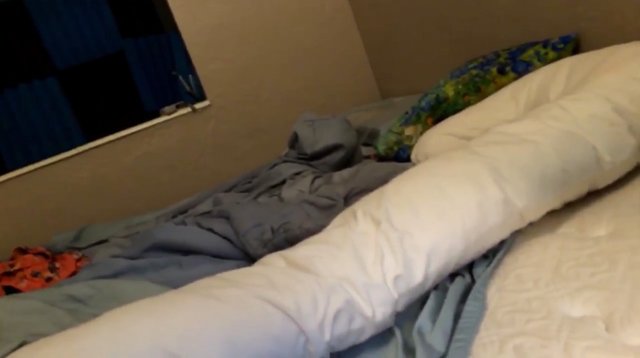
I live in Florida, so I get a lot of sun on this particular window.
Now, if I left this window open, it would allow a whole bunch of not just sun in, but also noise. What I've done, I've used some foam, which reduces some of the sound coming in a lot and I've also put a cardboard box on the background. I've blocked all the light out back here.
This way, the green screen, when it's day time, doesn't get a bunch of light in the background because if the green screen got a bunch of light in the background, that would mess everything up too.
When I did my green screen before I had a window that was open that then based on the time of the day would slightly alter the colors and any slight color alteration messes the whole thing up, it just ruined it.
I hope this has been useful to look at how to have a green screen set up in the studio. It doesn't matter which one of these green screen you buy necessarily. I will show one in another video explaining which one I bought, but they are just basically a green curtain.
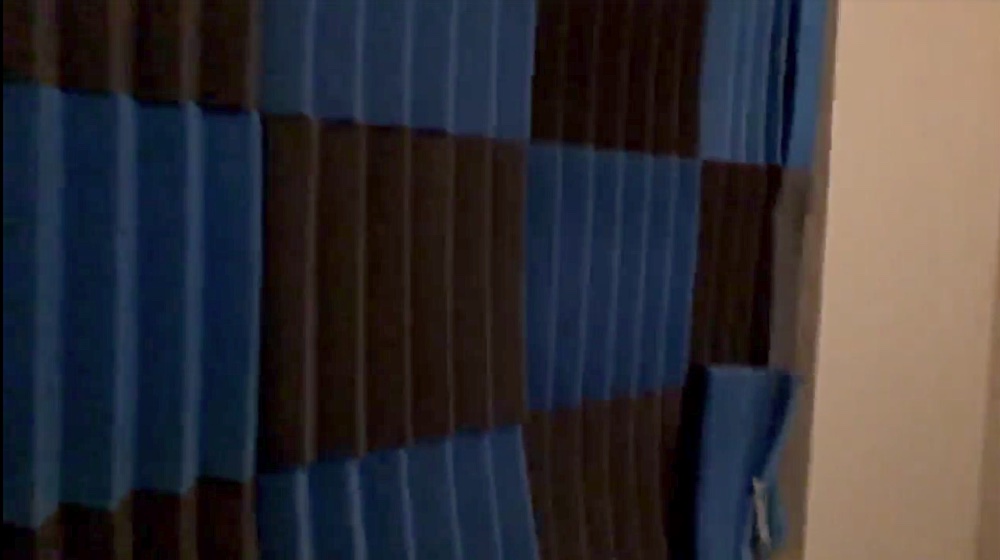
You can also use a green piece of something. If you have got like a home office shed, you can just paint the wall with a Chromakey green.
You could put a piece of wood up that's painted Chromakey green, that might work better than a curtain in a lot of cases because then you don't have to deal with wrinkling.
A curtain is a low-cost solution, but if you can afford to paint something that's solid with your setup, that would be better than having these wrinkles that come in the curtain.
Also, the curtain can get a bit dusty sometimes too, which can again slightly distort the color enough to mess things up. When you have got the green screen in, you have got the lighting in, then you are on your way to having some much more professional quality videos.

When you have got the green screen set up just like this, then you have got that professional look on the video. It's easy to have people just stop to notice and say, "Wow. That's a really nice setup," and it makes the video easier to enjoy for me.
I think it's obnoxious to have some big background in the video and have the screen awkwardly cut off. I think it's a lot cooler to be able to move around the screen like this, just hop around wherever you want.
I love doing it just in the middle of videos. I will just move myself around wherever I need to be, that way I can talk about what's on the screen, but I'm not stuck in one particular part of it.

Inevitably if you do a lot of things you will need to be in different spots on the screen because some things will be in the lower right or lower left.
Thanks for reading.
I hope this is helpful. If you found this post helpful on Steem, would you please upvote it and follow me because you will then be able to see more posts like this in your home feed?
Love,
Jerry Banfield with edits by @gmichelbkk on the transcript from @deniskj
Shared on:
- Facebook page with 2,260,298 likes.
- YouTube channel with 234,900 subscribers.
- Twitter to 101,630 followers.
Let's stay together?
- If you want to stay updated via email, will you sign up either to get new emails daily at http://jerry.tips/steemposts or join at http://jerry.tips/emaillist1017 to get an email once a week with highlights?
- If you would like to build a relationship with me online, would you please visit https://jerrybanfield.com/contact/ because I would like a chance to get to know you?
Our Most Important Votes on Steem are for Witness!
- If you do not know what a witness is on Steem, will you please read https://steemit.com/steemit/@gmichelbkk/what-is-a-steem-witness-how-to-vote-and-why because our votes for witnesses determine our future together here on Steem?
- If you want to fully participate in witness voting and have never made a vote before, will you please set me as a proxy at https://steemconnect.com/sign/account-witness-proxy?proxy=jerrybanfield&approve=1 because this help me to make all witness votes on your behalf and keep them updated?
- If you already have voted for witnesses and prefer to update your own witness votes, will you please place your vote using https://steemconnect.com/sign/account-witness-vote?witness=jerrybanfield&approve=1 because you will feel good knowing your witness vote is helping fund projects that grow Steem as explained here?
My video is at DLive
Hello @jerrybanfield the screens really give professional look. Keep it up
Hey Jerry! Awesome!
wonderful, very exotic

Click the Image Below to see the Video!
Fantastic....

thanks bro! you did well !
we can't vote you for witness there error in system !
it display message tell it can't try again
your video is very greas full
nice boss
cảm ơn bạn
đó là những chia sẻ tuyệt vời, nó rất có ích đối với tôi
I always wondered about your setup, Jerry. I didn't know about lighting the screen itself. It's amazing that a piece of cloth can enable so much. Thanks!
source
You're welcome!
This is awesome... I was able to pick out some tips, my brother is a great photographer... I guess this post will be so helpful to him. I will make sure he gets it and read through
Thanks very much for the lecture