Build the Wall - Part 1
No, not that wall. You see, I need an office, which I kind of have, but I also need some privacy since my kids like to run in here and interrupt me while I'm trying to get work done.
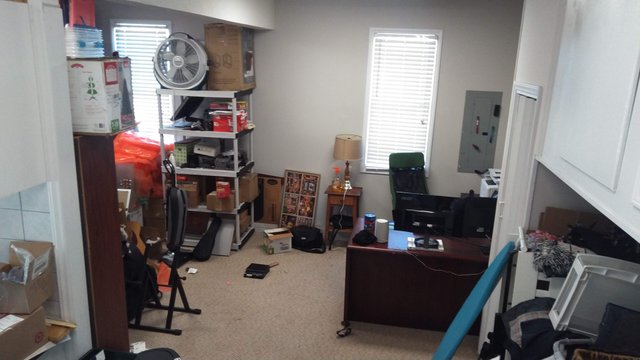
Pardon the mess, we're still in the process of unpacking. What you're looking at here is the garage/office area that we inherited as part of the new house. While the open floor plan is probably nice when you're empty-nesters hanging out in a quiet house all by yourselves, it does't work so well for the family with loud playing children when you're trying to get work done in there. Long story short, I needed to build a wall separating this office area from the rest of the house. There's not a door that I could close, so the kids can just walk in there any time. While I'm on an important phone call. While I'm concentrating on a difficult problem. And yes, they seem to walk in at the least opportune times, and well, it just needs to end.
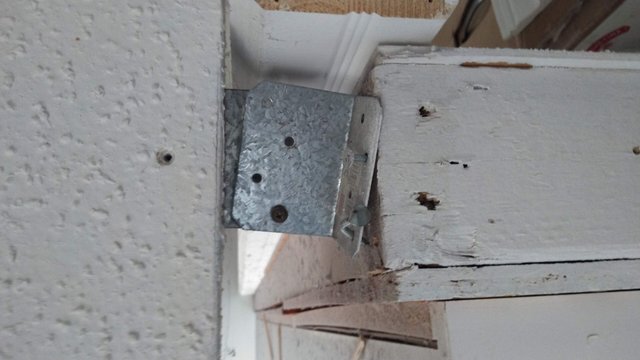
First off, I needed to take some measurements to mate up my wall with the false wall that's just hanging out there already between the laundry area and the office area. When I was taking the trim off to do so I noticed this. Why am I not surprised? This is the wall with the cabinet that I repaired in a previous post. There are several wall cabinets hanging off it on this end which it seems is barely held up with these couple bent over roofing nails and a screw that's functioning more as a pin than a screw. In short, if you were to load up those cabinets with heavy stuff and introduce any vibration at all, the whole thing could collapse. The base cabinets might hold it up for a while, but I guess it's a good thing I found it when I did.
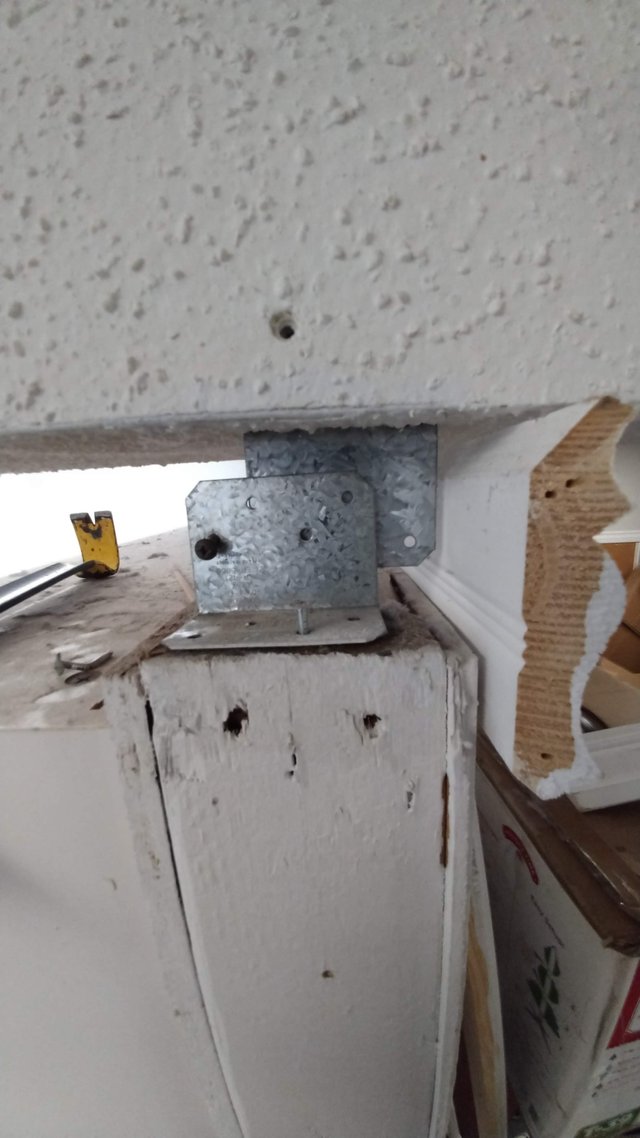
While the execution wasn't all that great, this isn't actually the worst idea I've seen to tie something together, so I decided to go with it. When I took the screw/pin out, this is how much I could see the wall was leaning. The top bracket must have been nailed into place before the wall was stood up because it was actually nailed in there quite well. I had to fix the bottom bracket's fastening system and pull the wall back into plumb so I could screw the two together until I started building the new wall section to it.
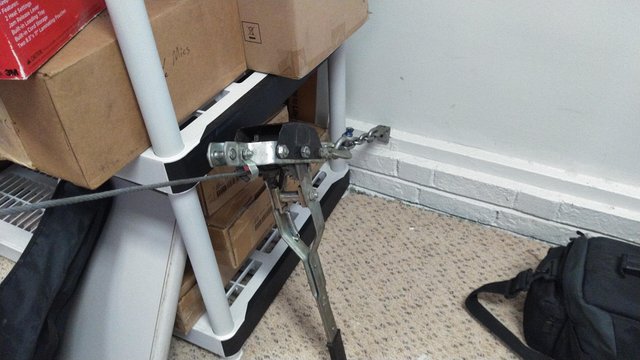
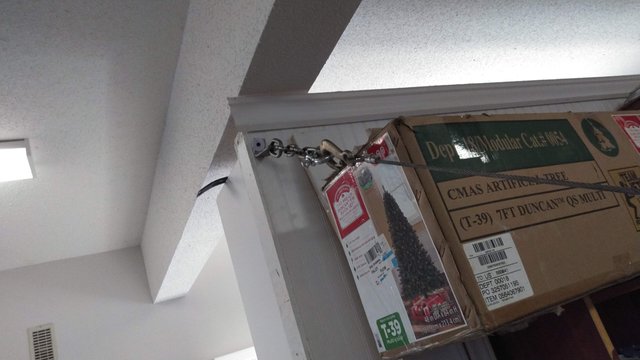
I fastened this come-along to the lower sill plate of the exterior wall and the other end to the top of the false wall I was truing up. If I'd had a helper I could have just had them push it over while I "nailed it", but this rig was a pretty good proxy for that.
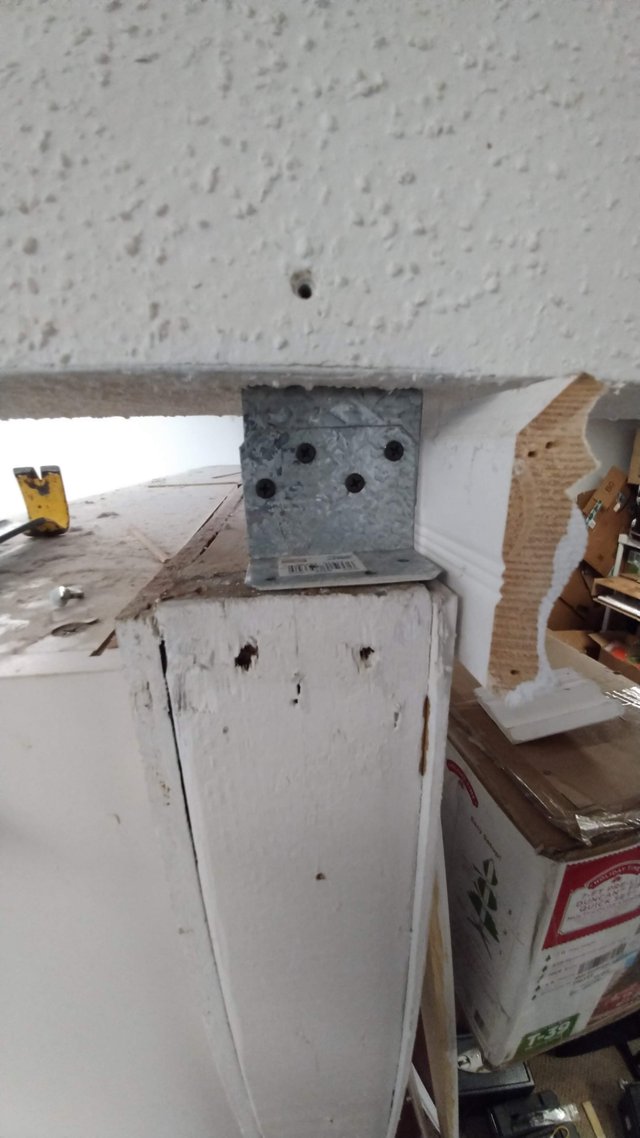
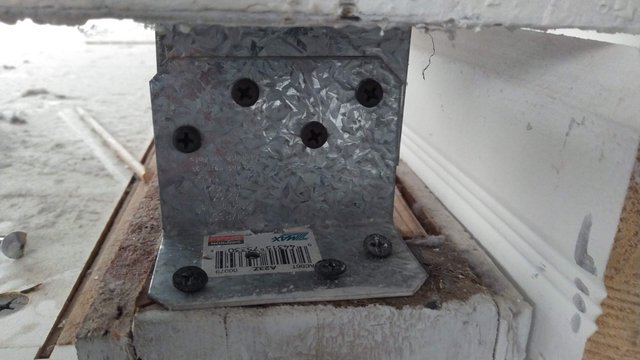
I slapped a 4 ft level on there, screwed the bottom bracket to the wall, then drove 4 sheet-metal screws through the two brackets to fasten them together and hold the wall where it needed to be. This would probably cause me problems if I wasn't going to abut another wall to it that goes all the way to the ceiling, but it's plenty strong for the temporary bracing I needed.
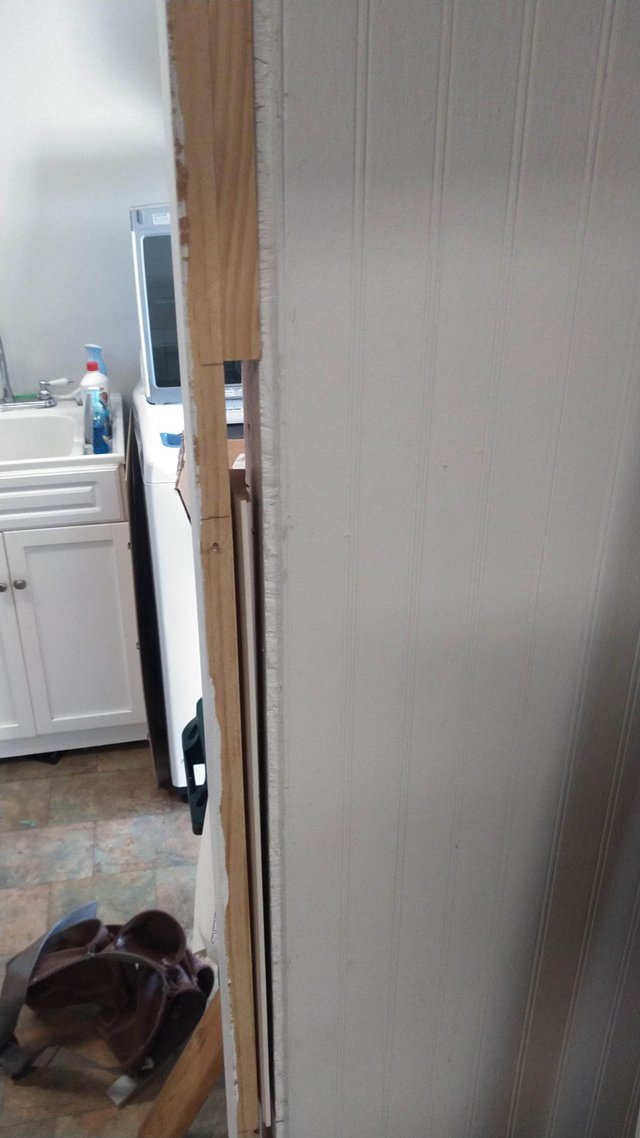
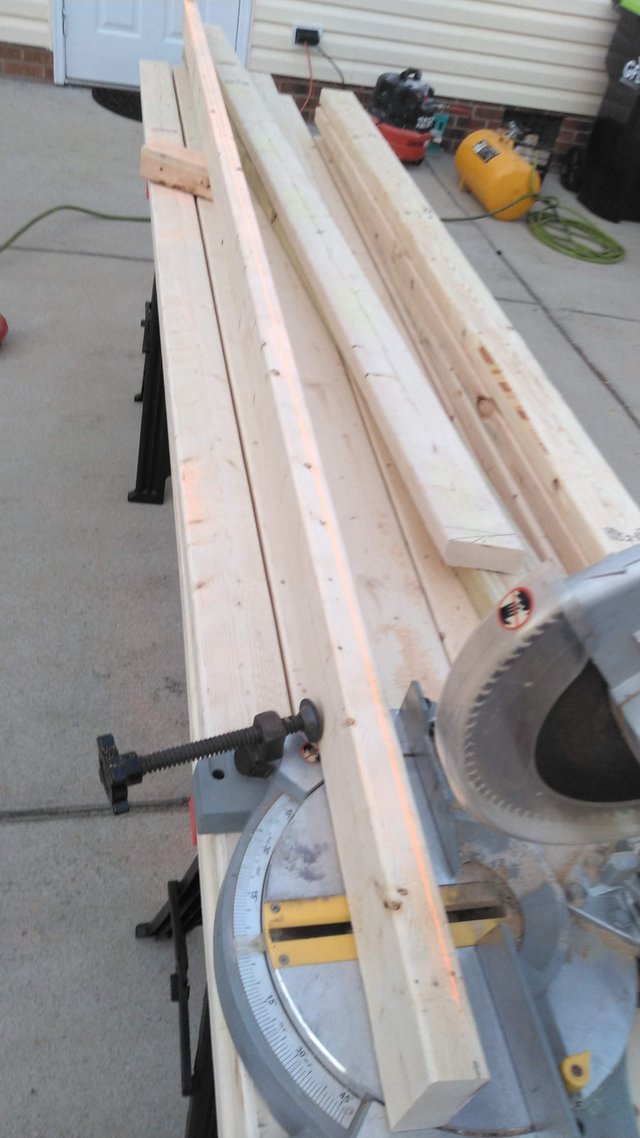
With everything in place I was able to get some measurements, and of course nothing was in square and the top to bottom error was about 1-1/4". I included a pic of the trim before I removed it. They did some creative shimming on the trim here to make it look right. I ripped down my own shim from this 2x4 on the table saw using the referenced chalk line. I sold my good cast iron table saw when I left California, so I had to make-do with the cheap jobsite saw I bought at Lowe's that day. You can't rip a full 3-1/2" board with one of these cheap saws, so I had to cut it down to about 3-1/4" high. These cuts never turn out well, but I've been able to get decent results in the past. It's a good thing carpentry doesn't require any better than a sixteenth to and eighth inch of precision, otherwise I would've been in trouble here. The final piece was an undulating mess because of the lack of rigidity on the blade, but it served its purpose and gave me a much more plumb and square surface to build my partition wall to.
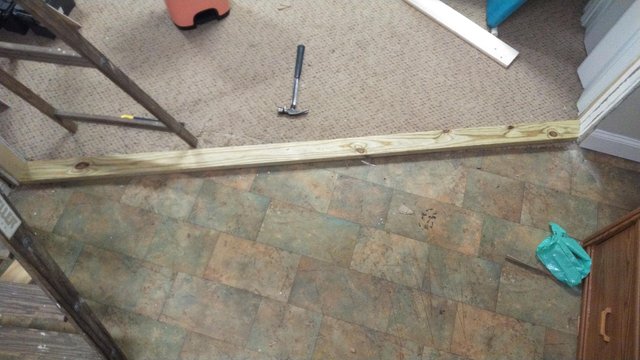
Now for the business of getting the frame built. I started with the bottom plate, which I used treated lumber on because this is a concrete floor at grade and we've had termite issues in this room before. The top plate was simply patterned from it.
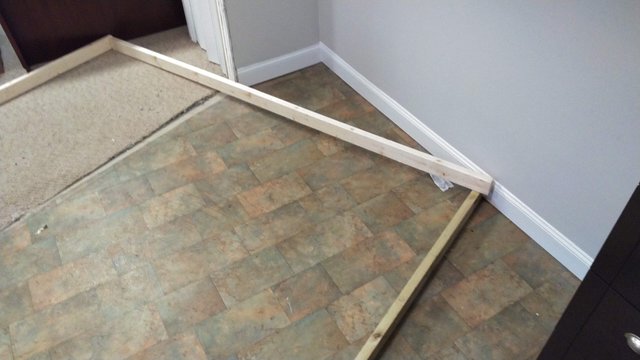
After cutting enough studs to length, I put a couple at either end to see if there was a way to build the wall on the floor and stand it up. I like to do this since it's much easier to nail in the studs from the outside rather than toe nail them in from inside. Unfortunately I just didn't have enough space, so I had to build it in place.
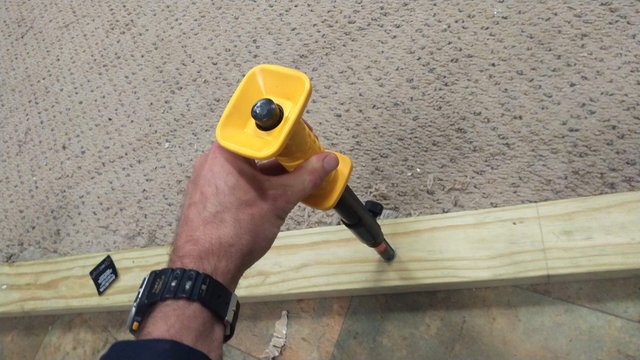
After cutting away the carpet to lay this sill plate down, I used this device to drive nails into the concrete for fastening. It's actually a ballistic driver that uses gun powder shots. The cartridges are rim-shot brass like you'd find in a .22LR rifle. In fact, the brass has Winchester Super X stamped on the back, even though they're DeWalt brand, meaning they were probably manufactured on the same line as rifle ammunition.
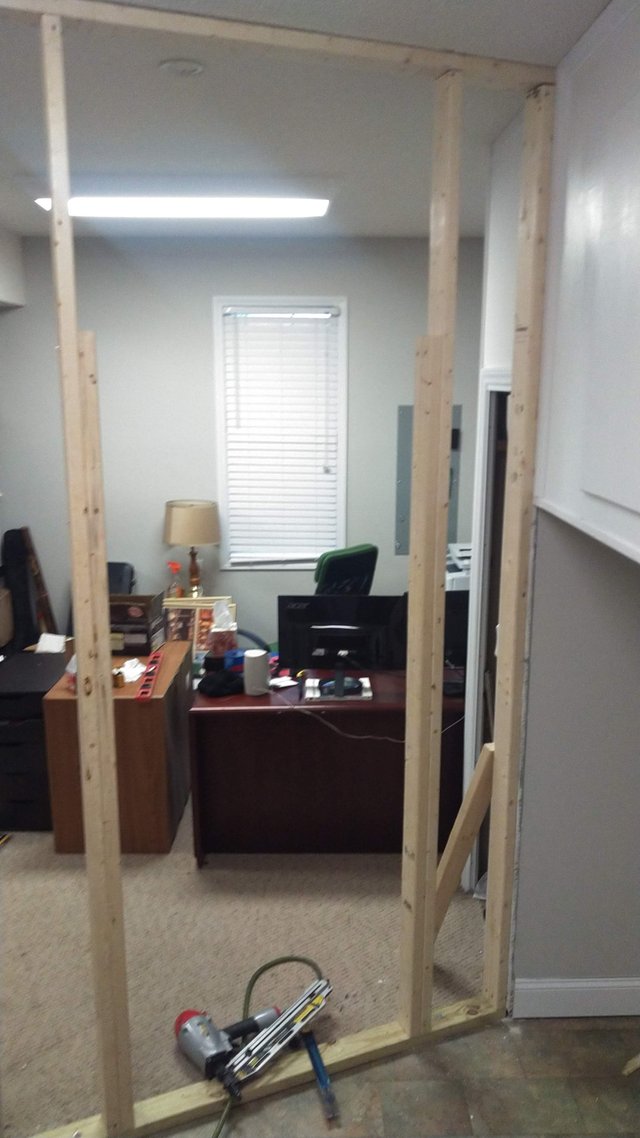
After stinking up the house with gun powder, I nailed the end studs to the bottom, set the top plate on top of them, and fixed it to those and then the other walls. It actually went smoother than I expected. I learned to frame with 16 penny nails driven with an actual hammer. Using this air nailer feels almost like cheating in comparison.
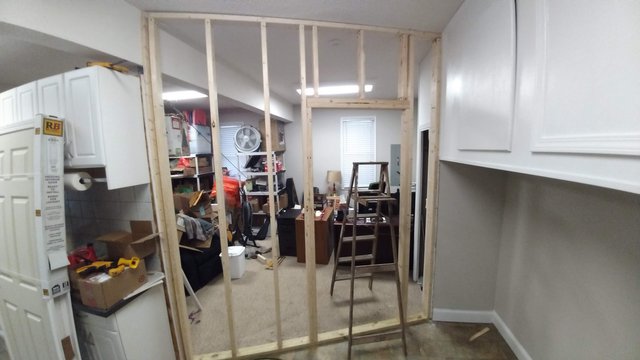
Here's the completed frame for the wall. This was actually the next day after I made the shim. It was raining this day and I had to make most of my cuts outside for the lack of room, so I did all of them before I quit for the night. It actually went together very fast like this. When you don't have to stop to make cuts in the middle of framing it goes together very quickly. Now you can see the wider part of the shim I made at the upper left of the frame. Both the shim and the end stud are nailed to both that beam and the false wall I straightened out earlier. This combined with the bracket work should be more than enough strength to hold those cabinets into place even fully loaded, as long as they don't fall off the wall ;).
That's a good place to stop for now, so that'll be it for Part 1. Look for Part 2 in the next few days in which I start some of the finish work. Until then, Steem On and Happy New Year!
Nothing like a little effort and hard work...Rewarding when the DIY is complete and operational right? Nice work, looking forward to the second instalment.
Thanks for the comment, and Happy New Year!
You're very welcome. HNY.
Congratulations @randr10! You have completed the following achievement on the Steem blockchain and have been rewarded with new badge(s) :
You can view your badges on your Steem Board and compare to others on the Steem Ranking
If you no longer want to receive notifications, reply to this comment with the word
STOPTo support your work, I also upvoted your post!
Vote for @Steemitboard as a witness to get one more award and increased upvotes!
Twitter post https://twitter.com/RandR10/status/1212233880645898240 #posh