DIY Phone Case #3: Sharpie Fruits
This took maybe ten minutes and has to be one of the simplest DIYs I have ever done.

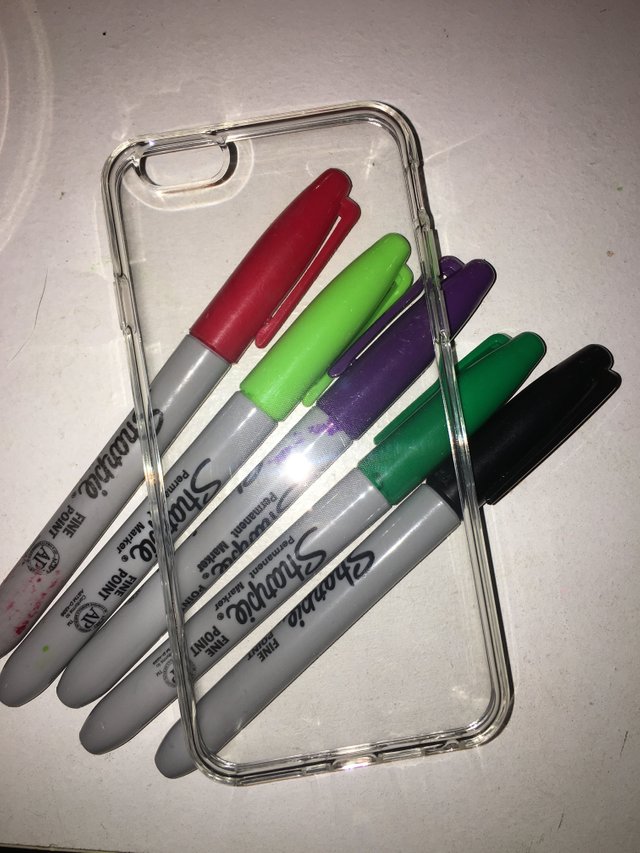
Materials
- Sharipies (I have multiple colors because I was going to do other fruits but decided I really liked the grapes)
- Clear Phone Case
- Glitter + Modge Podge Optional
Step One
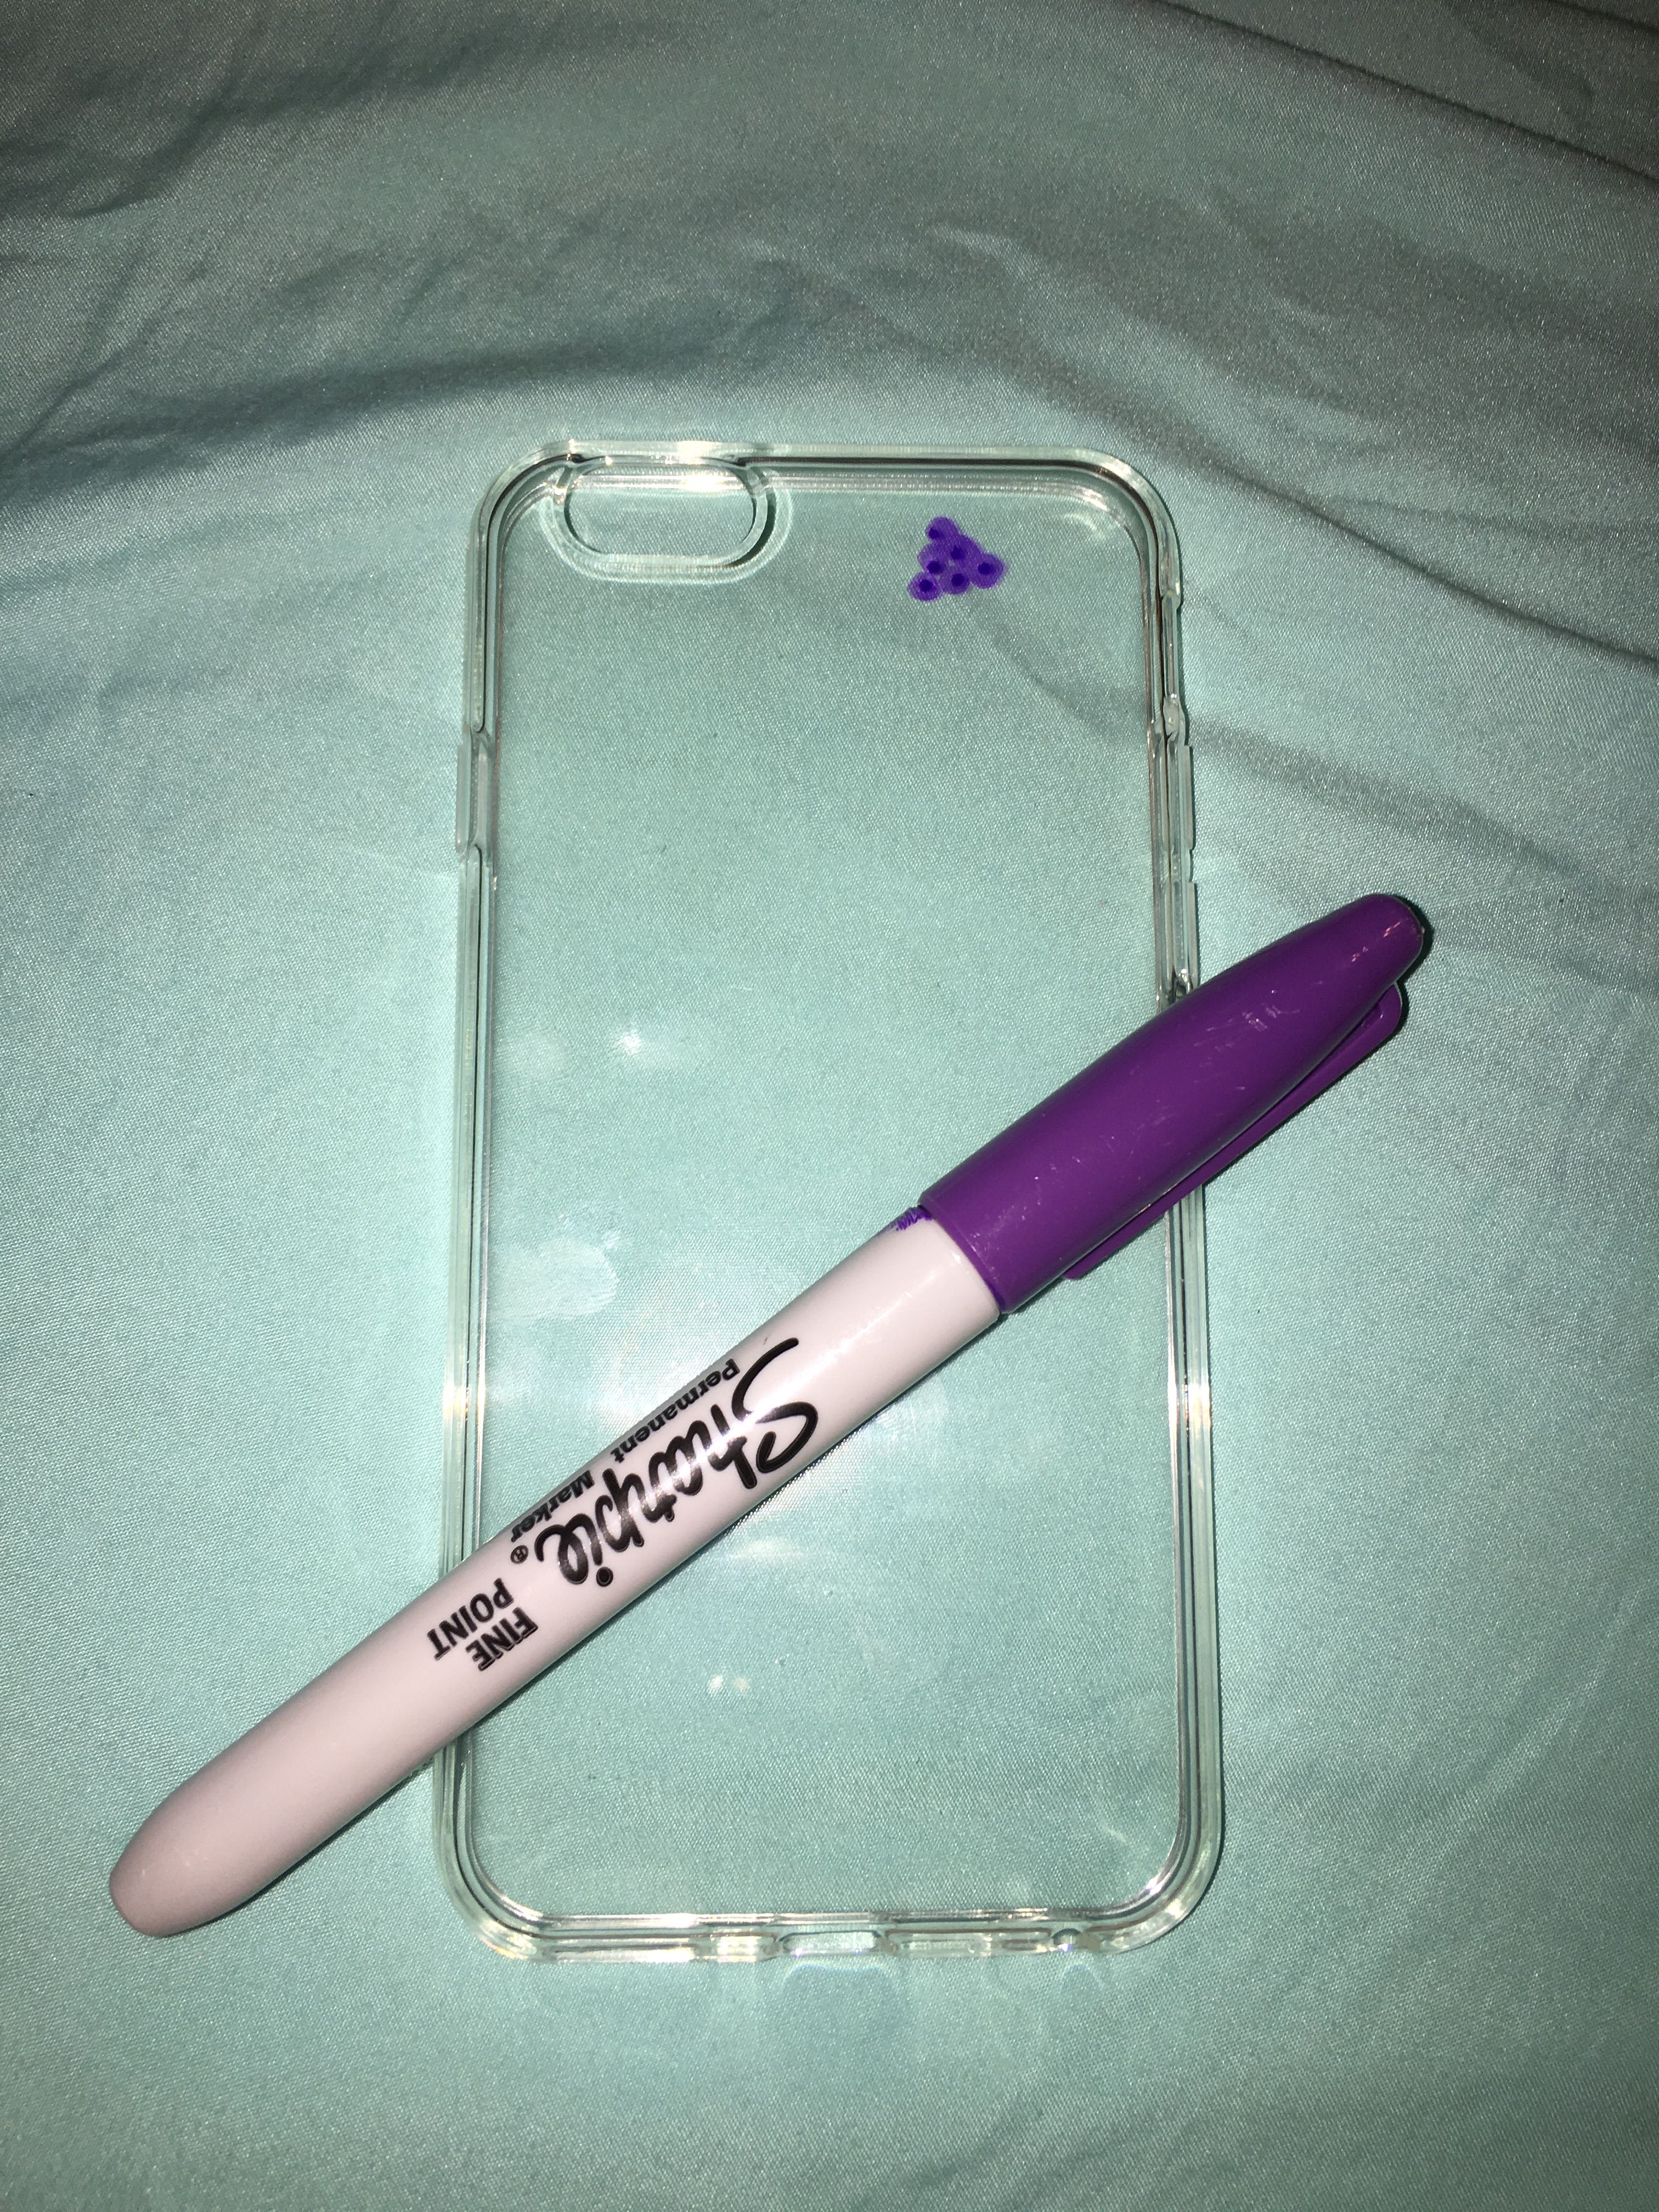
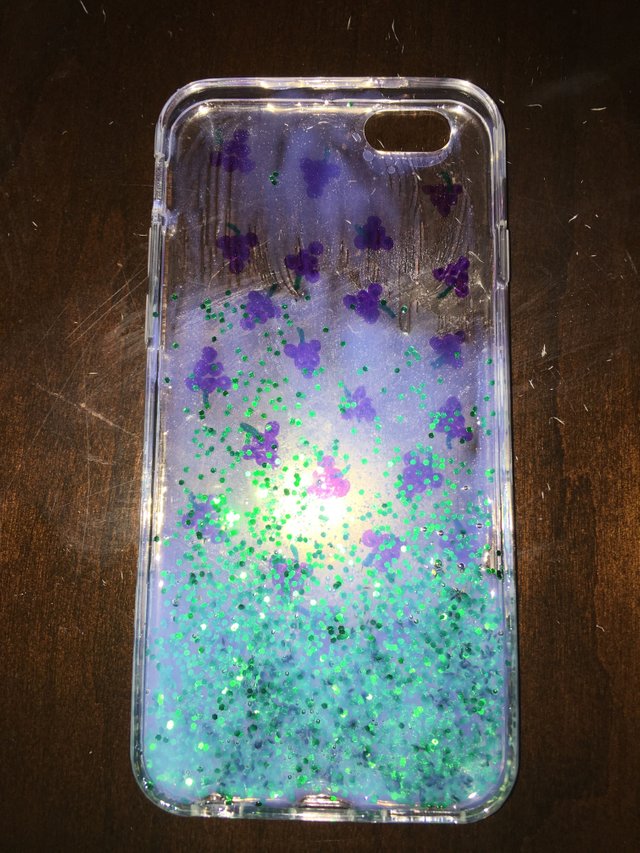
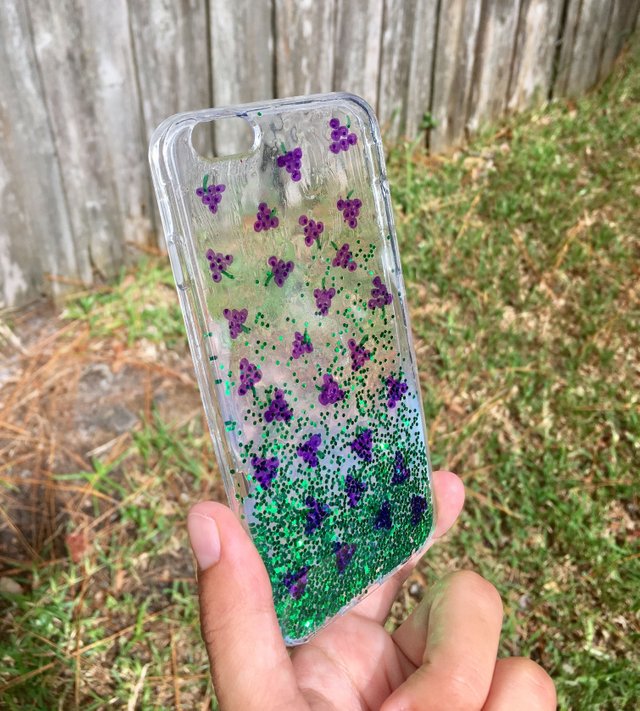
Take your sharpies and start to draw the base of your fruit on the outside of the case. I went with grapes so I just drew three circles at the top, then two right under it, and one at the bottom. 🍇 Repeat till your case is filled to your liking. The sharpie dries instantly so be careful, you can't erase or wash off any mistakes made.
Step Two
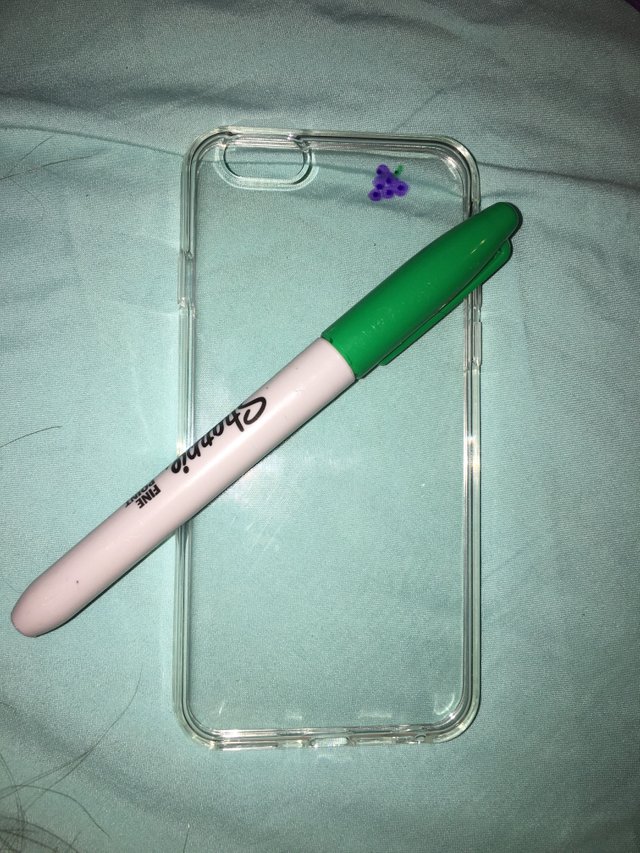
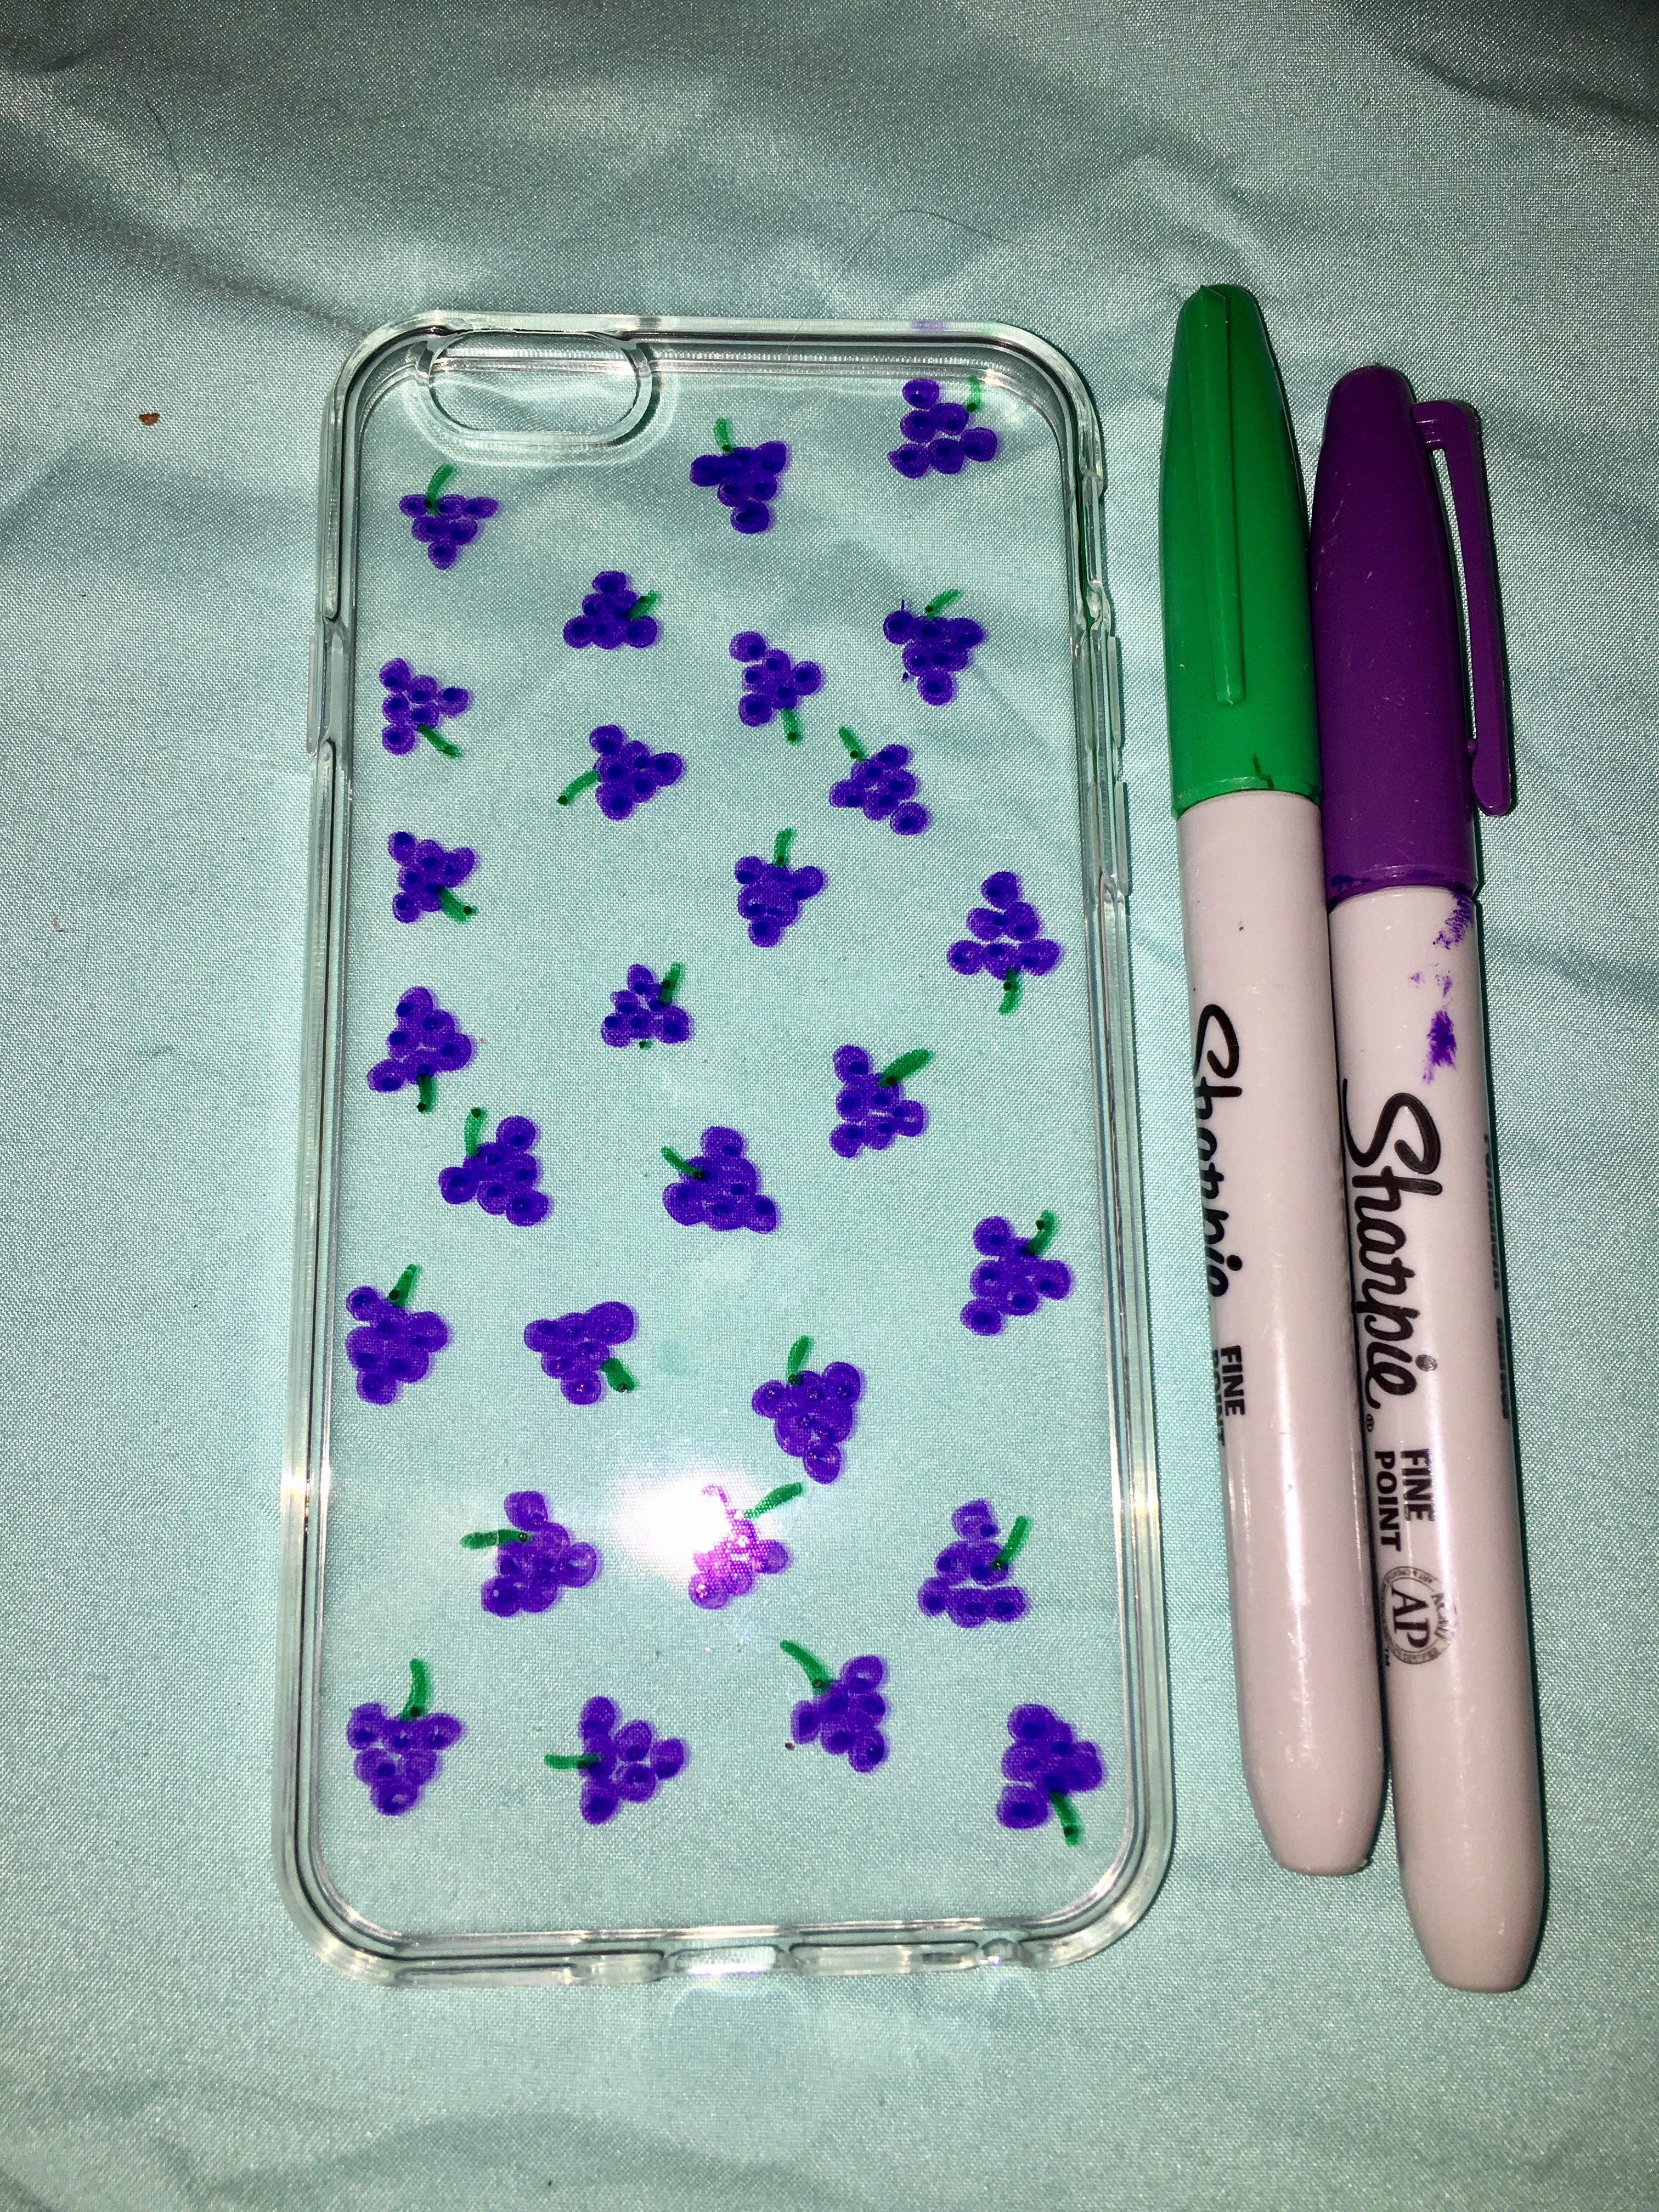
I drew all the bases of my grape first and then went back and added stems to them all.
Step Three Optional
I love glitter so I painted some modge podge on the inside of my case and sprinkled my glitter in an ombré effect. Then I painted another layer over the glitter once the first one was dry to seal my glitter in so it doesn't get on the actual phone. Make sure you do this step on the inside of the case otherwise the glitter will cover up your fruit.
I know this wasn't a very complicated DIY and it was pretty self explainitory, however, hopefully this left you with some inspiration because I found it to be super cute and all the supplies were easily attainable. 🍇If you try it out let me know what kind of fruit you used and how well it worked! :)
Very nice. Cherries would be cool!
The grapes are super cute! I like the glitter added to the bottom of the case too! Great job!
Really amazing :0) never thought about doing on myself like this....lol so inspiering.
Thank u for sharing.
Followed upvoted resteemed
Thank you!!!
:0)
great DIY! thanks for sharing!!