DIY Monitor Stand with Foam Board!
Recently I made myself a large art print display out of foam board and it got me excited about the possibilities of building with this easy to cut and glue material!
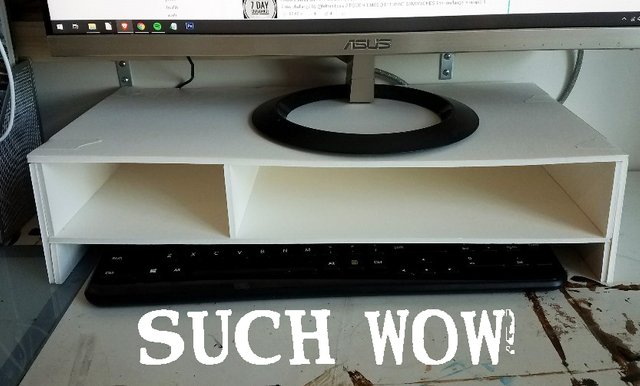
I had also recently made myself a very basic monitor stand, but ultimately was not completely satisfied with it, and so wanted to upgrade.
This post will walk you through how I made my new-and-improved foam board monitor stand. It's my very first DIY tutorial, EVER! :O
First, I want to say a few things, though...
It turns out that even double-layering framing-quality 3/16" foam board (purchased from a framing store -- specifically Aaron Brothers which, at least in my area, is closing and all of the company's framing services will now take place through Michael's) is still not strong enough to fully support my monitor without sagging and while still having the compartments and shelving that I want in a monitor stand. As such, it may not be the best solution for everyone. But it was still really fun to make and I would like to share!
So this can be a just-for-fun exploration project for you, or it can be something you opt to make because you don't mind the sagging issue! Or, you can take a look at this tutorial and let it inspire you to make something less weight-bearing out of foam board. Or you can just read along for fun or interest's sake. :) (Thanks for being here, by the way!)
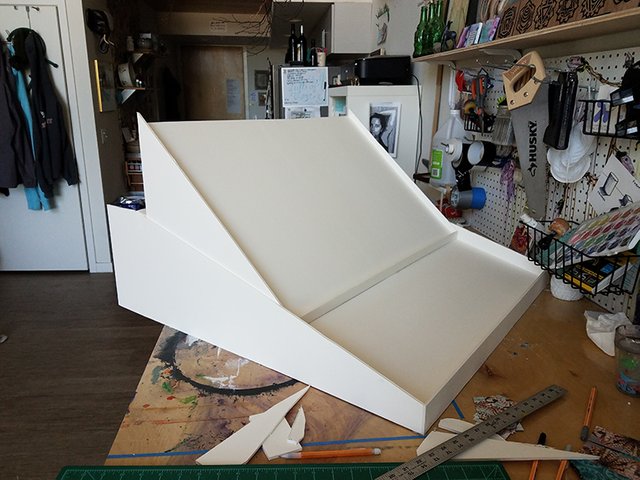
I wish I could share a tutorial of my art print display, but alas, it was more of a trial-and-error kind of process. I do have a few pics I can share, though:
in progress:
technically still in progress because I added info and one more piece to the top portion, but the most complete pic I have:
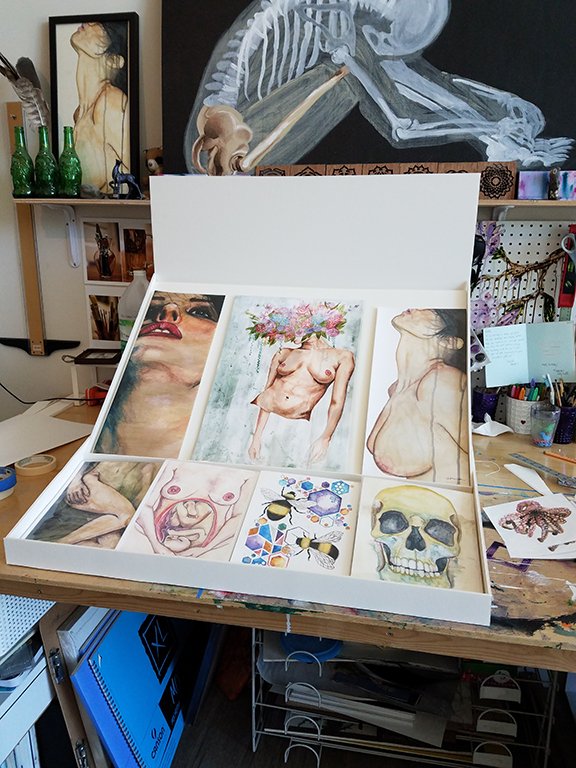
Foam board is DEFINITELY strong and sturdy enough to support something like art prints!! :)
Okay, on to the monitor stand!!
First, MATERIALS:
- one 3/16" (or thicker if you can find it!) 32x48" foam board
- tacky glue
- xacto knife, ideally with a couple extra blades
- a yard stick
- a smaller ruler is helpful as well
- a pencil
- a cutting mat (I suppose you can cut on whatever surface you want, but a cutting mat is easiest and will help keep your blade sharp)
- a paper towel in case your glue drips/beads up
- tape! masking tape, painter's tape, or artist's tape will do just fine. I used artist's tape.
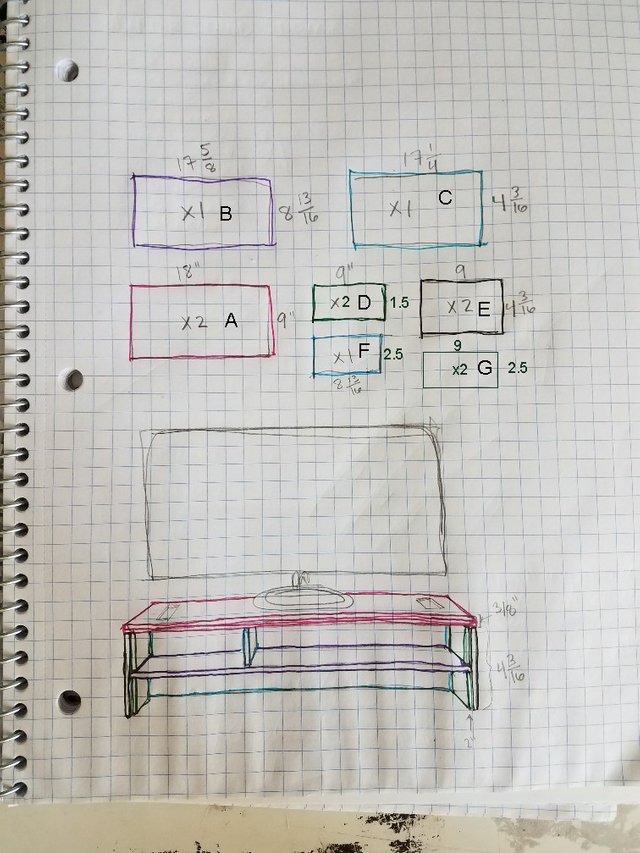
The first thing I did, aside from research examples of monitor stands out there to see what I like, was draw up my plan. I like to color code it to keep things easier for myself, and also letter-label pieces so as to not get confused once they're cut. I did do a last minute adjustment to the height of the walls, and forgot to change that adjustment on the shelf divider piece, and forgot to take a new pic of any of those adjustments on paper! So I changed a couple things in photoshop to accurately reflect what I was aiming for. Please note the shapes are not drawn to scale!
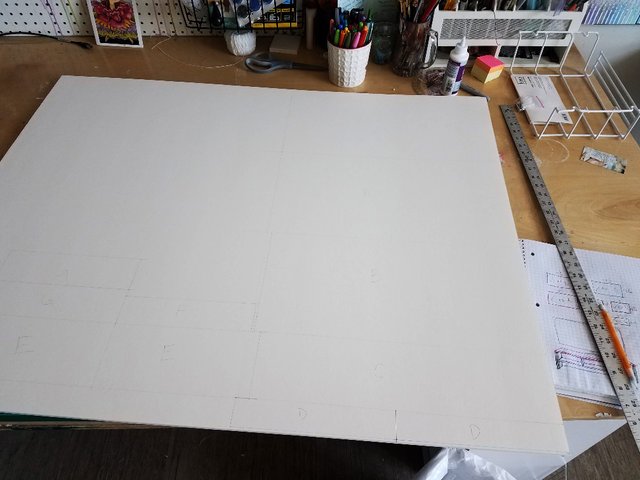
Next up I drew out all my shapes on my foam board. Now, I did make a couple measurement errors here, so be careful! Fortunately even with only one piece of foam board, this project leaves plenty leftover to make new pieces if you do make mistakes. I also put the corresponding letter of each shape on the foam board. I know it's really tough to see -- sorry about that, this is my first time doing a DIY tutorial! - but I think you can still get the gist of it. I just started with the two biggest pieces and then kept on adding, letting the pieces share cuts.
Next up was just carefully cutting along all the lines! I like to score it by cutting lightly the first time, then go back and press harder to actually cut through. The corners can be tricky and get stuck and to avoid cutting into the piece next to it I go back and position everything such that I am pulling the blade toward the corner that needs help.
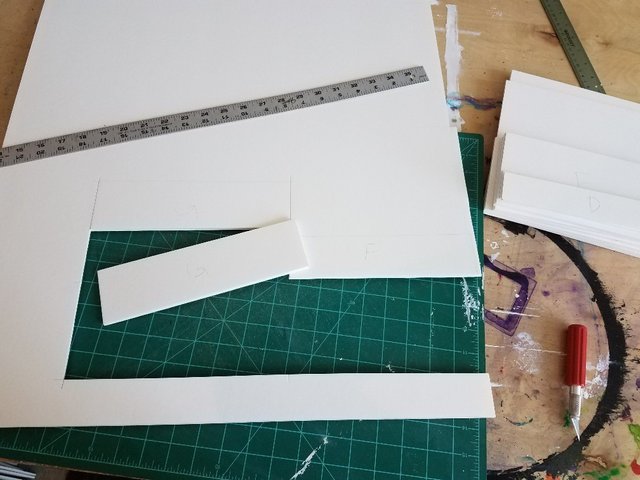
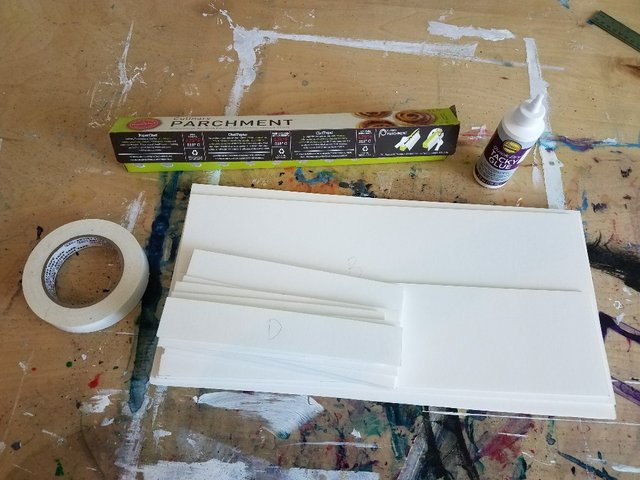
Alright, there's all the pieces!! Here's where the parchment paper can come in handy -- I like to put it under my project to prevent glue from dripping onto my table. If you live a more daring lifestyle and want to forego the parchment paper, go for it! But obviously my table is pristine so I simply cannot let glue get on it.
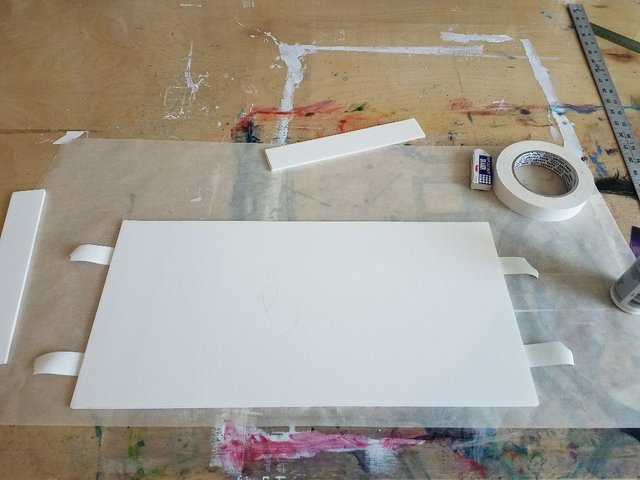
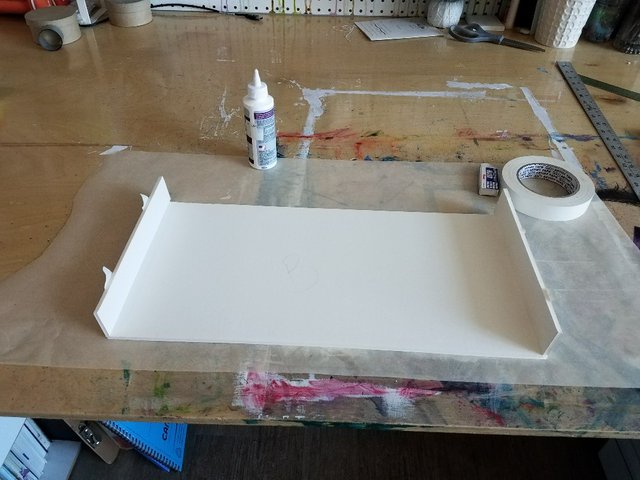
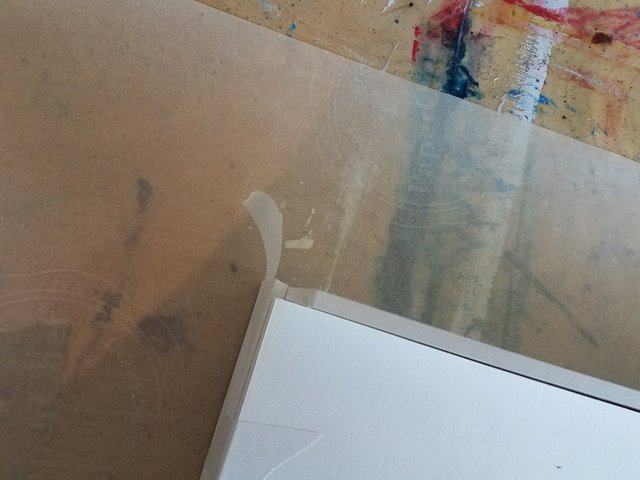
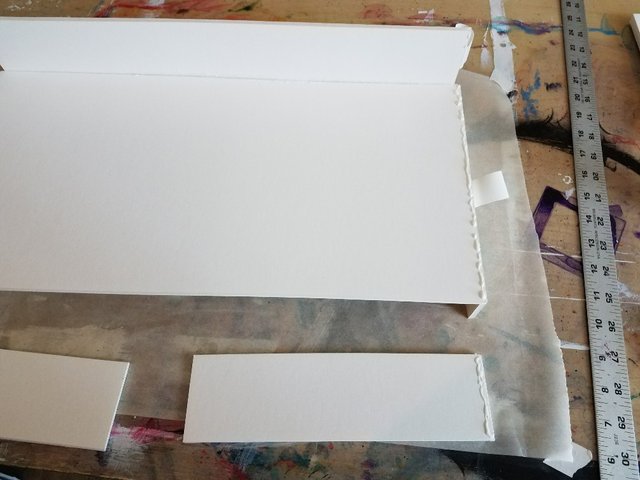
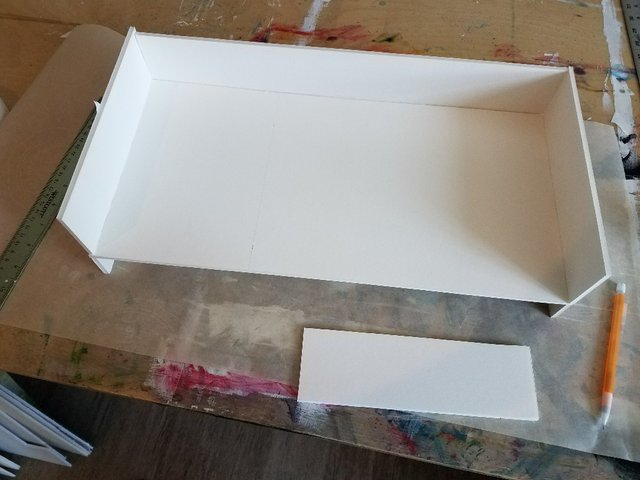
I began with the middle shelf piece, labeled "B". I set it down with the underneath side facing up (with foam board this typically doesn't matter, but if there are any marks or imperfections you want to hide, be careful about which way you assemble!). I placed tape underneath it as seen in this picture. The tape serves to quickly secure the pieces I'm about to glue on, holding them in place while they dry.
Next I glued on the two shorter wall pieces -- the 1.5" ones labeled "D". I made these shorter because it's all the space my keyboard needs to be tucked under the shelf. These are slightly longer than the depth of the shelf. Let the longer portion hang off in what you are planning to be the back of the unit. These little "wings" are what the backing will fit between.
I also like to add glue rather generously along the seams. I didn't do that as much with this project as my glue was getting low and amid all my many errands yesterday, glue was the one thing I forgot. D'oh!
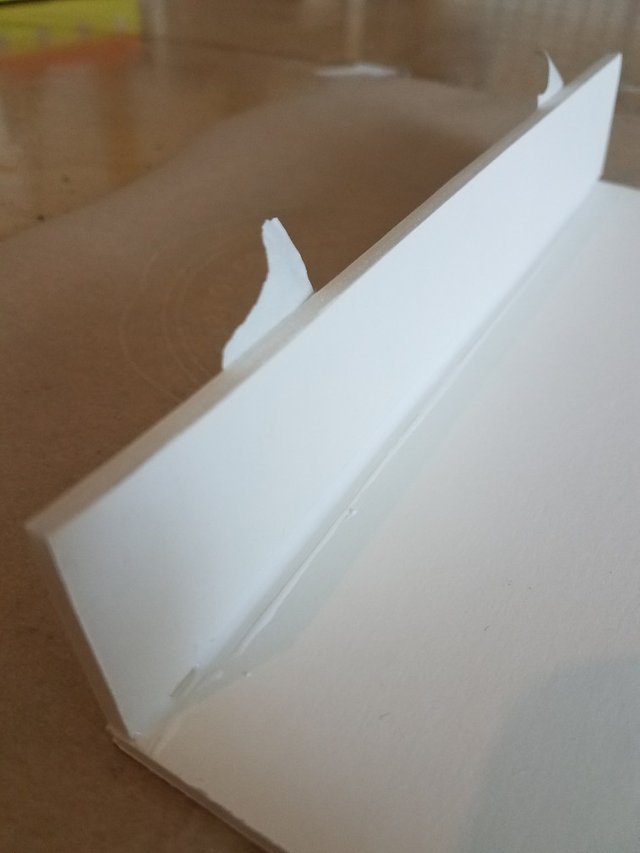
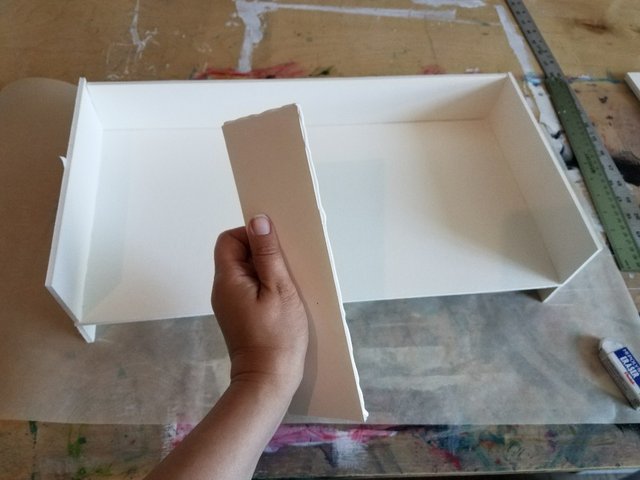
It seemed to me that putting the back of the unit on next seemed like the best move. This is the piece labeled "C". It should fit between the two "wings" hanging off from those side walls. I put glue on those side walls where the backing would touch, and put glue along edge of the shelf. The next few pictures show how this fits.
Again, I added glue to the seams. Then I noticed my backing was bowing a little away from the shelf, so I held it in place for a few minutes to try and secure the bond.

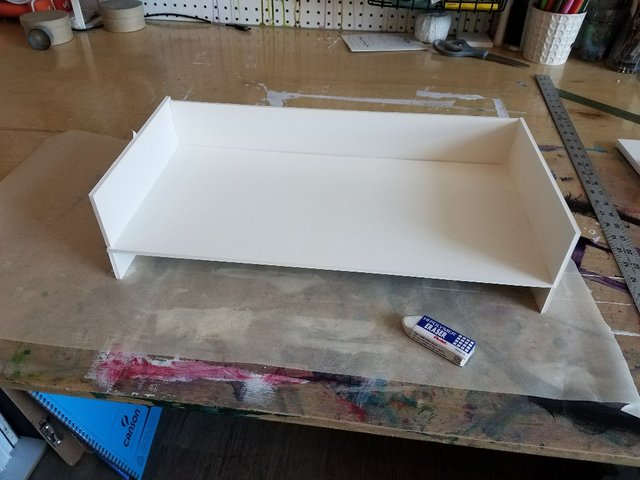
Once I felt satisfied with that bond, I moved on to the upper walls ("G"). At this point it's time to remove any tape that was applied near these joins.
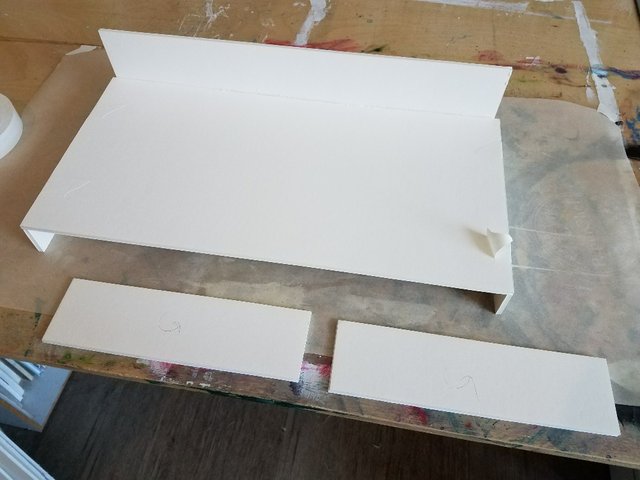
I applied my glue as shown, again with tape ready to hold things in place.
Things were coming together nicely!
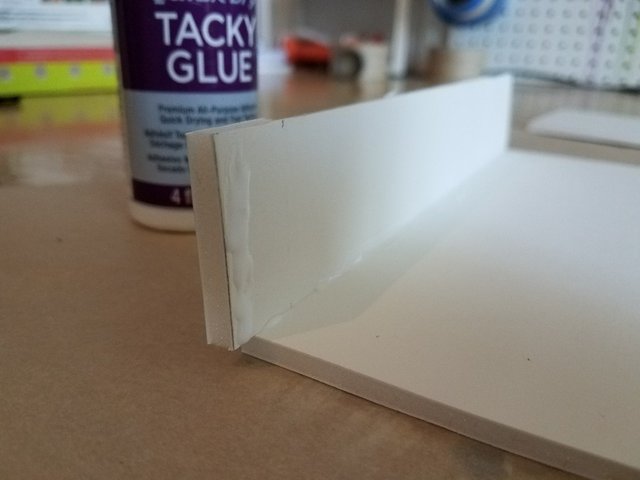
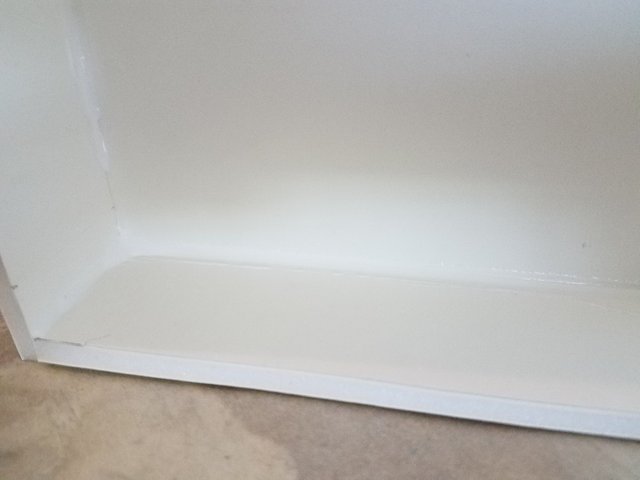
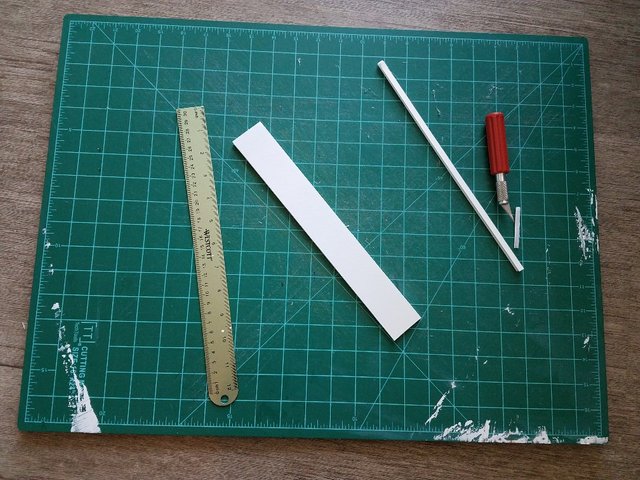
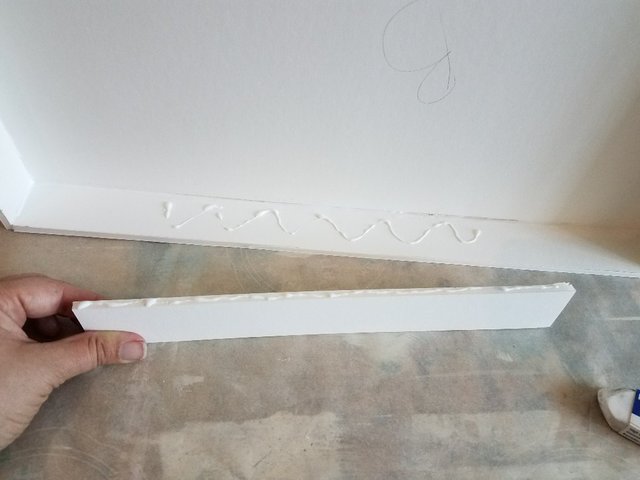
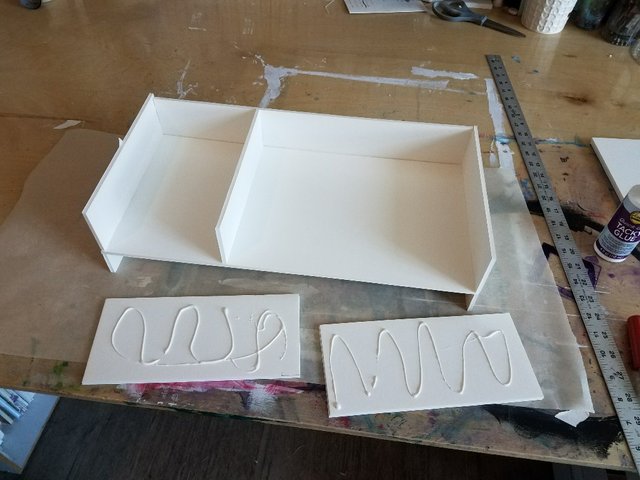
But the shelf was understandably already showing some sagging, so I quickly cut a 1.5xhowever-long-I-felt-like piece to reinforce it along the back wall:
I glued it on as such, nice and secure:
Next up was deciding exactly where to install the dividing wall for the upper shelf. I wanted to be able to keep papers or notebooks in the right side cubby, so I measured out a generous 11.5 inches from the right side.
I glued on the dividing wall ("F"), and found it quite steady and ended up skipping any reinforcing tape.
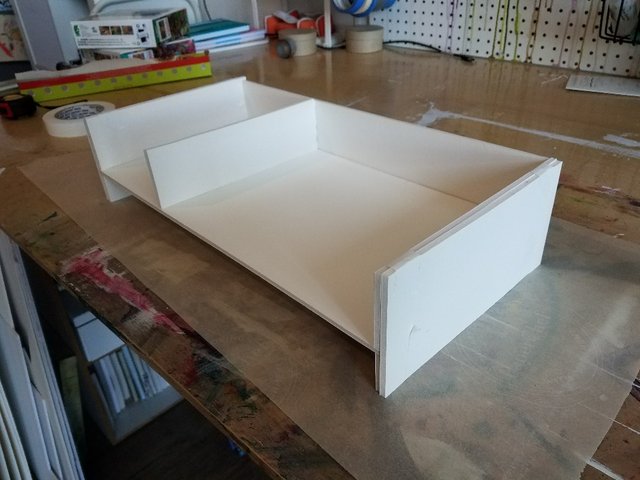
Voila! And next came a part that I found strangely exciting: gluing on the outer walls ("E").
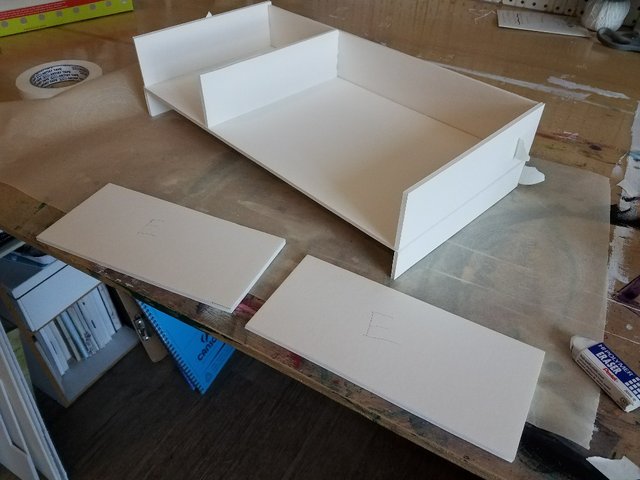
(I was gonna add a pic of the cute pixar robot, but I don't know enough about copyright to decide if that's a good idea)
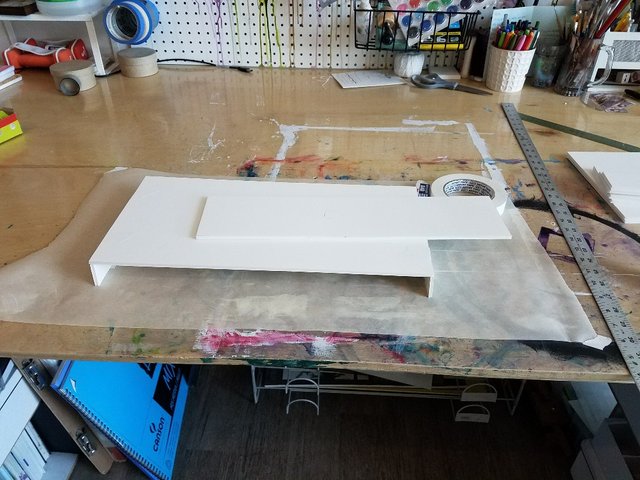
Alright, walls reinforced with tape, and that pesky shelf is still sagging a little. I wonder how much space my keyboard actually even NEEDS under there...? Let's find out (and take peek at the previous foam board monitor stand while we're at it):
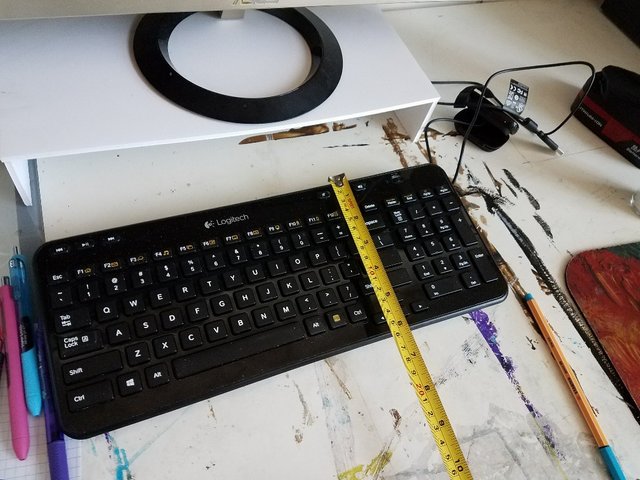
I gave my keyboard about 6.5" of space in its little cave. I used some of my extra foam board to cut a piece 1.5"x17-1/8" and inserted it like so:
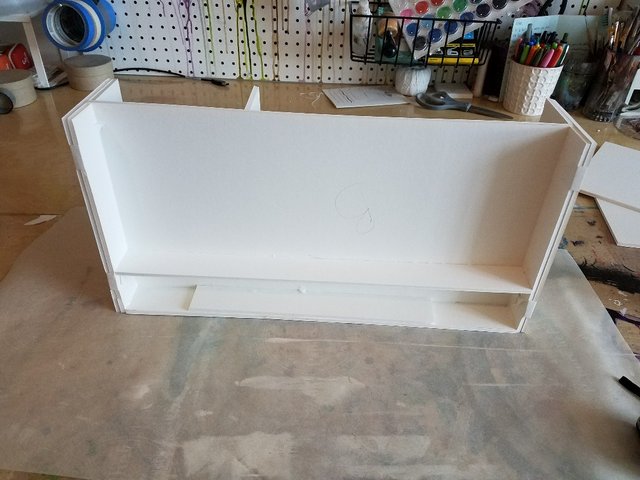
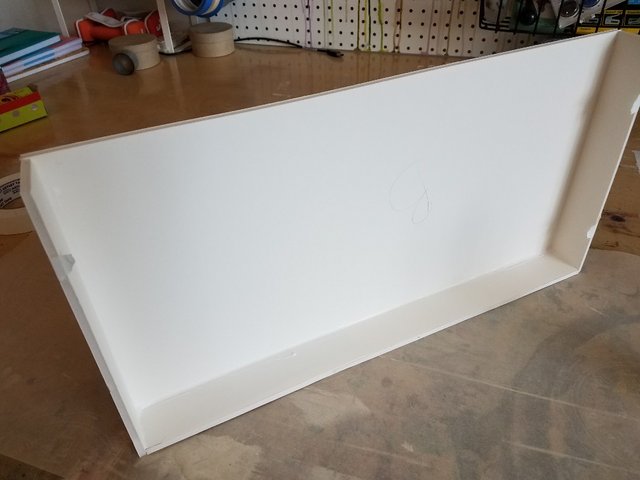
Next was another really fun part: gluing on the top ("A")!!
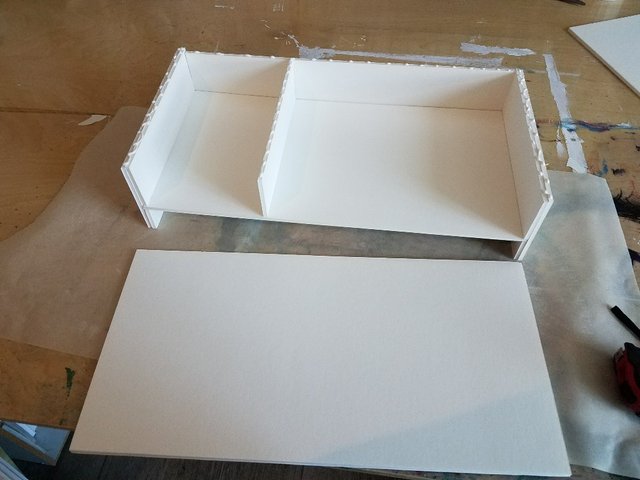
Ah, so satisfying, isn't it? Now, why did we cut TWO pieces for the top? Well, a lot of the fancy monitor stands I found for sale online have grooves in the top for things like pens, pencils, sticky notes, etc. So, as an option, you can cut holes of whatever shape into this top piece before affixing it onto your unit, and have those same kinds of features!!
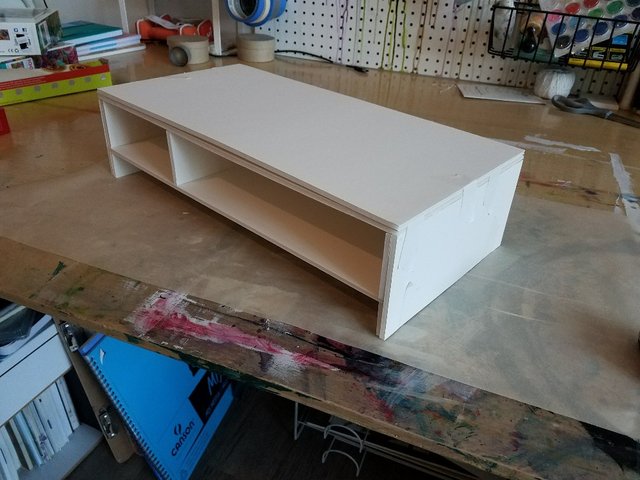
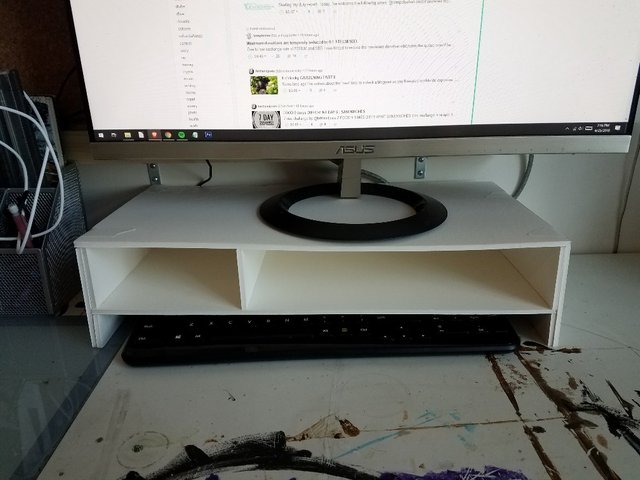
For me, I miscalculated somewhere in the height, and I literally could not fit that one more layer of 3/16" on my unit without the shelf above my desk getting in the way of my monitor. Oops! So here's the finished product in all its glory, now serving as a throne for my monitor, a garage for my keyboard, and storage for other things! And of course at this point any remaining tape can be removed. (Yeah, me, geez, get with it.)
Alright, that's it, folks!!
Foam board hasn't ended up being quite the stable solution I had hoped it would be for this project, but it was definitely a lot of fun to design and make and I learned a lot in the process. Now my DIY-mind is moving onto different things... hobby boards and plywood, for example... Stay tuned. :)
Join our Discord Channel to connect with us and nominate your own or somebody else's posts in our review channel.
Help us to reward you for making it ! Join our voting trail or delegate steem power to the community account.
Your post is also presented on the community website www.steemmakers.com where you can find other selected content.
If you like our work, please consider upvoting this comment to support the growth of our community. Thank you.
This is such a cool tutorial ! The art board is also very cool, you are so talented ;) I agree that it's nice to just make somethings trial and error, sometimes you can create the most amazing things (much better suitable than in the stores)
Yes!! Trial and error can feel frustrating, especially if you struggle to be patient, but you actually learn so much more through that process! And thank you!!
That's an interesting choice of material! I've never thought of styrofoam as a structural material... might try using it for my projects too...
Thanks for sharing! :)
thanks! yeah it is especially great for objects that don't need to hold a lot of weight, OR for proto-typing a more solid project, which is what this has ended up being for me. soon I'll be sharing a DIY tutorial of the same monitor stand created with hobby board panel from the hardware store! :)
Could be useful, thanks for sharing :)
You wrote at one point, "Walls ('E')," and that made me think of that cute cartoon robot movie, Wall-E. Good work with this project, as long as it is strong enough.
hah! did you notice my caption below the photos under that part? ;)
Oh, you worry about copyright. I believe in fair use and I believe that a lot of laws are bad and should be ended if they are not already. In the EU, they're banning memes, not just copyrighted stuff, and that is the problem with some laws, when government gets bigger, the rules, the laws, the regulations, the taxes, can be like how Rome fell.
Congratulations @kaitleevenable! You have completed some achievement on Steemit and have been rewarded with new badge(s) :
Click on the badge to view your Board of Honor.
If you no longer want to receive notifications, reply to this comment with the word
STOPTo support your work, I also upvoted your post!
Do not miss the last post from @steemitboard!
Participate in the SteemitBoard World Cup Contest!
Collect World Cup badges and win free SBD
Support the Gold Sponsors of the contest: @good-karma and @lukestokes
This post was shared in the Curation Collective Discord community for curators, and upvoted and resteemed by the @c-squared community account after manual review.
Congratulations @kaitleevenable! You have completed some achievement on Steemit and have been rewarded with new badge(s) :
Click on the badge to view your Board of Honor.
If you no longer want to receive notifications, reply to this comment with the word
STOPDo not miss the last post from @steemitboard!
Participate in the SteemitBoard World Cup Contest!
Collect World Cup badges and win free SBD
Support the Gold Sponsors of the contest: @good-karma and @lukestokes