Cabin Patio Upgrade: Framed an Enclosure for Additional Comfort
We spend a lot of time outside on the cabin patio. From the first morning coffee brewed on the propane stove to multiple relax and meal cooking sessions, the patio gets a lot of use. I finally framed up an enclosure for the patio to shelter us from rain, wind, and snow.
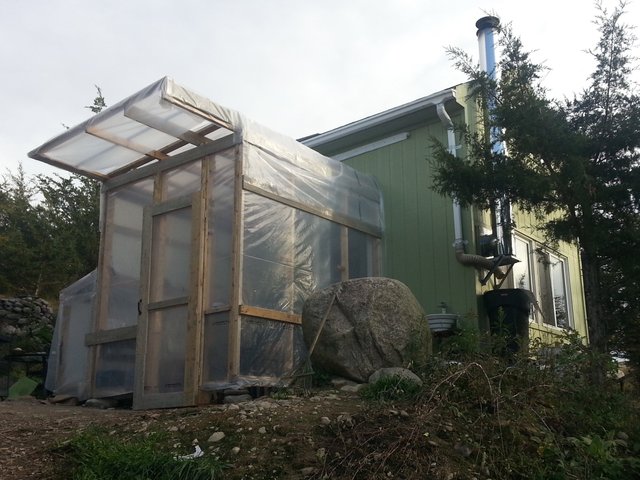
It feels like an extra room was added to the cabin. It will also act as a buffer from the elements - so the inside of the cabin isn't blasted with wind and snow when the door is opened. Before next winter we will be moving into the house we're building at the top of the valley, so for now the cabin enclosure has only been wrapped with 6 mil poly until I decide how permanent the structure will be.
Built in Desks
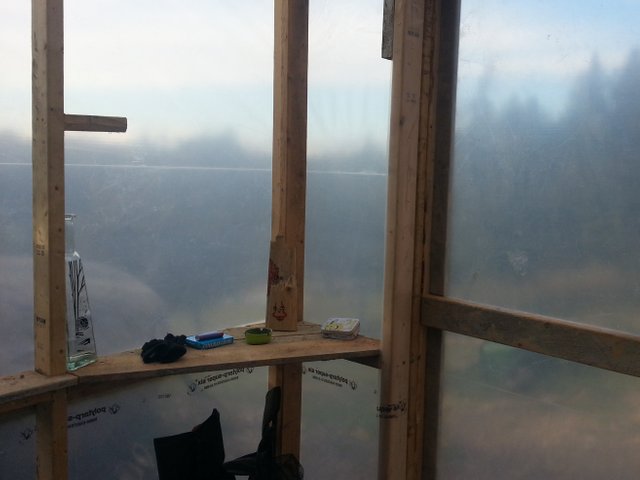
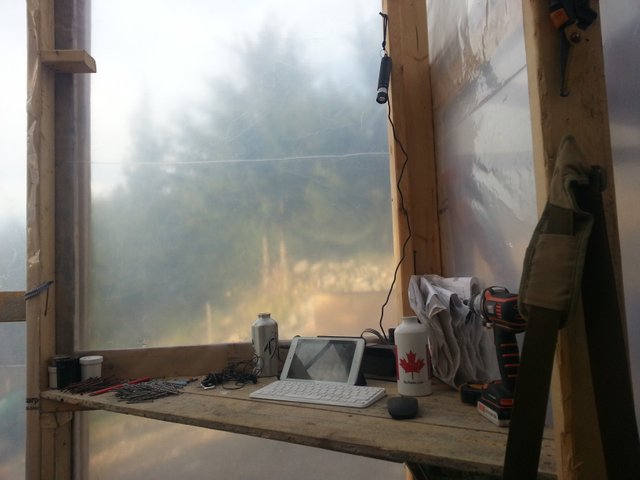
I do a lot of internet surfing, podcast listening, and steemit post creation on the patio, so I was sure to add a small built in counter top and desk top into the corners of the enclosure. Ran an extension cord from the cabin to power the USB devices and lights.
|
|
Outdoor Cooking Comfort
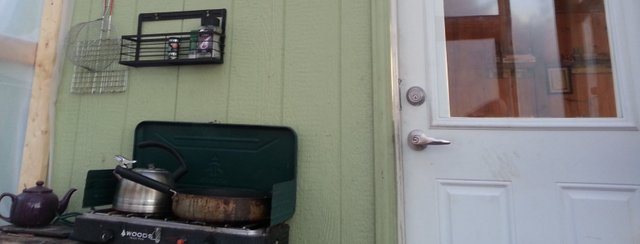
In the winter we do a lot of the cooking on the wood stove top, but the propane burners on the patio are especially useful for the morning cup of coffee - before starting the wood stove. We don't fire up the cabin's wood stove in the summer, so most of the cooking is done with the propane burners on the patio. A little shelter from the wind and rain makes the task much easier.
Framing the Patio Enclosure
The enclosure was mostly framed using 8 ft long 2x4" lumber, and a couple 14 ft long 2x6" pieces of lumber. I went with an 8 x 8 x 8 ft structure so I could leave most of the 2x4" lumber uncut for potential reuse on future projects if this enclosure ends up being a temporary structure. Deck screws were also used for this project for easy dismantling. Framing nails will be added if the structure becomes permanent.
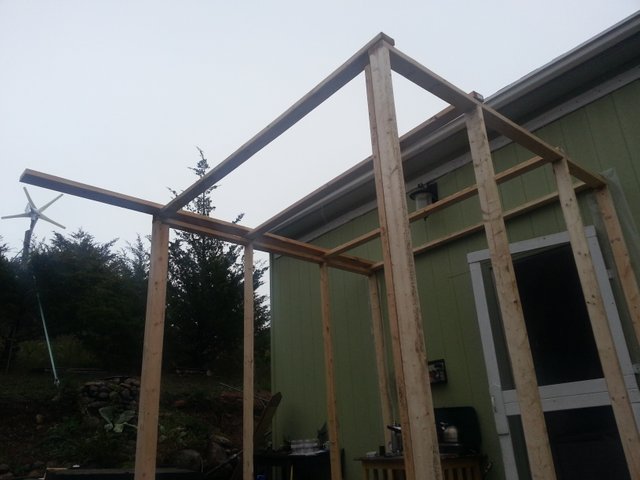
In the picture above you can see the 2x4s attached to the cabin. The frame was built out level and square from those 2x4s while supporting the bottom of the frame with field rocks. More field rocks will be added under the frame to provide more support and to stop air flow.
Poly Vapor Barrier
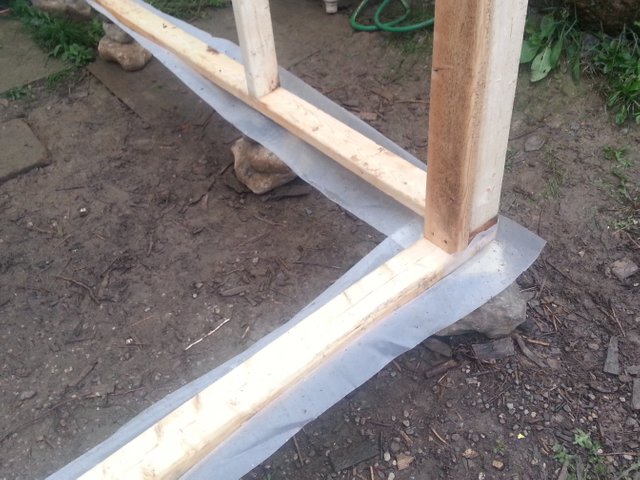
Strips of 6 mil (0.6 millimeters thick) poly vapor barrier were stapled to the underside of all the bottom 2x4s to prevent the wood from rotting from foundation moisture absorption.
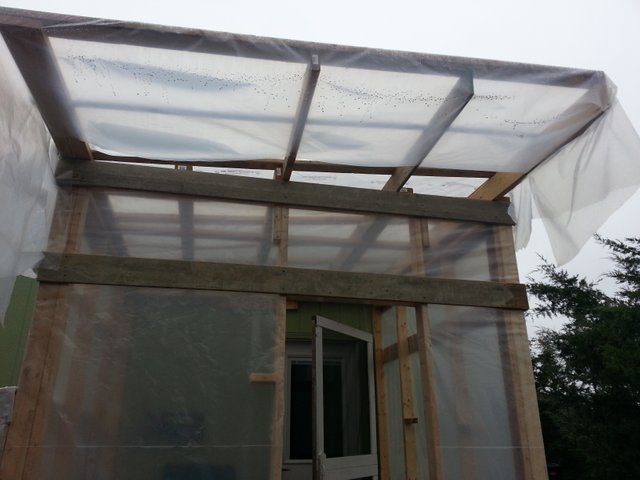
in the picture below you can see the walls and roof wrapped and stapled with 6 mil poly. I made the mistake of stapling the roof poly to the roof rafters - causing leaks. I gave the roof an extra wrap of poly and was sure to only staple the poly to the sides of the enclosure - not the top.
Slight Roof Pitch
You can see from the roof rafters the slight pitch down to the left for the water or snow to gently run off the roof. A storage shed for firewood was added to the left side of the enclosure.
Enclosure Door
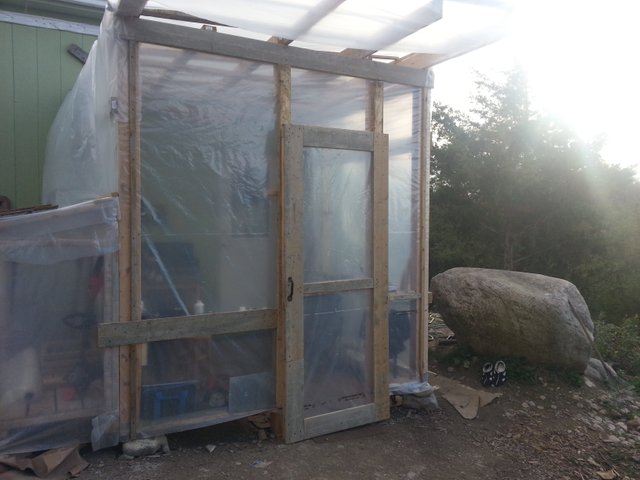
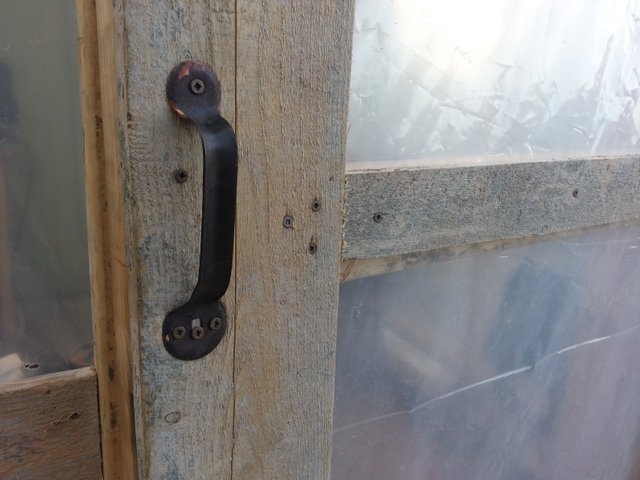
To complete the enclosure I made a door with 2x4s, 1x6s, 2" screws, 6 mil poly, and staples. I happened to have a simple metal door handle to attach to the outside of the door.
|
|
Door Hinges
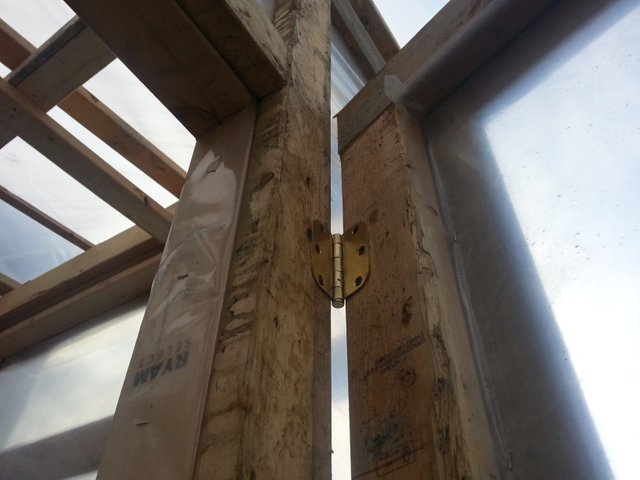
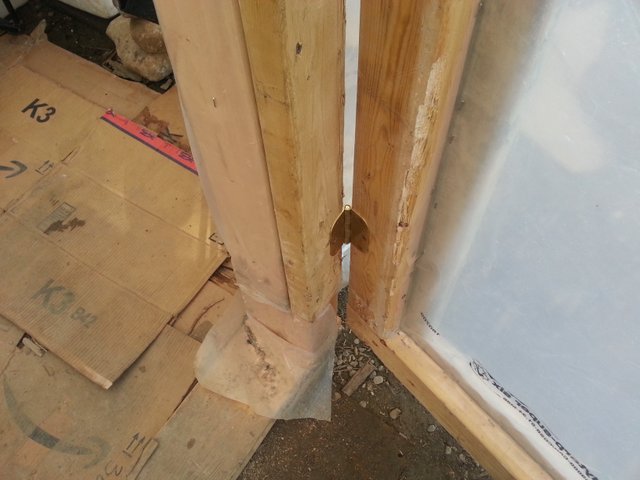
Luckily I also had a pair of hinges to attach the door. I framed the door opening with 2x4s, then screwed the hinges onto the frame. While being attached, the door was held in place with the help of a block of wood underneath the door. One screw was used to attach the bottom hinge to the door. With one screw holding the bottom hinge to the door, the door was rotated into position for the top hinge to be attached to the door with one screw. After a gentle test, the remaining screws were added to the hinge attaching the door. The door purposely opens in this direction so the normal direction that the wind blows will blow the door shut - not open.
|
|
Rope Latch
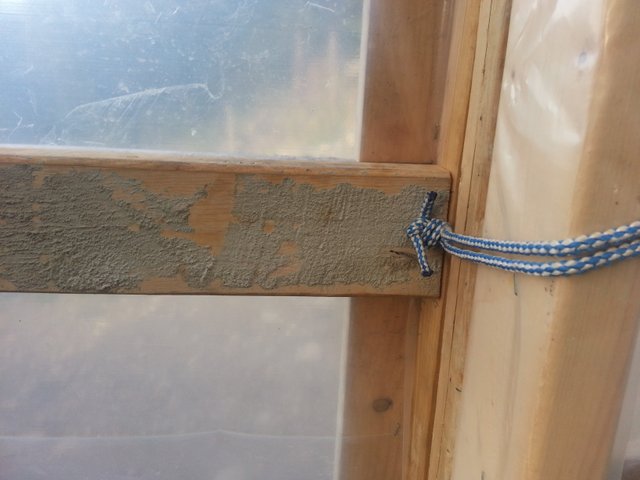
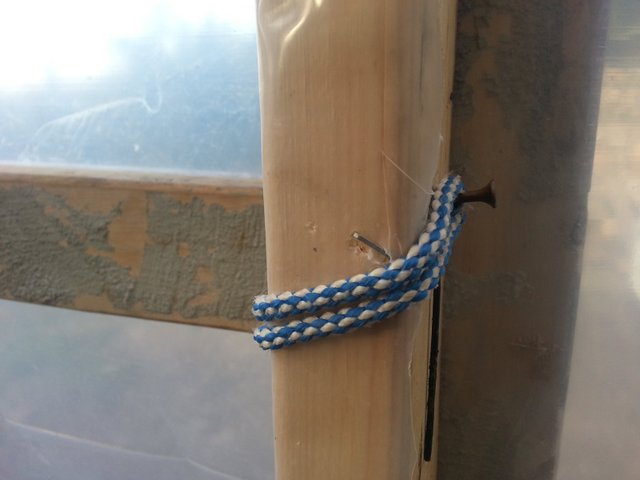
During the first windy night the wind kept slightly opening the door, then slamming it shut. A rope door handle was added to the inside of the door to help pull the door closed. The rope handle can also be attached to a screw on the frame to act as a latch to keep the door closed.
|
|
Upgrade Potential
If this cabin patio enclosure becomes a permanent addition, plywood and shingles will be added for the roofing. There are other roofing options like metal or poly-carbonate, I just happen to have a few bundles of shingles available to me. Potential upgrades could include siding, windows and screens, improved foundation, a floor, and insulation.
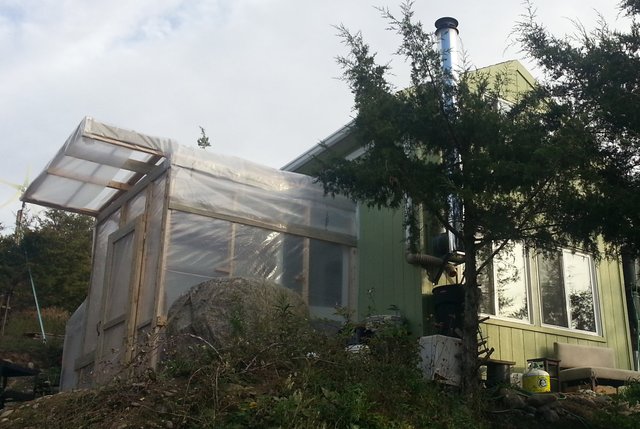
Posting this from the cabin patio enclosure - Have a great day!
sweeheet, im lovin this cabin! great work jack
Thanks @eaglespirit - we keep it nice and cozy in the winter :)
cozy is nice
This is a great project, I really like how descriptive and thoughtful you are when describing about the door. I look forward to see it being finished =).
Congratulations for your curie vote ^_^.
Thanks @scrawly - lots of love for Curie :) The 2x4 door frame and the 2x4s of the door provide an excellent surface for a solid door seal - I don't even feel a need for weather stripping.
Hi jackdub,
Visit curiesteem.com or join the Curie Discord community to learn more.
Today the patio is an element of landscape design. It allows you to arrange the yard in original style in designing a corner of comfort and relaxation. Creating a patio on the site with their own hands is quite real. The main thing is to decide why you need a patio. The classic patio location is at the back wall of the house, where there is an entrance. You can also arrange it in any convenient place, protecting it from prying eyes by specially built fences made of wood. Durable paving, properly chosen furniture, and accessories will make the patio a full-fledged extra room. The family will be happy to relax there.
That's a nice sun room you've built there!
The 6 mil poly holds up pretty well for a couple of years, but the sun eventually eats it up and it has to be replaced. There are indeed a lot of options for making it more permanent if you choose to do that. Personally, I like the clear corrugated PVC panels like the ones I used on my greenhouse, but polycarbonate is tougher and lasts much longer than the PVC panels. Of course, the polycarbonate panels cost more than the PVC panels, so it tends to be a trade off.
Thanks - it feels like my outdoor office/workshop :) I do like the clear corrugated PVC panels you use on your greenhouse, there's a good chance i'll be using that when I put a greenhouse together :)
We would like to convert our deck into a three-season enclosed room like you did. I'm not sure when we will get around to it, though. There are so many projects, so little time.
For me it was totally worth it, took a few hours. I hear you about the time - this has been another summer of me getting half way through the projects list :)
The cabin looks cute, more so with the attached enclosure. I thought it will be lovely to enjoy morning coffees in the transparent enclosure with a clear view of nature outside while still being inside. You did a great job!
Under the "Poly Vapor Barrier" section, I see that there is no foundation. The posts were mounted on stones. Will those be sturdy enough not to be swayed with strong force like wind maybe?
Thanks - no sway, it's been through a few wind storms as well. The enclosure is solidly attached to the cabin with the 2x4s that are firmly attached to the side of the cabin - that along with the weight and rigidity prevents sway. While I was building the enclosure, i noticed one of the front corners was not resting on the foundation rock, it was hovering a couple inches above the rock - square with the cabin.. I raised the corner rock. It wasn't designed to have it's weight held up by the cabin, but it does prevent any sway. I'll be adding more foundation rocks before winter. Stand alone structures usually have anchor bolts coming up from the foundation to attach the wood frame to. I will definitely include anchor bolts if I end up pouring a foundation for this structure :)
Now that's a kind of a foundation standing against storms even if its upon the rocks! You did great then. But I am curious about the roof and wall covering. At first I thought it was glass but you mentioned poly. What poly do you mean? Is that something like a clear and think plastic?
That looks dry and windproof, as a test that looks great, easy and quite quick decision, I believe if you like and decided to keep it, you really need a really roof. It is very handy to use Youtube for such advices I like the videos with some workshops you can learn a lot and save some money for professional, actually with time you become professional yourself. Only important thing is that you should listen and learn before starting with expensive stuff to experiment. Good job and like your process photos.
Thanks - it might be easiest to think of it as a step up from putting up a dining tent :) This will be our last winter staying in the cabin before moving up to the off-grid house we're building 300 feet up the hill. It will be taken down at that point, the lumber re-claimed for other projects on the property. The $40 worth of poly tarp will most likely be used for another project as well. The $130 worth of 2x4s were actually reclaimed from framing up and supporting the foundation forms at the build at the top of the hill. It took about 3 hours to build the cabin enclosure, will take about 30 mins to take down - will be enjoying the enclosure all fall, winter, and spring :) Also a good idea to get a building permit if your area requires it and a large amount of money is to be spent.
That looks like a great project. It must feel amazing to accomplish this yourself. My husband loves creating things. Well, we don't have a cabin but if we did I'm sure he would make an attempts to build something similar.
Last winter there? You must be looking forward to moving to your new house. Will you keep the cabin as well? You could make a cool guest house out of it :) Seeing how you built this, I'm sure you could build the guest house too!
Enjoy your time there before you move up!
Thank you for sharing details of your project!
howdy from Texas jackdub! I can see why you guys wanted an enclosed patio and that thing is going to be a huge improvement. I like the way you described the addition so far and it all looks good. Are you going to put a floor in it?