TUTO DIY: Create your own 'patchwork' bag !

There are many kinds of bag, from many brands, expensive or not. But have you already think to create your own bag. With old stuff. It's not expensive, and you can custom it as you wish.
That's what I'm suggesting you: create your own bag!
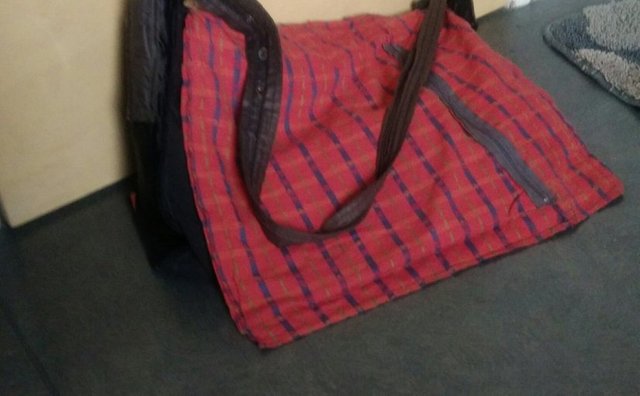
The bag you can see on the above picture, is the one I made a year ago. It never broke, I made it with a rags and curtains in a patchwork style. And in my good habit: the nearly science!
But I offer you in that tutorial, objective dimensions.
Note: this tutorial is dedicated to people who knows already the sewing basics.
What you need:
- Fabric, of course! However, contrary to last time, you can't take old pants, or it will be a bit difficult. But you can take a fabric with web. Or a curtain, rags, beddings,...
- A Pencil, to draw the patterns.
- A ruler, scissors, to draw and cut the patterns.
- A sewing machine or sewing kit. I advise you to sew, mostly, with machine. Otherwise, this will be long and not necessary tough, durable...
- A fabric strip, you can take it from another bag, or cut/make it with the fabric you use.
- Zippers.
The patterns:

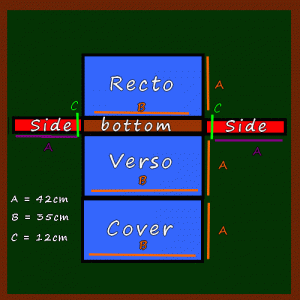
At the beginning, take a fabric for the base. Draw this pattern with the ruler and your pencil. I advise you to do like on this pattern: divide it in partitions (recto, verso, sides,...) and sew them together. This will enables you to have a best form for your bag and make the assembly easier.
Then, you will repeat this action twice, in order to cut an internal lining, and in the same way, an external lining.
Note: don't forget to cut 1 or 2cm more for the seams.
ADVICE: You can take the opportunity of the linings to make pockets. That's what I did. I did cut randomly my linings, and I availed the imperfections to make my pockets.
Then, just sew your linings.
The strip

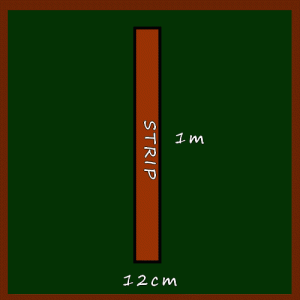
For this strip, you need to have at least 1 meter of length, and a width approximately equal your bag's side width.
Pockets
Red lines represent the seams.
If you want to make pockets on the front of the bag, just cut a piece of fabric, make folds, and sew it to the recto face on the folds.

For this pocket, make a slit in your cover face's lining and sew a zipper.
How to sew the zipper ?
It's easy. Do it with your machine or with your hands. (But I advise you to do it with hands, because it's more precise). You just need to sew the two strips inside your lining. WARNING: Try to not sew too close to the mechanism. Otherwise the opening/closing might be constrained."-But your zipper is stitched above your lining!"
Yea, simply because at this time I didn't know how to sew a zipper!"My zipper is too long for my pocket... what do I do ?"
To remedy, the easiest solution is to sew your zipper as I did on this jacket's pocket:The overflow will be in the inside. No need to cut the mechanism. 
The Assembly

Before assembly, you must sew your bag's strip. You just need to sew 20'25cm of your strip on the two sides.
Then to assembly, just sew edge to edge the Sides to the Recto & Verso faces. It may takes a while if you do this with your hands. Good luck !
And now you finished ! Well done, your selfmade bag is done!

You can also follow me on:
My Blog: http://amystuff.net/
My Twitter: http://twitter.com/amystuffblog
My Facebook: http://facebook.com/amystuff.net/

Your Post Has Been Featured on @Resteemable!
Feature any Steemit post using resteemit.com!
How It Works:
1. Take Any Steemit URL
2. Erase
https://3. Type
reGet Featured Instantly � Featured Posts are voted every 2.4hrs
Join the Curation Team Here | Vote Resteemable for Witness