3D Modeling Basics

As an amateur and hobbyist 3D modeler I often post about various projects I am working on. It's easy to forget that not everyone knows the weird terminology and tools used. I therefore decided to write this post for anyone interested in learning more. My modeling software of choice is The Foundry's Modo 12, but all of the terminology and the majority of tools apply to other software in the field.
The Basics
Coordinates
3D space is plotted in three dimensions: X, Y, and Z. Generally - and in Modo's case - Y is up and down, but other software may use Z to represent this dimension. Y is usually represented in green, x in red and z in blue. To make things easier, rather than present arbitrary numbers, these coordinates are presented as real world units, be they in mm, cm and meters or inches and feet. The absolute center of a scene - also referred to as the origin - is at 0, 0, 0 on x, y, and z.

In this scene for example, I have created a cube that is 5m in all three dimensions at coordinates -2.85m in the x, -75cm in the y, and 1.34m in the z.
Components
All 3d objects are made up of three different components. A vertex is a single point in 3D space. An edge connects 2 vertices / vertexes. A polygon is made from 3 or more edges. Although the software can show vertices and edges, a 3D object without polygons is not visible in a render - more on this later.
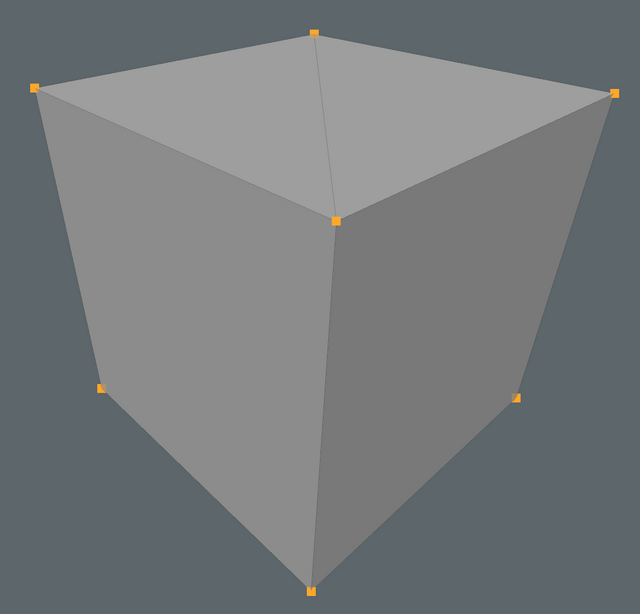
Vertices, massively increased in size for illustration purposes
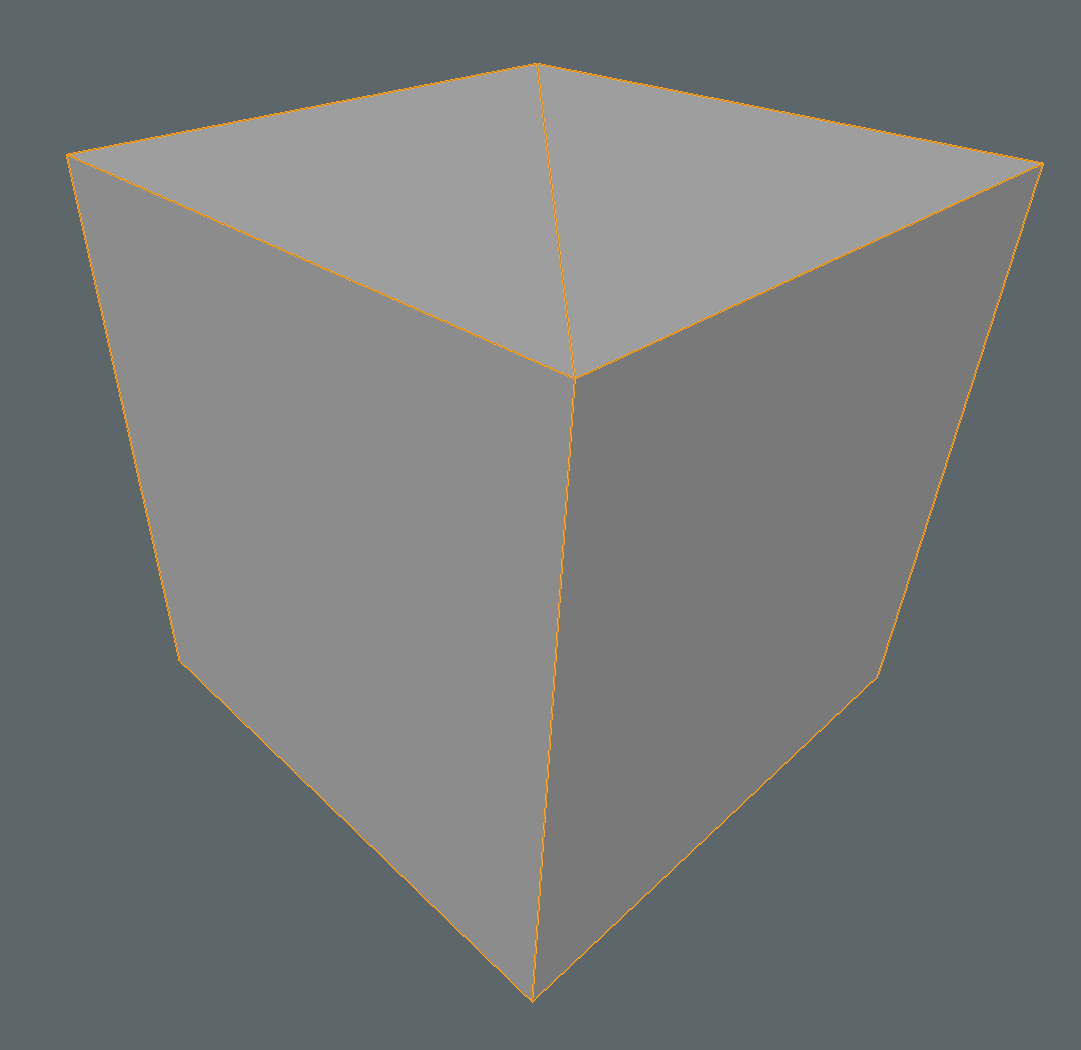
Edges - or sides, highlighted in orange
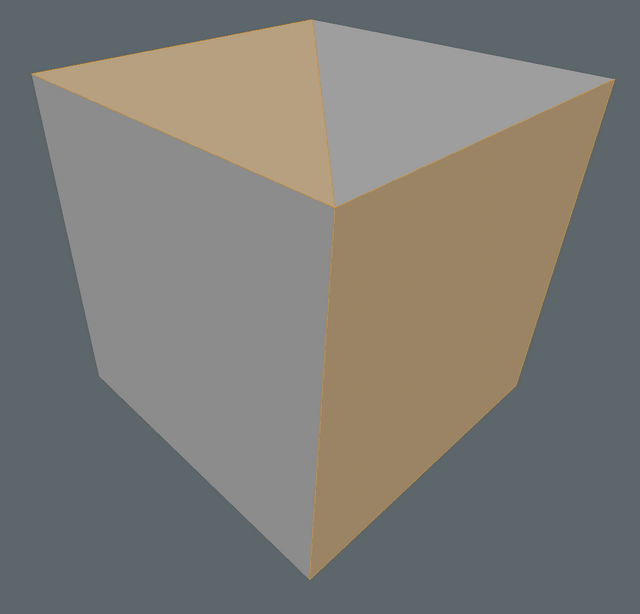
a 3 sided polygon and 4 sided polygon highlighted in orange
Polygon terminology
A 3 sided polygon is also known as a triangle. A 4 sided polygon is a quadrilateral, usually abbreviated to quad. Any polygon with more than four sides or edges is often called an ngon, n being the number of sides it has.
Creating Geometry
Before you can manipulate an object, you need some basic geometry to work from. All 3D modeling apps have a library of basic shapes such as cubes, spheres, cylinders and cones. More advanced objects may include a torus / donut, text, tubes, and in Autodesk's case, teapots.
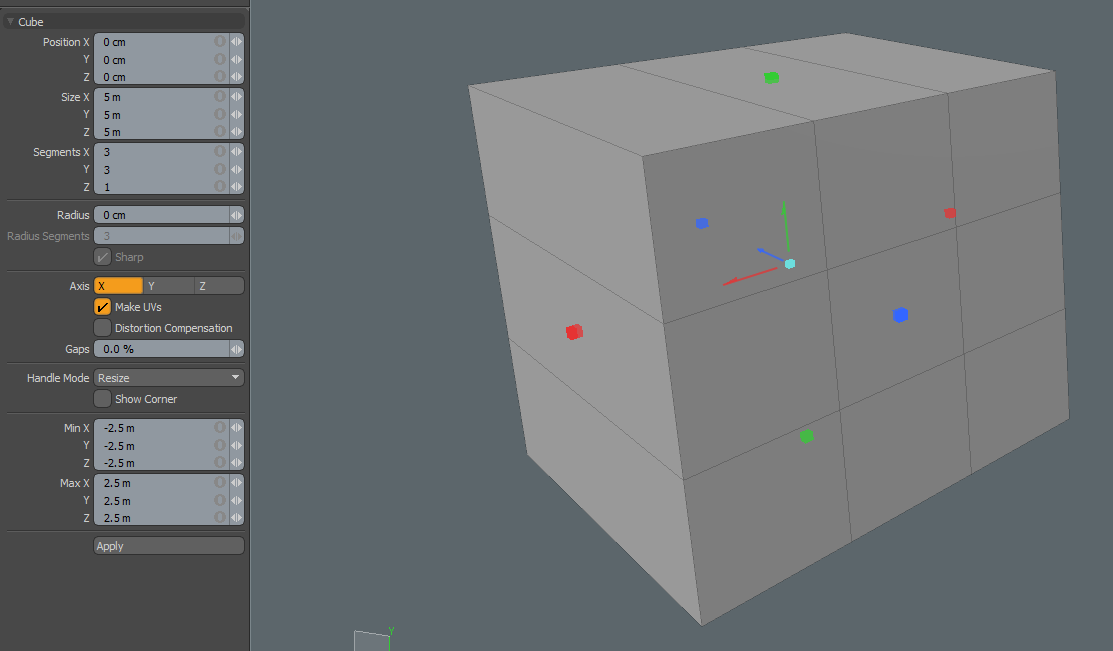
Here I have created a 5m x 5m cube at the origin - center of the scene - with 3 segments along the x and y axes.
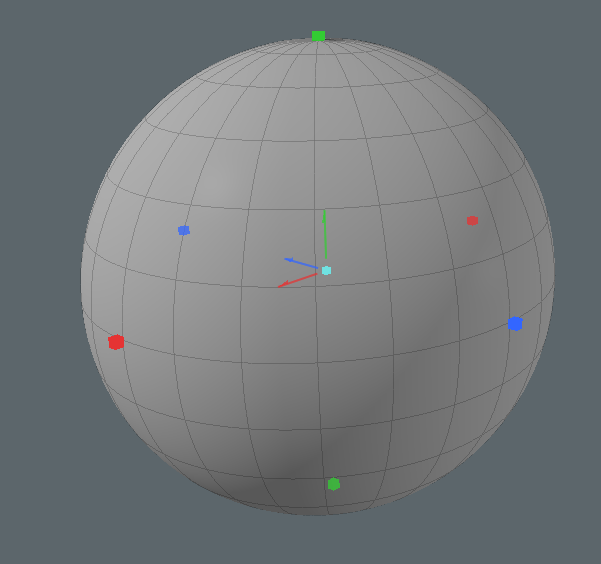
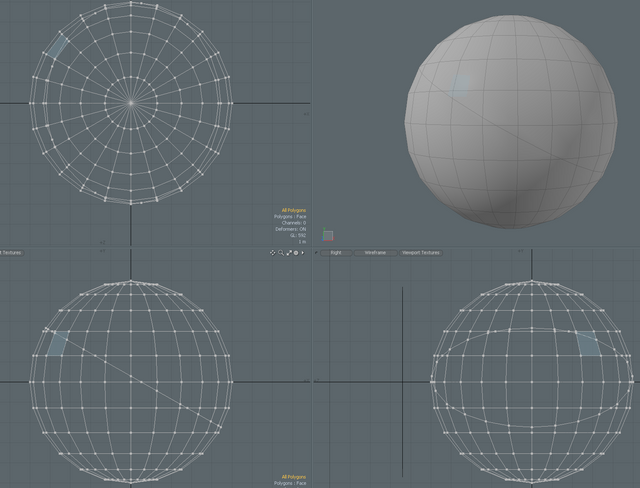
A 5m sphere with 12 sides in the y and 24 segments around its circumference.
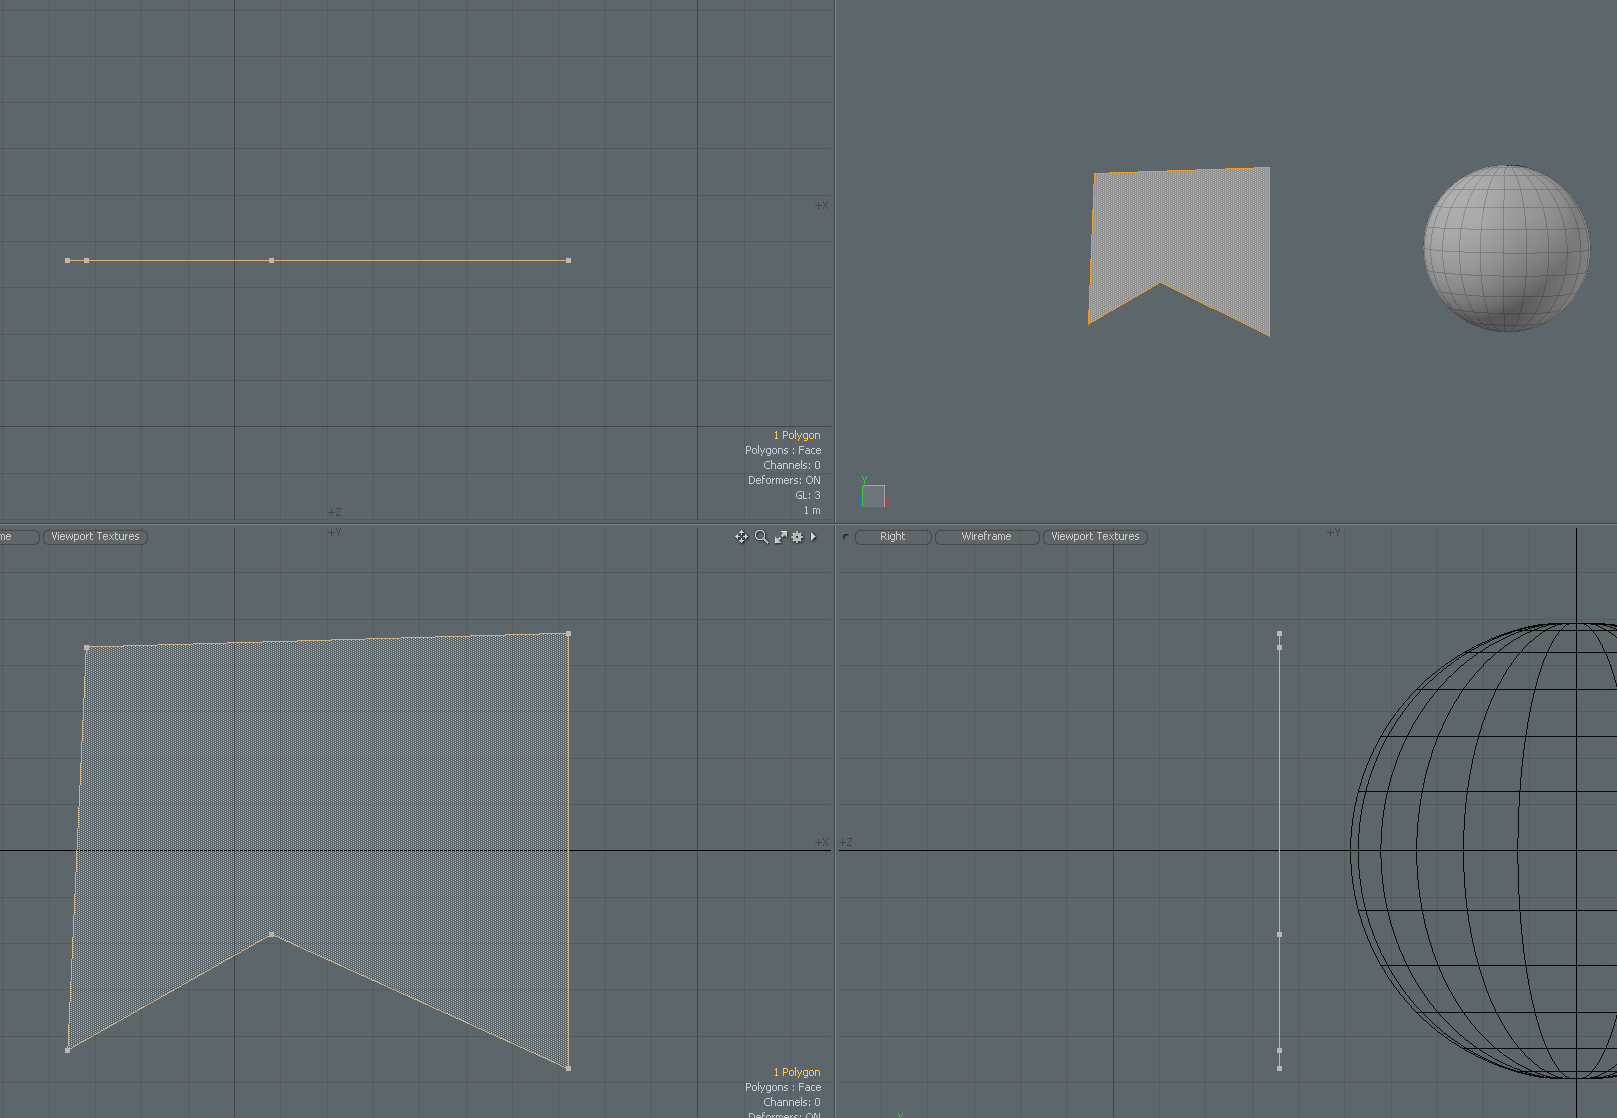
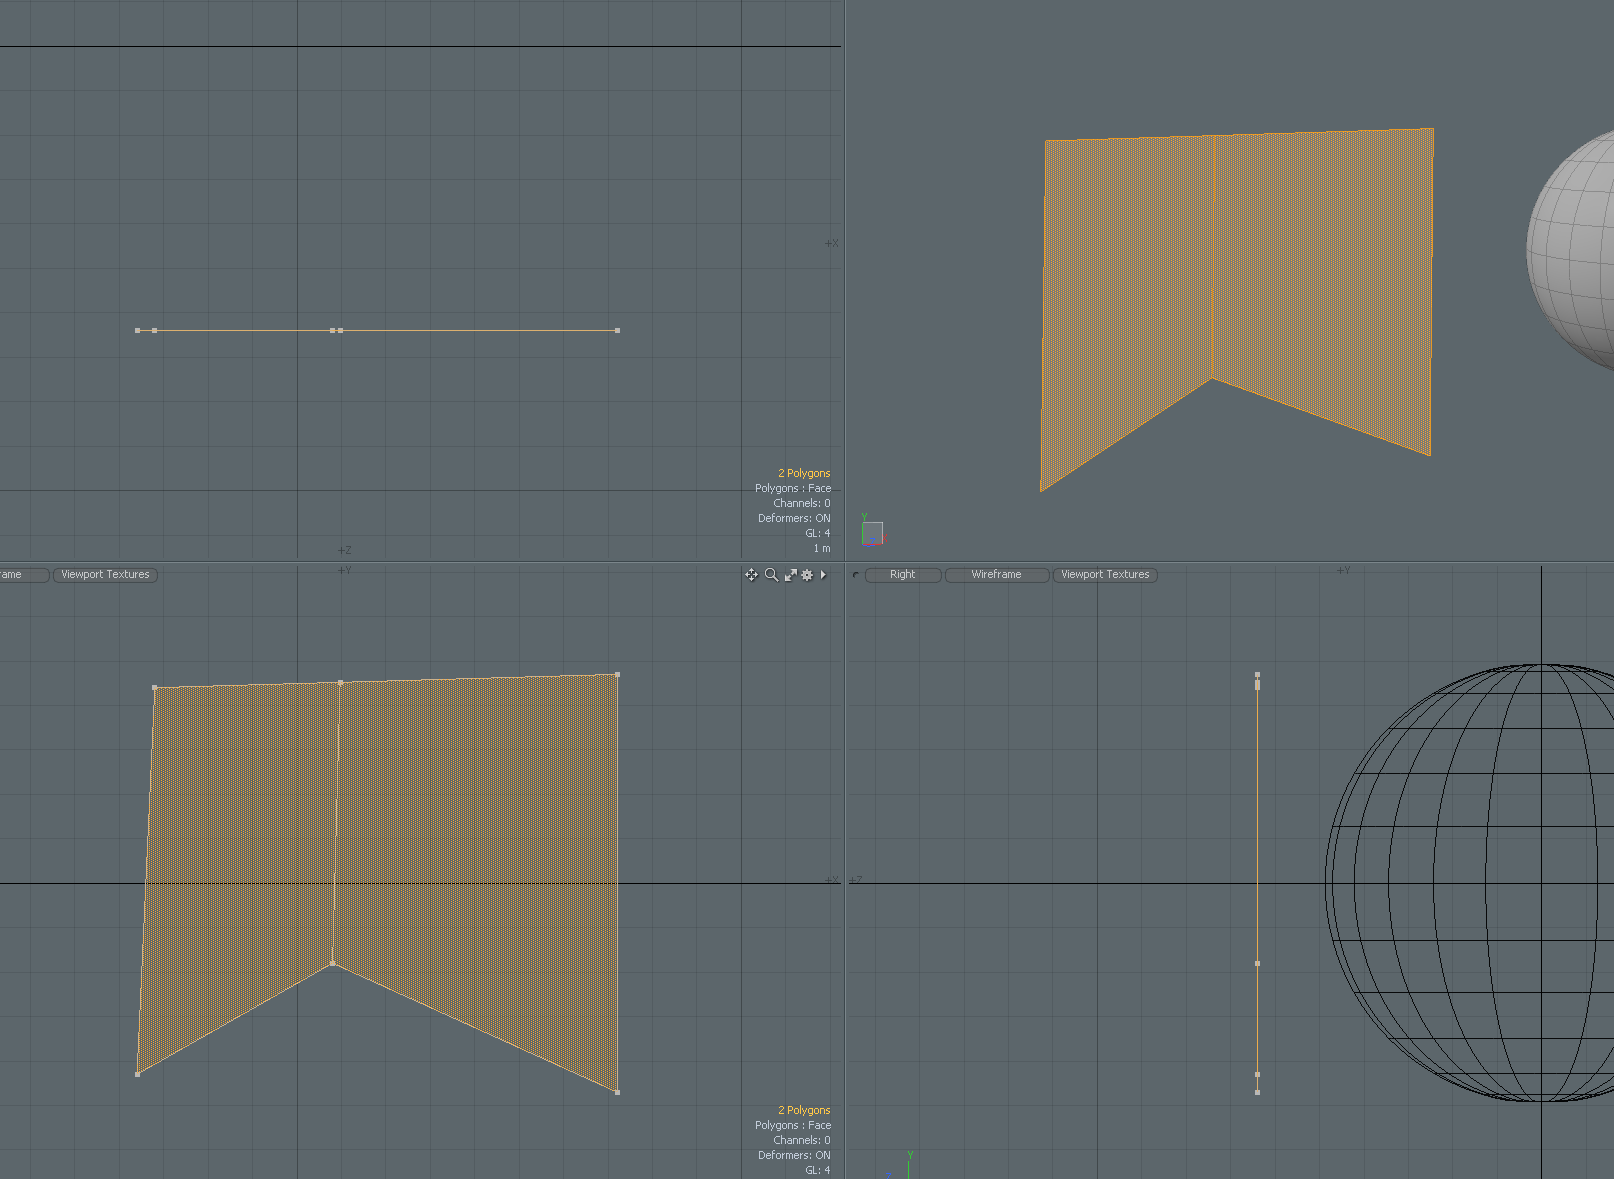
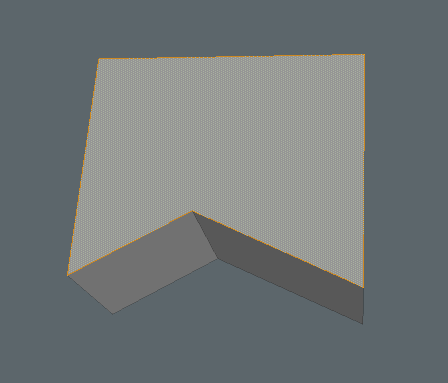
You do not have to use a default object. In this next picture I used Modo's pen tool to lay down 5 vertices to create a 5 sided polygon.
Basic Translate Tools
The basic and simplest tools to use are move, scale and rotate.
Move
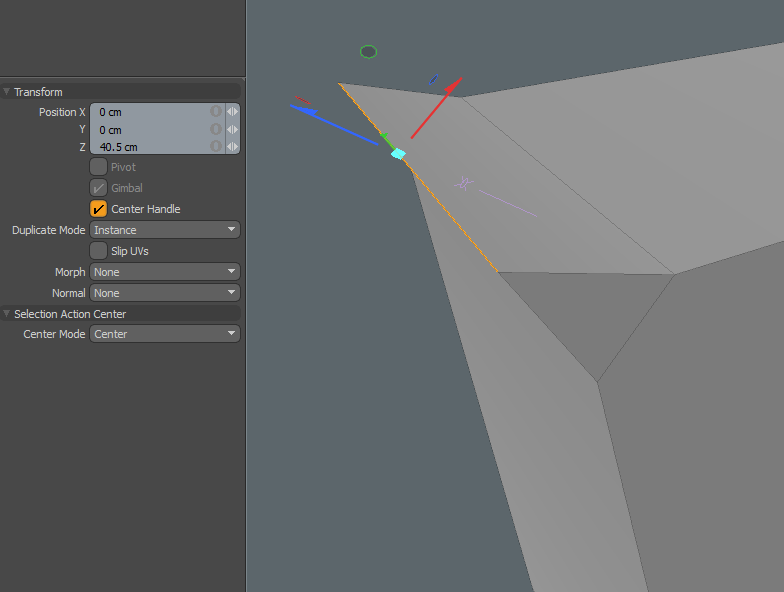
Move, also referred to as translate, can be used on all 3 components.
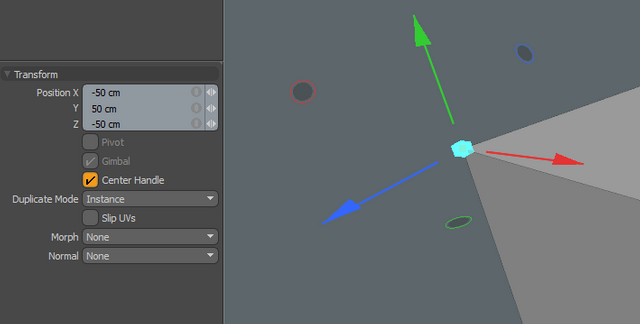
In this screenshot I have move the selected vertex -50cm in the x, 50cm in the y and -50cm in the z. In the picture you can also see a manipulator which allows you to drag in the x, y or z - using the arrows - or a combination of x and z, y and x or z and y, by using the corresponding circle. You can also type values directly in the text boxes over on the left for more precision. It is also possible to move in all 3 dimensions by clicking and dragging the center of the manipulator.
Rotate
Edges, polygons and whole objects can be rotated around the x, y or z axes. As vertices only represent a single point in 3D space, even if you were to rotate them, it would make no difference.
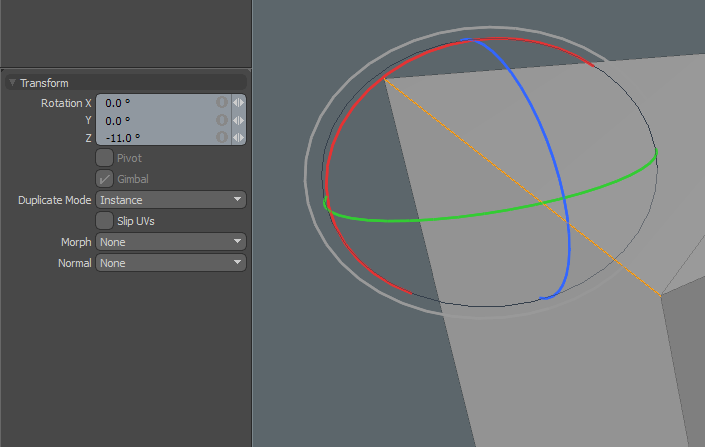
An edge rotated -11 degrees around its z axis
Scale
Edges, polygons and objects can also be scaled. In the following picture a polygon has been shrunk 50% across all 3 axes. Shrinking it across the red x coordinate has no effect here as the polygon is already completely flat along the z and y axes.
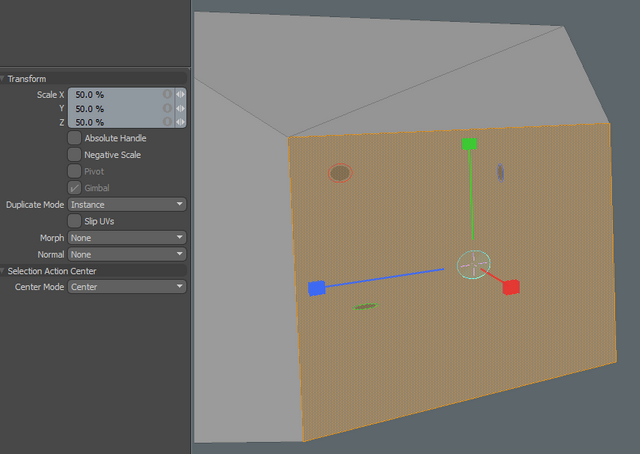
As with the move tool, you can use the individual handles on the manipulator to scale in x, y or z. You can also scale a combination of 2 axes such as x and y by dragging the blue, green or red circles, or all 3 axes simultaneously by clicking and dragging the light blue circle in the center of the manipulator. You can also type values directly in the text boxes on the left.
Cutting geometry
Returning to my previous example where I created the polygon with the pen tool, I could slice across it to add an edge in the middle.
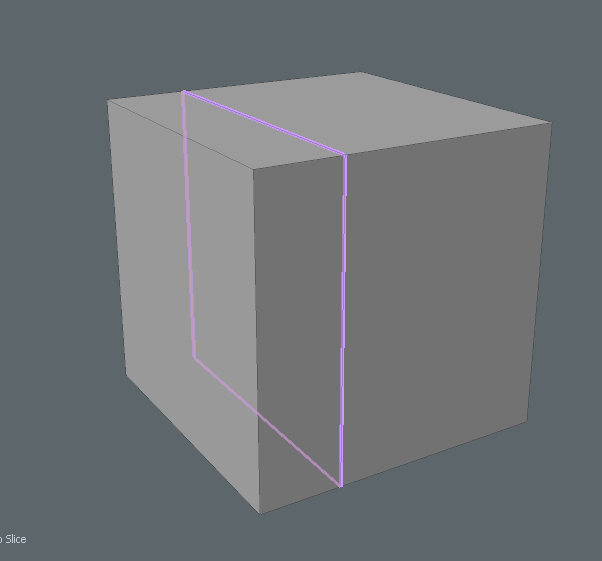
I can use the same tool to slice through entire objects.
With this cube, I selected an edge and used loop slice to create a loop of edges around the box.
It's also possible to add multiple loops at a time.
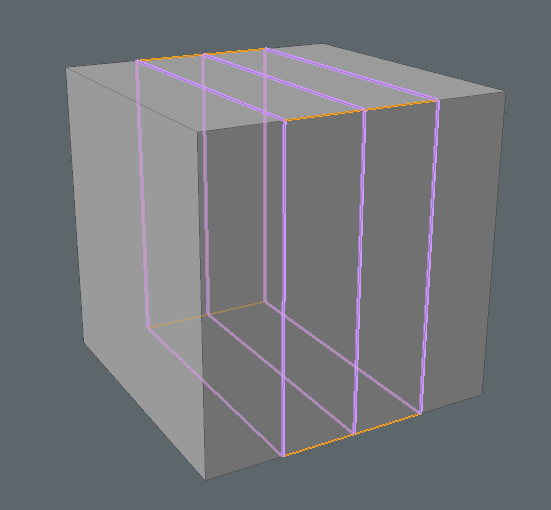
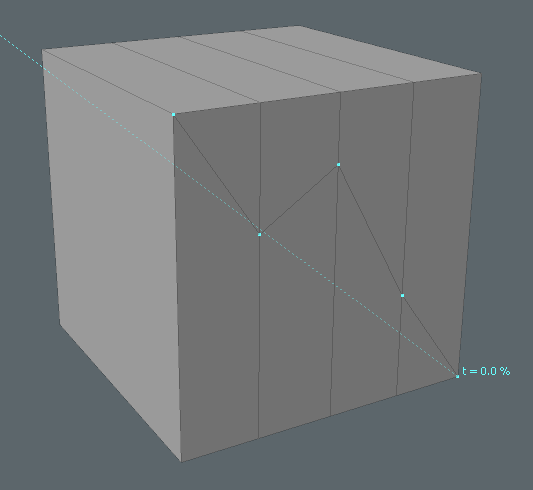
The edge slice tool allows you to cut edges exactly where you want to.
Editing Tools
I will not list each and every tool available as there are many, and different 3D packages may or may not offer the same options.
Bevel
One of the most powerful tools in Modo is bevel. You can accomplish a lot just by using this one tool in combination with the translate tools.
Vertices, edges and polygons can be bevelled, with different results.
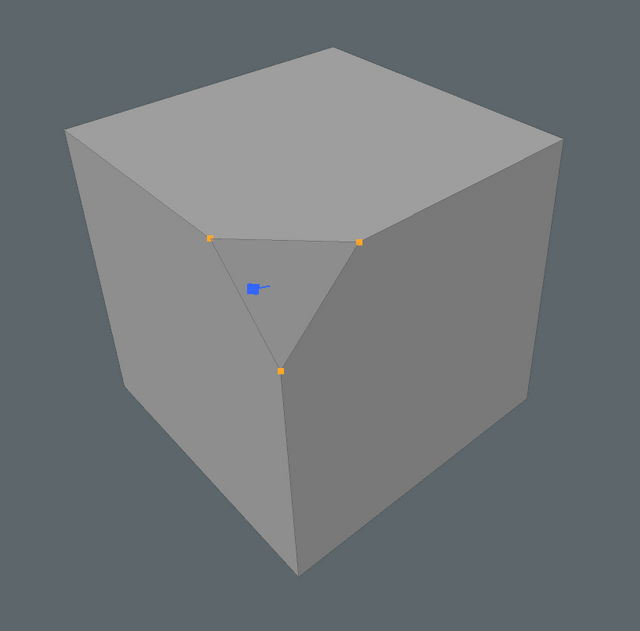
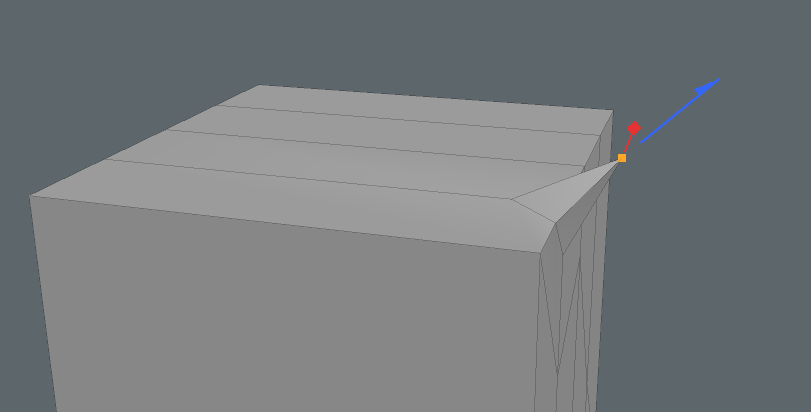
Here a bevelled vertex splits into 3 along each connected edge, creating a triangle. The blue manipulator allows you to dial in the inset or size of the polygon.
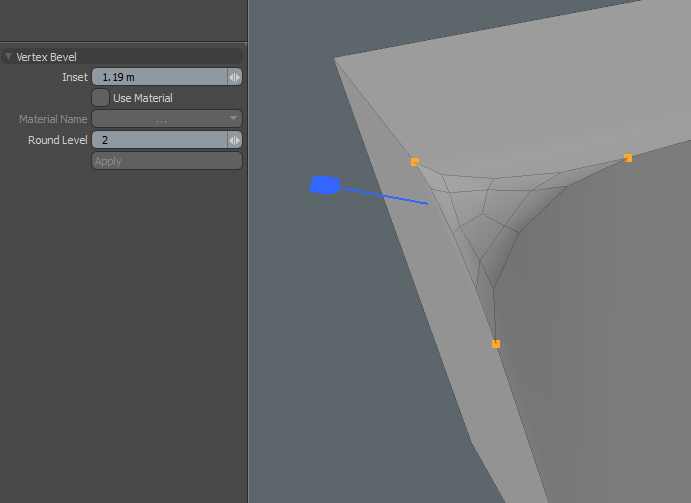
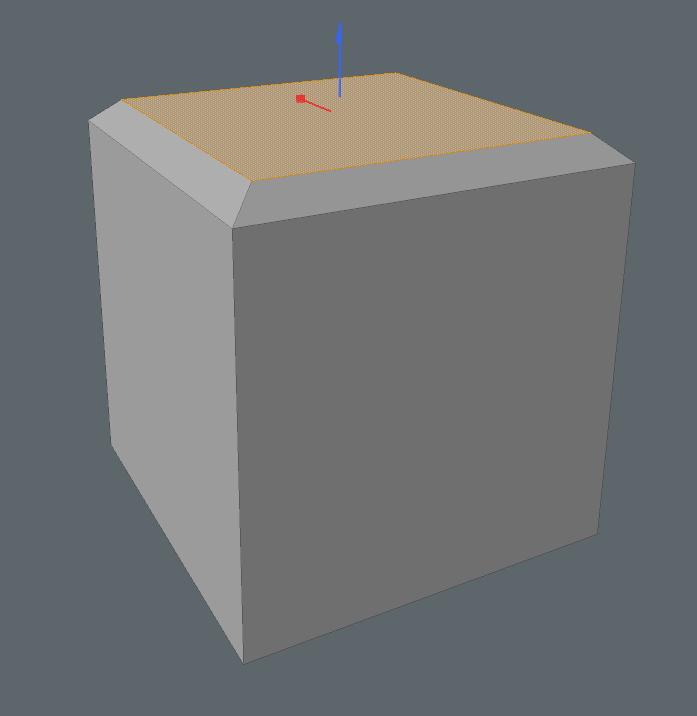
Modo allows you to add a 'round level' to create a rounded corner, adding more vertices, edges and polygons inside the inset
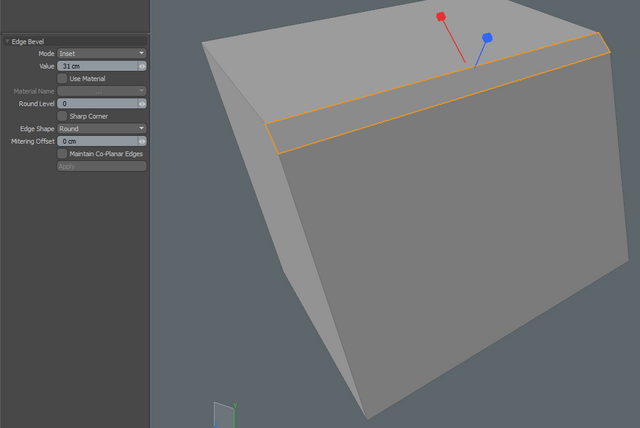
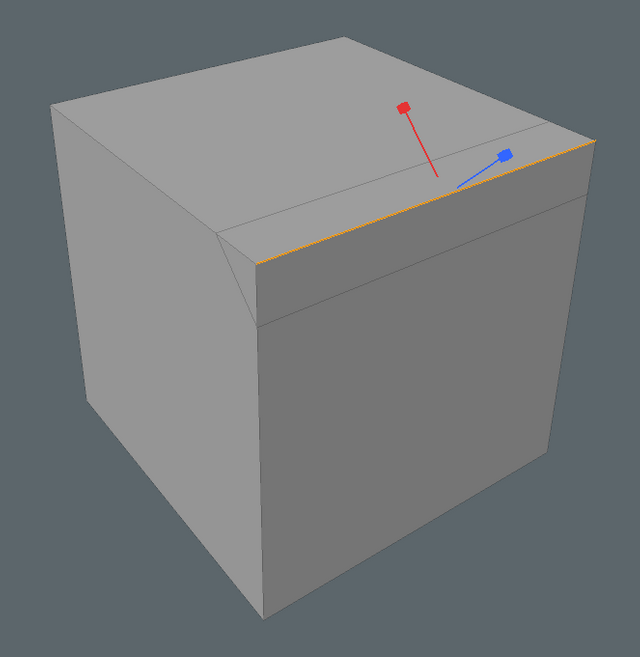
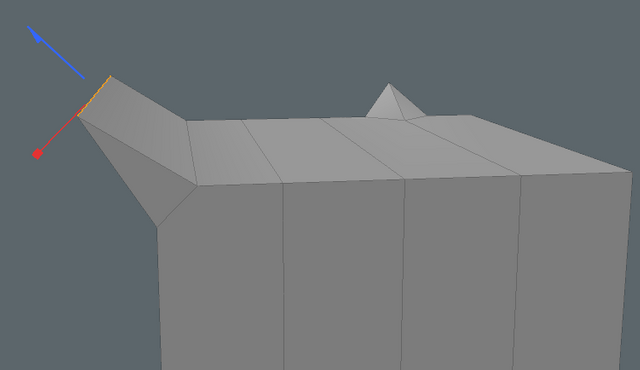
A bevelled edge splits in 2 and creates a corner by pulling the blue manipulator. Again, we can add a round level.
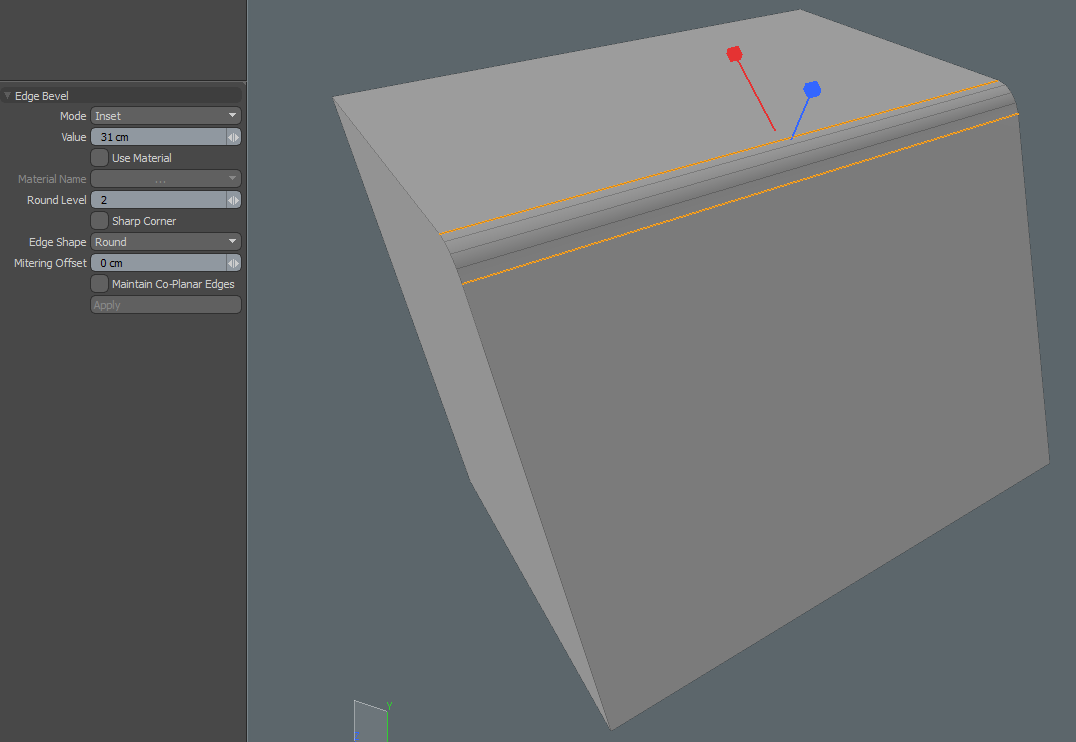
By pulling on the red manipulator you can add mitering, which adds an edge either side of the selected edge.
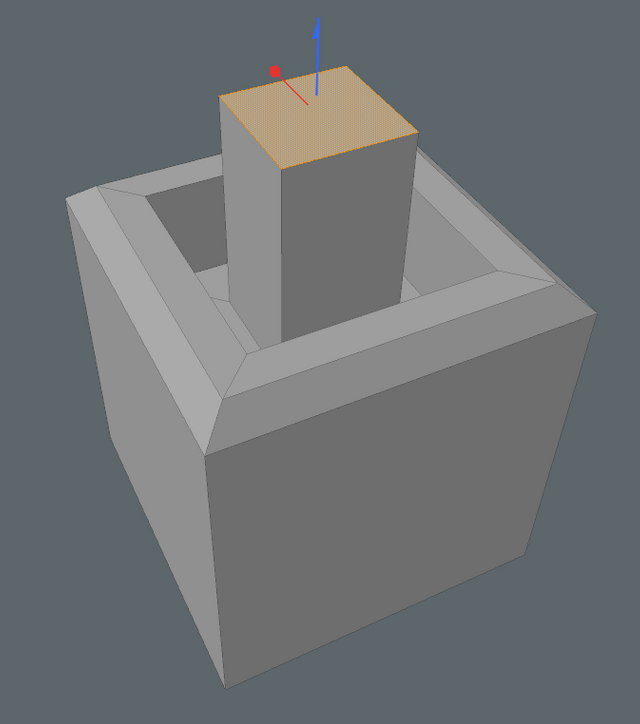
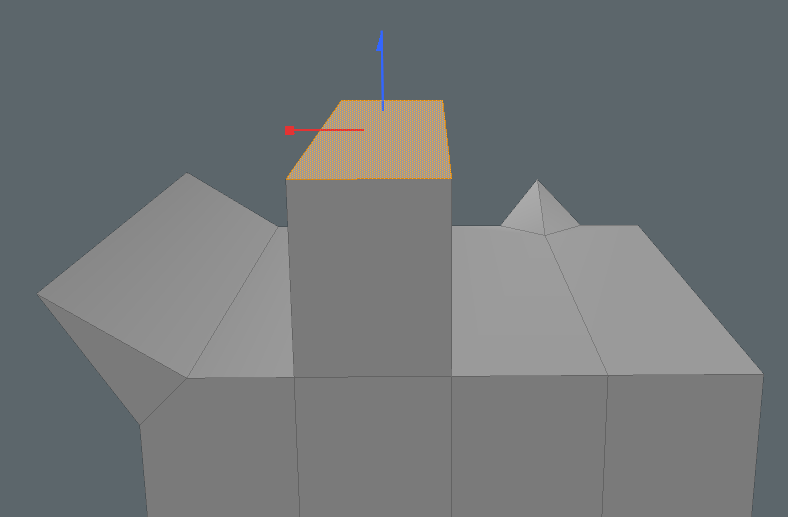
You could then select the original edge and pull it out to create the following, for example.
By bevelling a polygon you can inset it by dragging on the red manipulator, in effect creating another smaller polygon inside the selected one.
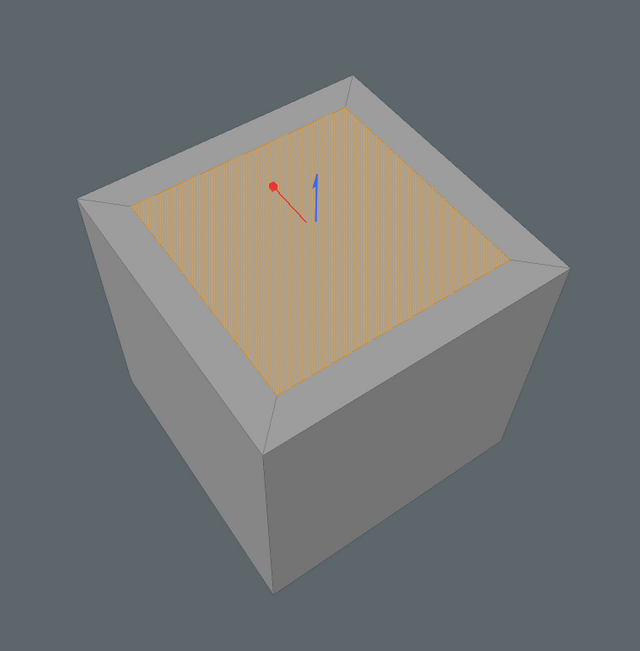
Pulling on the blue manipulator moves the newly created polygon out from the original.
Continued use of the bevel tool allowed me to create this object.
Extrude
All components can be extruded. Using the two manipulators I pulled a vertex out to create this spike.
Extruding an edge creates this result.
Finally, extruding by a polygon we get this result.
Returning once more to the pen tool created polygon, extruding this gives it thickness.
I can select the polygons from both sides and bevel them like this.
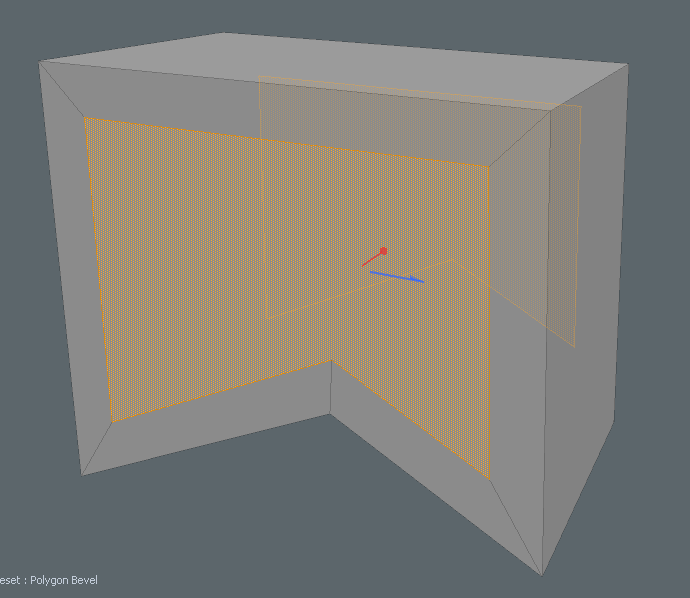
Then I can delete the inset polygons and select the edges around the holes...
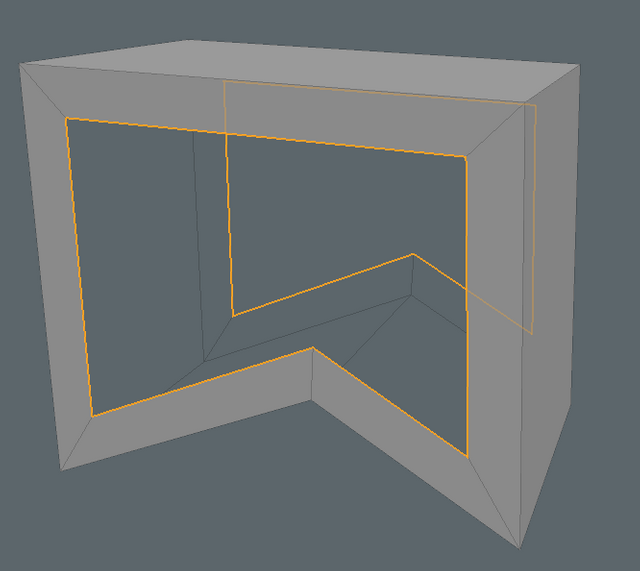
...and use the bridge tool to span the holes.
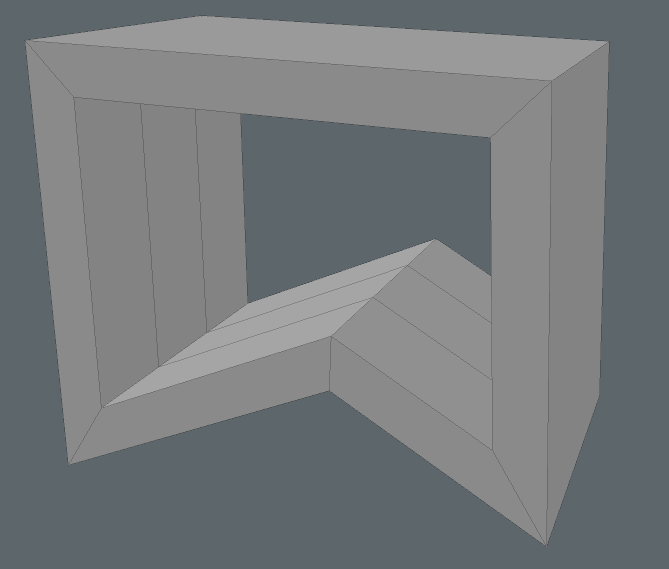
By using these tools and the many other in Modo's repertoire, I can go from a basic cube to something like this.
This brings me to...
Rendering
Once a model is complete the best way to present it is by creating a 3D render, sort of like taking a photograph of it. 3D rendering is the process of creating a 2 dimensional picture of your model or scene, capturing lighting, shadows and materials. This is very processor intensive as the renderer has to compute the way light bounces, reflects, is absorbed and how it subsequently casts shadows. Real lights can be reproduced or HDRI images - High Dynamic Range Images - can be used to simulate a complete environment.

No lighting, very fast render time 1 second. No reflections or shadows.
Basic lighting, more realistic but grainy shadows. Render time 30 seconds.
High quality lighting preset. Even more realistic with soft shadows and accurate lighting. Render time 5 minutes.
Truly realistic images can take hours to compute and render. Animations which can consist of at least 25 frames per second can takes weeks and months to render, depending on quality required and the length of the animation.
Conclusion
This is a very basic look at 3D modeling and the way I create models with Modo. Each model can take days and weeks but it's a process I very much enjoy: I put on my headphones, crank up my Spotify and lose myself in the zone.
You really love this portion... Am I right? (^_^)
This software that you are using for 3D is the same use of 3D Max and 3D AutoCad... (^ _ ^)
Similar in use, yes.
Yes, similar in use. But it takes time to finish one model! 😊
God, yes...lol. But I enjoy it.
Hmm you have me intrigued.
I use to build very basic 3D things with the InWorld tools in Second Life. They were very clunky compared to this program and yet this program seems much easier than say Blender and others.
Have you seen the motorcycles that @woodywood143 makes?
I have seen his work, very impressive.
Modo to me is a lot simpler to use than Blender.
Thankfully, simple doesn't mean ineffective ;-)
I'm also equally impressed by your models
Thank you for writing about Modo.
By the time I left Second Life, I was enjoying making textures and or contorting textures onto other people's builds just as much as my own. I think that's possibly what I miss more. Do you have a favorite person teaching about textures?
Thank you.
I don't do any texture work currently - my models just have basic materials applied. I will be getting more into texturing with Substance Painter in the near future.
There is so much to learn and do. I can see you spending hours doing this a day. :) maybe too much time
this was really informative - Ive always wanted to try my hand at 3D printing, but all that graphing....I couldnt wrap my head around it!
Join our Discord Channel to connect with us and nominate your own or somebody else's posts in our review channel.
Help us to reward you for making it ! Join our voting trail or delegate steem power to the community account.
Your post is also presented on the community website www.steemmakers.com where you can find other selected content.
If you like our work, please consider upvoting this comment to support the growth of our community. Thank you.