Create Cryptocurrency Token in Almost Any DeFi Ecosystem Without Programming
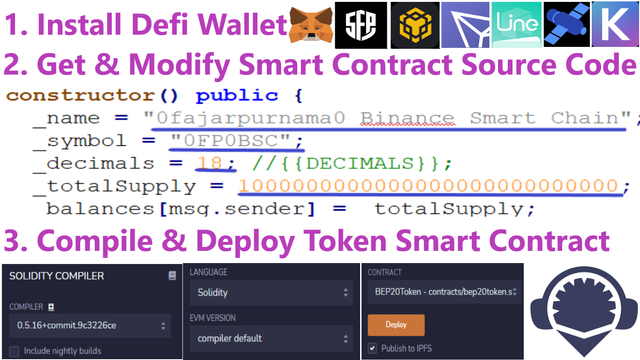
I will straightly write that we can issue our own tokens on Ethereum and other related ecosystem without the need to absolutely know anything about programming. Although it can be tiring for people who are less literate in computers but all we need to do is follow existing guides thoroughly. After having the minimal of running computer connected to the Internet is to proceed on these steps:
General Steps
Generally, there are 3 steps, but each steps contains many sub steps and infinitely expandable.
1. Install DeFi Wallet
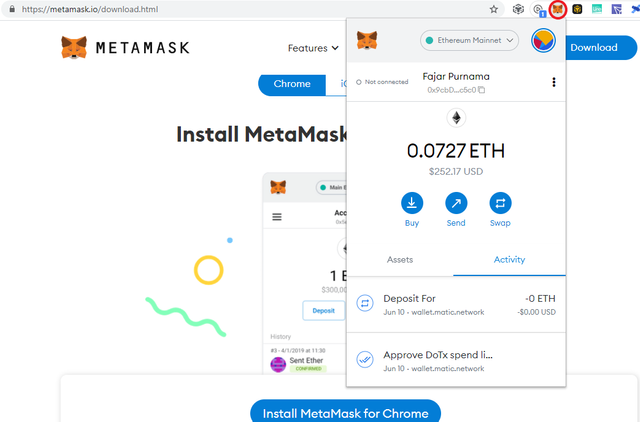
Install Metamask browser extension and fill it with native coins such as Ethereum, Binance Smart Chain, Polygon, Avalanche, Solana, etc. Some ecosystem does not yet support Metamask that needs to install their own wallet such as Tron and Neo. Anyway, get used to using decentralized finance (DeFi) such as trading on decentralized exchanges (DEX) like Uniswap, farming on Sushiswap, add other remote procedure call (RPC) in Metamask or other custome network and try DeFi applications (Dapp) in other chains.
2. Grab and Modify a Custom Token Generator Source Code
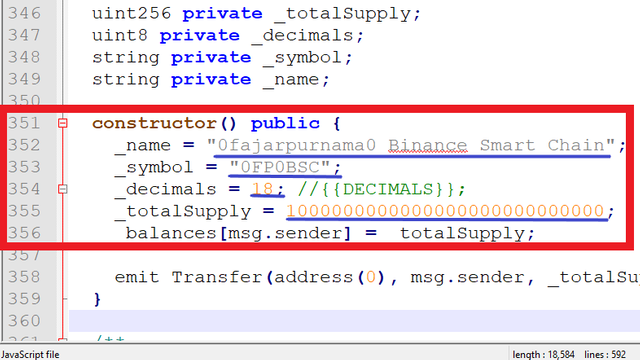
If our goal is only to mint a token, then we do not need to learn Solidity or other programming yet. Just grab a source code and modify few lines where today the source code from Open Zeppelin is recommended. Usually we modify the lines that controls the variables of (1) Token Name, (2) Symbol, (3) Decimals, and (4) Total Supply or the current easiest way is to use the Open Zeppelin Contract Wizard.
3. Compile and Deploy Smart Contract using an IDE
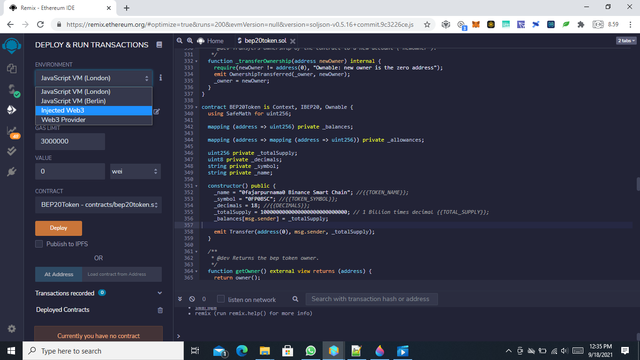
Remix Integrated Development Environment (IDE) may not be the choice for advance development but for just simply issuing a token, it is the best choice where normally we need to run our own node or connect to other nodes but Remix IDE did it for us. Another IDE to practice and save our Solidity programming is ETH Fiddle. (1) In the menu section, go to file explorer, create .sol extension file, and input the source code, and leave it open. (2) Go to compiler menu and set the compiler mostly it is Solidity but change the version suitable for the source code which can be found on the first line. (3) Go to deploy and run transaction menu where if using Metamask, then set the environment to injected web3 and choose the source code file in the contract selector, and finally compile and deploy.
4. For Other Ecosystems
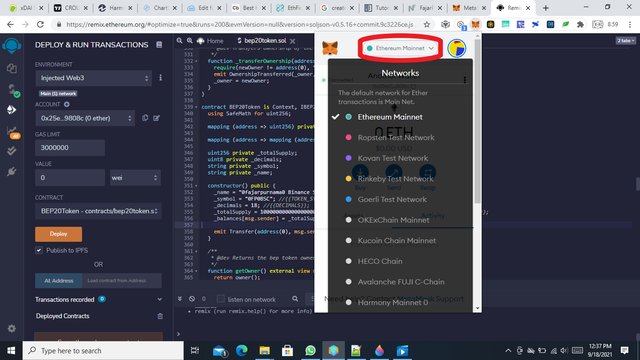
For as long as the ecosystem is Ethereum Virtual Machine (EVM) compatible such as Binance Smart Chain, Polygon, Avalanche, Harmony One, Wan Chain, Energi, Tomo Chain, and XDAI, the same smart contract can be reused. In other words, just repeat the previous steps but change the custom network or RPC of the Metamask. Don't forget that there are test networks for testing before actually deploying because the cost for deploying on Ethereum can be very expensive. Although on other ecosystems are cheap where for simple programmers like us to just use the main network straight away but test network still exists for serious developers. Otherwise if the ecosystem is not EVM compatible, then there is no choice but to go through their documentations and follow their official guide.
Reference to Ecosystem Specific Tutorials
The purpose of this article is to generalize the steps of token issuance of many different ecosystem as written above and list the hyperlinks to those guide below for myself to revisit in the future:
- Ethereum: https://forum.openzeppelin.com/t/create-an-erc20-using-remix-without-writing-solidity/2908
- Binance Smart Chain: https://docs.binance.org/smart-chain/developer/issue-BEP20.html
- Polygon: https://moralis.io/how-to-create-a-polygon-token/
- Avalanche: https://docs.avax.network/build/tutorials/smart-digital-assets/create-erc-20-token-on-avalanche-c-chain
- Bitcoin Cash: https://simpleledger.cash/
- Tron: https://developers.tron.network/docs/issuing-trc20-tokens-tutorial
- Solana: https://spl.solana.com/token
- Neo: https://neo-one.io/course
- Terra Luna: https://docs.terraswap.io/docs/howto/token/
- Polkadot Moonbeam: https://docs.moonbeam.network/builders/
- Tomochain: https://docs.tomochain.com/developer-guide/tutorials/how-to-deploy-a-trc21-token-on-tomochain
- Wanchain: https://wandevs.org/docs/smartcontracts/create-token/
- Harmony One: https://docs.harmony.one/home/developers/tutorials/deploying-hrc20
- Cosmos Atom: https://cosmos.network/starport/
- Zilliqa: https://en.cryptonomist.ch/2020/07/11/create-token-on-zilliqa-blockchain/
- Waves: https://docs.waves.tech/en/building-apps/how-to/assets/issue#using-javascript-4
- IOST: https://developers.iost.io/docs/en/3-smart-contract/Token.html
- EOS: https://developers.eos.io/manuals/eosio.contracts/latest/guides/how-to-create-issue-and-transfer-a-token
- Hive: https://hive-engine.com/?p=faq
- Steem: https://smt.steem.com/
- XDAI: https://www.xdaichain.com/for-developers/developer-resources/burner-wallet-factory/mint-a-token-unbacked-on-xdai-in-5-minutes
- Stellar Lumen: https://developers.stellar.org/docs/issuing-assets/
- Cardano: https://developers.cardano.org/docs/native-tokens/
- QTUM: https://docs.qtum.site/en/QRC20-Token-Introduce.html
- Fantom: https://docs.fantom.foundation/tutorials/create-a-fixed-cap-asset
- Thunder Core: https://thunder-docs.readthedocs.io/en/latest/tutorials/index.html
- POA: https://kauri.io/#collections/POA%20Tutorial%20series/poa-part-1-develop-and-deploy-a-smart-contract/
- Arbitrum: https://moralis.io/how-to-create-an-arbitrum-token-in-6-steps/
- Optimism: https://github.com/ethereum-optimism/optimism-tutorial/tree/main/standard-bridge-standard-token
- Celo: https://docs.celo.org/developer-guide/celo-for-eth-devs
- Ethereum Classic: https://ethereumclassic.org/development/guides
Mirrors
- https://www.publish0x.com/cryptocurrency-101-for-users/create-cryptocurrency-token-in-almost-any-defi-ecosystem-wit-xqmvnjg?a=4oeEw0Yb0B&tid=steemit
- https://0darkking0.blogspot.com/2021/09/create-cryptocurrency-token-in-almost.html
- https://0fajarpurnama0.medium.com/create-cryptocurrency-token-in-almost-any-defi-ecosystem-without-programming-afc038b5e96c
- https://0fajarpurnama0.github.io/cryptocurrency/2021/08/01/create-cryptocurrency-token
- https://hicc.cs.kumamoto-u.ac.jp/~fajar/cryptocurrency/create-cryptocurrency-token
- https://0fajarpurnama0.wixsite.com/0fajarpurnama0/post/create-cryptocurrency-token-in-almost-any-defi-ecosystem-without-programming
- http://0fajarpurnama0.weebly.com/blog/create-cryptocurrency-token-in-almost-any-defi-ecosystem-without-programming
- https://read.cash/@FajarPurnama/create-cryptocurrency-token-in-almost-any-defi-ecosystem-without-programming-0e4e094d
- https://www.loop.markets/create-cryptocurrency-token-in-almost-any-defi-ecosystem-without-programming/
- https://markethive.com/0fajarpurnama0/blog/createcryptocurrencytokeninalmostanydefiecosystemwithoutprogramming