SEC20W56 Class 6: Edging for garments and roses
It has come to the end of our learning session in crochet. I want to say thank you teachers for this privilege, I appreciate your teaching techniques It has really unleashed that creative mind in me.
I followed the class right from week one and I can say that I can hold my pin very well and I understand the basic terms in crochet making.
This week I've also learnt how to make a rose and how to create border.
In response to the homework task, here is my entry.
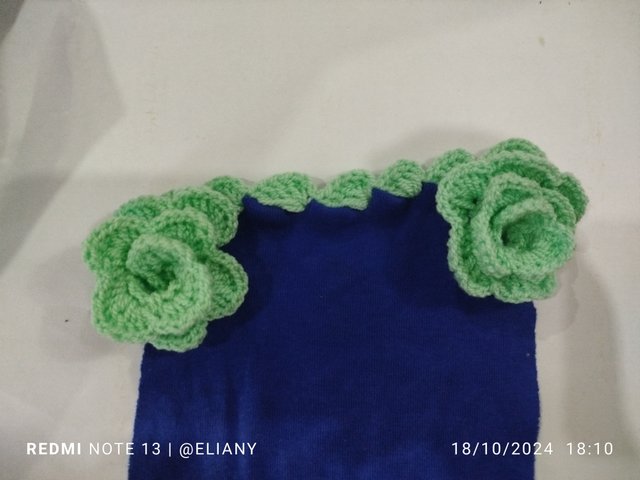
Create a border on the garment of your choice, whether it's a handkerchief, scarf, shirt, pants, etc. Support your task with videos, a photo collage, and at least one photo of the completed task.
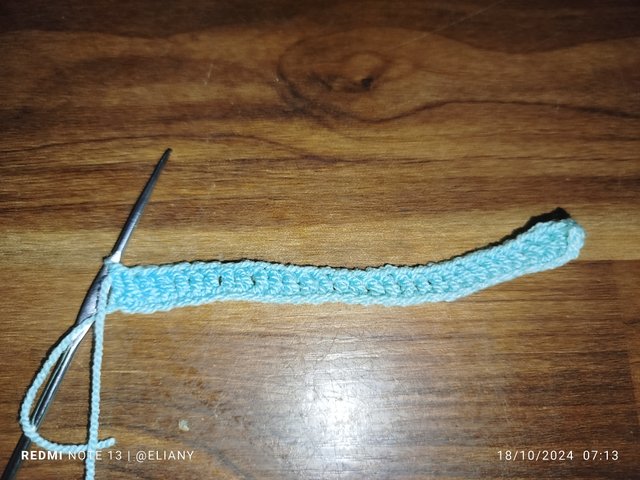
I created a border on a handkerchief after series of practice, I understand the steps and I carried it out. Because this steps requires more care so as not to spoil the material I'm using I decided to do more practise with a scarf that is not useful until when I knew how to do it and now decided to use a handkerchief for this contest.
How I made it
After inserting my yarn to the handkerchiefs, I started the petals with a single stitch then added 5 double stitch which takes me to another begining of another petal and I start with a single stitch. I repeated the process till the end. You can watch the video for more explanation on how I did it.
Make only one of the two roses explained in this lesson. Support your task with videos, a photo collage, and at least one photo of the completed task.
 |  |  |  |
|---|
How I made it
I started by making a starting knot, then I knitted a 32 chains. At then end of it I left 2 spaces and begin the next step with a half double stitch.
To make the half double crochet, I yarn over, passed the hook through the stitch, pull it out to form three strands on the crochet hook. Now, I took a loop and passed it through two firat strands then passed through the last two. I repeated the same process of making the half double crochet in the remaining part of this step.
Half double crochet
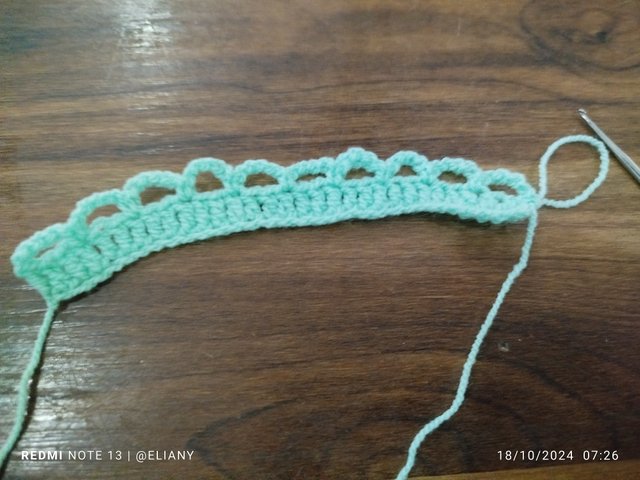
At the end of the row, I make 5 chains then turn it, leave two spaces and in the third chain I make a single crochet, then make 5 chains and repeat the same process until the end of this step. And after finishing the steps, i have 10 squares holes that i will use to make the petals of my flower. Finally for this steps to finish, I make a single crochet and a chain stitch, then we turn it to start making the petals.
Take a look at how it will be below 👇
Round hole created
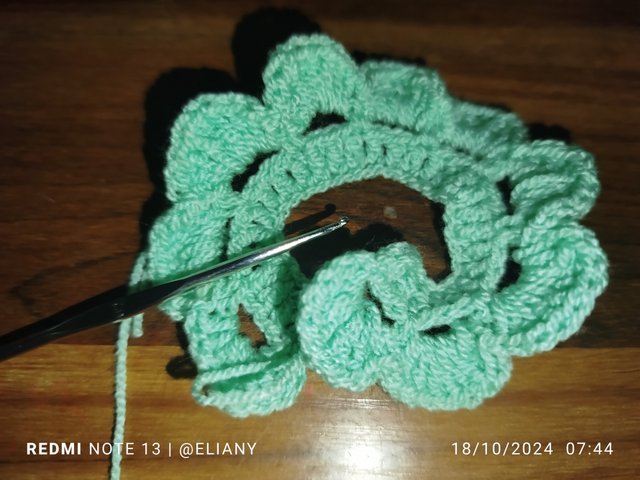
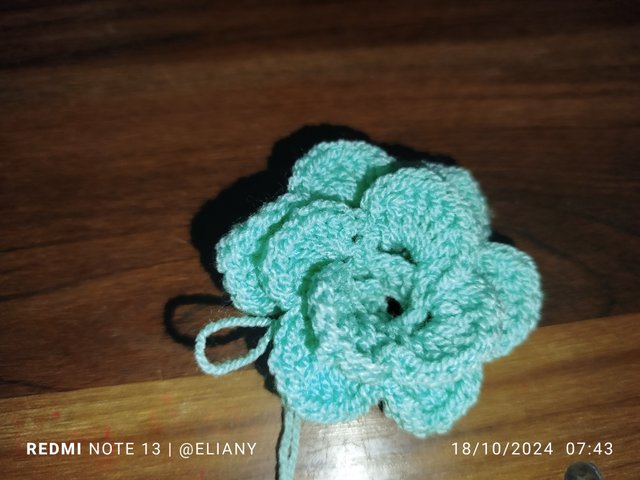
Finally steps to begin this final step, I make a single crochet, a nine double crochets and finish with a single crochet all in the same hole. I repeated this pattern to complete this steps then, I made a single crochet in the starting chain and close it with a slip stitch and my work came out beautiful. A beautiful rose.
Petals created
Finally it was done and then i took photographs of it.
Watch the full process here
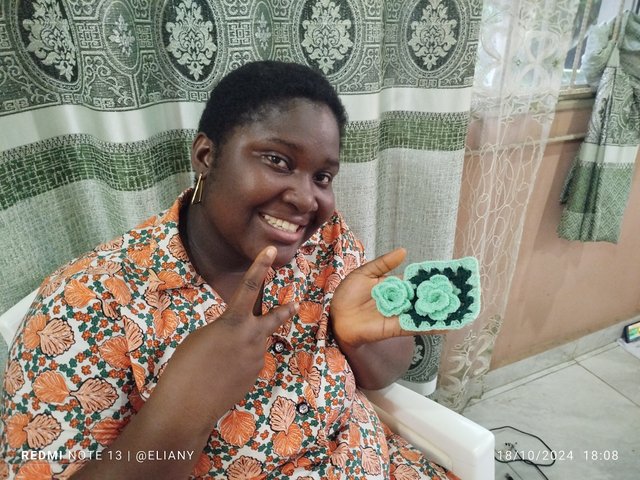
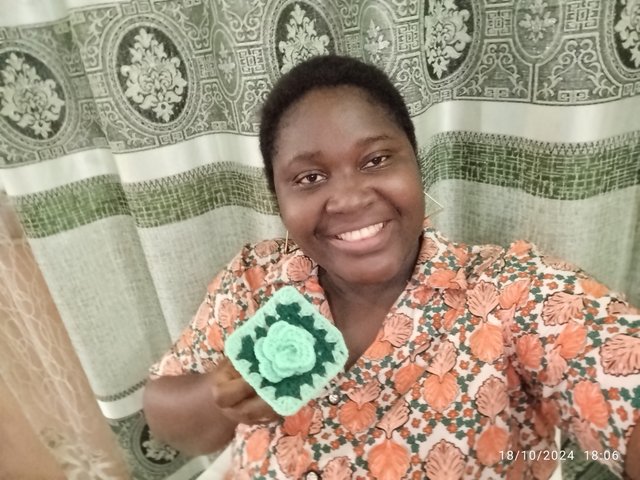
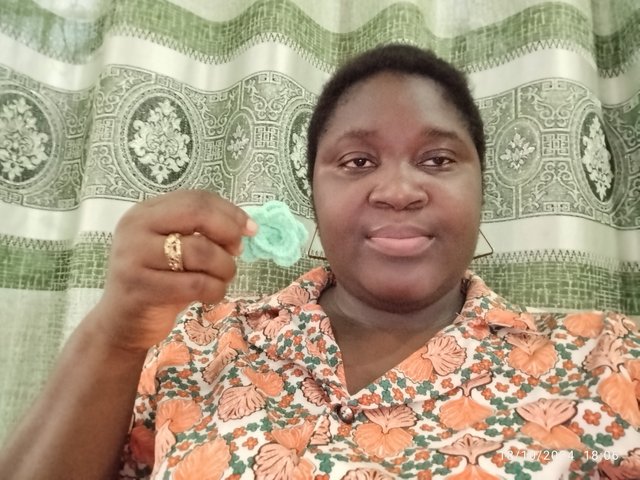
Share a selfie with both completed projects.
 |  |
|---|
I want to sincerely appreciate @analp and @naka05 for their deep love in sharing their skills in making crochet with us. Your consistent teaching of different crochet is amazing, I've really enjoyed my 6 weeks training in this field and looking forward to create different designs of crochet soon for myself.
Thank you steemit team for this great privilege,if I was to pay and learn this skill I know how much it would have cost me, but here I am learning a skill and I'm being compensated for learning it.
I love you all
I will like to invite @dequeen @nancy0 and @ninapenda to take part in this contest

Greetings dear friend.
Thanks so much for your invitation, I deeply appreciate. I see that you are consistent in this course from week 1 to six, this is highly impressive.
Your edging of garments and roses look beautiful and neat. I really admire your yarn colour,lt look cool but vibrant.
Your appreciative words are commendable. I will soon joined this contest. I will you success in this challenge.
Much blessings 💕
Oh I'm grateful, thank you so much for your wonderful comments it has added more smile to my day already.
Looking forward to see your entry
Tu flor quedó muy hermosa, bien hecha. El borde del pañito queda realmente hermoso, cambia la vista de la pieza.
Saludos y bendiciones
It was really an adventure my sister I appreciate your good comment we hope for something better.
Oh this is beautiful and neat. You made it easy for anyone to understand and I must say that this class was an interesting one. I wish to have them on board for the next season.
To learn this skill would have cost a fortune, true! But all the same, thanks to the teachers and to the organizers...
Good luck ma'am!
Yes true it cost a lot to buy this materials but the skill we acquire worth it.
It Isy pleasure, thank you so much.
I wish them success as well to the next season we need to learn more.
Thank you for your best wishes, hope to see your entry as well.
Te quedaron hermosas las labores, me encanta el borde que realizaste, se ve muy bello, muy tupido, y las rosas también están preciosas.
Tienes mucha razón con respecto al curso, hay muchos presenciales pero tendríamos que trasladarnos a algún lugar, cancelar, asistir en un horario, en cambio este curso lo vamos desarrollando a otro ritmo y nos recompensan por mostrar nuestro proceso, es genial.
Bendiciones y éxitos
I'm grateful thank you for your contribution to my post I appreciate you.
Thank you @lirvic
Que hermosos tejidos y la manera como lucen, son maravillosos.
Una gran e ingeniosa habilidad muy bien desarrollada.
Saludos y exitos.