Complete the Lines - An Android puzzle game

(German version/deutsche Version)
Complete the Lines is one of my current projects. It's a puzzle game where the player has to complete lines in different modes. There will be three of them:
- Quickcomplete: There is a grid of parts where one of the parts is missing. Also there is a list of other parts on the screen and the player has to choose the right one to complete the lines within the time limitation.
- Part Swap: All needed parts are on the grid and the player must swap neighbours to complete the lines. But the player has only a limited time to do so.
- Buildup: Within a given time the player has to place all parts from a list onto an empty grid to create completed lines.
More information about the project can be found in this video
You can become a part of this
I offer everyone the opportunity to help me with this project by creating levels and line combinations. To make this a little bit easier, I've written a small tool that makes level creation very easy. Currently it works only under Windows, but I work on Mac and Linux versions too. Instructions for the tool can be found later in this post. You can download the tool as a .zip archive here. Extract the archive into an empty folder and run "CTLLevelCreator.exe". If you would like to see your level in the game, submit it using this Form. You can decide wether you want to be named in the credits or not. You must also include a link to the level file. I recommend GoogleDrive or Dropbox to deploy the file, but any other location accessible from the Internet is also great. I appreciate any support.
Instructions
Now I would like to explain you the Level Creator.
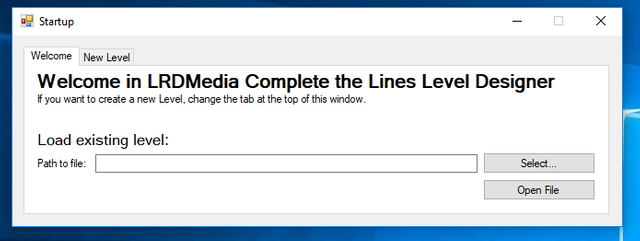
1. Start Screen
This screen is displayed after the program is started. With the "Select" button any existing level file can be selected to edit it with a click on the "Open File" button. You do not have to finish the level directly. You can also create a new level by clicking on the "New Level" tab.
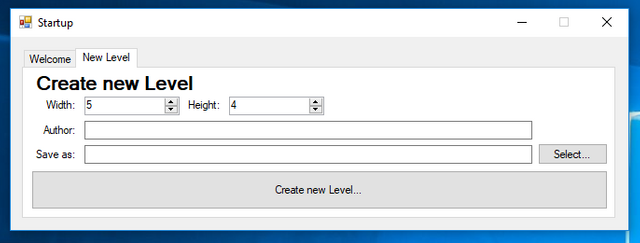
2. Create a new level
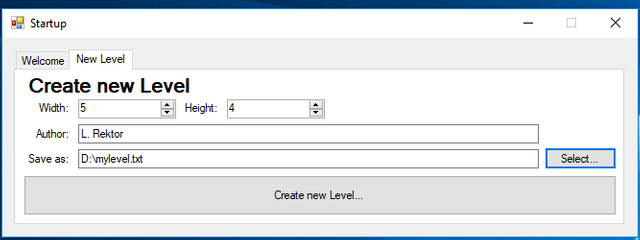
A new level can be created using this screen. First, the level size must be set, the default is 5 * 4 blocks, but you can choose anything between 2 * 2 and 20 * 20. In the field "Author" the name of the author can be entered, if you want to remain anonymous, you can write anything in this field (e.g. "anonymous"). Click the "Select" button next to the "Save as" field to choose the storage location of the new level. This is what this screen might look like when everything is entered:
Use the button "Create new Level" to create the file and open the editor window.
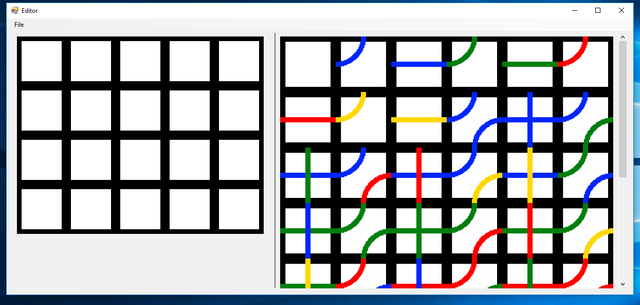
3. The editor
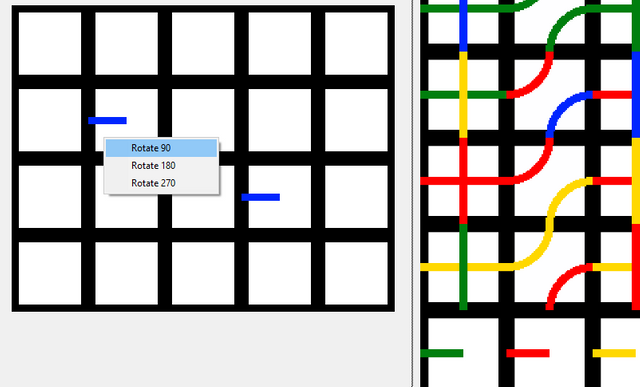
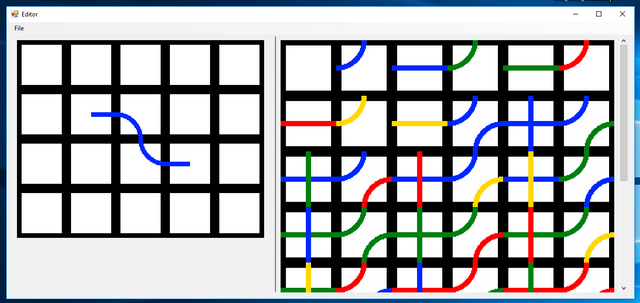
This is how the editor looks like. On the right side are all available line blocks. By clicking one of these blocks, the block is selected and can be set by clicking on any field on the left side. The left side is the actual level. Here you can see what the level will look like and how the blocks are arranged. Rotating a part is possible by right-clicking the part. This context menu will appear:
A "finished" level may look like this:
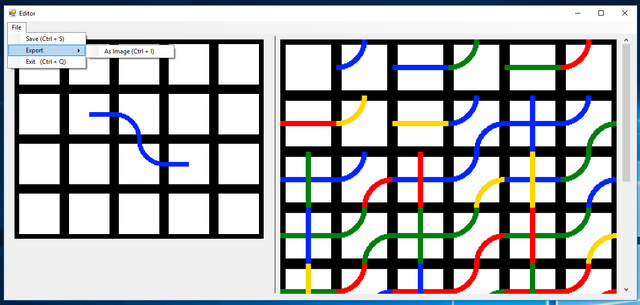
3.1 File-menu and shortcuts
| Entry | Shortcut | Function |
|---|---|---|
| Save | Ctrl + S | Saves the current state into the file |
| Export > As Image | Ctrl + I | Exports the level as an image file (PNG or JPG) |
| Exit | Ctrl + Q | Closes the program window |
4. Questions
If there are any open questions write a comment and i'll try to answer them.
Congratulations @lrmedia! You received a personal award!
Click here to view your Board
Congratulations @lrmedia! You received a personal award!
You can view your badges on your Steem Board and compare to others on the Steem Ranking