Threading the wasteboard for my CNC
You may wonder what that even means, well, allow me to explain.
A cnc mill is basically a router on rails. stepper motors move the router in x.y and z direction and since the bit is rotating fast, everything it comes in contact with is then removed, By carefully controlling the movement of the router, it is possible to make amazing stuff.
However there is alot of force involved so if the material that you cut into isnt secured, it will be thrown about by the router, everyone who have ever used a router knows that is can really exert some force.
the harder the material and the more aggressive cuts you want to make, the better you need to secure the material. For soft woods and foam you can sometimes get by with doublesided tape or glue , but for hardwoods and metal you need more. Some people have build (or bought ) vacuum systems where a strong vacuum hold the work in place, but I went for something simpler. A threaded wasteboard.
The wasteboard is the plate at the bottom of the mill. in the case of a shapeoko it is made from 1" mdf. It is called a wasteboard because it is essentially a sacrificial piece of wood, you can just screw the workpiece directly into the wasteboard, but then you would have to replace the wasteboard fairly frequently.
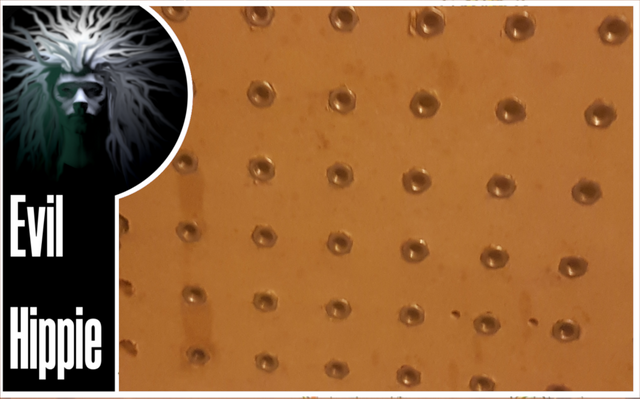
what I did was making a gcode file with a number of holes evenly spaced (40 mm) and milled these into the wasteboard.
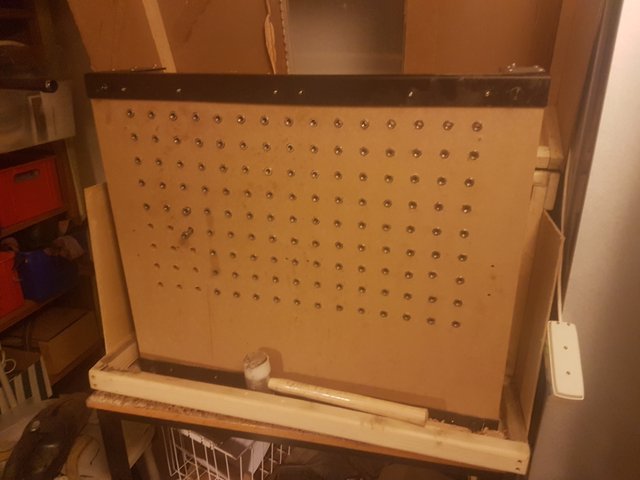
Then from the underside i drilled larger holes using a normal handdrill and inserted nuts into these. I made sure the fit was so tight that I had to hammer them in. that way the will havesufficient friction to not roll around in the holes when I screw a bolt into them from the upper side.
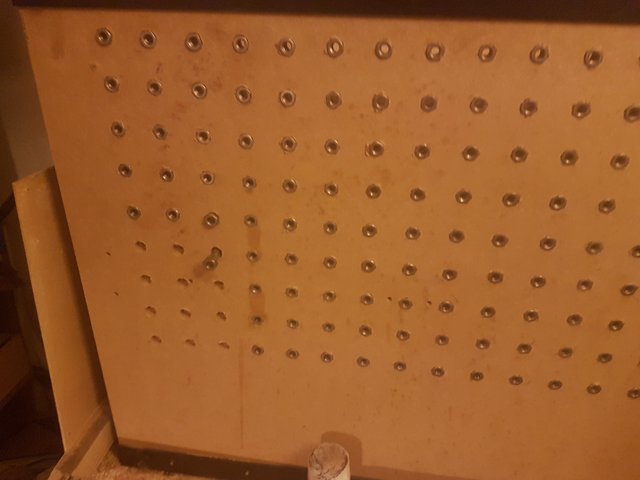
to guide them into the hole I put a bolt through from the other side and threaded the nut unto that just a few mm. Then it was easy to hammer them into place.
It is tedious work to drill all the holes and making sure that the larger diameter from the bottom doesnt go all the way through. On the Shapeoko the actual work area is much smaller than the actual mill so I had an issue with the area that was outside the reach of the router. What I did was use the angular holders.
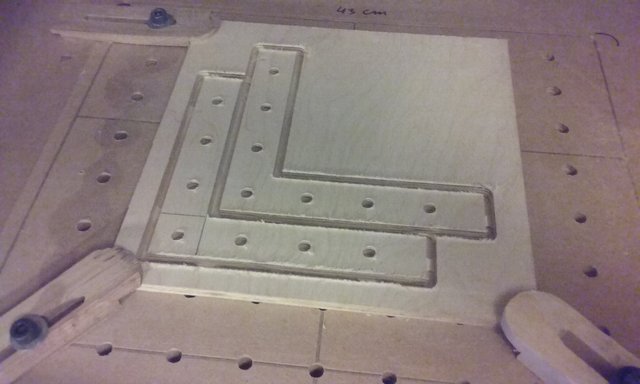
using the holes that I had already made using the router I fastened the holder on the edge and drilled new holes one step further out. I then moved the holder into these new ones and that way I could get more holes.
It took a while but it worked really nicely, so now I can place the holders outside the workarea to be able to use the entire workable area for the workpiece.
Next up will be using all my newfound possiblities on some real projects.
until then.

Im EvilHippie, a compulsive creative and jack o' trades. If you want to know more about me, check out my introduction post here
If you like what you see, feel free to upvote, follow and resteem
or you can check out my accounts on these sites:
Why didn't you write some gcode to tap all of those holes? :-p
Ever use your CNC router to build a better CNC router? I am sure it will happen to you in no time. ^_^
He. yes i should have probably done that. only problem is, then i would have had to learn that as well. I guess at some point i will probably have to learn to write gcode. for now i will stick with using software to generate it
as to the building a better cnc with my cnc : the thought has crossed my mind but i fear I am a bit too busy at least at the moment, so i might just buy another cnc instead when i grow out of this one
Hello @evilhippie, thank you for sharing this creative work! We just stopped by to say that you've been upvoted by the @creativecrypto magazine. The Creative Crypto is all about art on the blockchain and learning from creatives like you. Looking forward to crossing paths again soon. Steem on!