Basic Tutorial Keepass 2 (open source software) Password Management
Following my previous post, I will be doing a little resume of what is is Keepass 2 before starting the tutorial. For those that don't know about Keepass 2, it is an open source password manager that helps you store your accounts and randomizes your passwords to increase your accounts' security.
After you have downloaded and installed Keepass 2 Professional Edition you can start creating databases to manage all your account passwords and to do so here I prepared some easy steps to follow:
- After you installed and execute the software you will see the next window where the 4 highlighted icons you see there will help you create new databases, open existing databases, saving your changes in a database or adding a new entry in a database.

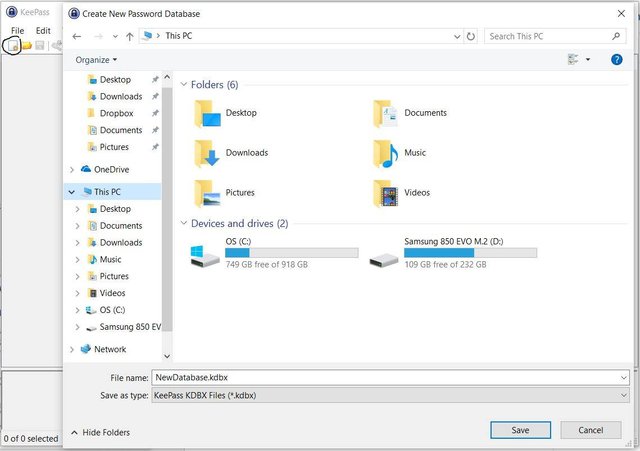
- Now let's start creating a new database, click on the highlighted icon, then choose a location in which you want to store your database and the name you want to use in it.
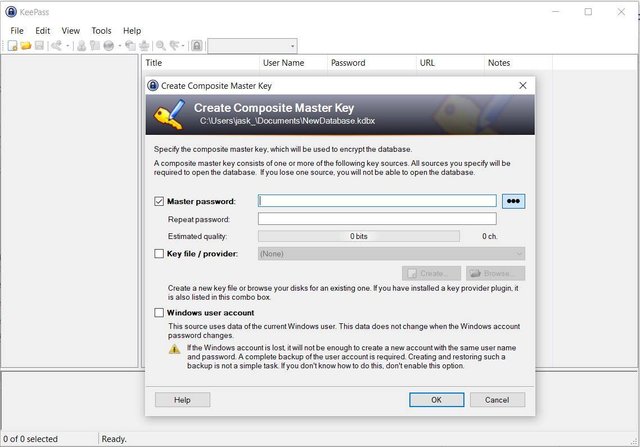
- After you have selected the name of your database and the location storing it, you will be prompted with a window asking for a master key, this master key is extremely important to memorize because with this you will have access to your database, if you lose or forget your master key then you will not be able to access it (well technically you can access it using some hacking tools but that is beyond the scope of this tutorial).
- A new window will be prompted asking for a database name and a description (both of this are optional, you can even use the same name of the archive you used in the last step).
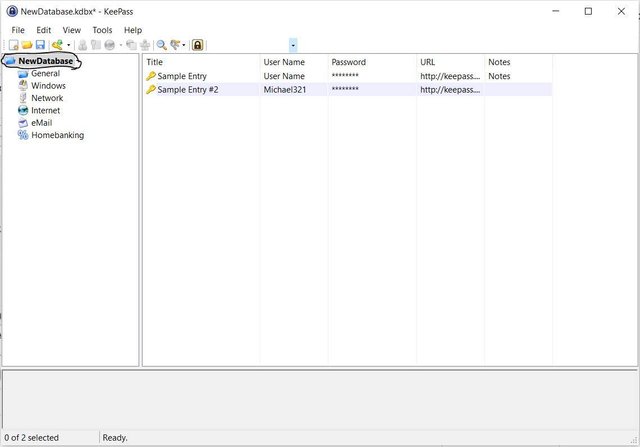
- Now after the initial setup, you will see the main group, some sample subgroups, and entries, here you can customize it as you want, you can create as many subgroups as you want to categorize the type of accounts you have, or you can put it all in the main group. If you want to create more subgroups just do a right click on the main group (the highlighted one) and choose to add a group
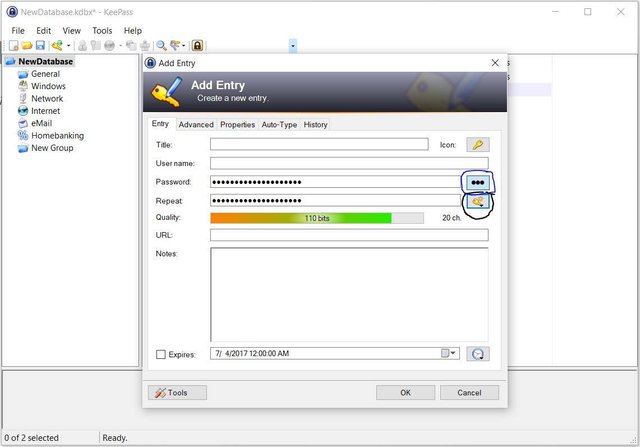
- To add a new entry, select the main group or a targeted subgroup then click on the highlighted icon and choose Add Entry. This part is really self-explained as you can see on the screenshot, you can add a title for the entry, your account username, password, URL, notes and an expiration date if you want (this expiration date will only remember you to manually change the password, it will not delete any password for itself).

- In this step, you can see two highlighted icons, the one with a blue circle and the other with a black circle. The blue circle is used to hide or show your password as characters, if you choose to hide your password it will only appear as asterisks as you can see in the picture. The black circle is used to create passwords and this will be discussed in the next step.
- To create a password for your entry, click on the highlighted icon, then choose Open password generator, now you can see the new prompted window, in here you can choose the options to fortify your password with different characters and length.
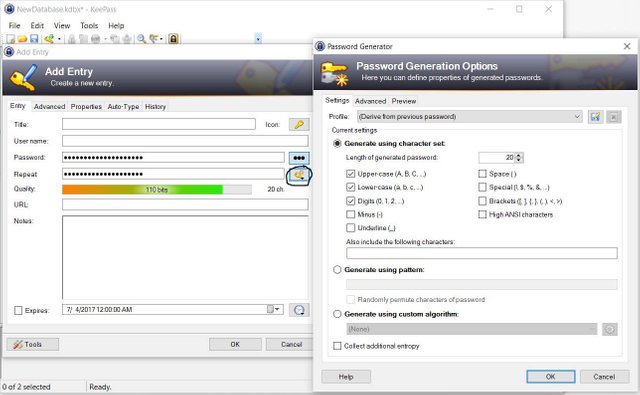
- Once you have done selecting the attributes for your password, click OK and it will take you back to the Create Entry window, here you can see the Quality of the password generated, a good rule of thumb is to have a Quality in the range of 120 bits to 128 bits, to generate again a password using the password generated in the last step, click on icon highlighted with a blue circle then choose Derive from previous password until you have the desired password Quality, when you are done click ok and remember to save the changes in your database using the icon highlighted in red.

- Now do the same for all your accounts you want to manage using the software. If you want to log into an account, go to your account website, find the account entry in the program, then right-click on the entry and choose copy username (this will copy the username to the clipboard and you can right click on the website of your account to paste it without typing it), this can also be done with the password, right-click on the entry and choose copy password, then paste it on the website of the account login entry (some websites don't allow you to paste the username and password, for those websites you will have to manually type your username and password, if your password is being hidden with asterisks just double-click on the entry, then on the new window select the icon to hide or show your password, now you can see the password for that entry and manually type it on the website of that account.
Now you can secure all your accounts with difficult passwords, there are some recommendations I would like to mention before ending this tutorial:
- Always backup the database archive in a physical device and in a cloud storage service, for the cloud storage you will have to memorize that account and password, so in total you will have to memorize just three passwords (the master key, the cloud storage and of course the logging account of your laptop or PC).
- Keep your backup files updated everytime you make a change in your main database archive.
I hope this has been helpfull for you, Keepass 2 is a great software and it really adds extra security in your accounts.
Have a Good Day! and stay out there!. :)