From Wax to Finish, How I Make My Rose Candles
Hey!
Thanks for popping in, I finally got around to showing you all how I get these rose candles made!
I didn't get into the depths of temperatures and proportions because I don't want to bore anyone LOL but I did put a visual to everything from mixing my waxes and additives, to revealing the final product. Take a look below and let me know what you think!
It all starts with getting the wax and tools necessary for the job. I found that for the type of pillar and molded candles that I make require a mix of natural and synthetic wax. It helps keep the intricate structure of the rose petals, it holds the candles scents really well, and it slows down the burn. I mix soy wax and paraffin wax, I put 55% soy and 45% paraffin wax. The soy wax alone does not hold scent and it burns very quickly.
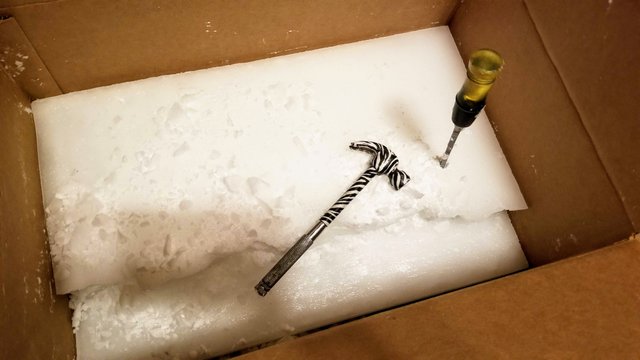
Below is my chisel and hammer for the paraffin wax blocks that I purchase in bulk (oh yes, this is a multi-purpose method for both stress management and wax retrieval).
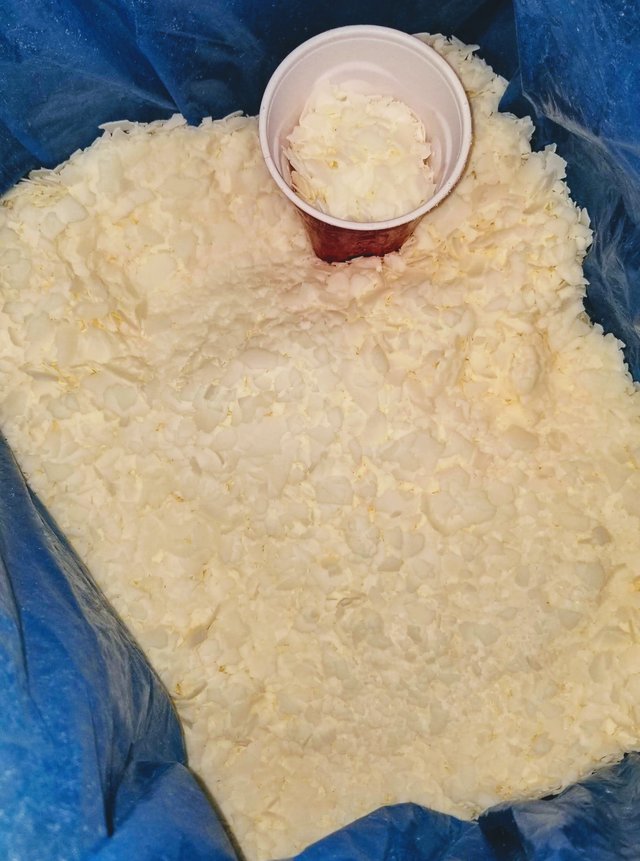
Next is the 50 pound bag of soy wax flakes that I also purchase in bulk.
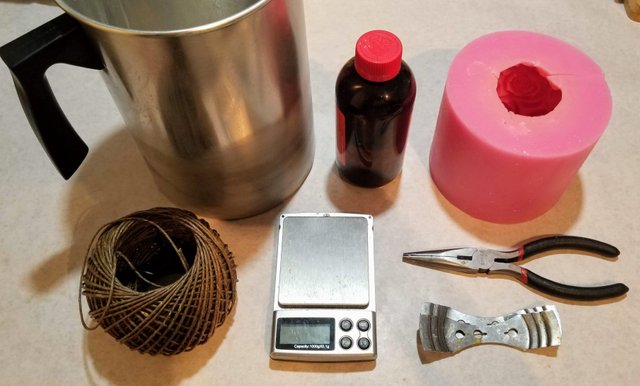
Here are most of the necessary tools to get the job done! Starting with the metal melting pot to place the waxes and all the additives (which will be going into a double boiler to melt); then the bottle of fragrance to add to the wax; also very important is a kitchen scale to measure out your wax and additive proportions. Then I have the wick of my choice and a wide eye needle so I can thread the wick through my mold. Of course, the MOLD (the pink object with a hole in the middle), I prefer silicone as it is easiest to remove the dried candles at the end. At the bottom right at the metal wick stoppers that are placed on top of the candle mold to hold the wick in place (photos coming up).
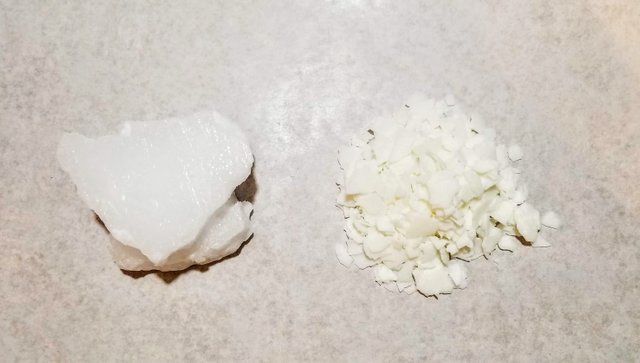
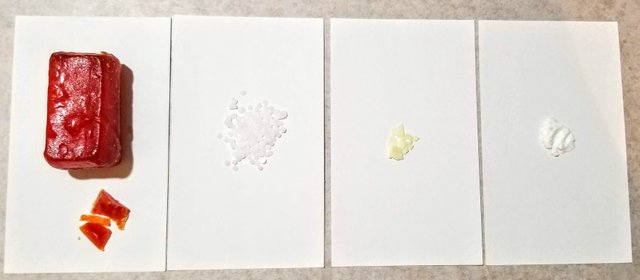
These are the two types of waxes up close (left side paraffin, right side soy wax flakes), as you can see they are different colors and textures, after a whole lot of trial and error I was able to figure out the perfect proportions to get the proper results when dried.
This next step is where the magic comes in. All the way on the left is my ivory color block....yes, it is quite orange looking, but that's because of how deeply concentrated the color is. That chipped amount is just about how much I need for one round rose candle, you will see the results at the bottom. Next to the color block we have my three additives. The first is a third type of wax called Vybar and it causes the two types of waxes I use to melt together versus trying the separate in the melting pot...without the Vybar the candles dry with all sorts of issues like bubbles and frosting. The two on the right are additives that prevent the candles from color fading. Both direct sunshine and fluorescent lighting will cause the candle to change colors, these two additives prevent that from happening.
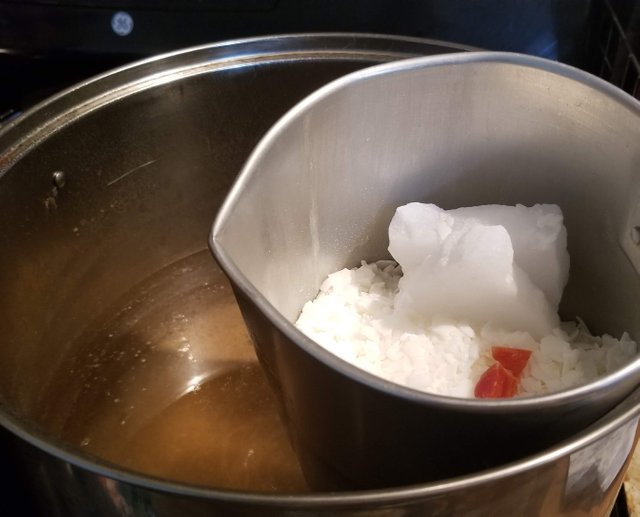
Photos below show the two waxes, color block, and three additives combined in the melting pot.

AND FINALLY, we can start melting. This is how I place the melting pot into the double boiler. I just use a regular large cooking pot, fill it about half way so no water splashes into the melting pot when it is boiling.
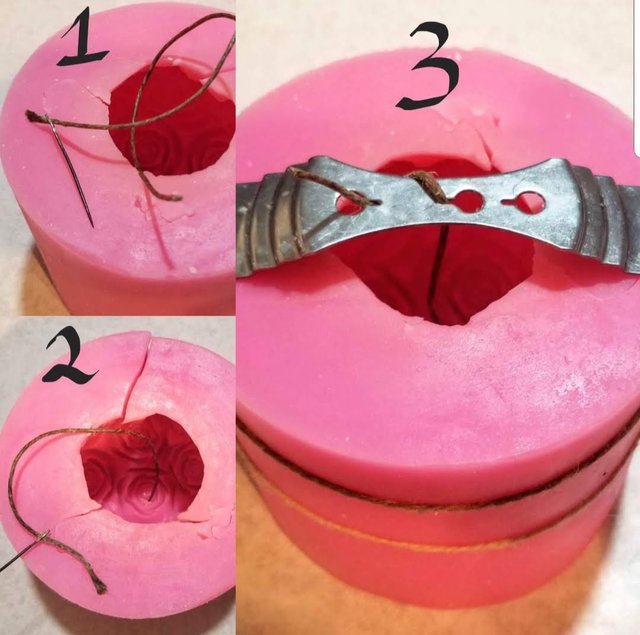
So while that is melting I can turn to the candle mold. First I need to thread the wick into the needle (I flatten the end of the wick with the pliers so it is easier to fit in the needle eye), then pull the needle through the bottom of the mold and use pliers to pull it up from deep inside the mold...after a few pokes from the needle you'll see how useful these awesome pliers are. Last, I wind the wick on the wick holder to stay in place.
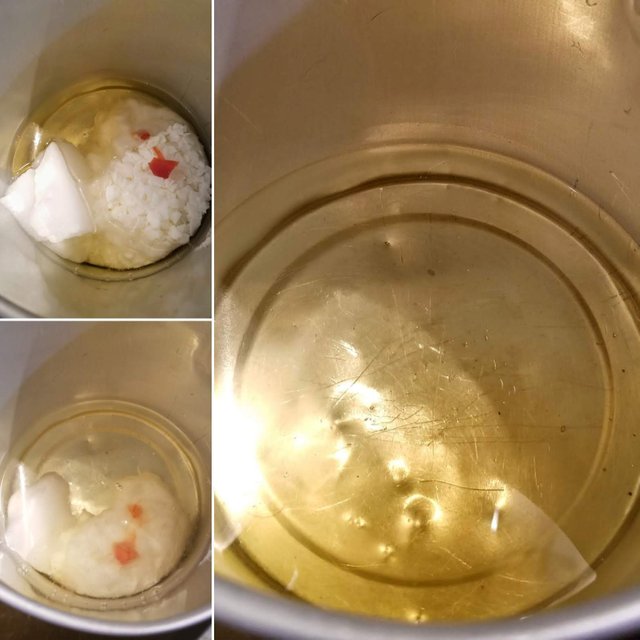
Turning our attention back to the melting pot, below is progression of the melt. As soon as the wax is fully melted I add the candle scent and continue to let it mix for another three minutes. (NO MORE ORANGE COLOR!)
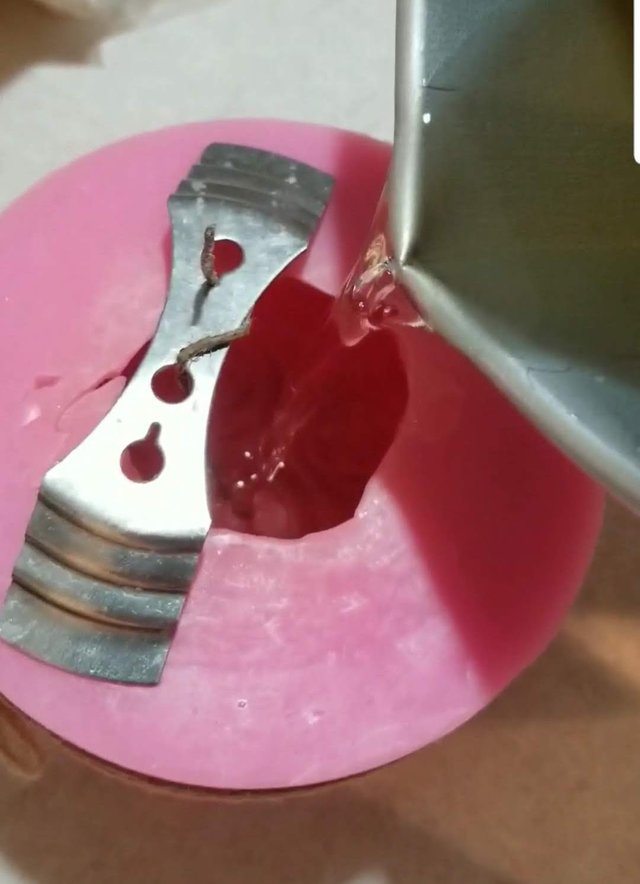
AND WE POUR! (I wish I could show you guys the pouring video :( maybe I'll find a way to link it soon)
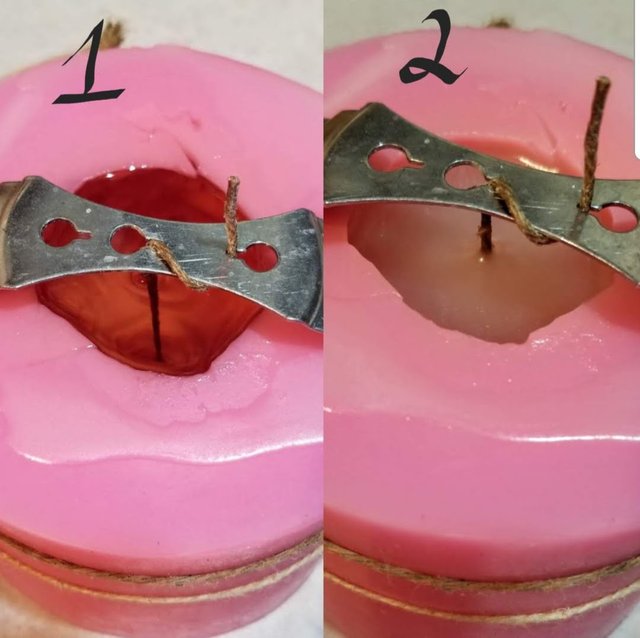
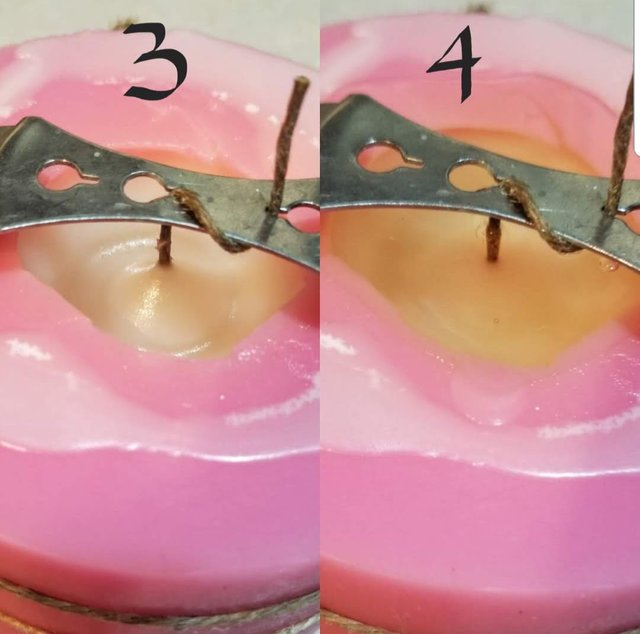
Alright! Below 1 and 2 is the drying process, if you notice that the wax has gone down from the top of the mold, this usually happens with candle making, the wax settles and expands so it needs a re-pour. Number 3 and 4 is the new small layer of wax I poured to finish off the candle.
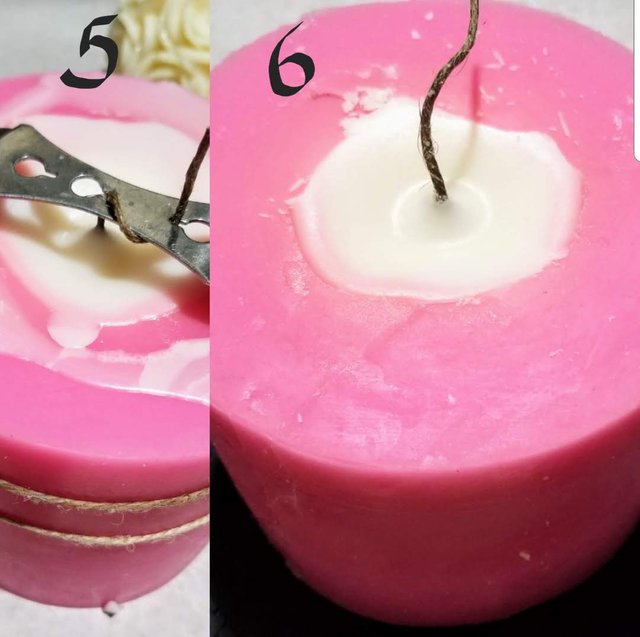
And finally the candle has dried! Make sure you peel off all the extra wax residue from the top of the mold, it can cause damage to the candle when you are removing it from the mold.
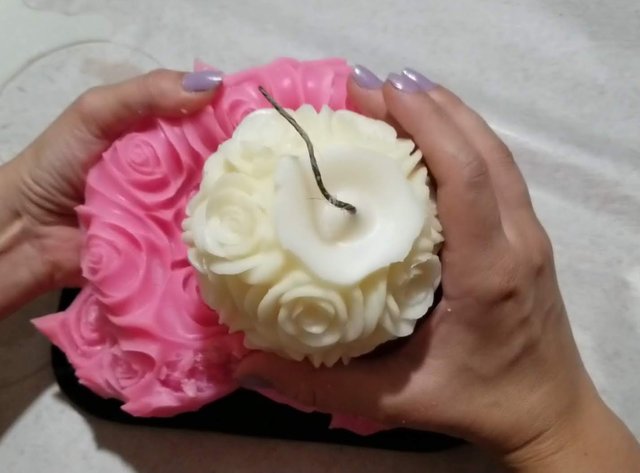
I had another great video to show you of exactly how I take these beauties out of the mold, but I will save it from next time. Instead take a look at the process in a couple of photos.
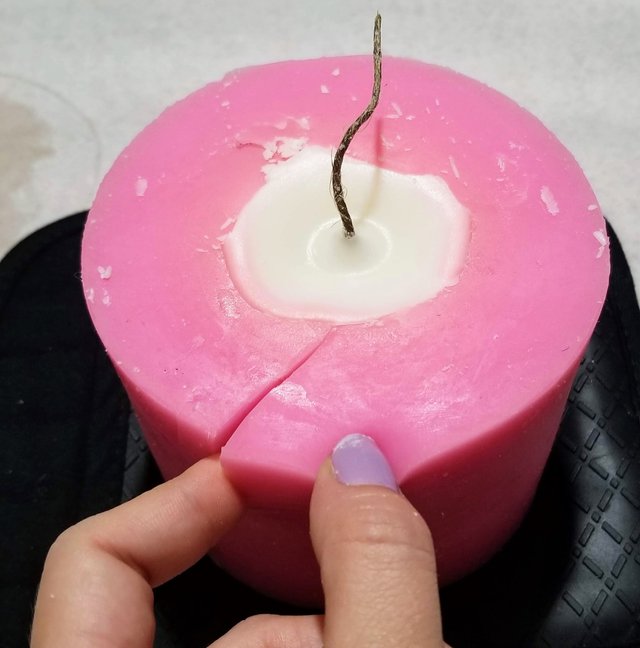
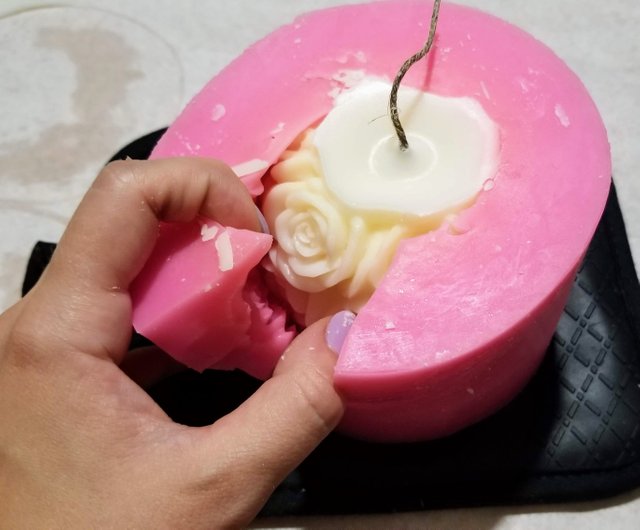
Gently peel the silicone mold first from all the edges, and slowly wedge your hands all the way around and inside the mold to grab a hold of the candle and pull it right out.
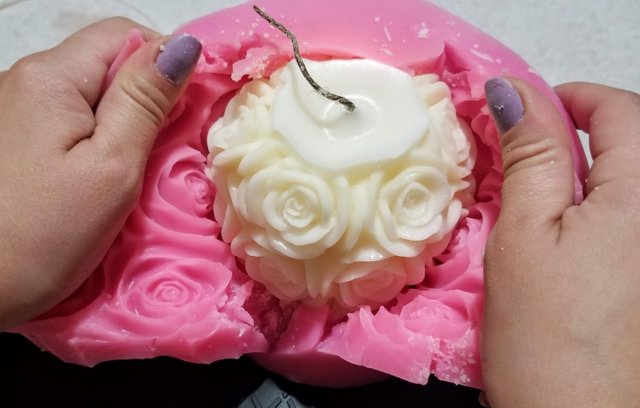
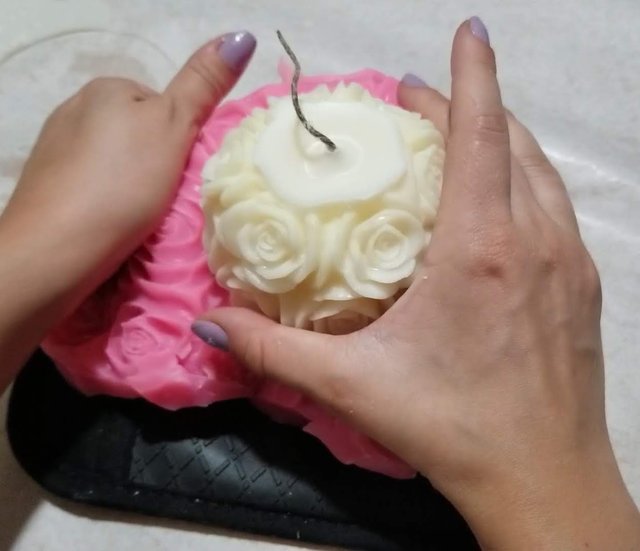
And at last, we have the final product!
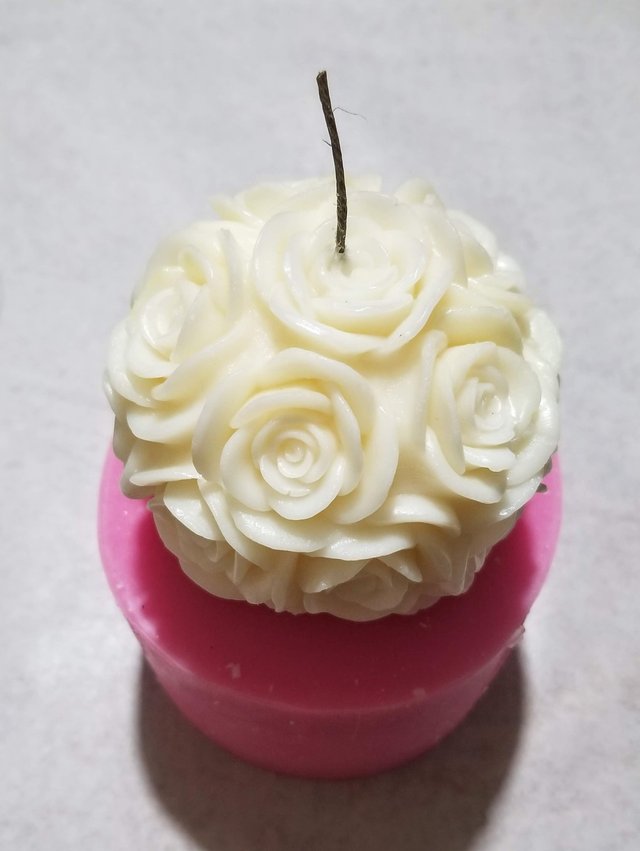
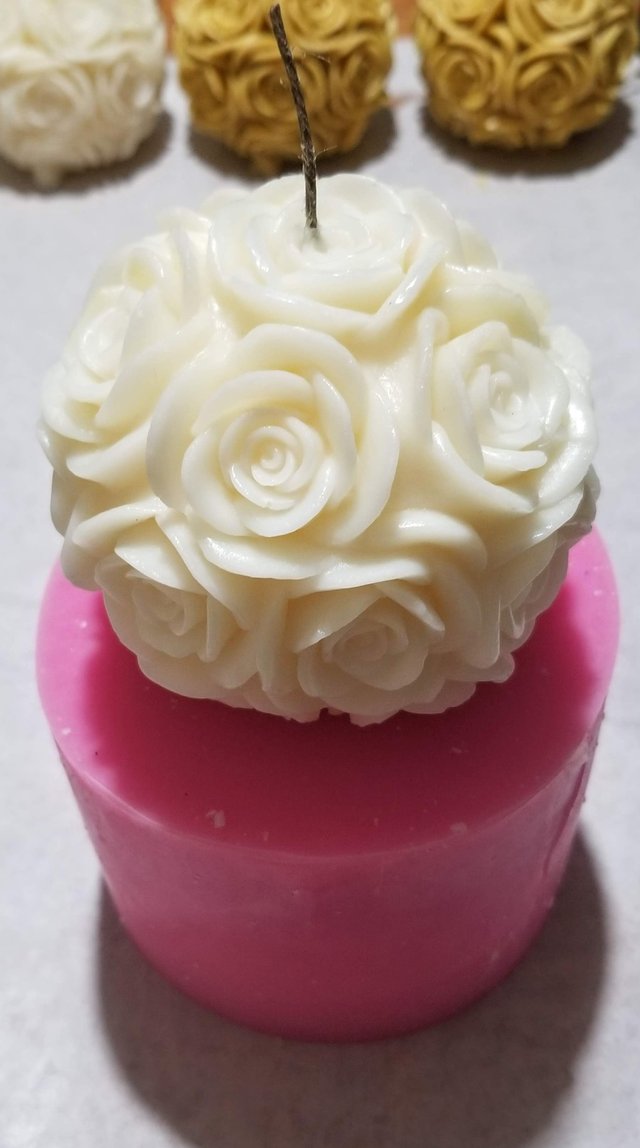
A perfectly ivory, round rose candle, scented in citrus & teakwood.
HAPPY BURNING!
Hey Jules!! Yay I’m so glad to see you hear!! I love and appreciate all of the process pictures you shared to go along with each step! Sharing pictures like these really helps your audience get more excited about what you’re sharing...especially for us visual people.
These rose candles are so beautiful! I love he pulling away the silicone step, that’s like the best part because it reveals the final product! I think you did a great job on your first post.
May I suggest you search introduceyourself posts? You definitely want to have an intro post showing your face, holding up a Steemit sign and date etc. so that you can be verified as a “real” person. This will give you more credibility while here on Steemit. Welcome aboard!! 😃
Thank you for your kind words! I didnt even think to do an intro post but that makes total sense!! Im gonna get on that asap!
You’re absolutely welcome ;D
Jules, yay!! You are so descriptive and very in depth with your post. So glad that you finally got signed up!! I look forward to your posts. Congratulations and great job!
Wow - that is neat @candleamor! You make it look so effortless. 😁
How long does it take your candles to dry?
Thank you!! 😍 it takes about 6-8 hours for those molds to completely dry :)
Amazing work! Love it!! Upvoted and followed!
Posted using Partiko iOS
That candle is so beautiful @candleamor!! I quit using store-bought candles because of all the toxins, and this looks like the perfect filler for me :) By "candle scent", do you use essential oils?
Congratulations @candleamor! You received a personal award!
You can view your badges on your Steem Board and compare to others on the Steem Ranking
Vote for @Steemitboard as a witness to get one more award and increased upvotes!
Congratulations @candleamor! You have completed the following achievement on Steemit and have been rewarded with new badge(s) :
Click on the badge to view your Board of Honor.
If you no longer want to receive notifications, reply to this comment with the word
STOPCongratulations @candleamor! You have completed the following achievement on Steemit and have been rewarded with new badge(s) :
Click on the badge to view your Board of Honor.
If you no longer want to receive notifications, reply to this comment with the word
STOPCongratulations @candleamor! You have completed the following achievement on Steemit and have been rewarded with new badge(s) :
Click on the badge to view your Board of Honor.
If you no longer want to receive notifications, reply to this comment with the word
STOPCongratulations @candleamor! You have completed the following achievement on Steemit and have been rewarded with new badge(s) :
Click on the badge to view your Board of Honor.
If you no longer want to receive notifications, reply to this comment with the word
STOP