DIY Project: Building a 12' x 12' Shed
When I bought a house without a garage or shed I knew it wouldn't be long until I would have to do something about it. I am a pretty handy person so I need a place to put my tools, work on projects and store all the extra shit that we don't use often. I decided on a shed because I didn't want to share my space with a vehicle (lol) and after Hurricane Florence, I wanted something off the ground in case there was more flooding during the next storm.
I didn't want to buy one because they aren't made properly and they use crap materials, so I figured if I wanted something done right I had to do it myself. Besides, it saved me a few thousand dollars over buying one! And it would be nice to have a big project since I am a disabled veteran who has nothing but time.
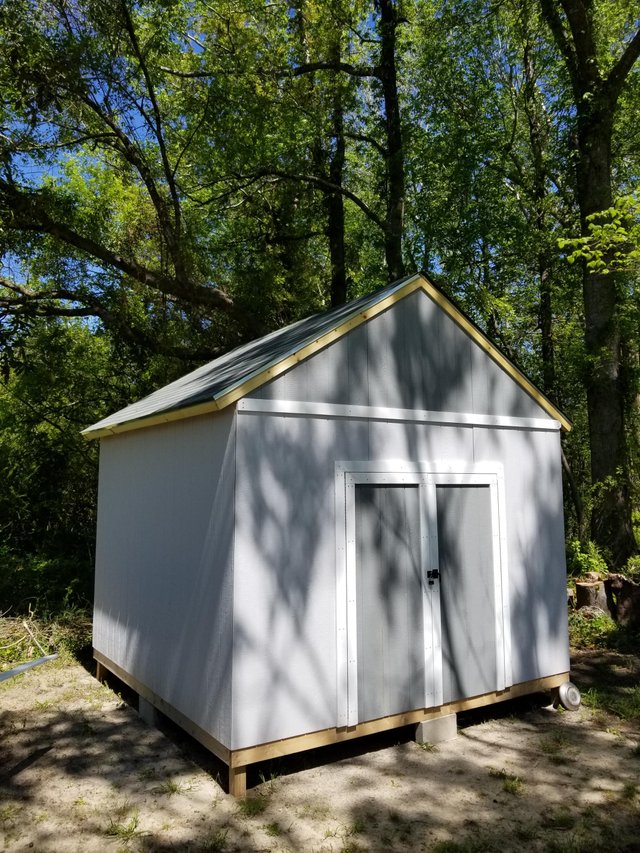
I had never designed or built a shed alone before, but I have helped to build a few garages and fixed up a lot of houses in my time so I didn't think it would be too hard. I started by visiting the big box construction stores to look at their designs to get an idea of how I wanted to build it. After looking at them all I decided to use my own design because I didn't like any of their designs. I went with a simple 12' x 12' square shed with 8' ceilings and two 3' foot barn doors.
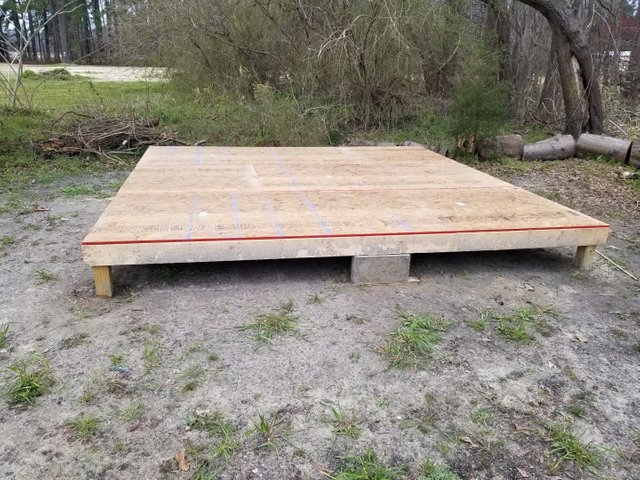
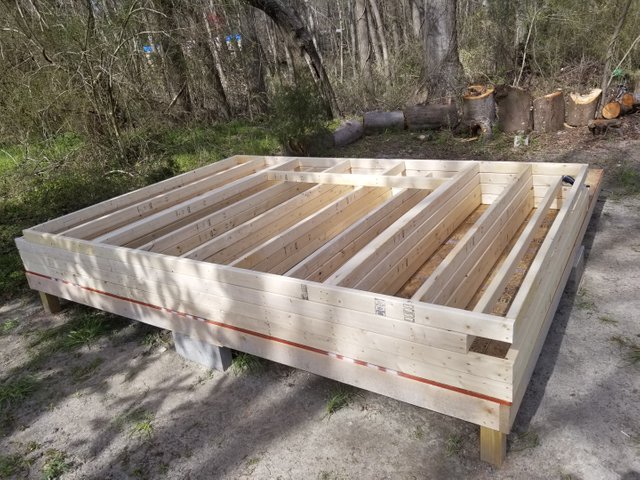
I wanted to raise it off the ground so I dug the corner post holes 3' deep (I would've gone deeper but I hit wet clay) and cemented in four 4' x 4's in each corner. Then I framed the floor with 2" x 10" x 12' joists starting along the outside then filling in the middle. I used 3-1/2" screws to construct the base of the shed.

Next came the floor, I used five 4' x 8' x 1/2" sheets of plywood to construct the floor. I screwed it down with 3" screws so it holds better, but I did leave a small gap between panels so the wood could have room swell in the summer when humidity is incredibly high and not get ruined. This is something you have to do in certain regions of the world, especially if you are close to the coast and somewhere warm.
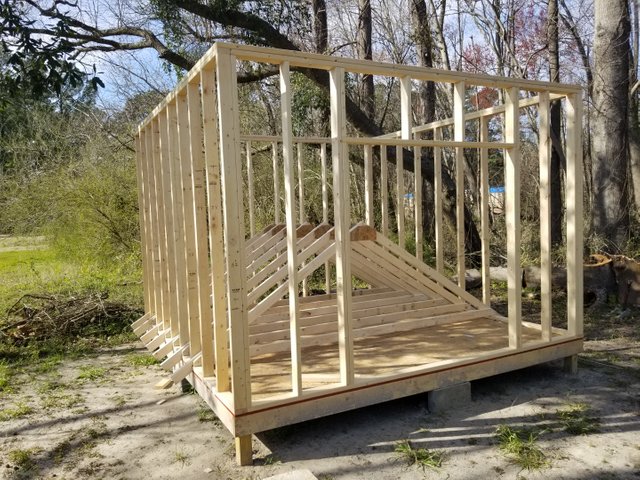
The walls came next. That was a bit more tricky since the only place I could build them was on the shed floor I just built, so I had to get creative. I built the walls properly, meaning I built them with the same specifications of a home, a 2' x 4' x 8' stud placed every 16" on center. Building it this way will make the shed much more sturdy so hurricane winds and rain won't be able to knock it down.
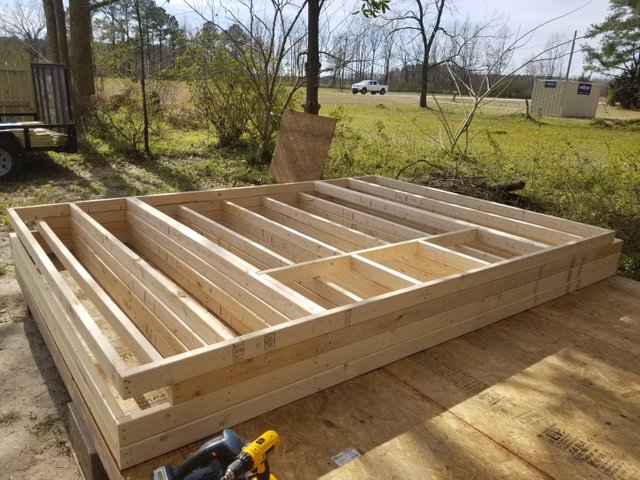
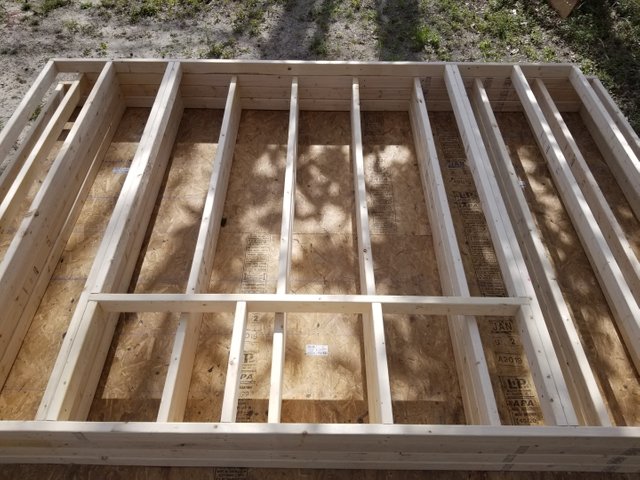
After building them came the task of getting the walls raised. I had a little bit of help from my fiance with holding them in place while I screwed the walls down to the floor and to each other. At this point it was starting to resemble a shed :0)

Before I moved to the next step I screwed down 2' x 4' x 12' boards along the top of the frame to make it a bit more sturdy and have it be ready for the roof to be put on.
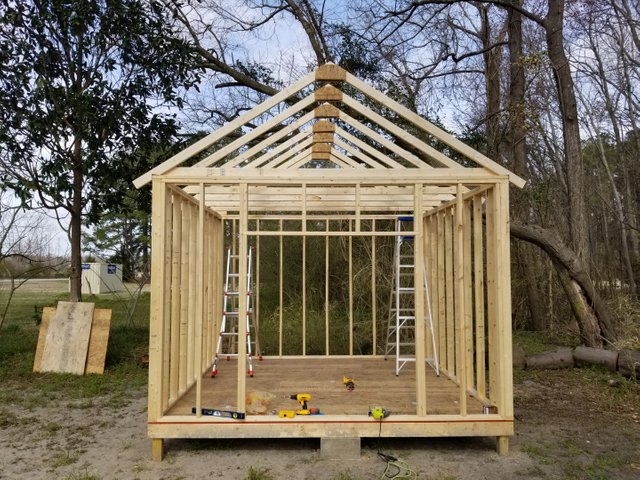
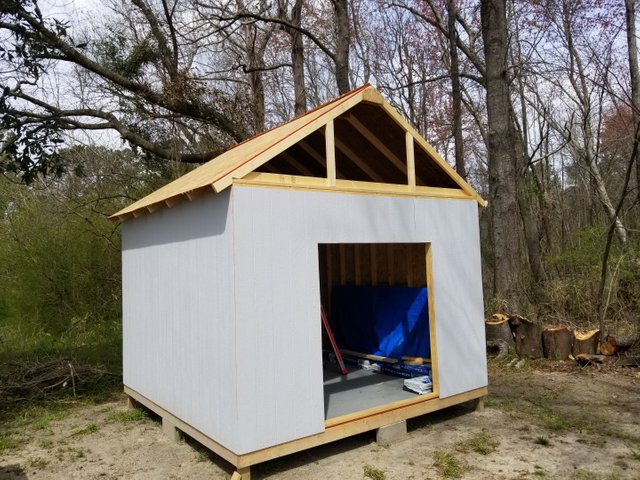
Next came the construction of the roof. I used 2' x 4' x 8' boards for the joists of the trusses and leftover scraps of plywood to build the trusses. It's best to screw down some boards to the floor to make a frame so all the trusses are exactly the same as you build them. I didn't do that at first and I had to redo all the trusses so they were all exactly the same, it took a lot of time but was well worth it.
Getting them up on top the shed wasn't bad, I did it by myself with a ladder. Once I got them in the right position they would stand on their own so I just had to screw them in quick. I used 4" screws and tacked them down with 4 screws on each side, I didn't want them moving!
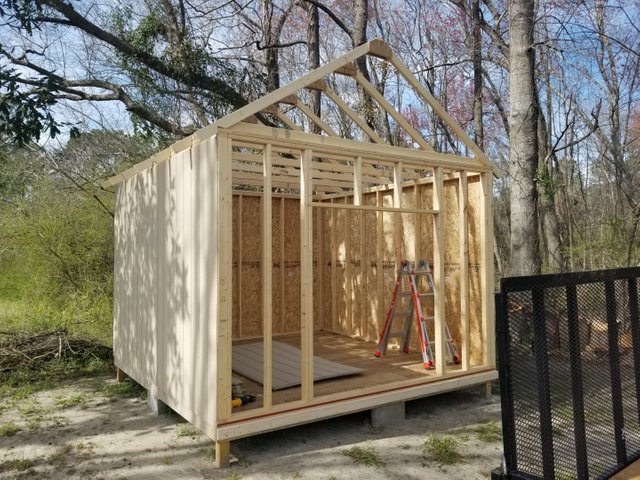
I decided to go with T-111 siding for the shed, it is mostly plywood with a nice wood grain face on one side. It is commonly used for sheds, garages and other outdoor buildings. This was another thing I had to ask for help with and once again my fiance came to the rescue. She helped to level and hold as I screwed in all the panels, it was some awesome teamwork if I do say so myself ;) I did put a 2' x 4' x 8' board along the bottom so we could rest the panel on something while I was screwing it in, that made life much easier for us.
I ended up having to paint the walls and floors before I finished building the rest of the shed because storms were moving in and there was no way I was going to finish the roof before the rain. Luckily the paint I bought was waterproof, so it only needed a few hours to completely dry. I decided to go with a two-tone color blue for the shed, the bottom light blue, the top dark blue.

I went with the 1/2 plywood for the roof as well so it would be sturdy. Getting them up on the trusses was probably the hardest part of this build. So with some sweet-talking I convinced my fiance to help me one last time on this project. We set up two ladders and struggled to push them up on the roof as we were slowly climbing the ladder. It was no easy task, to say the least, but we got it done!
Now I could finally finish attaching the siding to the top areas of the shed. It's these projects that take the longest because of all the angles, measuring, and cuts. Not to mention going up and down ladders too many times to count! LoL.

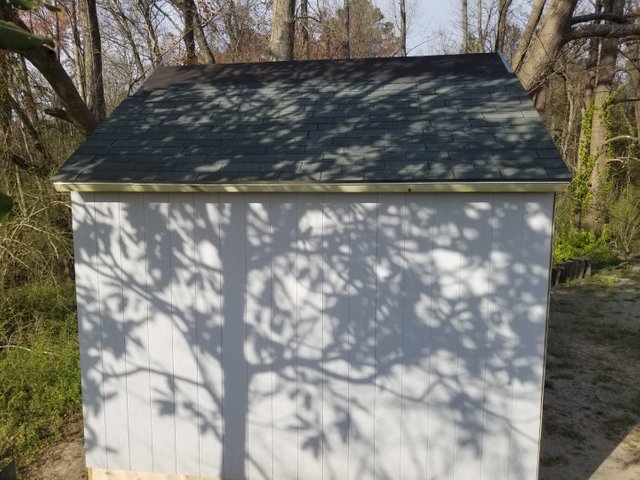
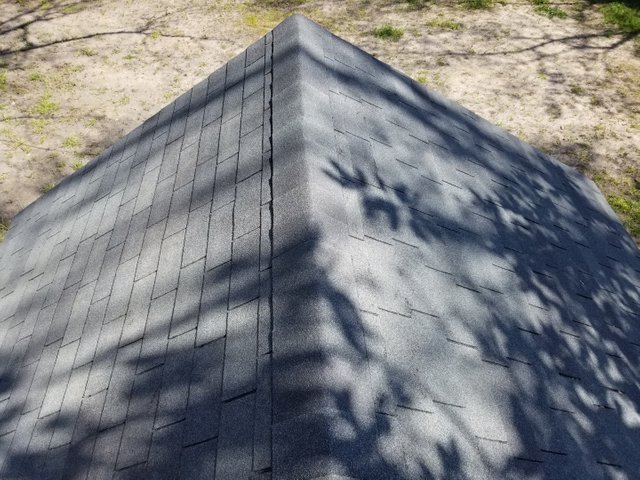
Next on the list was finishing the roof. To be honest, it has been a while since I had done any shingling, but I wasn't letting that stop me. First, I laid down the tar paper over the plywood on the roof and tacked it down with a few roofing nails. After that I put the flashing around the edges. Then came the shingles, starting at the bottom and working my way across and up. It didn't take long to remember and then things started moving along. It took me about 6 hours and about a thousand nails to completely shingle the roof.
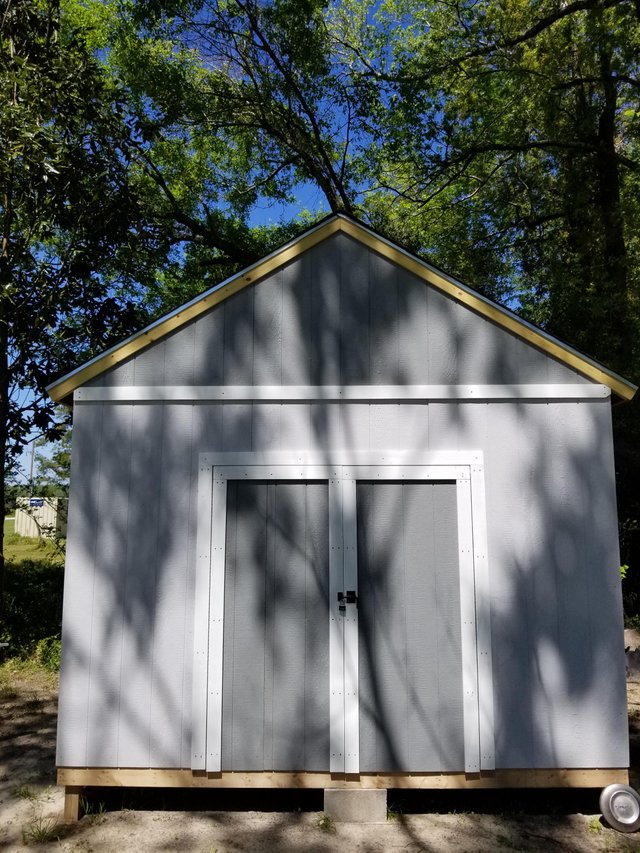
At this point I was getting to the end of the project, the building itself was built. Now I just had to build the doors and attach them. I made them from plywood and T-111 paneling so they would match the rest of the shed. I hung them with a long door hinge made for heavy shed doors, it runs the length of the opening.
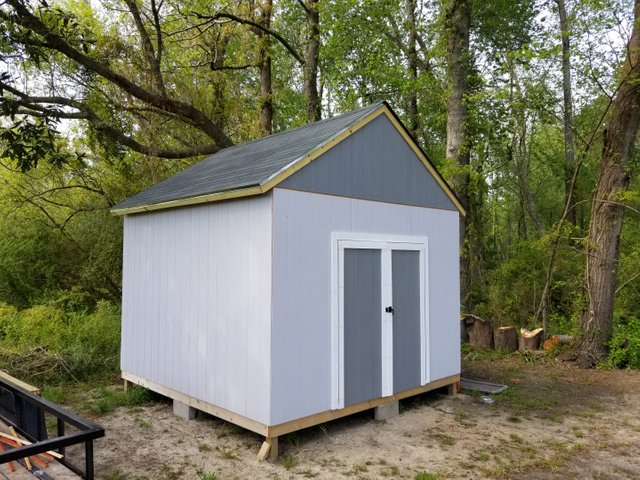
All that was left was after the hanging the doors was putting up some white trim to tie together the two-tone blue paint.
Hi there!
I stumbled upon this fantastic guide to building a 12' x 12' shed, and I must say it's been incredibly informative and inspiring. I'm in the process of planning my own shed project, and the insights provided here are a real treasure trove of knowledge.
One aspect I found particularly valuable was the section on materials. It's no secret that the foundation of any sturdy structure starts with quality materials, and that's where my interest in Plywood sheets comes into play. Plywood is such a versatile material, and I've been researching the best options for my project, and found a solution from CutMy DIY Store, they have ready-made sizes, and you can make to order, which made me very happy. The advice here has been incredibly helpful in guiding my decision.
I appreciate how this guide not only provides step-by-step instructions but also emphasizes the importance of choosing the right materials for the job. It's clear that attention to detail is crucial in constructing a durable shed.
Thanks again for sharing this valuable guide, and I'm looking forward to continuing my shed-building adventure armed with the knowledge I've gained from this resource!