| Step By Step Guide To Adding Photos To Your Posts And Profile | Pictures Inside
Uploading photos to Steemit can be tricky but with the right guidance this can become very simple. Ill explain below.
Step 1: Click "Submit a Story" in the top right hand corner of the screen

Step 2: Click the "editor" button above the text box
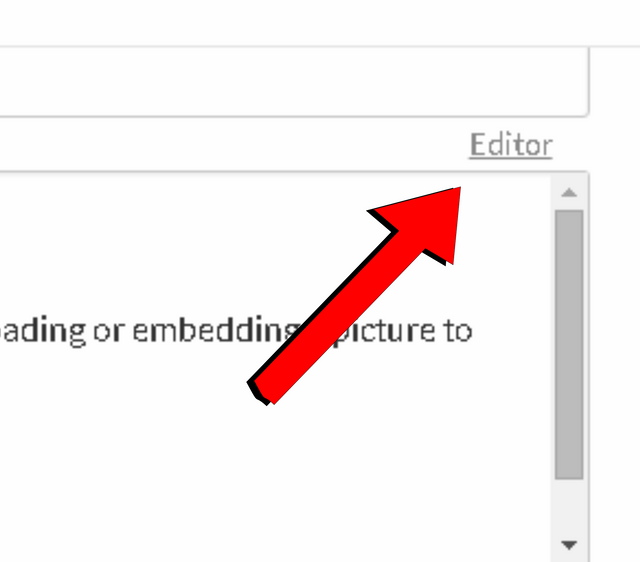
Step 3: Use Free Image Hosting Service
There are multiple hosting platforms available, All for free, Some of the ones I use include the following.
- http://imgur.com
- https://imgsafe.org/
- https://imgbb.com
- http://www.freeimagehosting.net/
- http://tinypic.com/

Every image hosting site has the option to either sign up to save photos or upload without an account. You can choose whichever you prefer. Most also include a drag and drop feature.
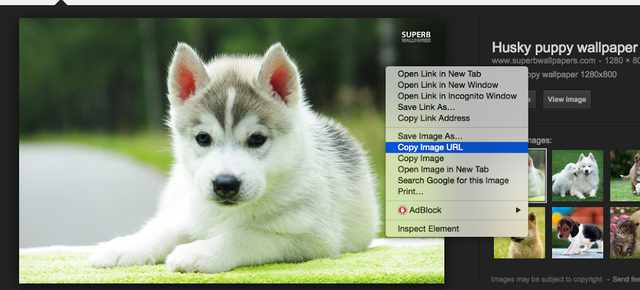
Step 4: Copy the (URL) to clipboard from Free Image Hosting Service
Step 5: Paste link inside of the editor field.
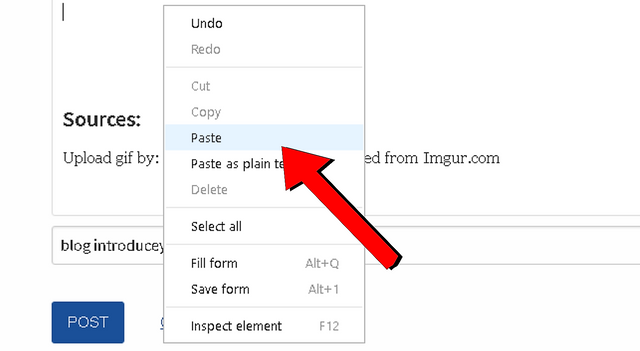
After pasting the image url you will now have the image added to the post. If you wanted to preview the image hit "raw html" located where step 2 is licated and scroll down to preview.
How do I upload a profile image?
Another very common question asked here on Steemit. I hope to shed some light on the matter below.
Adding a photo to steemit is very simple, Especially after learning how to add photos to your posts. All you ave to do is simply follow steps 1-4 from above and istead of pasting your link or url into a post you will go to Settings
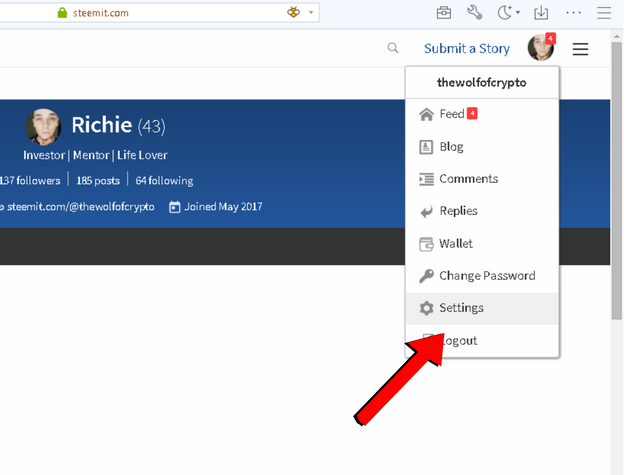
Then paste the Url in the designated field
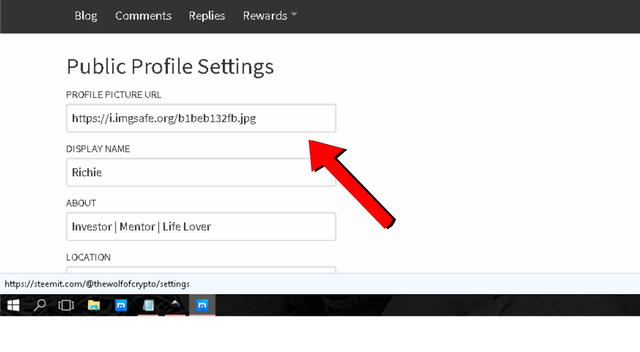
And there you have it. You are now a photo posting ninja here on steemit.
Sources:
Upload gif by: by ThatsWhatSheSed Sourced from Imgur.com
Copy url photo sourced from imgur.com

Hope that you enjoyed the content. If so feel free to follow for more. Upvote and Resteem to show your support and as always thank you for viewing.


Great info. I am new to this and uploading a photo is very confusing.
Glad to help
Very nice tutorial. Thanks.