A very late anniversary present

Hello all,
I was married on 11-3-2012 and this past anniversary (our 5th) I told my wife I would build her a table. I started on this thing in October and am just now getting done. Nearly 6 months later and my wife finally gets to have her table. Sorry babe.
I took a few pictures as I was building it so I will go into detail on what exactly I did.... except I won’t take 6 months to write this. I hope.
Step 1: figuring dimensions
I like to stick close to the golden ratio (around 1.618) when determining the length and width of just about everything I build. The space where my table will be going has room for a table with a max length of 5 feet. Normally, table tops are about 3 ft wide and around 4 feet long for 4 people, 6ft for 6 people, 8ft for 8 people. In my case 5ft is somewhere between a 4 and 6 person table which is probably odd but it fits for us. I wanted to incorporate bread boards on my table for the anti warping and strengthening properties they give, and I just like the way they look. So I had to keep that in mind when making plans. After choosing the lumber I wanted to use I came up with a 34 inch by 59 inch table top which is pretty close to that golden ratio. 34x1.618=55.012 so only 4 inches off.
Step 2: selecting materials

My situation in selecting materials is probably fairly unique. Having access to two different lumber companies gives me a nearly unlimited selection. Also, I relieve our main Sawyer at Byrd lumber in the evenings so if I cut an interesting board or timber while I’m sawing, I will tell the edger man to pull it to the side for me to take home. At Byrd Lumber we are a southern yellow pine mill but occasionally some cypress, cedar, cherry, etc may make its way here and we saw it up for friends or family. The pine we sell to wholesale companies. My favorite wood to use is quarter sawn old growth pine. The stuff is nearly unbreakable and absolutely beautiful. Here’s an example of a quarter sawn 1inch board.
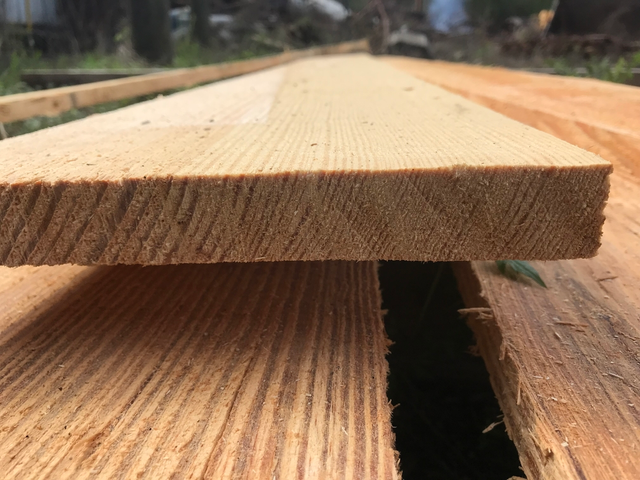
I didn’t use this type of wood on her table but if you get a chance to work with it, do it! The grains on a quarter sawn board or timber are vertical instead of horizontal which makes it highly resistant to warping, cupping, and breaking.
On my wife’s table I chose some cypress that I had sawn myself and had stacked in my shop for over a year. A year of air drying should be fine for most softwoods that are 1 inch thick. I love the look of cypress. So many different colors and beautiful grain patterns. It’s great to work with, light and decently strong. Cons to cypress are it is volatile when it comes to moving with the weather/climate, so be sure to have it acclimated to your home’s interior temp and moisture content, also cypress is a soft wood so any ding you put on it will probably show up(so use a good hard finish).
I let my wife choose between two options of cypress:
2x12 Pecky cypress

Pecky cypress forms in a cypress tree by a fungus that slowly eats away at the inside of an old tree leaving these cool striations throughout. When I cypress tree is cut down that has this fungus, the fungus dies with the tree. I think it’s beautiful but my wife liked the second option better so happy wife happy life.
1x6 cypress
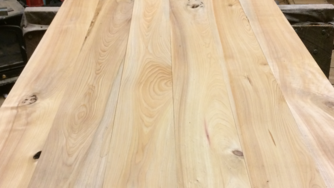
This picture is after I selected the straightest, most warp free, and structurally sound pieces I had, then planing them from rough stock down to 3/4”. I needed 8 pieces, 6 pieces a little over 4 feet long and 2 pieces a little over 3 feet long for the bread boards. I loved the grain patterns these boards had and the coloring so I wasn’t too upset on not getting to work with the pecky cypress just yet.
When picking through lumber be sure to keep an eye out for excessive wane(rounded edge where outside of tree didn’t get cut out), cracks, rot(which may only be evident by touch), encased knots(makes a board easily breakable), any loose knots, excessive crook(board is crooked down the edge lengthwise), excessive cupping, and bowing(board is bowed down the length on the face side). So many things can be wrong with a piece of wood but don’t let minor imperfections deter your choice as long as it is structurally sound. Some imperfections add to the character, uniqueness, and beauty of the piece.
Step 3: preparing your stock
Many of you will not have to perform some of these steps because you have will have bought your lumber already dressed and kiln dried and edged. Since I brought the lumber home rough and green I had more work ahead of me.
Next I cut the pieces to the desired length for ease of handling. If you are working with rough wood that you intend to dress, you should leave the boards about a foot long if possible, to ensure that any sniping(dips in the wood when the piece goes in or out of the planer) can be removed and so that you’ll have enough room for your tenon in your mortis and tenon joint to the bread board. The mortis and tenon joint is one of my favorite things in carpentry. It’s pretty hard to do it correctly but when you do, you have an extremely strong joint that will last as long as your wood does.
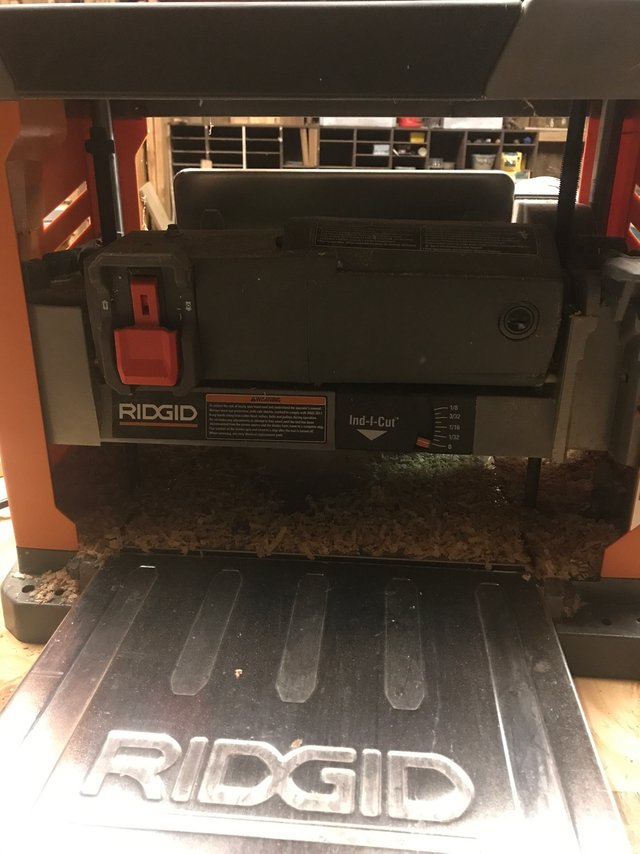
I then planed all the boards down to 3/4” which is the actual standard thickness for 1 inch lumber. I have access to an industrial sized planer, sizer, and moulder but I also have a small planer I bought for small projects such as this. When all the boards are slicked up you should inspect them again for cracks or shakes or other hard to see defects you may have missed while they were in the rough.
Some of my boards had some crook in them. Unfortunately, I don’t have a straight line rip saw in my shop, so I clamped all 8 boards together with the crooks opposite on every adjoining piece and then sent them through the planer edge up, flipped them over and sent them back through. After that my boards were perfectly straight and all the same width.
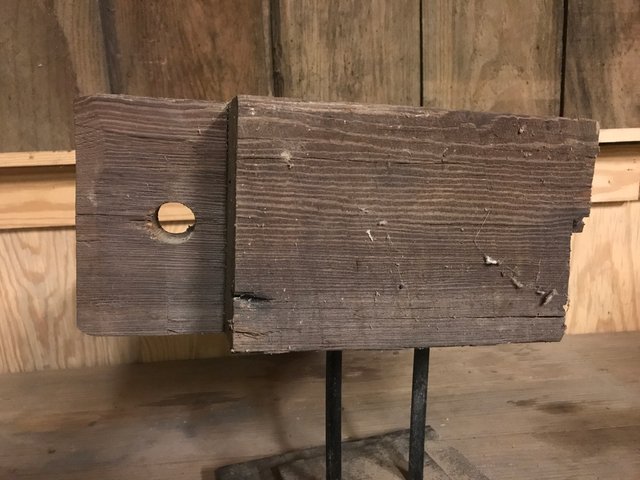
I employed the mortis and tenon joint to connect the bread boards (pieces on the end) to the main bulk of the table. I put the mortis (slot) in the bread boards and the tenon (tongue) on the main boards. This is a very old 8x10 heart pine timber that was part of the floor of a house built in the 1800’s. Back then they didn’t have 4 inch deck screws, so everything was mortis and tenonned and pegged.
I’m going to stop there for now and go into more detail on the mortis and tenon and describe the finishing process, which incorporated the use of a Grizzly double drum wide belt sander. My uncle let me use it and it is one hell of a machine. Super jealous.
Anyway that will finish the table top. I’ll do a third post on the base describing how I lathe turned the legs and mortis and tenonned the aprons to them. Please tell me anything you’d like me to add and if I did a good or bad job putting this together. This is the first time I’ve ever posted anything like this anywhere. Hope you enjoyed and thanks for reading.
Looks great! I'm a sucker for heavily "naturized" wood...that pecky cyprus is sexy looking!
Oddly enough, I made my wife a 6 ft kitchen table from spalted pecan just last year. Years ago my step father had a small mill. Had some really thick/wide chunks of southern pecan. Long story short, he died, wood sat, fungus came, made wood beautiful, dan took it to the mill, to get some good slices out of it...
Ultimately, the wood had softened up a bit, so I had to do a little bit of epoxy work on the underside and had to get creative with my cutting. But, after fixed up, jointed and treated, man, that wood came out beautiful!! (did the legs industrial (metal) no wood there.
Great stuff man, thanks for sharing!
Good grief sounds like you had some work cut out for you! I bet it turned out pretty though. Post a pic! I used some epoxy on this table to fill a couple knot holes. First time I ever worked with it. I definitely liked using it.
yeah, the epoxy is a useful tool. I used it one other time for our barnwood dining room table (that wood had some serious rot to dig out and repair!)
Ok, here is the spalted pecan...nowhere near the amount of woodwork you have on your piece (I'm but a humble amateur woodworker), but the wood was special and had some beautiful fungus stains :)
First time I've used industrial piping on a table (used it on this huge checkerboard cutting surface I made for our kitchen), needless to say it is a very sturdy table.
Man that is beautiful. I don’t think I’ve ever run across any spalted pecan. I’ll have to find some of that. Yep I bet you could put a baby elephant on your table!
You can read about us here
Thank you!
We have started a woodworking community here on steemit and would welcome you. We have a discord channel, link here: Woodworking on Steem Discord Channel
And a weekly woodworking post competition ,which you can read about here
Thanks
@jist
Awesome! Thank you!