Brewing Kombucha
Hello everyone!
Today I'm going to show you what I do to brew kombucha.
What is kombucha?
Kombucha is tea that is fermented using a scoby to produce a probiotic and nutrient rich beverage.
Well... what the hell is a scoby?
A scoby is a living culture of bacteria and yeast, and derives it's name from just that, a Symbiotic Culture Of Bacteria and Yeast. Now you're probably thinking "Eww that's disgusting", and it certainly sounds gross. However if you know anything about apple cider vinegar and mothers, kombucha is brewed in a similar fashion but using different bacteria. It's a rubbery, tan colored mass of cellulose that floats at the top of the kombucha. If you've ever swallowed some, you'll remember it's snot like texture.
So what is it good for?
Simply put, kombucha makes an excellent digestive aid as well as a refreshing drink. Some brewers may say it can cure a variety of ailments, such as cancer, arthritis and depression. However these claim have not been scientifically proven and make kombucha sound like snake oil, which will only prove harm it's reputation.
Is it safe?
There is a lot of controversy as to the safety of home brewed kombucha. Even though the fermentation happens in your home, it may still be subject to any wild strain of yeast and bacteria floating around. That being said, one must look back to how old kombucha really is. Research shows kombucha to be anywhere from 200 to 2000 years old. Not a very definitive number, I know, but one thing is certain. If they were brewing kombucha way back then, its safe to say that their kitchens then were far from as sterile as our kitchens today.
It's really up to you to determine if you want to brew your own, if you're not sure don't be afraid to do some research on it. With that being said, I have to make a disclaimer.
If you decide to brew kombucha, you are doing so of your own choice and free will. The information posted here is a summary of my experience and the steps I took to get there. The results I receive may not reflect in kind on your own results if you choose to copy what I have done.
Here are the materials and ingredients I used.
Materials:
- 1 gallon glass jar with rim
- Cheesecloth
- Kitchen twine or butchers twine
- Scissors
- Old clean t-shirt
- Rubber band
- Dish soap
- Aquarium thermometer
- Pair of disposable gloves (Not a requirement but I use them)
Ingredients
- 4 quarts water
- 1 1/4 cups white granulated sugar
- 1/3 cup loose leaf black, green, or white tea (1/3 cup is approximately 6 tea bags)
- 1 SCOBY in 2 cups starter tea
- Distilled white vinegar
Step 1: Clean the glassware
Using a mild dish detergent, I cleaned the glass jar inside and out with hot soapy water. After drying with paper towel, I then took 1 cup of distilled white vinegar and poured it inside the jar. I swirled the vinegar around the inside of the jar, making sure to cover everything, and then dumped it in the sink. There is no need to dry the jar again after you dump the vinegar. The vinegar is there to help clean any remaining soap residue as well as provide an acidic wash to sterilize anything that the soap may have missed.
A note on vessels to ferment in. It's advised you use glass, ceramic, or stainless steel to ferment your kombucha in. Glass is best because it cleans easy and is non reactive; plus you can see your brews progress as it develops. Stainless steel is good too, however any other type of metallic vessel is not advised because the acidity of the kombucha can leach unwanted flavors and toxins in to your brew. Ceramic crocks are great as well, but you MUST make sure you are using a certified food grade crock to ferment in. A lot of ornamental crocks use a leaded glaze, which the acidic environment of kombucha can allow lead to leech in to your brew and poison you.
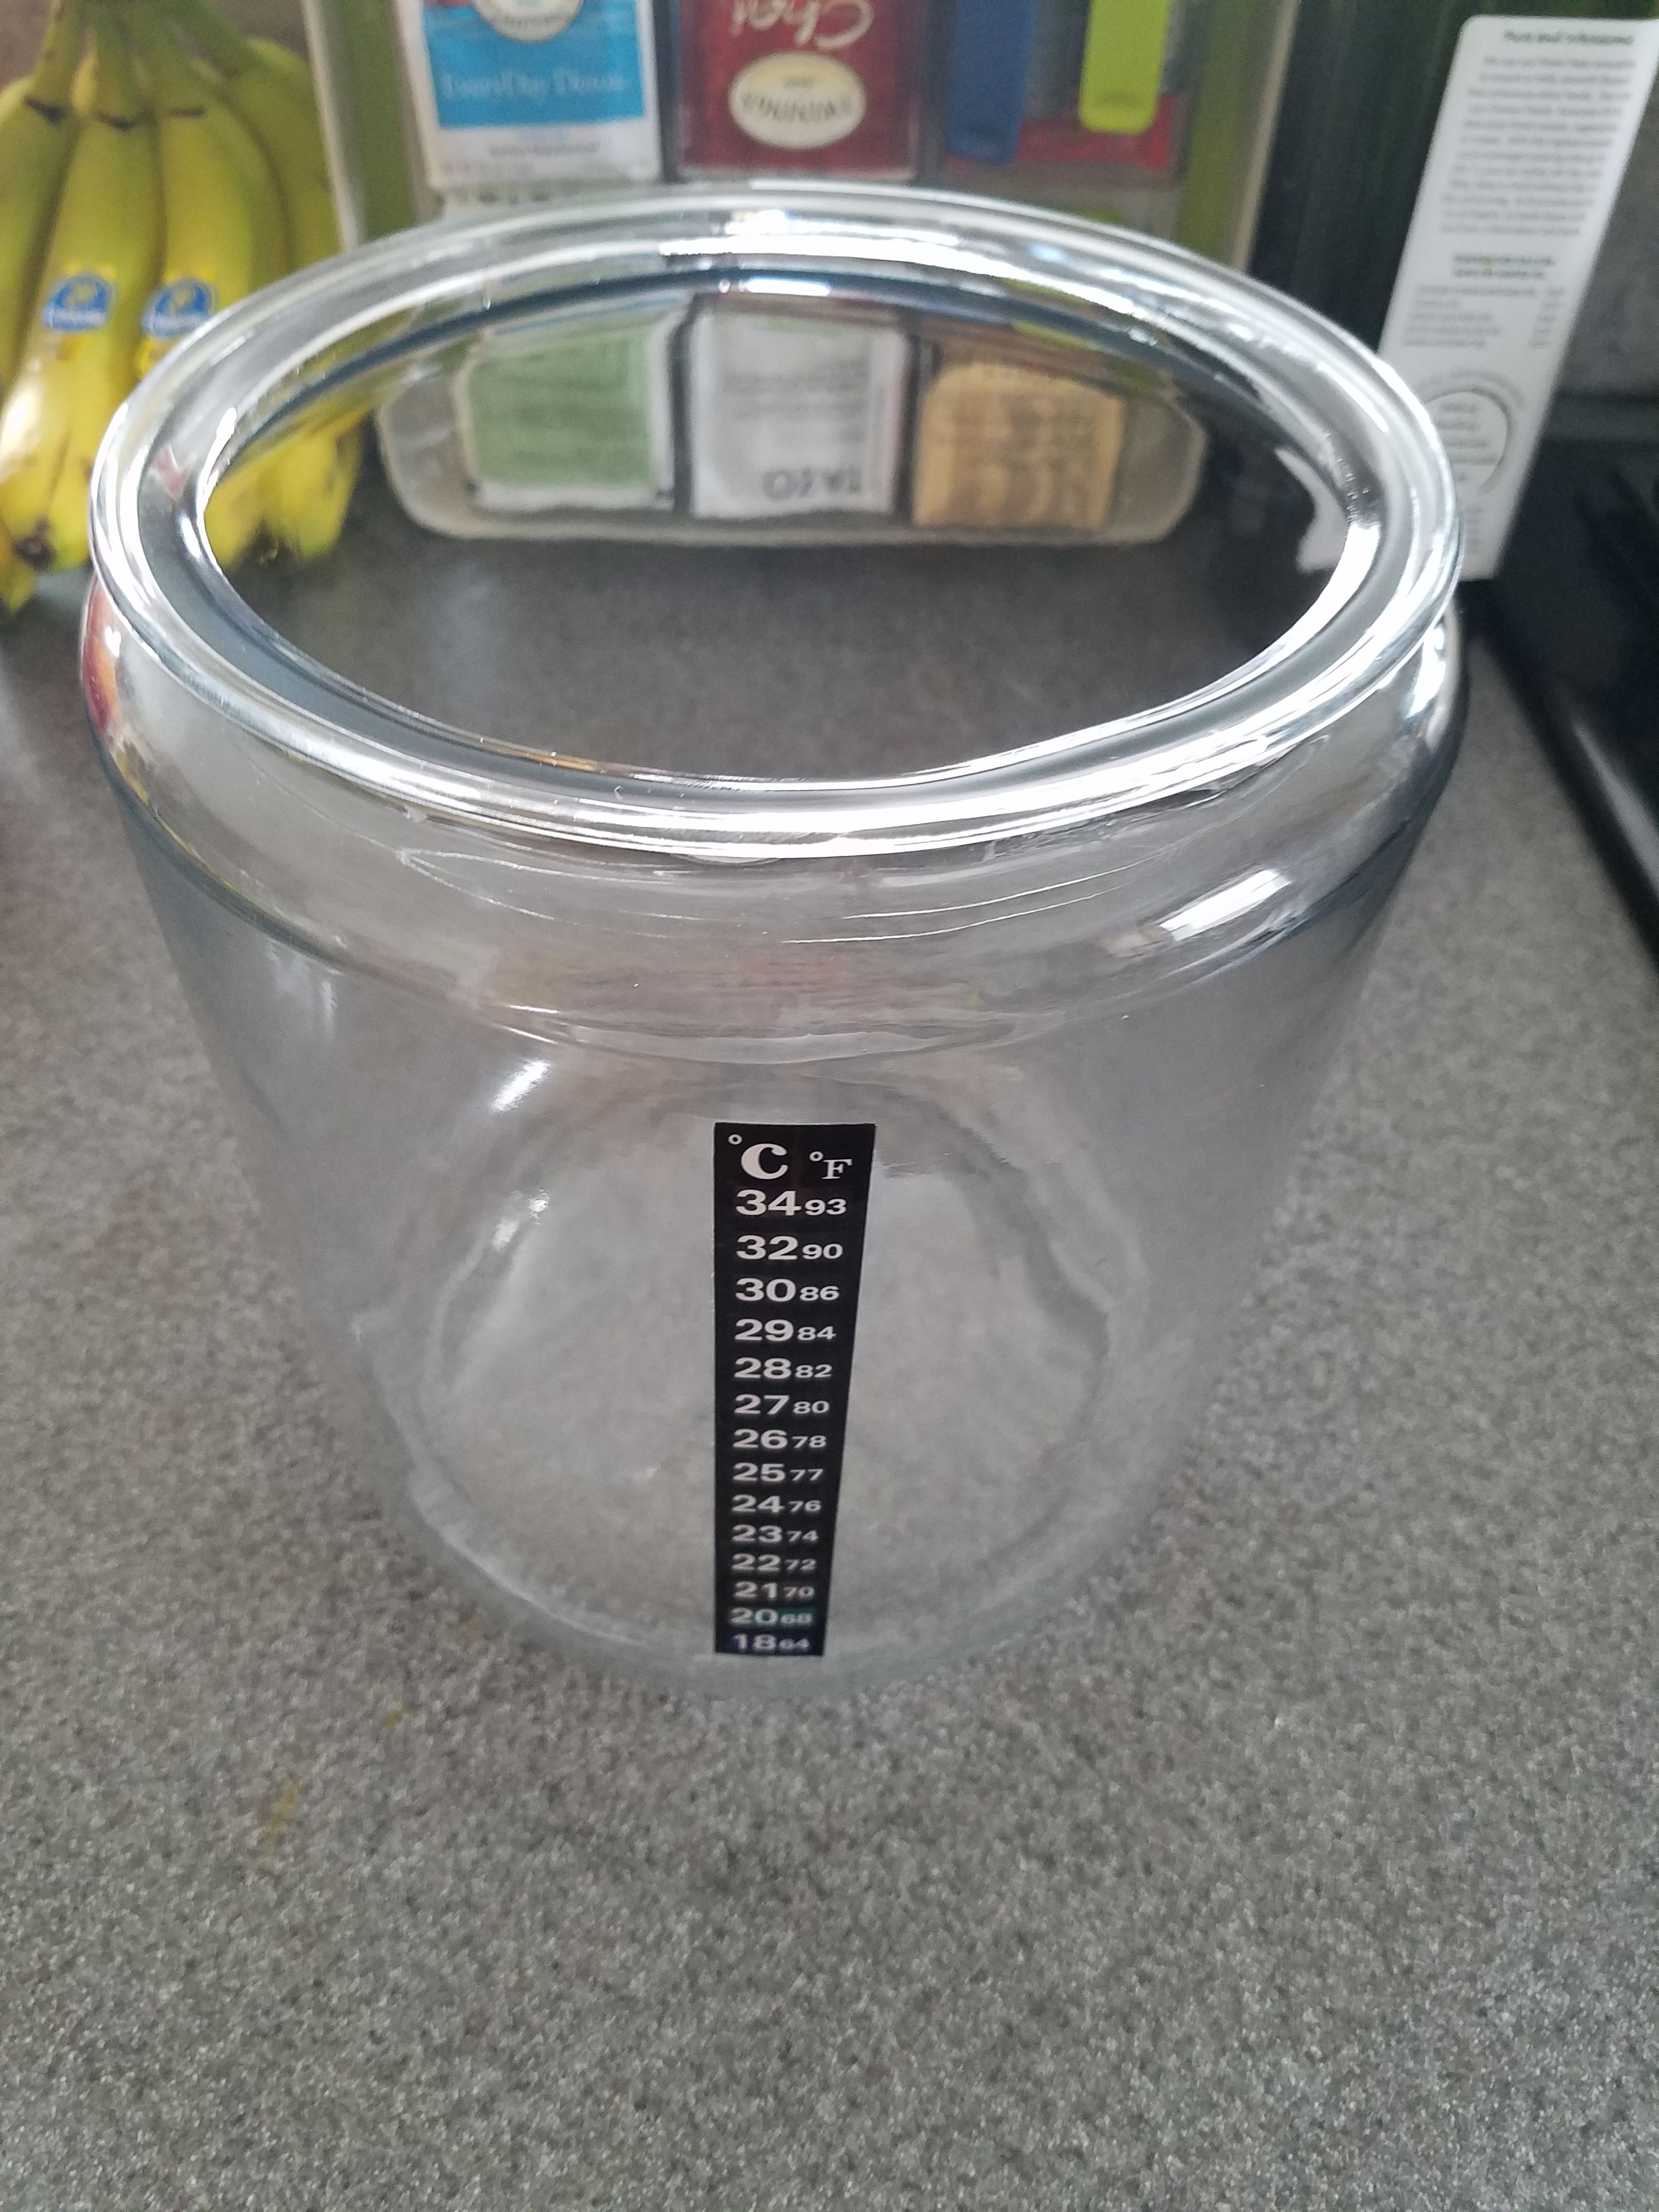
You may have noticed the black strip. This is an aquarium thermometer. I highly recommend one because it will come in handy as the ferment progresses.
Step 2: Prepare the tea
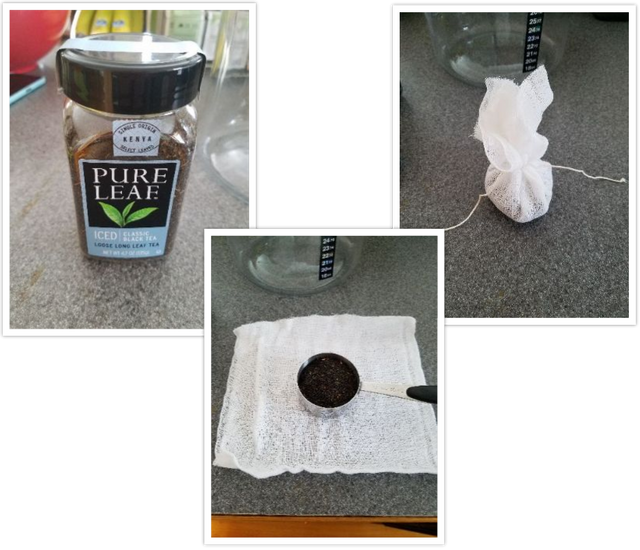
Cut a section of cheesecloth 3-4 layers thick to approximately 8 inches square. Measure out 1/3 cup of loose leaf black, green, or white tea. Pour tea on to the cheesecloth and tie it tight using some kitchen or butchers twine. There you have it, one tea satchet.
I've mixed teas before too, like 50/50 white and black. Use black tea for a sharp flavor, green tea for a more earthy flavor, and white tea for a lighter flavor. Interesting note about caffeine, as kombucha ferments, the caffeine content is reduced significantly (Up to 1/3 of its original potency). Black tea has 30 to 80 mg caffeine per cup, after ferment this will be reduced to 10 to 25 mg!
Step 3: Brew the tea
There are two methods to do this.
Method 1: Bring 4 quarts of water to a boil. Add sugar and stir until dissolved. Add tea satchet (or bags) and let steep for 10 minutes. Wait for tea to cool to 78 deg F (26 deg C). Remove tea satchet (or bags). Pour tea in to glass jar.
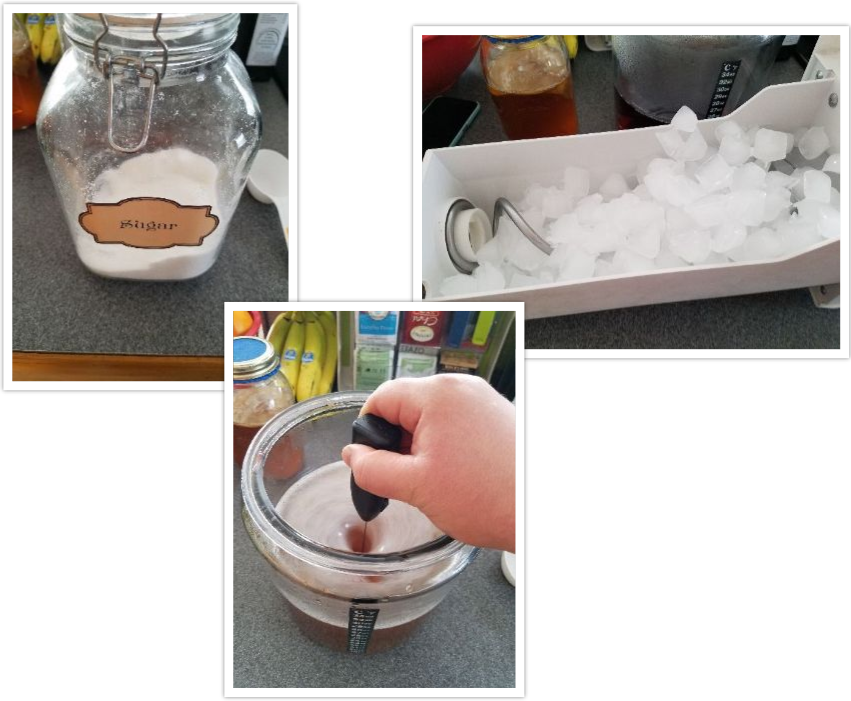
Method 2: This is the way I do it. Add 2 quarts of water to a pot and bring to a boil. Pour water in to glass jar (But go slow! Otherwise thermal shock can break the glass!) In my case I used my tea kettle. I then added my sugar and stir until dissolved. I had the aid of my handy little IKEA milk frother (Link). Then add the tea satchet and let steep for 10 minutes. After 10 minutes remove satchet.
Now here's where it gets interesting. Notice I only heated 2 quarts of water. The reason behind this is because I can now use ice cubes to bring my tea to the 78 deg F (26 deg C) I'm looking for. Add Ice slowly and stir with a clean spoon until target temperature is met. I used an infrared thermometer to check, but a probe thermometer will work too (The aquarium thermometer will work but may provide inaccurate results in this stage of the process).
Step 4: Add the SCOBY
But wait a minute. Where does one get a scoby?
No worries. There are a few places you can get a scoby. Scoby's can be purchased online from sites like Amazon, Etsy, Thrive Market, Kombucha Kamp, and more! If online is not your game, you may be able to find some locally at a health food store or local kombucha brewer.
Anyway, once the target temperature of 78 deg F (26 deg C) is reached, the scoby is added along with it's starter tea (What it's been living in). I'm wearing gloves for this, you shouldn't need to touch the scoby when you dump the starter tea in to your brewed tea. I'm handling the scoby because it's one I split from another batch I've made previously, so I'm inspecting it for any unwanted mold growth and checking it's overall health.
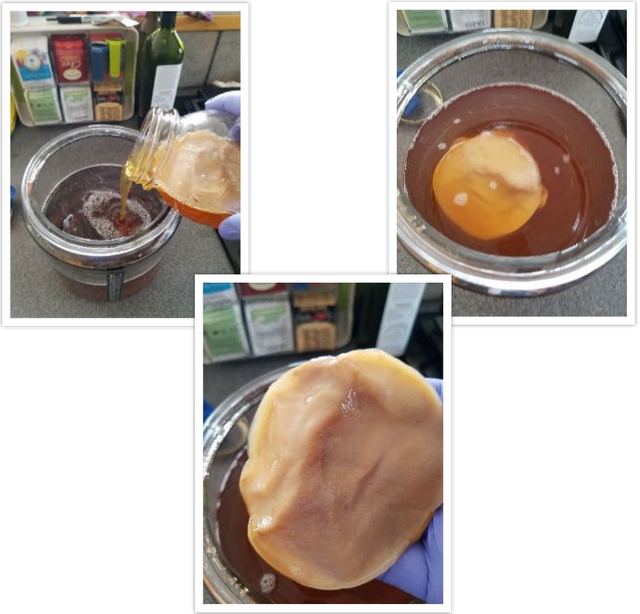
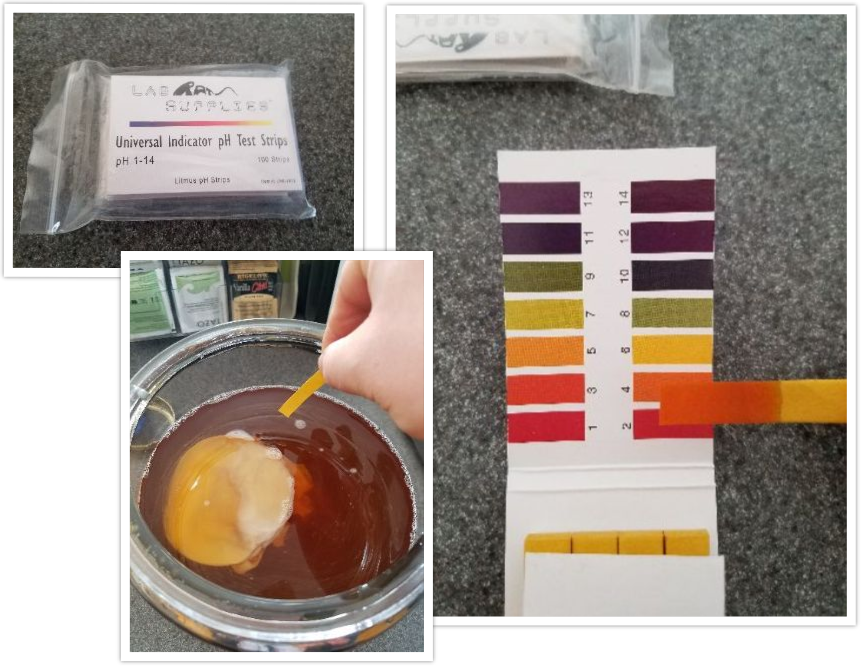
The starter tea the scoby came in is vital to the process. Scoby thrives in an acidic environment, and part of the fermentation process helps to create this environment. The high acid environment makes it hard for invading bacteria and molds to thrive (Same reason we pickle certain foods when we're canning them). The ideal PH for a healthy kombucha scoby is between 3 and 4. A PH of 3 is ideal, and any less than that is entering raw vinegar territory which may not be too tasty (Unless you're in to that kinda tangy sharpness). The scoby is great at managing it's own PH levels once it gets them in range.
If the brew becomes too neutral, we open the scoby to attack from foreign invaders, so adding the starting tea should drop the PH of your brewed tea to a level of 4 or less. If however, the PH does not fall in range, distilled white vinegar can be added in small amounts and gently stirred until the PH is met. Only use distilled white vinegar. Apple cider vinegar will affect the flavor and may contain traces of the vinegar mother that can affect your scoby's health. Rice wine vinegar is a no no as well. Just stick to distilled white vinegar.
Step 5: The ferment
To ferment your kombucha, it needs to be able to breathe, but we want to keep bugs and dirt from entering our fermenting vessel. This is achieved by using heavy layers of cheesecloth, a tea towel, or in my case an old but clean t-shirt. Whatever you choose to protect your brew needs to be attached to the vessel in such a way where it will not come loose and fall off of or in to your fermentation vessel.
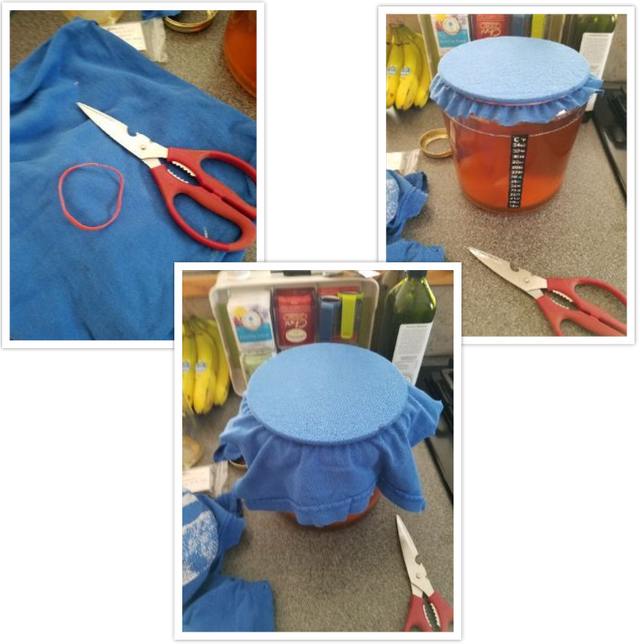
Now we want to keep our kombucha warm. Ideal temperature is 78 deg F (26 deg C), but kombucha can ferment within 64 deg F (18 deg C) to 86 deg F (30 deg C). Anything above 86 deg F is the danger zone and will hurt the scoby, anything less than 64 deg F will slow the scoby down and place it in a dormant state. Remember the aquarium thermometer? This is where it becomes useful in tracking temperature without having to guess based on feel, or risk contaminating the batch to stick a thermometer probe in. Pretty smart, huh?
When is it done?
On average of a week but the temperature can affect this process. The warmer it is the faster the fermentation will take place, the colder it is the slower it goes. If you maintain target temperature of 78 deg F, a weeks should be sufficient.
But how do I know!?
You can do a taste test. Get a hold of some clean paper wrapped drinking straws. Open a straw and slide it past the scoby in to the center of the liquid and cap the end of the straw with your finger. Pull the straw up and taste the liquid. It should have a tanginess to it, similar to vinegar but a bit sweeter. It's really up to you to decide what tastes good to you.
Step 6: Bottling
Your kombucha should be decanted in to a clean glass vessel without the scoby and placed in the refrigerator. You can discard the scoby if you wish or save it to brew another batch. If you choose to save it, you will need to save 2 cups of your kombucha for it to live in. I tear a small chunk of the scoby off and place it in a 1 quart mason jar with the 2 cups of starter tea then I place a small patch of t-shirt I've cut and hold it in place with a mason jar ring. You will need to refrigerate your scoby in starter tea if you don't plan on using it within the next 2 weeks. You have 5 weeks to use the scoby you save.
If you dont want to store a scoby and want to keep going you can drop it in to another batch of cooled brewed sugar tea (Don't forget 2 cups of starter tea for PH) and make another batch.
Isn't kombucha carbonated?
Yes, but it doesn't have to be. To carbonate your kombucha you need to store it in a sealed vessel that can be easily vented in high pressures. The carbonation time should take from 3 to 5 days at room temperature, but it's really up to you as to how carbonated you want it. The best bottles for carbonating kombucha are Grolsch style because they can withstand high pressures and the metal clasp can flex a bit, allowing the bottle to vent itself if the pressure becomes too great (But not always, be careful of bottle grenades).
I personally use a sterilized 2 liter pop bottle, as they can withstand a tremendous amount of pressure and can provide for super carbonated kombucha! I also don't have to vent the pop bottle so I won't lose any carbonation potential. I then decant the 2 liter through a cheesecloth filtered funnel in to a couple medium sized grolsch bottles and refrigerate until fully chilled.
Isn't kombucha flavored?
Yes, it is, but again, doesn't have to be. To flavor kombucha it needs to go through a second fermentation. This secondary fermentation happens before, or in some recipes, during carbonation. I will cover secondary fermentation's in a later post. Until then, I need to wait for my kombucha to brew!
This post is real good, I like your attention to details and the pictures :)
Thats a great post. Never heard of Kambucha before!
Sounds pretty long and intensive to make, not really sure i would make it, but i bet its got some real benefits.
Thanks for sharing man.
Congratulations! This post has been upvoted from the communal account, @minnowsupport, by mraggaj from the Minnow Support Project. It's a witness project run by aggroed, ausbitbank, teamsteem, theprophet0, someguy123, neoxian, followbtcnews, and netuoso. The goal is to help Steemit grow by supporting Minnows. Please find us at the Peace, Abundance, and Liberty Network (PALnet) Discord Channel. It's a completely public and open space to all members of the Steemit community who voluntarily choose to be there.
If you would like to delegate to the Minnow Support Project you can do so by clicking on the following links: 50SP, 100SP, 250SP, 500SP, 1000SP, 5000SP.
Be sure to leave at least 50SP undelegated on your account.