Blogger Secrets - How I Edit My Pictures (3 Free Tools)
In a previous episode "Blogger Secrets - The Picture Perfect Feed" I shared with you some practical advice about Blogging and how to structure your posts that they are visually pleasing, appeal to your audience and make you a better blogger. As I mentioned before: " Since we all are visual beings and appreciate beautiful aesthetics... which means your audience has no other choice (assuming they are human) but to appreciate it and love scrolling through your blog. Just like we "eat with our eyes" we consume anything else with them and they decide whether or not will give it a try. Especially if you are building a brand (personal or not), blogging on Steemit or elsewhere this could be a game-changer for your establishment.
So I asked you in that previous post if you'd be interested in a list of my favorite tools aka. Free APPS that I use to edit my images and make them look slightly better. Since I received so many positive comments and saw that many of you found the tips already helpful and were interested in my editing tools, I will now finally share it with you!
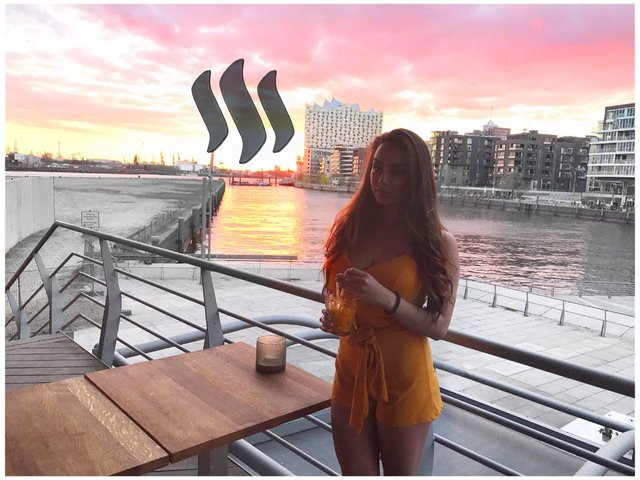
After:
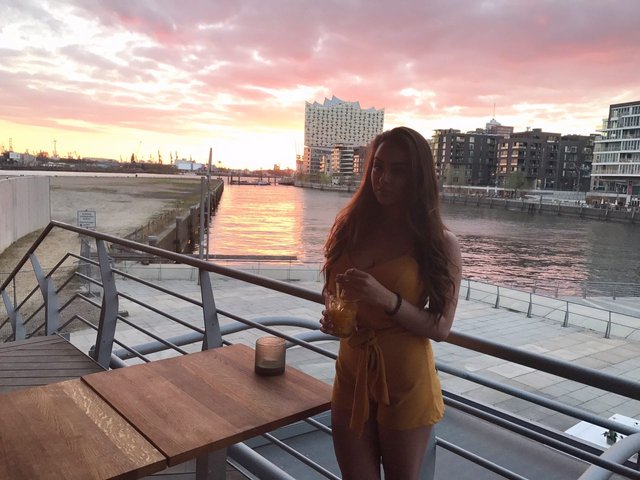
Before:
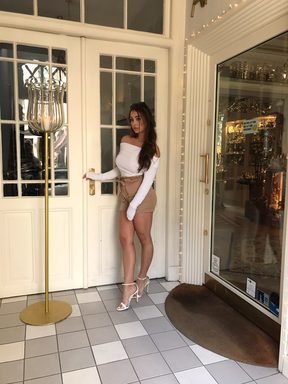
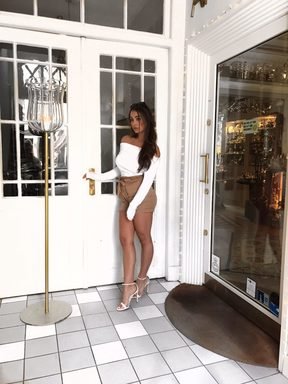
The 3 APPS that I use:
1. Facetune 2
For editing details, whitening, b&w, softening
2. Snapseed
For color correction, setting the tone and editing areas.
3. Adobe Photoshop Mix
For adding a layer (e.g logo)
Facetune 2
By far my favorite APP! Without further explanation, check out the following gifs and I'm sure you'll understand why...

Black & White: One of my favorite effects. Especially if you are building a brand with a color scheme and even in general to make your feed more even and aesthetically pleasing, it is an amazing tool to B&W some areas in your image, and highlight others.

Whitening: This is probably my favorite effect out of all of them. I just love cleanness and especially when in the real photo the white looks rather yellowish, with this tool you can turn it into shining white.

This tool is perfect for perfectionists, like me, as you can zoom in and make sure to cover every little corner.


And I love using it on backgrounds and any white area in the picture.

Smooth: Yup this one is pretty straight forward. You can make any area smoother. This is great for areas like faces or body parts in general, as long as you make sure to use the adjuster.

Vibrance: If I like to embrace the color in some parts of the image, I use this effect to make them stand out. But be careful, you don't want them too much in contrast so feel free to play around with that bar on the bottom.

Glow: Another great effect to further highlight parts of your image. Again, make use of the bar on the bottom to make sure your image doesn't get too shiny.

Details: Finally you can embrace details by increasing the sharpness with this effect.


Snapseed
This APP is amazing for color correction! If you want an entire background lighter or darker for example, or a person, or a thing. There are many great features, but to be honest I have only been using the "selective" tool that lets you detect certain areas and change their brightness, contrast, saturation, and structure.


Adobe Photoshop Mix
And finally: HOW I EDIT THE STEEMIT LOGO ONTO MY PICTURES - ON THE GO!
Yes, there is a mobile version. Some of you already know this, in the early days on Steemit I was purely blogging from my phone, because my laptop was broken. And even though I wasn't using the logo on my images back then, I just recently again was traveling, had my laptop in my already checked-in bags and time on my hand to write a blogpost. So I figured I needed to improvise, to maintain my blog structure and find a mobile way to edit in the logo. And I found a great one that lets you add as many layers as you like!


You can even adjust the color!

And voilà! Your pictures look at least 10 X better than before.
I hope you enjoyed this episode of blogger secrets. Please feel free to comment any requests for tutorials, suggestions, questions etc.
Question of the day: What's your favorite editing APP if you have one and why? OR
What's your favorite APP in general?
Much love,
- Mrs.Steemit
Great tutorial. The animated gifs really help.
You have me convinced. I need to download those tools.
Wow thats pretty AMAZING. I only use my phone for everything and I was wondering how I could get better pictures. You solved my problems. Thank you thank you so so so much! Awesome photos!
Glad to hear that I could be of help. Keep it up! :)
I've always wondered how you and your friends put the Steem logo on your pics
all of you - @soldier, @sirwinchester ... etc etc have that I noticed which is pretty cool
now I know - thanks!
Is that available on playstore? And it would be nice as it is easier to use the internet on mobile device here in Nigeria than a real PC
I'm not sure about that, but feel free to check it. Otherwise I'm sure there are plenty more tools. Best wishes :)
Thanks O pretty one....
Wowza @mrs.steemit! Another awesome tools for the trade. And i love that it's on our mobile phone, ready to go anytime. :)
nice nails by the way.. ;)
Thanks! & Thanks :)
Welcome & always welcome!
You'll make my blog much more fab.. (  ̄▽ ̄)/
Thank you for the idea of photo editing with your smartphone. I got a question: How do you create your short snippets or movie previews in the post?
Those are "gifs" that I create on " giphy.com "
You can upload a video max. 15 seconds and turn it into a moving image.
Good luck :)
Great!, i'd used giphy.com just to find some funny emotions. Thank you!
Great guide! Using the smartphone to edit your photos is a creat timesaver.
Thanks! It is indeed
Good to know, thanks for the tips! You are gorgeous btw..
You do all this on your phone? That's pretty nuts. I haven't even heard about any of these things.
Yup, there are some pretty cool tools out there I'm sure I don't even know most of them
Those are great. I'm going to add them to my arsenal
Useful information mrs. Thanks for sharing
I'm glad :)