kkomazCoding - Blockstack.js — Status Multi-Player Followup Part I

I’ve been following the Blockstack ecosystem for awhile and even found myself as a github contributor. Recently the team started a contribution site that rewards individuals who are able to make meaningful contributions to the team via blog posts, pull requests, etc. (https://contribute.blockstack.org/)
If you do not know what Blockstack is or what they do, I recommend you look into their main website https://blockstack.org/ and read the white paper. This post will not dive into the goals or vision of the team but rather a technical approach to using the blockstack.js library
The contribution program gave me a boosted motivation to really deep dive into the blockstack.js tutorials. The one that really stood out is the multi-layer storage post by Ken Liao. I completed the tutorial but felt like it was incomplete and needed a bit more to fully make it usable for real world use.
Before you move on I highly encourage (or demand) that you go through the tutorial here https://blockstack.org/tutorials/multi-player-storage …. Otherwise it won’t make any sense at all!
So you finished the tutorial. You can now see the status of your profile and others. If you want to create a new status it can be done via the input parameters. If you go to another person’s page, you lose the create privileges. However what about deleting a status?
I did a minor refactor on the status display portion of the page. I realized there would be a bit of logic/criteria required to have the ability to delete a status.
Criteria #1: You have to be the actual user to delete a status
Criteria #2: You need to display the delete button
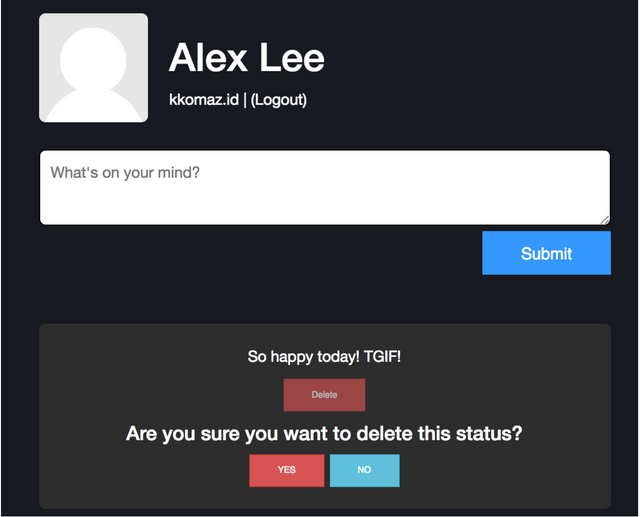
Criteria #3: Display to the user a confirmation text if deletion is intentional
I decided to create a Status component as shown below in the file Profile.jsx
// Old
{this.state.statuses.map((status) => (
    <div className="status" key={status.id}>
      {status.text}
    </div>
    )
)}
// New
{
  this.state.statuses.map((status) => (
    <Status
      key={status.id}
      status={status}
      handleDelete={this.handleDelete}
      isLocal={this.isLocal}
    />
  ))
}
I created a new function called handleDelete . Similar to saveNewStatus , I needed a function that had the ability to hook into the blockstack.js library to filter and remove the intended deleted status and use the putFile function to create new status.json.
handleDelete(id) {
    const statuses = this.state.statuses.filter((status) => status.id !== id)
    const options = { encrypt: false }
    putFile(statusFileName, JSON.stringify(statuses), options)
      .then(() => {
        this.setState({
          statuses
        })
      })
  }
}
As you can see the function handleDelete is relatively similar to saveNewStatus . The function is expecting an argument of id . With this argument we can compare and filter out the id from this.state.statuses . If you’re wondering why I did this approach as opposed to a traditional API DELETE method, I recommend reading this article https://blockstack.org/tutorials/managing-data-with-gaia
For reference here is the full Profile.jsx file
import React, { Component } from 'react';
import {
isSignInPending,
loadUserData,
Person,
getFile,
putFile,
lookupProfile
} from 'blockstack';
import Status from './Status.jsx';
const avatarFallbackImage = 'https://s3.amazonaws.com/onename/avatar-placeholder.png';
const statusFileName = 'statuses.json'
export default class Profile extends Component {
constructor(props) {
super(props);
this.state = {
person: {
name() {
return 'Anonymous';
},
avatarUrl() {
return avatarFallbackImage;
},
},
username: "",
newStatus: "",
statuses: [],
statusIndex: 0,
isLoading: false
};
this.handleDelete = this.handleDelete.bind(this);
this.isLocal = this.isLocal.bind(this);
}
componentDidMount() {
this.fetchData()
}
handleNewStatusChange(event) {
this.setState({
newStatus: event.target.value
})
}
handleNewStatusSubmit(event) {
this.saveNewStatus(this.state.newStatus)
this.setState({
newStatus: ""
})
}
handleDelete(id) {
const statuses = this.state.statuses.filter((status) => status.id !== id)
const options = { encrypt: false }
putFile(statusFileName, JSON.stringify(statuses), options)
.then(() => {
this.setState({
statuses
})
})
}
saveNewStatus(statusText) {
let statuses = this.state.statuses
let status = {
id: this.state.statusIndex++,
text: statusText.trim(),
created_at: Date.now()
}
statuses.unshift(status)
const options = { encrypt: false }
putFile(statusFileName, JSON.stringify(statuses), options)
.then(() => {
this.setState({
statuses: statuses
})
})
}
fetchData() {
if (this.isLocal()) {
this.setState({ isLoading: true })
const options = { decrypt: false, zoneFileLookupURL: 'https://core.blockstack.org/v1/names/' }
getFile(statusFileName, options)
.then((file) => {
var statuses = JSON.parse(file || '[]')
this.setState({
person: new Person(loadUserData().profile),
username: loadUserData().username,
statusIndex: statuses.length,
statuses: statuses,
})
})
.finally(() => {
this.setState({ isLoading: false })
})
} else {
const username = this.props.match.params.username
this.setState({ isLoading: true })
lookupProfile(username)
.then((profile) => {
this.setState({
person: new Person(profile),
username: username
})
})
.catch((error) => {
console.log('could not resolve profile')
})
const options = { username: username, decrypt: false, zoneFileLookupURL: 'https://core.blockstack.org/v1/names/'}
getFile(statusFileName, options)
.then((file) => {
var statuses = JSON.parse(file || '[]')
this.setState({
statusIndex: statuses.length,
statuses: statuses
})
})
.catch((error) => {
console.log('could not fetch statuses')
})
.finally(() => {
this.setState({ isLoading: false })
})
}
}
isLocal() {
return this.props.match.params.username ? false : true
}
render() {
const { handleSignOut } = this.props;
const { person } = this.state;
const { username } = this.state;
return (
!isSignInPending() && person ?
<div className="container">
<div className="row">
<div className="col-md-offset-3 col-md-6">
<div className="col-md-12">
<div className="avatar-section">
<div className="username">
<h1>
<span id="heading-name">{ person.name() ? person.name()
: 'Nameless Person' }</span>
</h1>
<span>{username}</span>
{this.isLocal() &&
<span>
|
<a onClick={ handleSignOut.bind(this) }>(Logout)</a>
</span>
}
</div>
</div>
</div>
{this.isLocal() &&
<div className="new-status">
<div className="col-md-12">
<textarea className="input-status"
value={this.state.newStatus}
onChange={e => this.handleNewStatusChange(e)}
placeholder="What's on your mind?"
/>
</div>
<div className="col-md-12 text-right">
<button
className="btn btn-primary btn-lg"
onClick={e => this.handleNewStatusSubmit(e)}
>
Submit
</button>
</div>
</div>
}
<div className="col-md-12 statuses">
{this.state.isLoading && <span>Loading...</span>}
{
this.state.statuses.map((status) => (
<Status
key={status.id}
status={status}
handleDelete={this.handleDelete}
isLocal={this.isLocal}
/>
))
}
</div>
</div>
</div>
</div> : null
);
}
}
In order for this function to be fully utilized we need our Status component to properly work.
For simplicity sake I decided to show the source code below with some bullet points.
import React, { Component } from 'react';
class Status extends Component {
  constructor(props) {
    super(props);
this.state = {
      showDeleteConfirmation: false
    }
this.onDeleteClick = this.onDeleteClick.bind(this);
    this.toggleDeleteConfirmation = this.toggleDeleteConfirmation.bind(this);
  }
onDeleteClick() {
    const { status } = this.props;
    this.props.handleDelete(status.id);
  }
toggleDeleteConfirmation() {
    this.setState({ showDeleteConfirmation: !this.state.showDeleteConfirmation })
  }
render() {
    const { status, isLocal } = this.props;
if(!isLocal()) {
      return (
        <div className="status">
          <div className="status-text">
            {status.text}
          </div>
        </div>
      )
    }
return (
      <div className="status">
        <div className="status-text">
          {status.text}
        </div>
<div className="status-button-options">
          <button
            className="btn btn-danger status-delete"
            onClick={this.toggleDeleteConfirmation}
            disabled={this.state.showDeleteConfirmation}
          >
              Delete
          </button>
        </div>
        {
          this.state.showDeleteConfirmation &&
          <div className="status-delete-confirmation">
            <h4>ARE YOU SURE?</h4>
            <button className="btn btn-danger status-delete-yes" onClick={this.onDeleteClick}>
              YES
            </button>
            <button className="btn btn-info status-delete-no" onClick={this.toggleDeleteConfirmation}>
              NO
            </button>
          </div>
        }
      </div>
    )
  }
}
export default Status;
status props is passed down through parent via
Profile.jsxisLocalfunction is passed down through parent viaProfile.jsx. If isLocal() is false render the status text WITHOUT the ability to delete. (This means you are viewing someone else’s profile)showDeleteConfirmationis an internal state of theStatuscomponent to determine whether or not to show the confirmation text. If true, show the confirmation text.The delete button has a
onClickhandler that callsthis.toggleDeleteConfirmation. This function is responsible for displaying the confirmation text via state change.The confirmation text will be rendered like below

6a. Delete button will be disabled via this.state.showDeleteConfirmation
6b. Clicking NO will call this.toggleDeleteConfirmation and reset the state. Thus, hiding the
confirmation buttons.
6c. Clicking YES will call this.onDeleteClick . Inside of that function it calls the parent function of Profile’s handleDelete via props this.props.handleDelete(status.id) , which also includes the id of the status. Through this, the status will now be deleted and the statuses.json will render the new results.
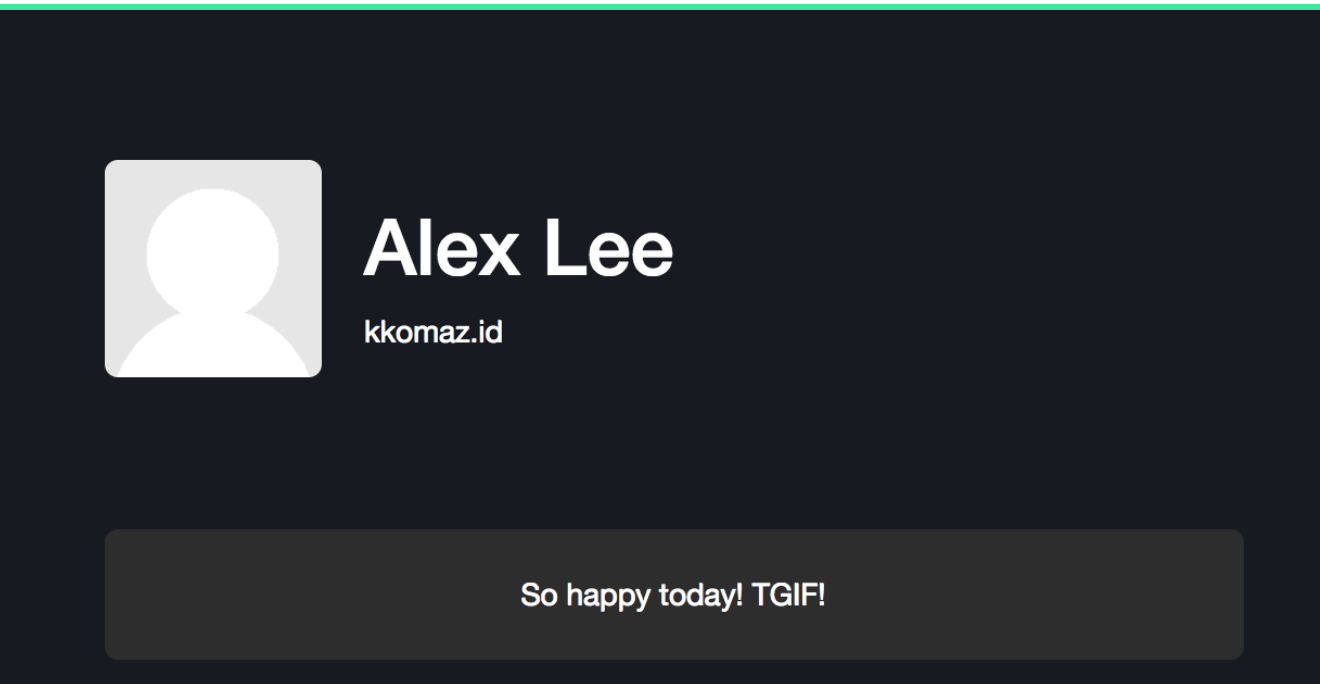
- If viewing a user you will not be shown the Delete option.

Example: http://localhost:8080/kkomaz.id
Minor CSS add-ons
I added some margin between the buttons to give a cleaner ui look which you can copy and paste at the bottom of the style.css file.
.status-delete{margin-top: 10px}
.status-delete-confirmation {margin-top: 10px}
.status-delete-yes{margin-right: 5px}
Conclusion
In my opinion, this is the standard CRUD blog post when beginners start learning web development. However, this post is configured for a blockstack application.
Prior to our changes, we had the ability to create a status and view the statuses of other profiles.
Now we have the ability to DELETE. What’s next should be the ability to EDIT a status. Stay tuned!
Things to note:
I removed theimg tag under the avatar element because steemit was complaining about url not being valid. Refer to my medium article for the full source code.
https://medium.com/@kkomaz/blockstack-js-status-multi-layer-followup-part-i-df560a638e6b
Github Link:
https://github.com/kkomaz/publik