Byteball E-mail Attestation (Tutorial)
1. Introduction
You have probably all heard about Byteball already. Byteball developer Tony is steadily adding new features to the software. Lately it was ‘textcoins’ followed by digital ID. Now, Tony has released a new feature that is all about getting rid of that awkward wallet address and use your e-mail address for receiving payments instead.
In the end, this means that someone can pay GBYTES to you by sending bytes to your e-mail address without having to type in your complex Byteball wallet address. This makes it a lot easier to send and receive funds from people that you know.
In this tutorial, I show the steps of linking an e-mail address to your Byteball wallet address. Prerequisites for the tutorial are:
- having a Byteball wallet installed with a small amount of GBYTES (0.5 MB)
- have an e-mail address ready (one that you can access)
- being able to read English
That shouldn’t be too hard, right? Let’s move on.
2. The type of wallet needed
Before we jump in, one additional word on the wallet. Thus must be a ‘single-address’ wallet. By default, Byteball wallets are ‘multi-address’ wallet. This means that upon each payment made, the change in the wallet is moved to a new address. This is hidden to the user (the user still sees his main wallet address and the remaining change in his wallet) but the change has actually been moved to a new address in the wallet.
To avoid this from happening, you can set up a ‘single-address’ wallet where any change upon a payment out remains in the main wallet. See below the steps required to create a single address wallet.

Figure 1: create a new wallet
Click the ‘hamburger’ on the left top side and a menu will appear.

Figure 2: create a new wallet
Choose to create a new wallet.

Figure 3: new wallet options
Give your wallet an appropriate name (I would choose ‘ID Wallet’) and make sure that the ‘single-address wallet’ option is checked. Create the new wallet.

Figure 4: new wallet created
When the new wallet is created, it is visible when tapping the ‘hamburger’ menu button.
Make sure that this wallet has some funds in it, as you will need to pay a small amount of GBYTE (0.5 MB) from it to complete the e-mail attestation process.
3. The e-mail attestation process (step by step)
Make sure you are working from your ID Wallet. With this, I mean the ‘single-address’ wallet as explained in paragraph 2 above.
See below how to switch to the right wallet in the Byteball wallet app.
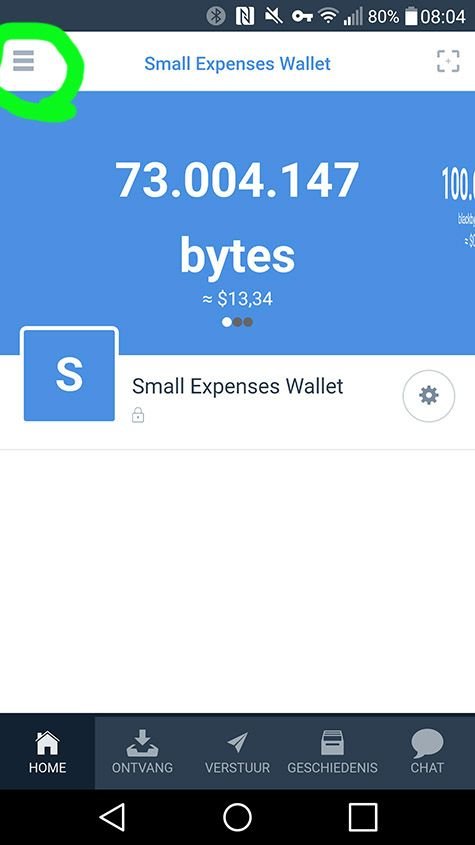
Figure 1: go to the hamburger button above
Tap the hamburger menu button.
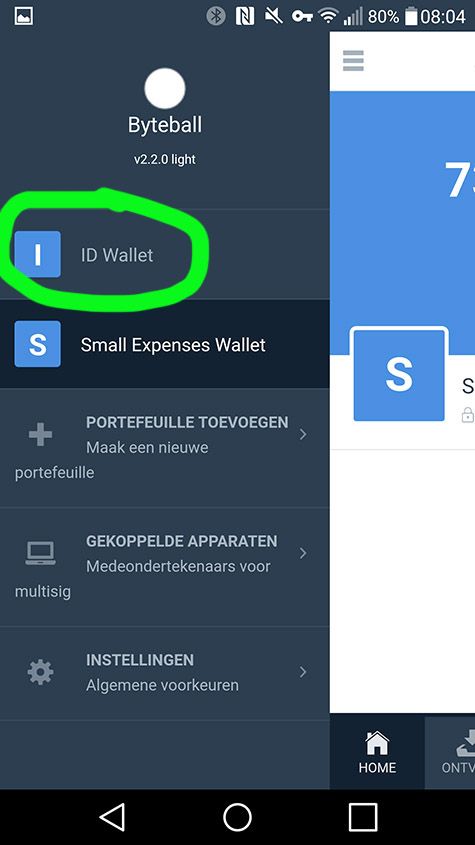
Figure 2: choose the ID Wallet
Tap the wallet that is your ‘single-address’ wallet. In my case, I named this wallet ‘ID Wallet’.
Now you are ready to start the process of getting that e-mail attestation done.
First, you will need to add the e-mail attestation bot. If you are already familiar with Byteball, you will know that the Byteball wallet app has a lot of bots available that provide information and services once you add them to your wallet. We will add the e-mail attestation bot to the wallet so that you can access the e-mail attestation process.
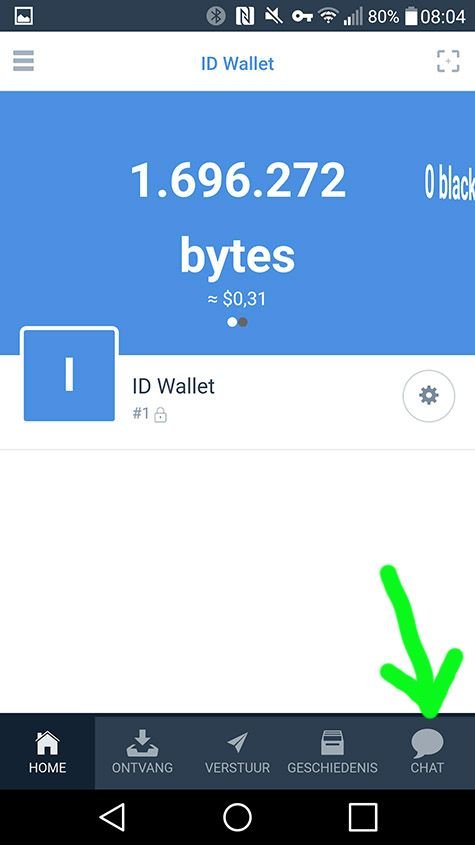
Figure 1: go to chat
From the wallet (again, the ‘single address’ wallet), tap the chat button.
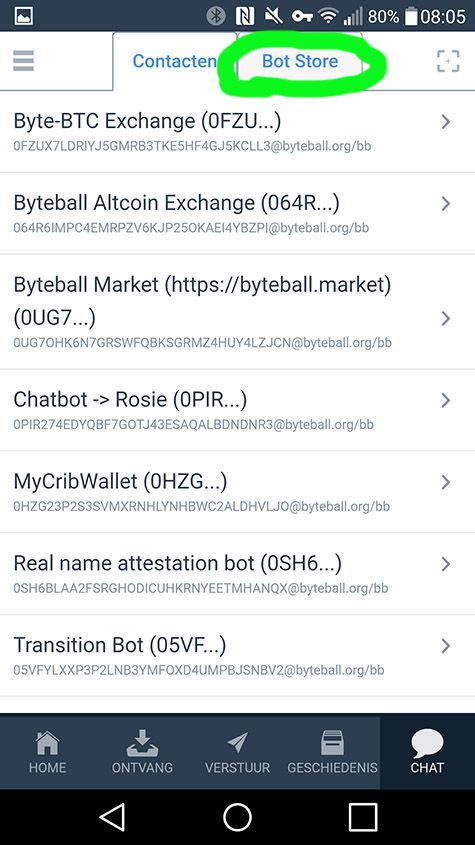
Figure 2: go to the Bot Store
In the chat menu, tap the Bot Store tab to get a list of available bots.
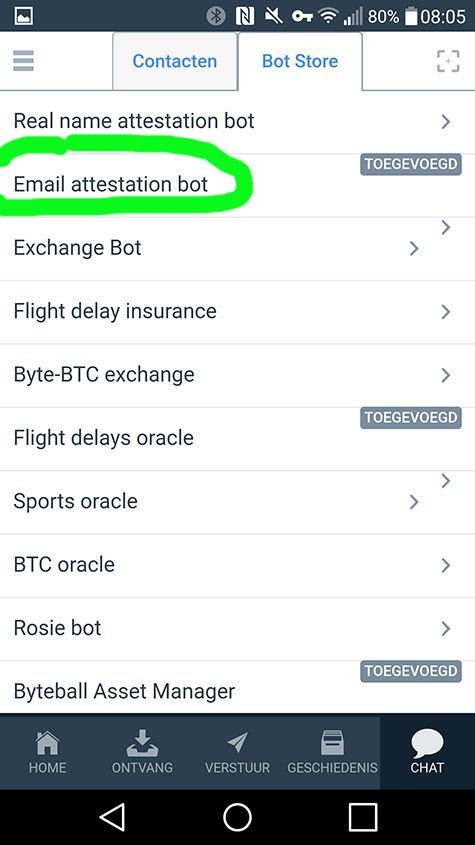
Figure 3: add the e-mail attestation bot
From the list of available bots, choose the ‘Email attestation bot’.
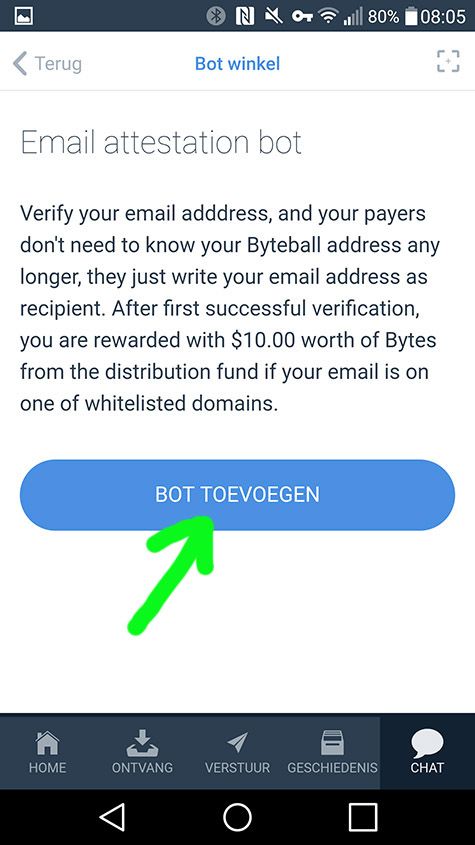
Figure 4: add the bot
Add the bot to your wallet by tapping the button.
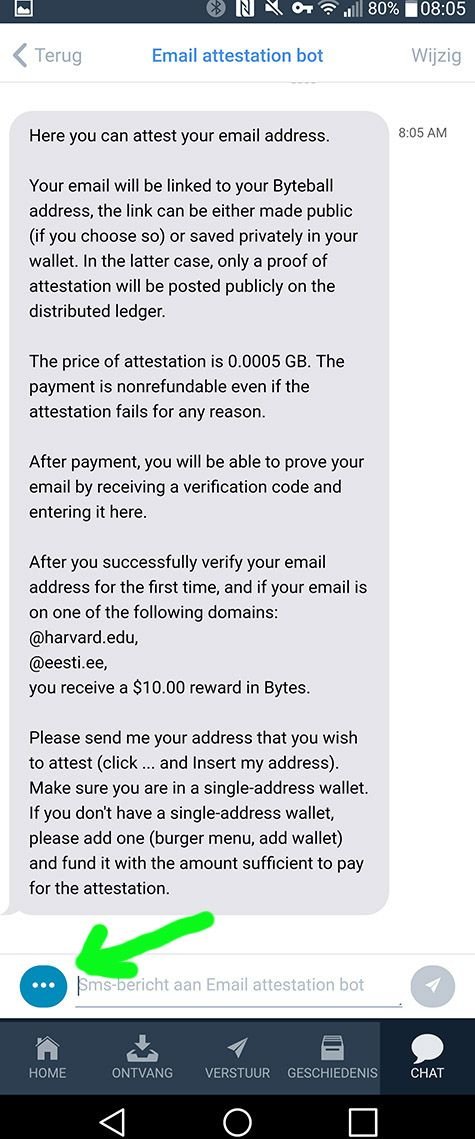
Figure 5: insert your wallet address
The bot explains its purpose and the general outlines of the process. Add your wallet address by clicking the blue button left-under.
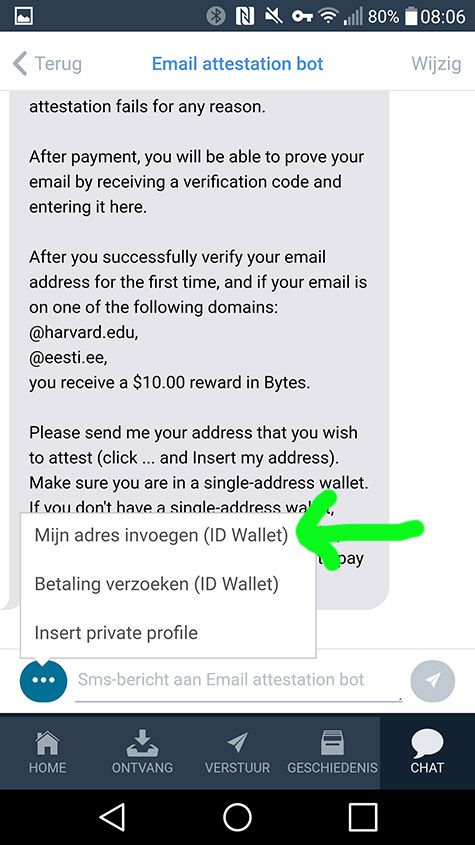
Figure 6: enter wallet address
From the options, choose the first one (insert wallet address).
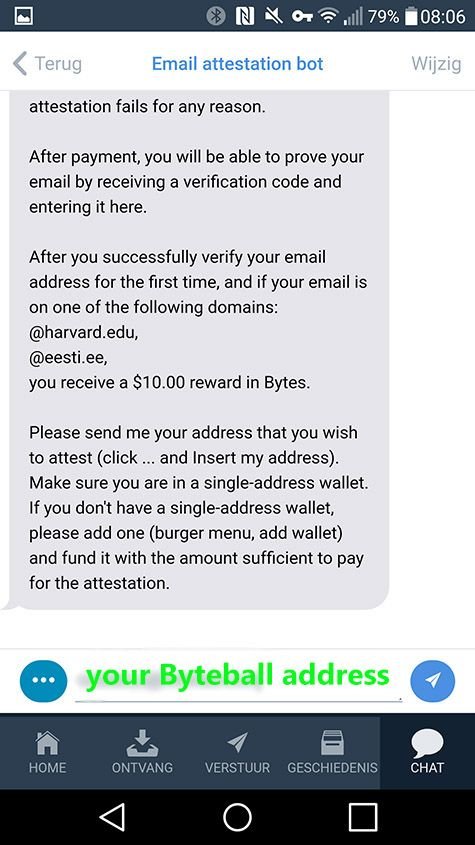
Figure 7: wallet address inserted
If you have done things right, your Byteball wallet address should be inserted now. Do not insert your e-mail address yet. That comes in the next step.
Tap the arrow to submit the wallet address.
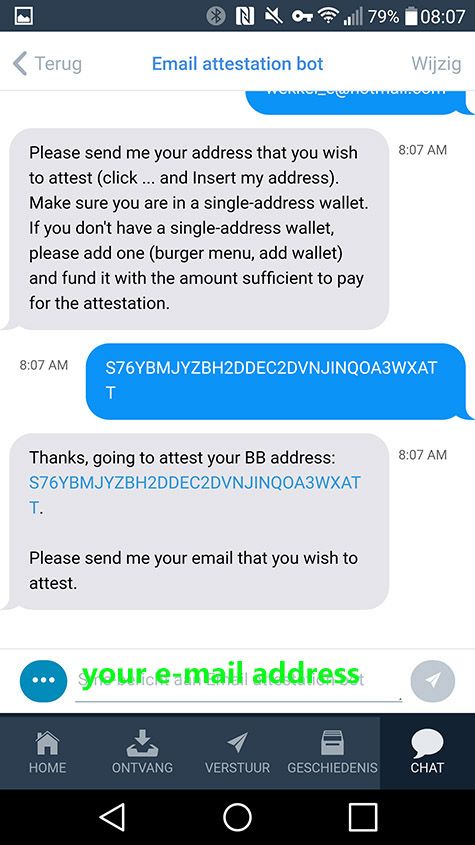
Figure 8: insert e-mail address
Next, the bot asks you to submit the e-mail address for attestation. Please note that you can either choose to have the e-mail address listed publicly or to keep it private. If you choose a public address, the whole world can look it up from the Byteball pages. So take that into account when choosing the e-mail address to submit.
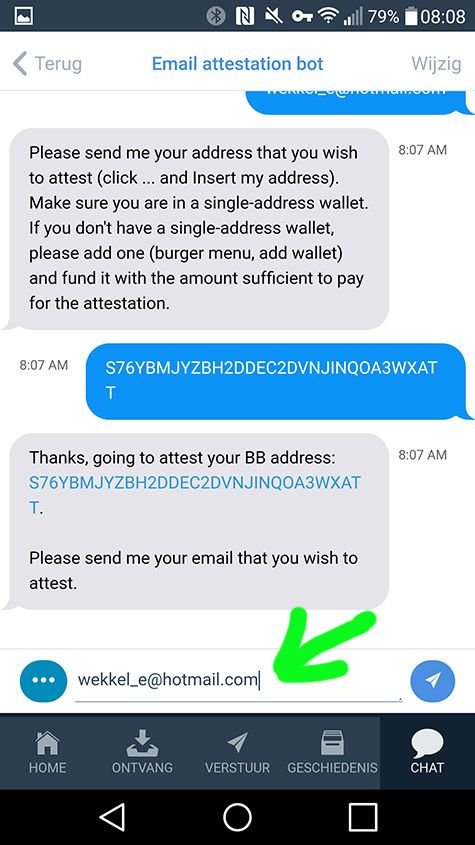
Figure 9: type e-mail address and submit
Insert your e-mail address for attestation and submit it.
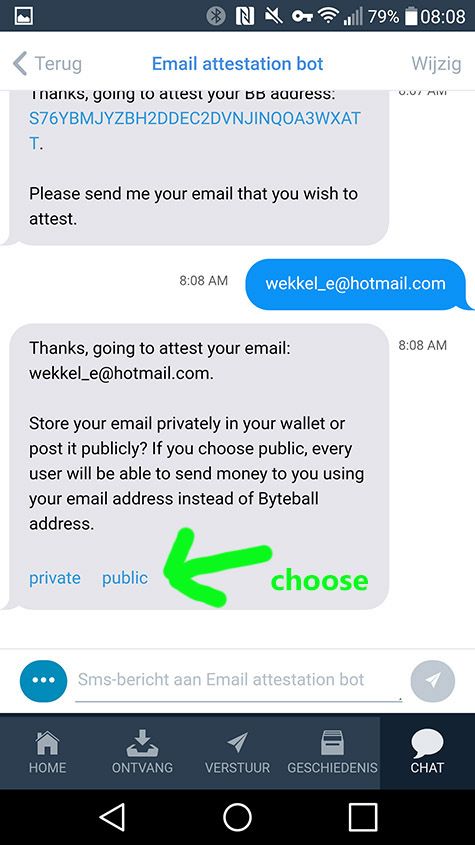
Figure 10: public or private
As stated above, you will have to choose whether to make the e-mail address public or private. The Official Byteball Medium post on e-mail attestation offers the following explanation:
“If you choose your attestation to be private, it will be stored in your wallet, nobody will see your email, and later you can disclose it to any peer you like. Third-parties will only know that you had attested some email address.
If you select public attestation, your email will be published to the DAG and linked to your Byteball address. This will allow others to send money to your email address, see below”
I chose public by the way.
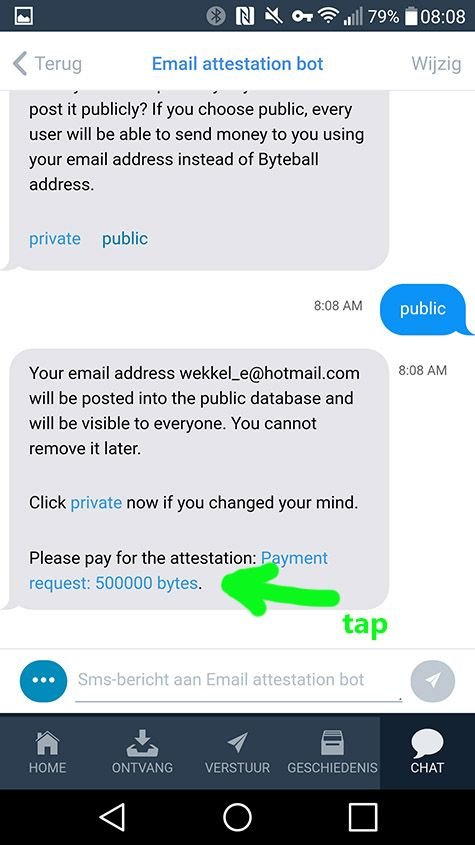
Figure 11: making the payment
The e-mail attestation process requires you to pay a small sum (0.5 MB) for the attestation. The bot sets up the payment.
It’s as easy as tapping the payment link, reviewing the details of the payment and sending the payment. Next screenshot is the payment page after tapping the payment link in the bot chat.
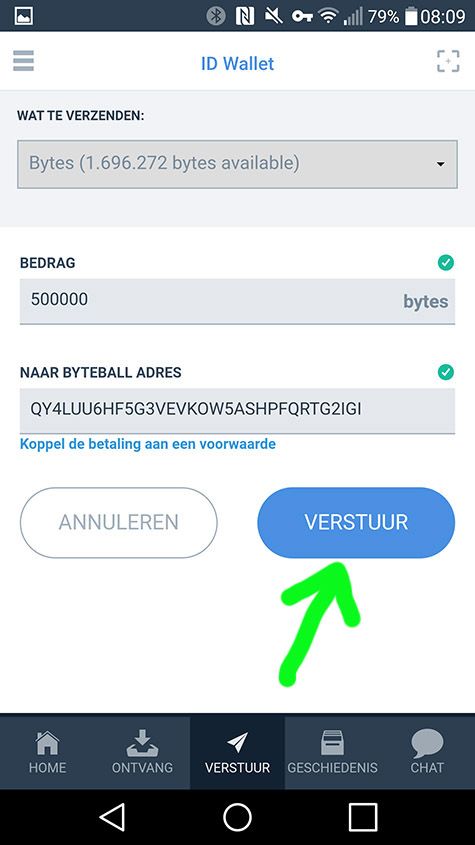
Figure 12: payment window
You can review the payment details but these have been prefilled already by the bot. Tap to send the payment.
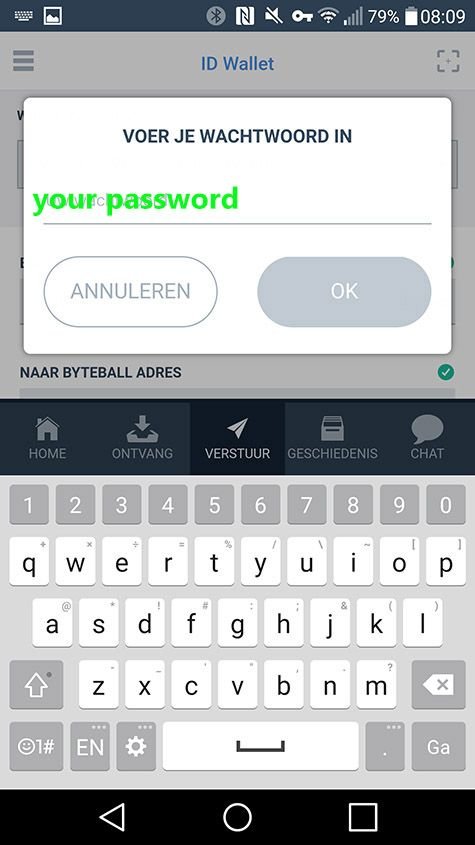
Figure 13: insert wallet password
Assuming you have set up a password for your wallet, sending the payment requires your password. Insert it to finalise the payment.
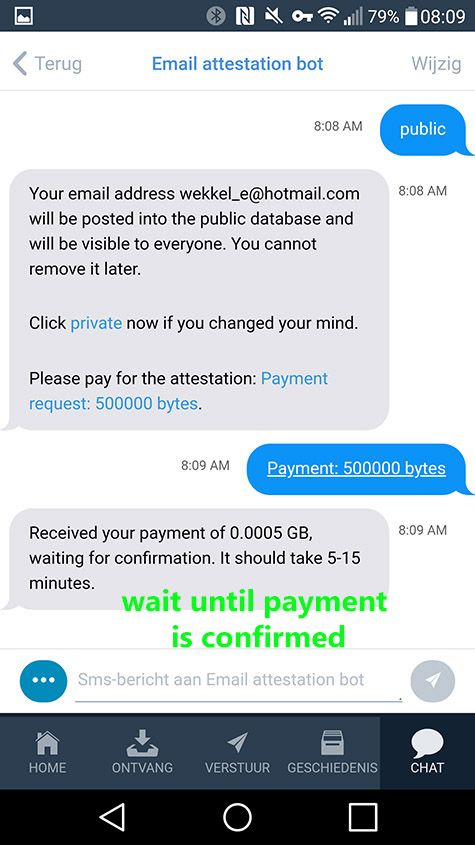
Figure 14: payment sent, awaiting confirmation
After sending the payment, the bot instructs you to wait until the payment has been confirmed. This takes about 5–10 minutes on the Byteball network. Proceed once the bot has indicated that the payment has been confirmed.
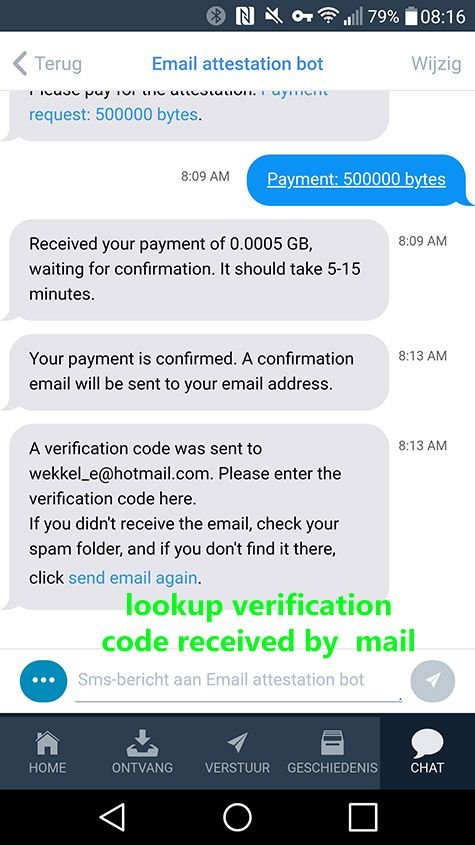
Figure 15: insert verification code
The bot has sent a verification code to the e-mail address that you submitted. Look up that e-mail and retrieve the verification code.
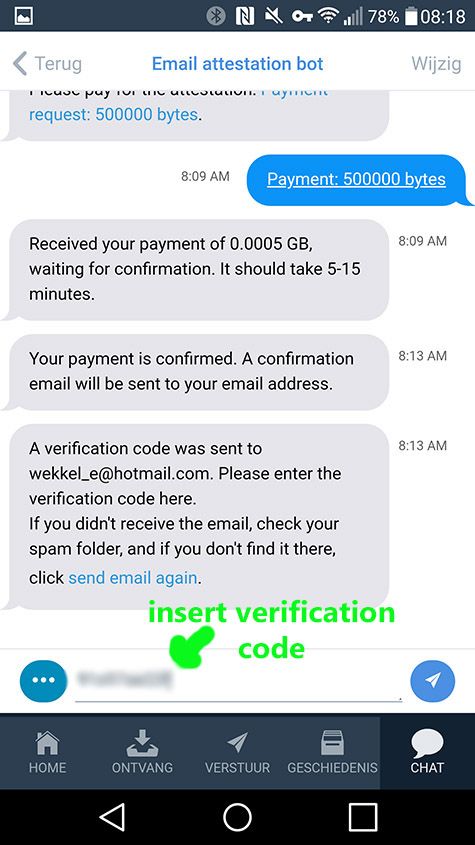
Figure 16: finalising the verification process
Enter the verification code that your received by e-mail and submit it.
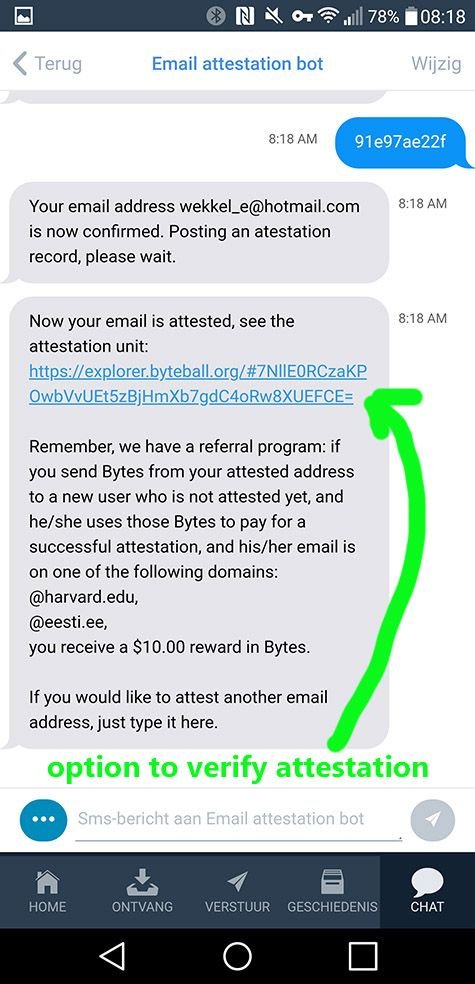
Figure 17: e-mail attestation process done
The bot will confirm that your e-mail is attested now and provides a summary link to the explorer. Now, people can send bytes to your wallet while just using your e-mail address.
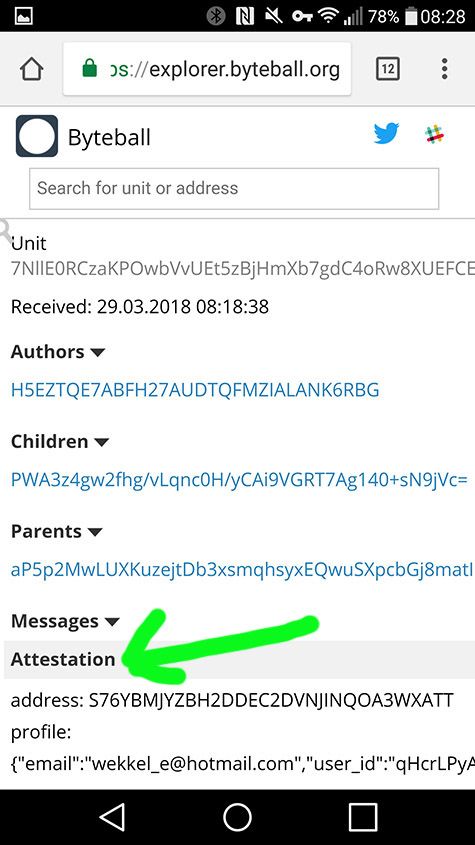
Figure 18: explorer showing the attestatoin details
Figure 18 shows the details of the attestation in the Byteball explorer.
4. In search of that Lightning Bolt
We can safely state that cryptocurrency is here to stay. It won’t be ‘uninvented’ and will continue to attract new followers, whether markets are reds or in a bull phase.
There are lots of projects out there solving different problems and offering different solutions. We are in the middle of a Cambrian Explosion with a fast expanding territory with many ventures being tried and trialled. It’s a big bowl of primordial soup waiting for that one Lightning Bolt to make cryptocurrency catch on with the masses big time.
With e-mail attestation Byteball takes another step towards bringing cryptocurrency to the masses. Being able to send payments to an e-mail address is surely much easier than remembering (!) and typing in a full Byteball wallet address to make a payment to someone. Together with the other excellent features of the Byteball wallet software, Tony as developer is doing everything he can to be that Lightning Bolt.
If you found this tutorial helpful, feel free to send me some GBYTES to my e-mail address: [email protected]
Great tutorial. Upvoted. I need 0.0004 GB to register if anybody can help here is my address IBOV4TBI4PWJINPYUHWVM2KVYZWYHGPO I can't find any faucet for Bytball.
Can you send me..
i will pay with steem or sbd.. please.. thanks