[28/02] [CORE POST] Extremely in-depth view of CURRENT Bitcoin price action (as well as bigger time frame look)
To view images, please right click them and open them in a new tab!
In short:
Entry points as shown below:

Previously
In my previous post, I pointed out that I would entertain both the bull trap count - for awareness - as well as the impulsive, bullish count. Today, I would like to continue to explore Bitcoin on the basis of two hypotheses:
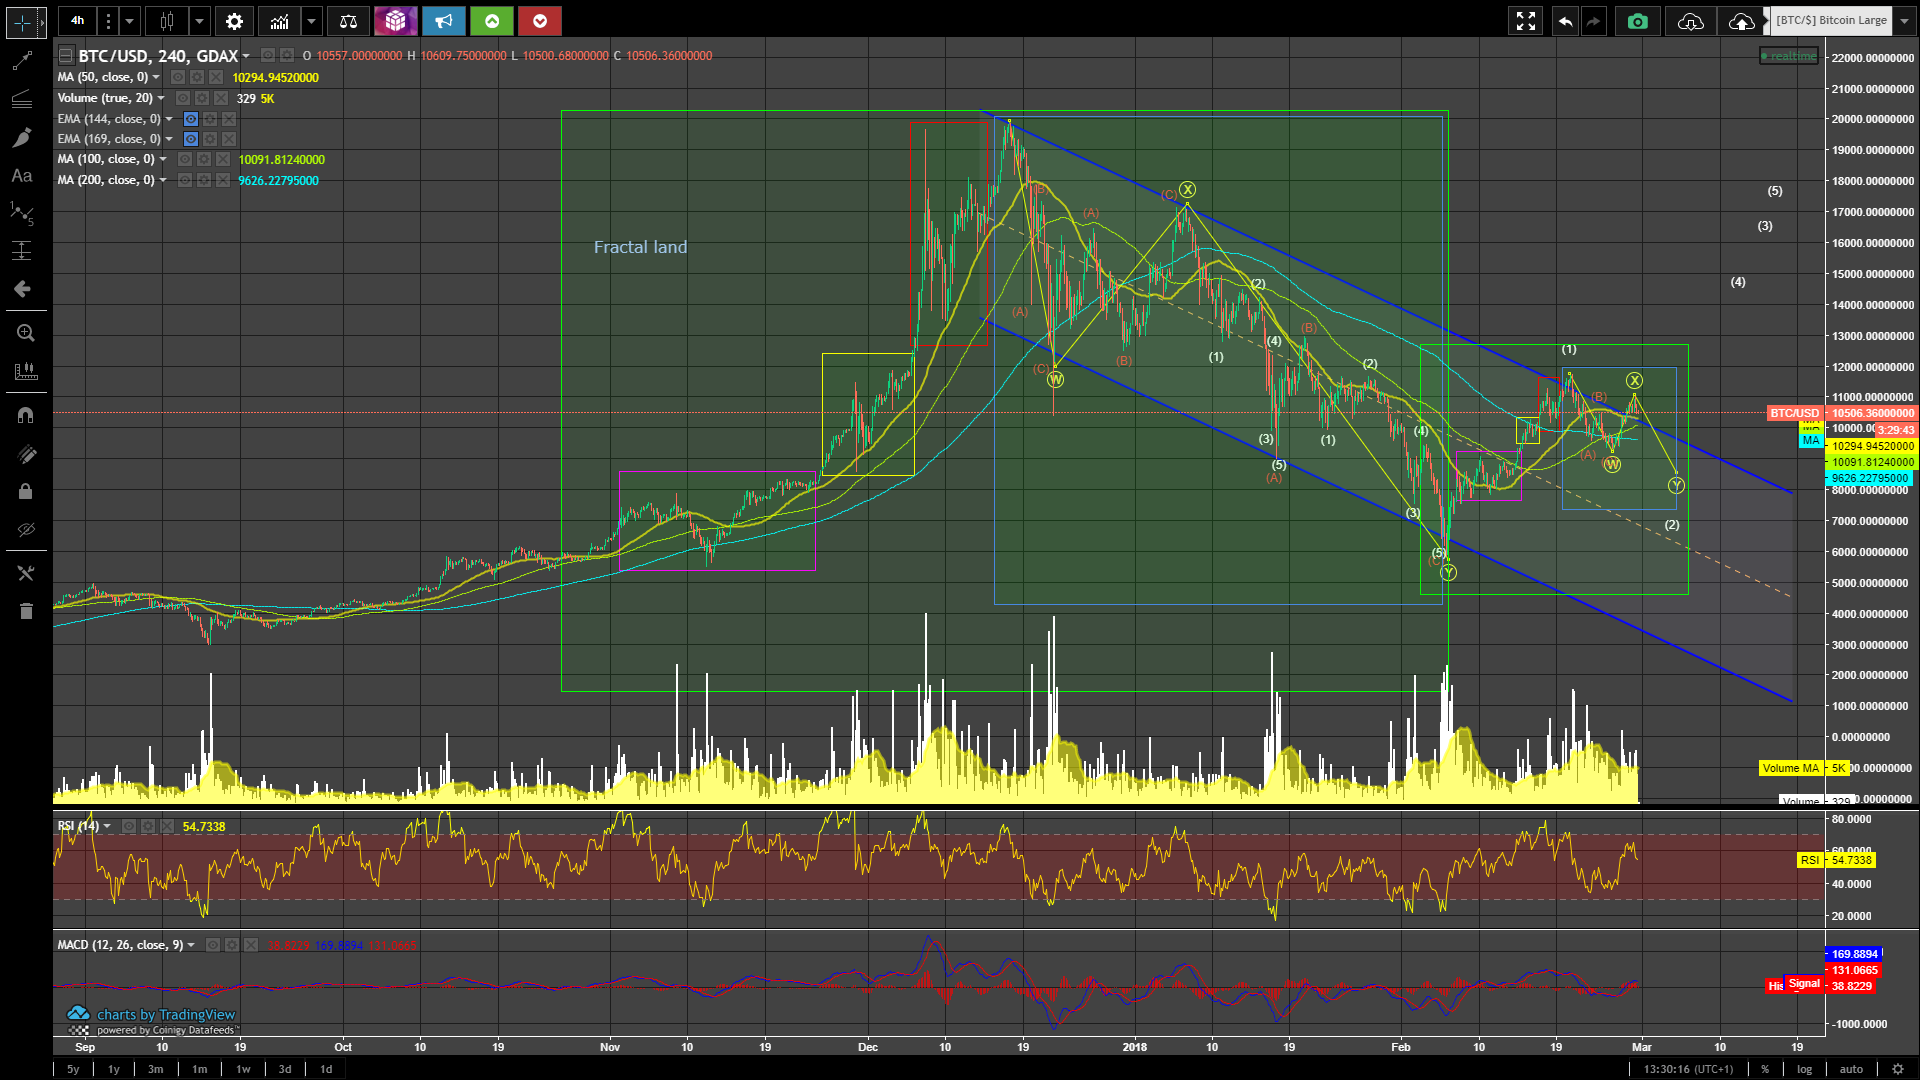
Hypothesis 1: Wave 2 is of corrective structure WXY and acts as a fractal to the 'Two' wave of highest degree. The current uptrend (disregarding positive news for now) is a bull trap and we are putting in an X-wave that will lead to a Y-wave.
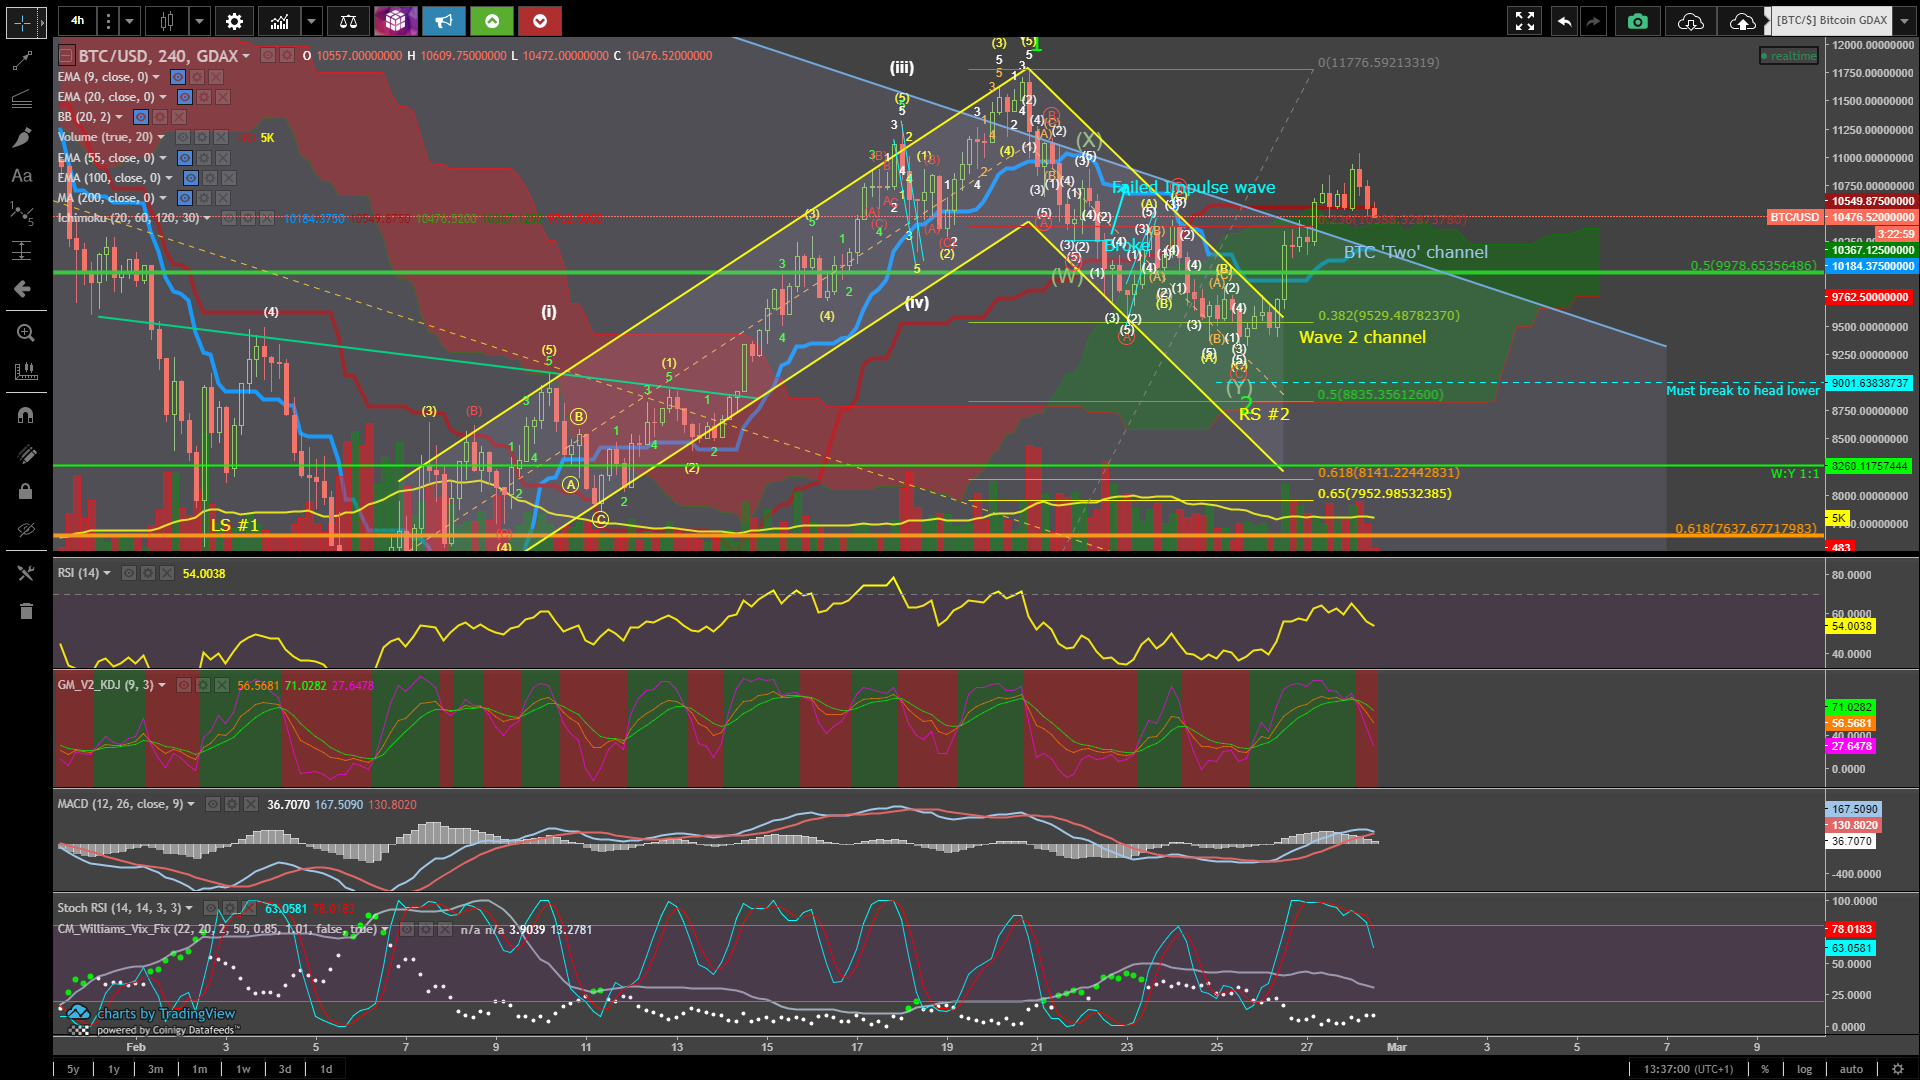
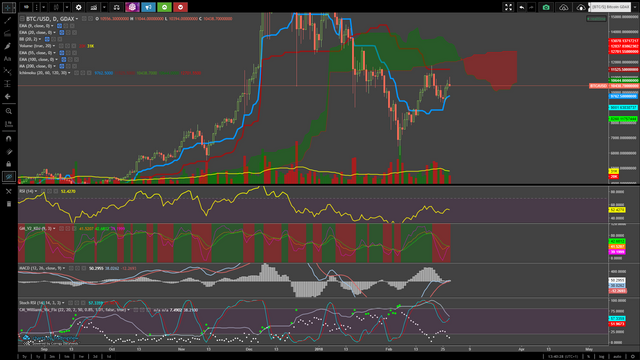
Let's look at this count on a high time frame and entertain the following fractals (by colour). I explored potential reasons for this in my previous blog. In short: Daily & 4H Stoch RSI are not that great and do not allow for much movement up. The Daily Stoch RSI has turned half and is heading back to the overbought regions. Ideally, I would have liked to have seen it go completely down to the oversold regions and put in a strong wave 2 (retrace between 0.5 and 0.618), but we did not get this (yet?). Please see my previous blog for a more in-depth view of this idea.
Of course, if this were to happen, we would continue our bullish movement to the upside, but putting in a stronger bottom for wave 2 would strengthen / have strengthened this move.
Hypothesis 2: Bitcoin has put in the bottom at around (roughly) $5,900 and has since been in an uptrend. We are now entertaining the idea that 5 impulsive waves should form on a high time scale.
Wave 1
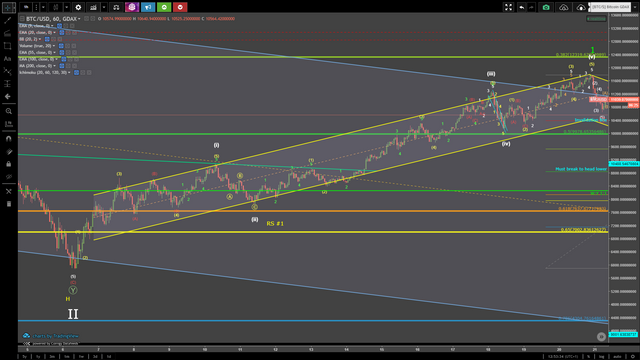
The full count for this wave is as followed:
- Wave 1 = white i,ii,iii,iv,v
- Each impulsive wave (i,iii,iv) consists of 5 more subwaves (yellow)
- Each counter-trend wave (corrective, in this case; ii,iv) consists of ABC. Notice how the white iv consists of 5 waves down. This was unexpected, but may indicate one of two things: the last leg of this count is faulty, or, due to the bullish nature of Bitcoin at the time, there were not enough sellers to drive price down. There are alternative ways to count white iv and v, using a truncated C wave, but the result is the same in both cases, so I will not delve deeper into this.
Wave 2
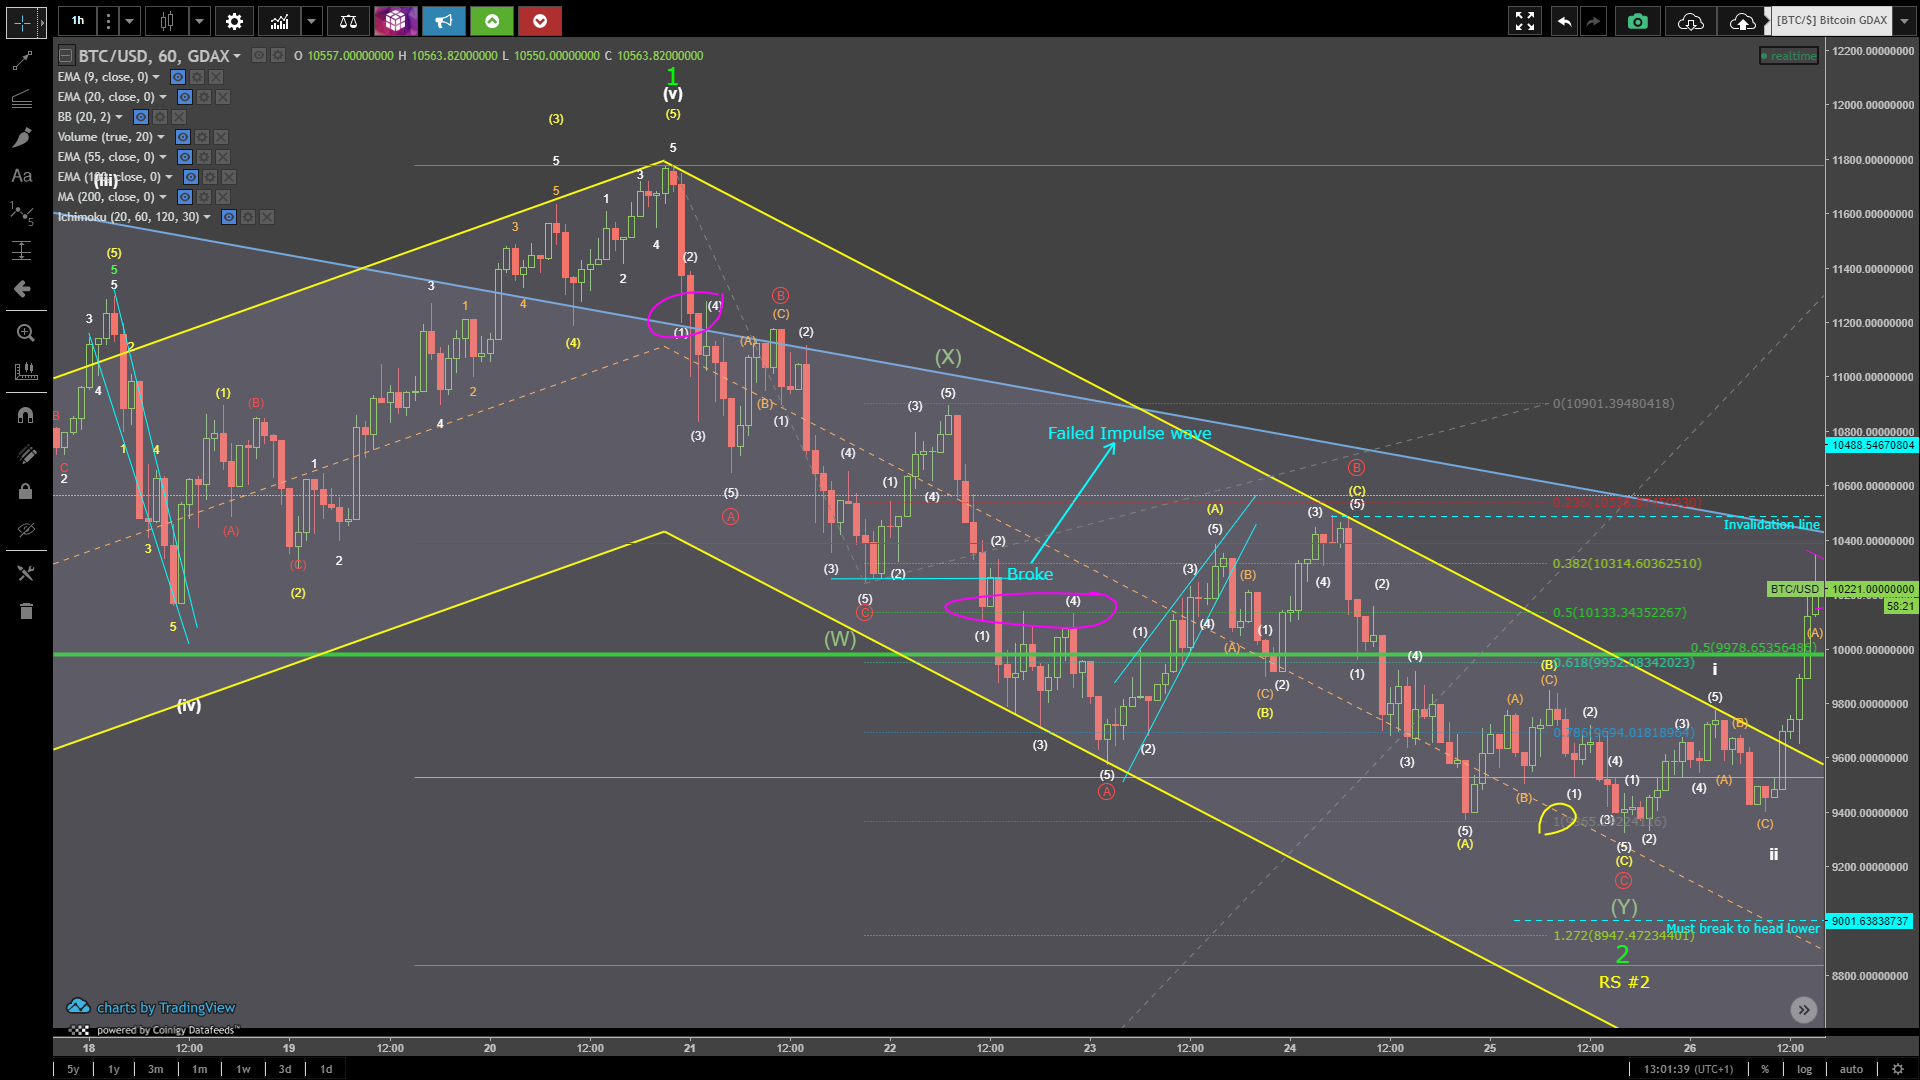
This wave is extremely complex in nature and could be counted in many different ways. If you read my previous blog (27/02), you would find that I had entertained the idea of an X wave at the location that is now denoted as red circled B (at around $10,480). This count was actually my initial count before the ascending blue triangle had even formed, but I dropped it because of the strong nature of that uptrend (yellow ABC). I returned to it, because it allows for W:Y to be 1:1 as circled in yellow. The X-wave indicates a failed uptrend, which can be spotted because of the 100% retrace (and more), annotated on the chart in blue.
The full count could be as followed:
- Wave 2 = WXY
- Each wave consists of 3 subwaves (ABC, ABC, ABC)
- Each ABC is Zigzag in nature, meaning it has subwaves 5-3-5
- There are a few issues in these white 5-waves, as you do have some overlap by (1) and (4) (two cases, marked in magenta), but I am not too worried by that, because they are logn wick overlaps, which could be due to low liquidity on GDAX. The important thing is that we can fit a valid count that supports the idea that wave 2 has ended. The bull trap hypothesis entertains the idea that this wave has NOT yet ended. More on that later in this blog.
Currently
Wave 3
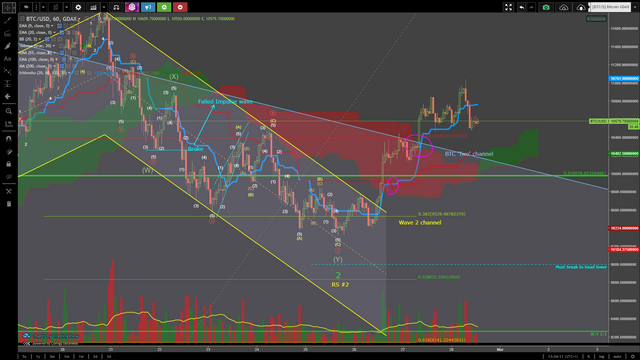
Notice how the T&K have crossed each other (highlighted in Magenta) on a 1H time frame. Price has also crossed the Kumo cloud and is now above the cloud (magenta highlight). This is pretty good news.
We have also broken out of the 'Two' channel again, which has been massive resistance for nearly 2 months now. Its is essential that we remain above it, or, at worst briefly retest or pierce (with a bull wick) the channel.
Volume has been excellent these past few days and certainly much higher than during wave 2.
Let's assume that we have finished wave 2 (slightly shallow, briefly piercing this 0.382 retrace of wave 1, but testing it 3 times in a short span of time). We should now be looking for wave 3, which in itself should consist of 5 subwaves. These subwaves will each have their own subwaves as well, and we will try to label these as we go from here.
On a side-note: we have managed the break through to the upside of the 4H Kumo cloud as shown below, but my expectation would be that we will definitely either retest the blue Tenkan line or the 0.5 retrace of Bitcoin's 'One' ( = $59 -> $20,000 give or take). The horizontal, green line (W:Y 1:1) on this chart is the region to which the wave 2 would have to go if it were to complete the WXY pattern in hypothesis 1.
Notice the 4H Stoch RSI coming down. Ideally, we would want to check our waves and verify Fib targets when the Stoch RSI is nearing (or has entered) the oversold zone and then decide whether or not we can buy in (more on this tomorrow).
Bitcoin Daily chart: notice the Stoch RSI that I mention in hypothesis 1. We have room to head upwards, back into the overbought zone, but, whether we like it or not, we will have to come back down at some point. If this move is sustained, it should still be days from now, which means we have plenty of time to make money off of this positive move up.
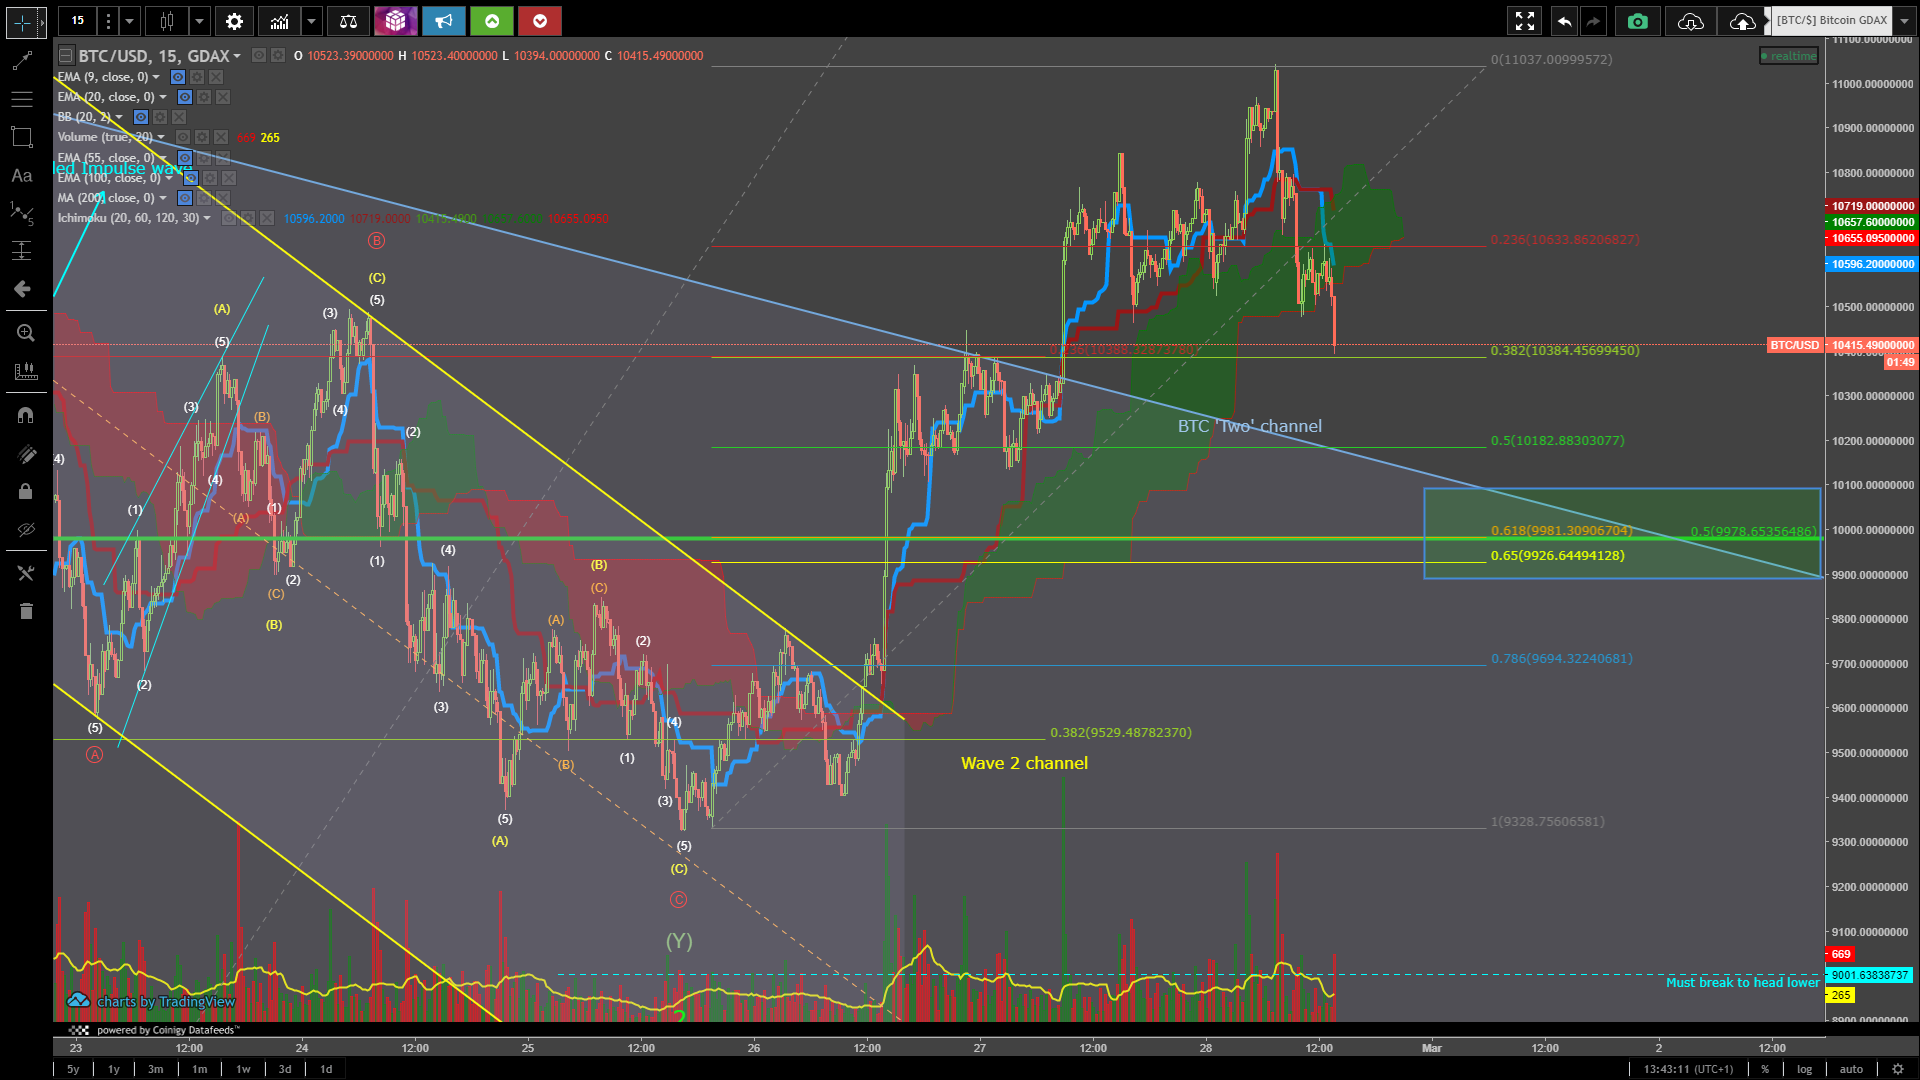
Let's start counting the first waves in wave 3. Look at the chart below. I have drawn a full Fib retrace of the uptrend, assuming that this is a first motive wave. Notice how the highest probable retrace zone for a second motive wave (0.618-0.65) overlaps the 0.5 retrace of 'One'. This would give us our (brief) bull wick into the channel, too. A retest of the channel would complete is we retraced to the 0.5 Fib target.
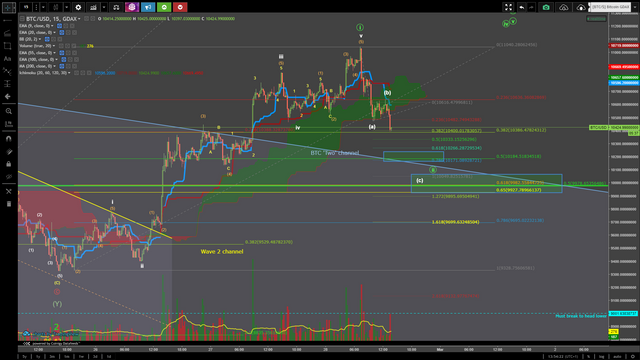
Current wave 3 count:
- Wave 3 consists of 5 subwaves, labeled in the green.
- Each green subwave will have its own subwaves. The first green subwave has 5 white subwaves (i,ii,iii,iv,v).
- I have labeled some of their subwaves to verify the count.
Notice how if we entertain the idea of a white (a):(c) 1:1 extension in this corrective green ii wave, our target is very close to the golden pocket we were talking about earlier.
Buy zones are indicated by the boxes. Due to the deep nature of the white ii in the first green motive wave, we might be looking at a deep green ii as well (cf. fractal nature of waves), so this golden pocket zone (0.618-0.65) is definitely in play, and would wipe out a lot of people who have their stop losses set on top of the channel 'Two' upper trend line (which coincides with the 0.5 retrace, indicated by the topmost buy box).
We will use the 1H and 4H stoch RSI to determine how fast this corrective green ii will end.
In terms of the extension for the green wave 3: I will return to this topic later in this blog when I discuss the iH&S (inverse Head and Shoulders) that is forming.
Technicals on the 1H show us that the RSI must hold above that 37, which is the RSI at which this upward move broke out of the wave 2 channel. This RSI is VITAL for the uptrend.
We can see (circled in magenta) that the stoch RSI is already oversold, but it can stay down there for a little while as can be seen in previous scenarios to the left. The Williams Vix, which is an indicator for finding bottoms is starting to give us green dots ( = price is near a potential bottom) which is an indication that price may start going up soon.
The GM KDJ indicator is nothing complex. It shows 3 Moving Averages. The way you trade off of this indicator (more reliable in higher time frames) is very simple. It works in the exact same way as you would trade off of Moving Averages crossing on your chart. To avoid clutter, I keep them off of my chart. Notice how the magenta MA is extremely low and begging to curl back upwards. When all three cross, you will get a (lagging) signal for an uptrend. In other words, a decent to good entry point (buy) is coming up.
One more thing: the yellow 200 MA is going to have to act as support (but can be pierced briefly, as will be shown on the 4H chart below this 1H chart).

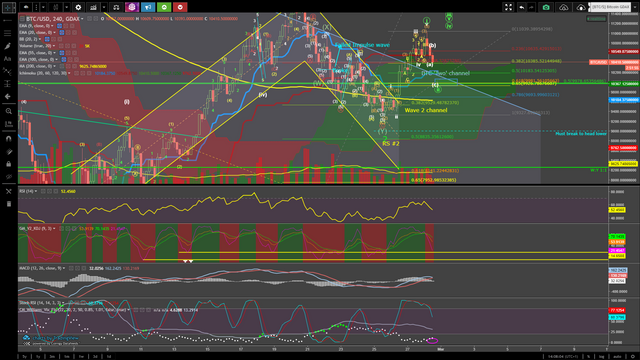
The 4H stoch RSI isn't looking great at all, and as previously mentioned, is the reason why the bull trap hypothesis exists (together with the daily RSI). The MACD is about to bearishly cross, too. Mind you, in a bull market, these stoch RSIs can move down quite quickly without hurting price too much.
If anything, we are expecting the yellow 200 MA on a 4H chart to act as support, but this would indicate quite a deeper retrace as indicated by the Fib levels (in other words, below what we would expect as an entry point based off of the 1H chart above). Coincidentally, it does confirm that the 4H still has a ways to go down, as does the magenta MA on the GM KDJ. It will find support at either of the two horizontal, yellow lines (most likely the 2nd one because of the high degree of this green wave ii, being a subwave of the big wave 3).
No green dots on the Williams Vix signal for finding bottoms either, just yet (on the 4H). It gave us 2 green dots (look left) on the subwave (white) ii of the first motive wave in the channel, so I would assume that it would give us one or two this time around, too. Remains to be seen.
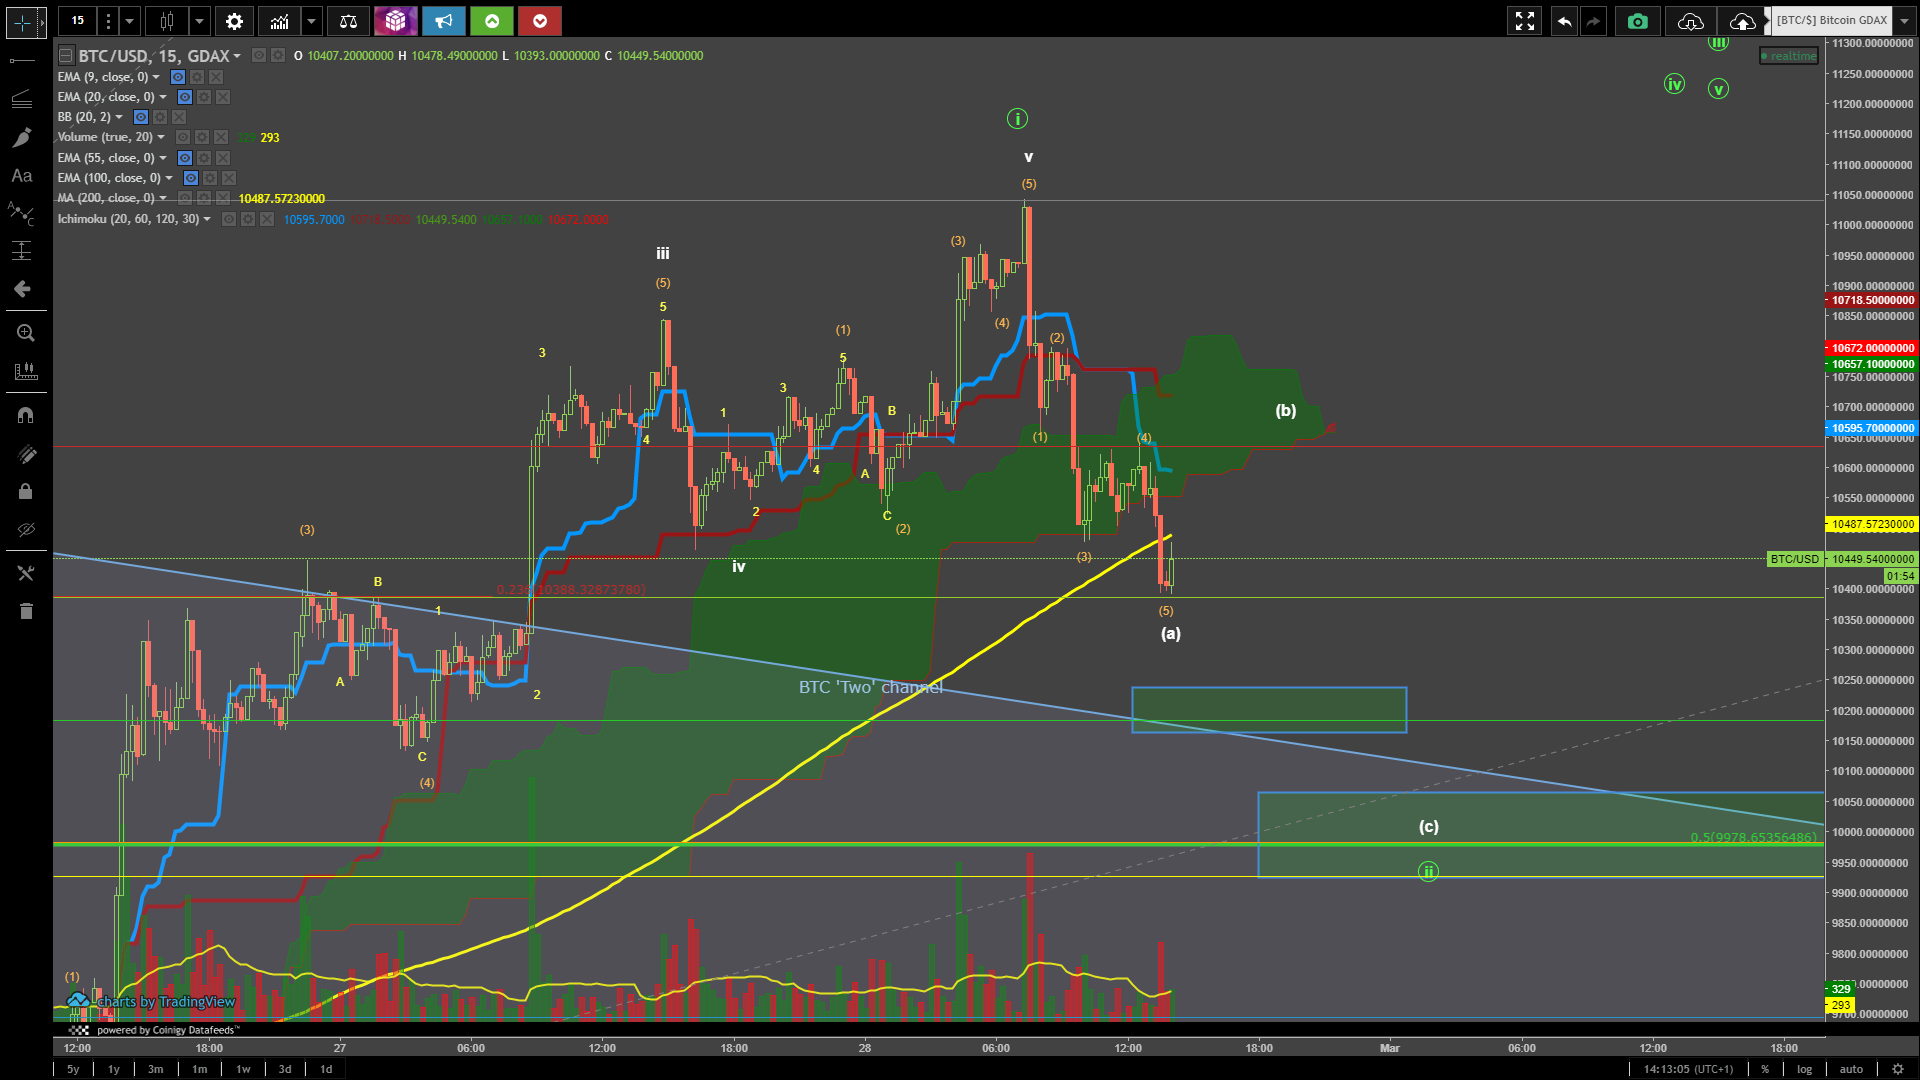
This is a possible count too for this green ii (though the orange wave (3) barely beats the (5) in length, making it the 2nd longest instead of the 1st and thus not invalidating any key principle of EW trading). Either way, unless you are a scalper or day trader, you would not look to scalp this white (b) and simply wait for your more consist buy entries are highlighted before in this blog (boxes on the chart).
The white (b) will most likely be an ABC and the white (c) will most likely be a 1-5, yielding an ABC zigzag correction pattern.
Lastly, I would like to draw your attention to the big picture:
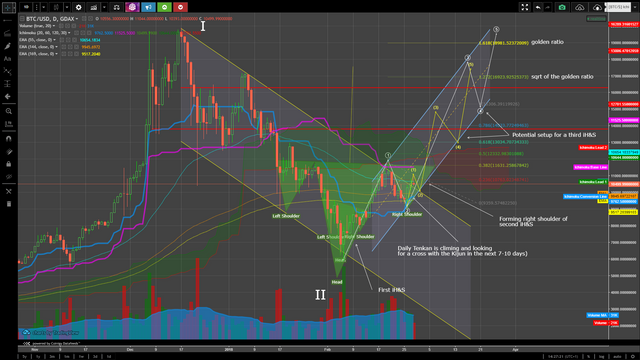
We have completed wave 1 and 2 in our bullish scenario and are looking for wave 3,4 and 5. We are currently forming the 2nd subwaves of that wave 3.
We have formed one small iH&S already, and are setting up to complete a second one. A third one is possible, too, but remains to be seen. Price will most likely move a channel of this sort, though this can be adjusted to be less steep. This remains to be seen and is merely an indication of what is to come.
I would expect for the 3rd subwave (orange) of wave 3 (white) to run into trouble in the zone that previously had a lot of activity during the correction in January, between the two red, horizontal lines.
There is some additional information on the chart itself.
Any questions? Feel free to leave them in the comments. If you are unsure about a particular topic, or you would like to see additional (educational) information on said topic, feel free to ask away.
Follow me for more updates.
Regards,
Arch
Is it possible to have larger images ?
Right-click them and select 'open in new tab'. That's the only way I know of, unless someone else can provide me with a better method.