How to create an ERC20 Token based on Ethereum
In this tutorial we show how to create an ERC20 token easily and simply so you can manage your own cryptoactives. A token is a symbol of any asset that can be marketed. That is, a token can represent a value within a community, an action of a company, a participation in a project, etc.
What is the difference between a cryptocurrency and a token?
As a general rule, a cryptocurrency has its own blockchain (block chain) and a token is based on the blockchain of an existing cryptocurrency. Since the appearance of Ethereum, a large number of tokens have appeared that are based on the Ethereum blockchain. Therefore, a token has the advantages that it relies on an infrastructure already created and, in addition, has the operation that the creator has programmed.
Create an ERC token 20
In this tutorial you will learn how to create an ERC 20 token based on the Ethereum blockchain and, among other things, you can configure the initial offer of coins, how to distribute them, their name, their symbol and many other aspects.
Install a wallet that allows you to deploy smart contracts
A token is created from an intelligent contract or "Smart contract" that is displayed in the blockchain of ethereum. Therefore, to be able to create an intelligent contract, it is necessary to install a wallet in the computer that allows creating contracts or, if you do not want to install anything, you can also use the services offered by MEW (myetherwallet.com).
Personally, I recommend the option of the purse, because it is much simpler and warns you of failures that the contract may have, such as obsolete codes or writing errors.
For the tutorial I opted for the famous "Ethereum Wallet" purse, since it is the purse of ethereum par excellence. You can download it from the Ethereum website. https://ethereum.org/
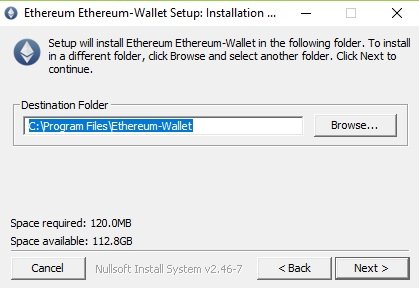
Once downloaded from the official website, the installation will proceed, like any other program.
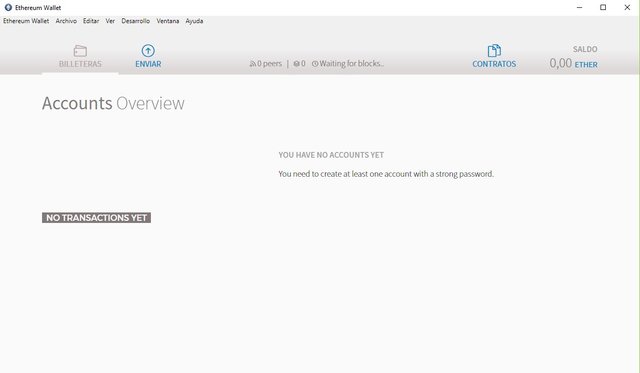
Once installed, the wallet will open and give the option to view the accounts, transactions and the total balance of the wallet. As the purse is newly created, it has neither accounts nor transactions nor balance.
Create an account and make an income
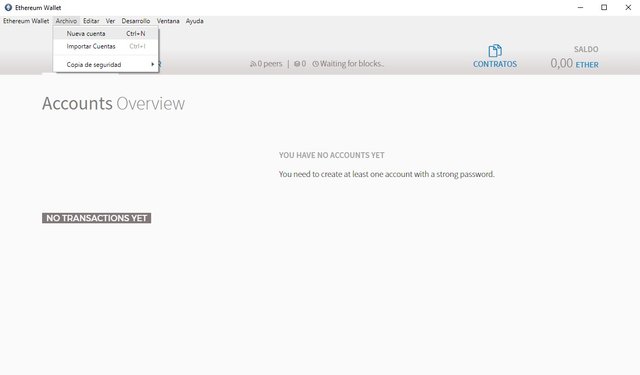
The next step would be to create a new account, because without a created account you can not receive ethers or deploy a contract. The program acts as if it were a purse manager and, therefore, each account is a different wallet.
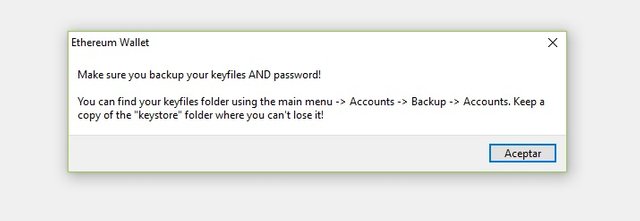
Once the account has been created, it is advisable to make a backup, because the only way to recover the ethers and cryptocurrencies that would be created would be through the file that contains the private keys of the different addresses that make up the account. Therefore, the file containing the keys must be copied and stored in a safe place outside the computer.
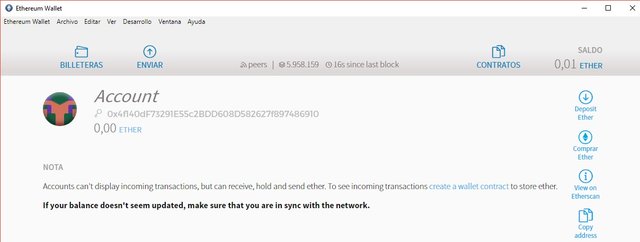
Once the process of creating the account has been completed, it will appear on screen and, as the account is new, the final balance of ethers will be 0. In order to create an intelligent contract, it is necessary to make a small income from ethereums, as To deploy a contract, you have to pay a small commission to the miners who validate the transaction.
On the main page of "Buy Bitcoins" we show the main exchange houses from which you can buy some ethereums easily and simply.
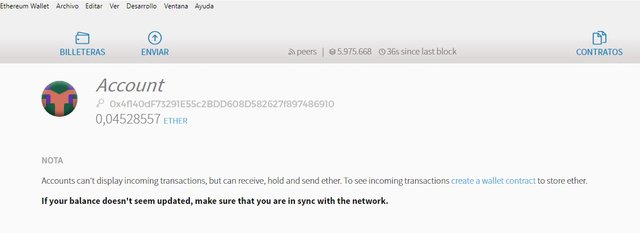
In a house of exchange I bought a small amount of ethereum and I have transferred it to my purse. Once this step is finished, you already have all the necessary infrastructure to create a new token.
Create a smart contract to create an ERC token 20
Currently there are many smart contracts that are already created and, therefore, you do not have to be an expert programmer to create a new token. On the website of ethereum.org they have several contracts created so that people can create their own tokens. I have opted for that source because it is reliable and, supposedly, will not have any malicious code.
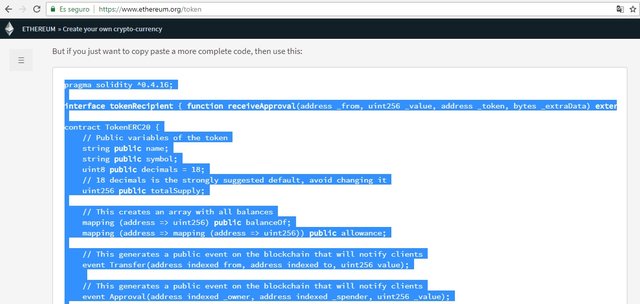
Code source: www.ethereum.org/token
Once inside, in the section of tokens it shows several codes. I have opted for a more complete one, because the first of all is very simple and does not allow practically configuration options.
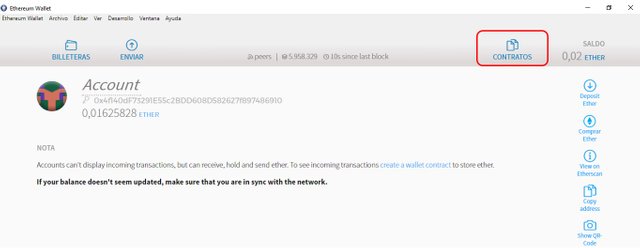
Once you have the code of the copied contract, you must access the section contracts of the Ethereum Wallet purse.
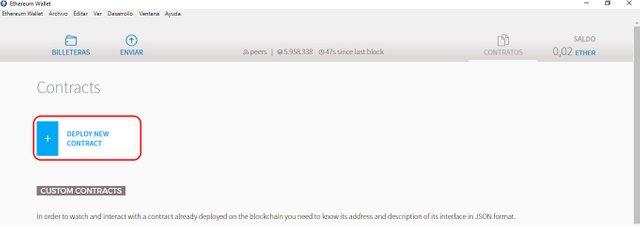
Within the contracts section you can see the contracts created. To create a new contract you have to click on "Delploy new contract" which in Spanish means "display new contract"
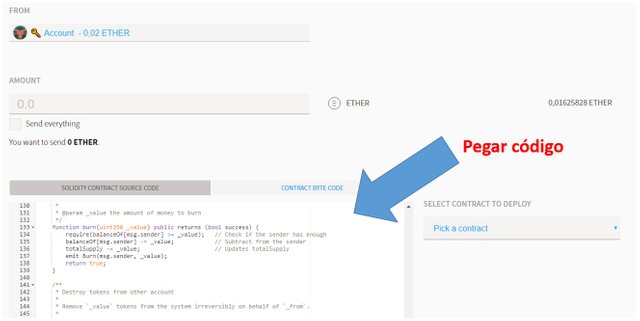
On the page that appears, you must paste the code that we have previously copied from the official website of ethereum. Also, you have to make sure you have selected in the drop-down list the ethereum account that has funds, in my case "Account
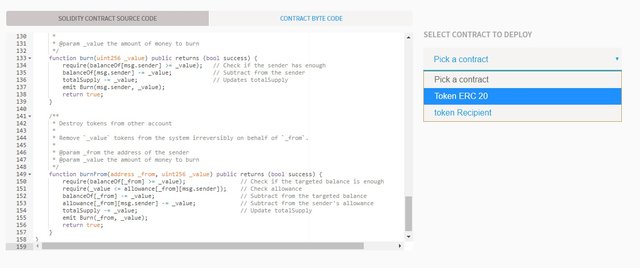
After having pasted the code, a series of configuration options will appear on the right side. The first step is to select from the drop-down menu the purpose of the contract: Token ERC 20.
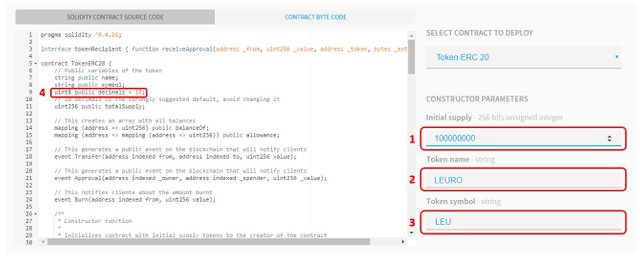
By touching the code, many aspects of the token can be changed. Even so, the most basic changes and adjustments that can be made are the following:
Initial supply: is the number of tokens that will be created. In the case of the token I created (Leuro), I have selected 100,000,000 tokens.
Token Name: the name the token will have.
Token symbol: the symbol of the token, usually there are usually three letters. In the case of bitcoin it is BTC and in the case of Ethereum it is ETH.
Number of decimals that the token will allow: I have selected 18. That is, each token "Leuro" can be operated with 18 decimals.
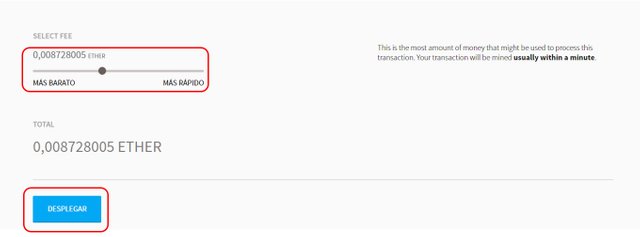
Once the token has been configured, the contract must be launched to the miners through a transaction in ethereum. For this reason, it is necessary to select the commission that will be paid to the miners and, depending on whether it is larger or smaller, it will be validated faster or slower.
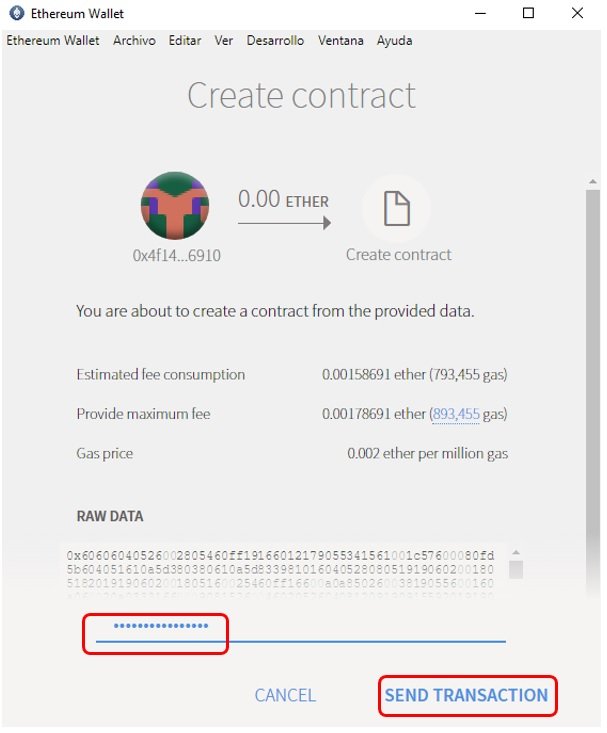
Finally, the wallet will ask for the password to be able to launch the transaction. Once it is entered, the transaction will exit the wallet and you will only have to wait for it to be confirmed in the ethereum blockchain.

The contract will appear in the purse's transaction list. Once it is confirmed, the Leuros will appear in my purse. Normally, the process usually takes 5-10 minutes.
Check if the Token was created correctly
Once the Token has been created, the created tokens should appear in the wallet. To confirm that it has spread through the network, you can access etherscan.io and search for the token that has just been created.
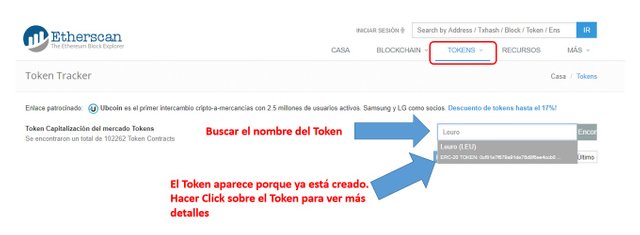
If you click on the name of the token you can access all public data of it.
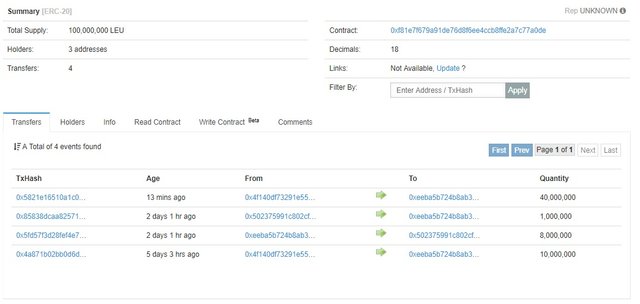
Among other things, you can see the following data: number of tokens issued, number and addresses owned by the token, all transactions made, address of the token contract, etc
How can you sell your own token?
There are many ways to sell your own token. In this tutorial I will show you the method that I have used to sell my own tokens.
Create a wallet in Myetherwallet
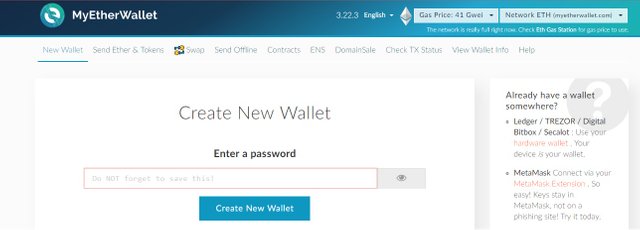
First of all, create a paper purse on the website www.myetherwallet.com. The important thing is to write the public address of the wallet and the private key on a piece of paper or a block of notes.
Send funds to Myetherwallet wallet
Once the wallet is created you have to send the tokens that you want to put on sale and some ether. For the tutorial I sent the 0.013 Ethereum wallet and 1000000 from Leuros. The Ethereum is necessary to move the tokens inside the exchange house.
Import account in Etherdelta
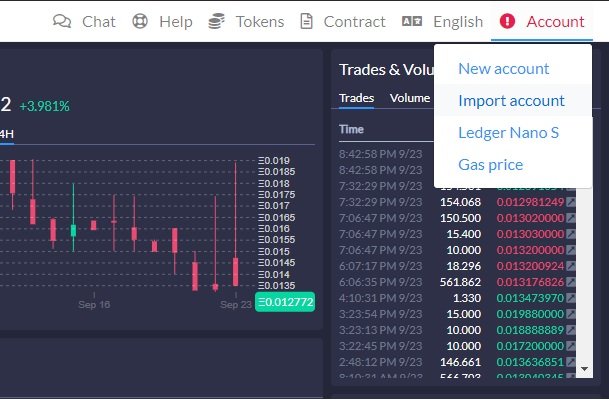
After having prepared the Myetherwallet purse, you have to access the etherdelta.com exchange house. In the upper right menu there is an option to import accounts.
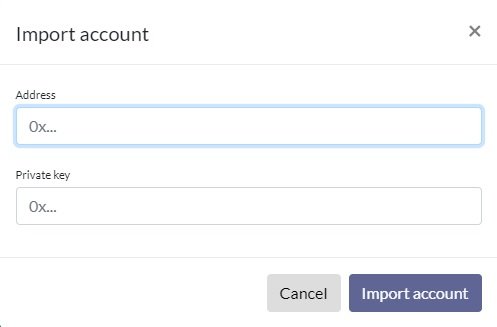
In the next step you have to enter the public address of the wallet created in Myetherwallet and its private key. Once this step is done, you will have access to all the tokens sent to the wallet.
Display token in Etherdelta
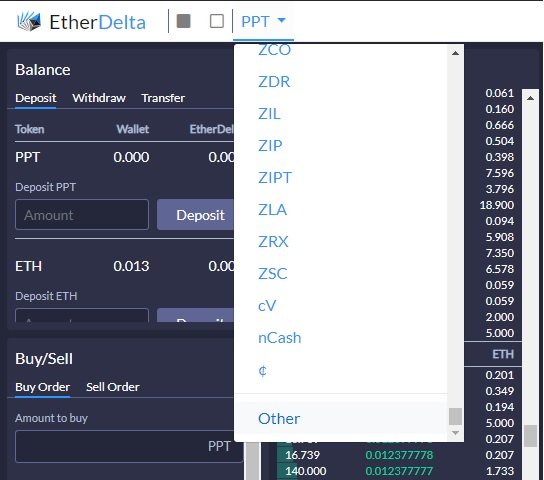
Once the account has been imported, we have to load our token. Therefore, at the top you have to click on "PPT" and then "Other".
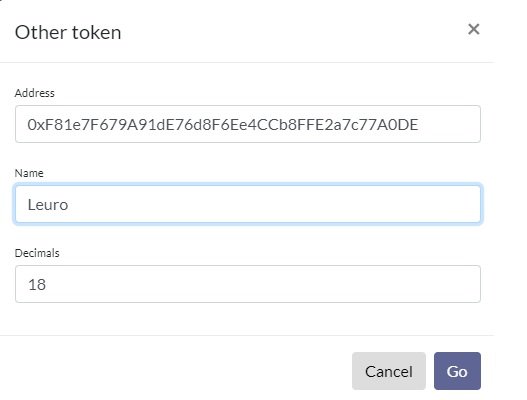
Now you have to add the data of the created token. The first of all is the token contract address (it's in the wallet from which the token was created). You can also check the contract address at etherscan.io. You also have to add the name and decimals it supports.
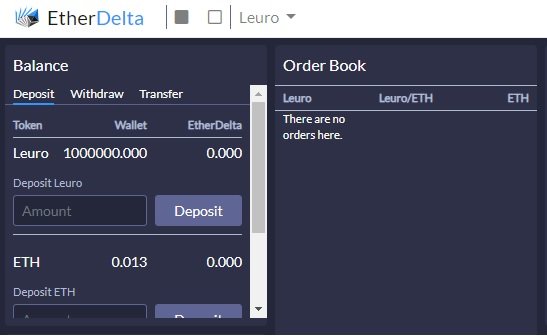
Once configured, the tokens that the wallet has (in my case 1000000 of Leuro) will appear in the balance section.
Create a sales order
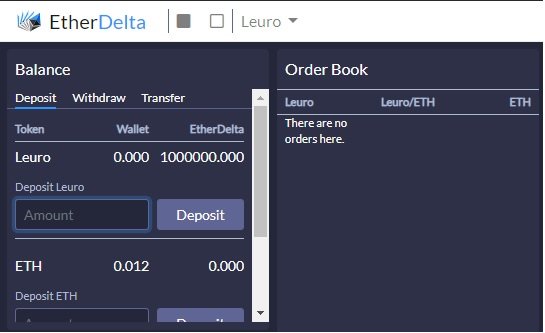
To sell the tokens you have to deposit them in Etherdelta. To deposit them, indicate the amount and click on "Deposit". This action requires that the wallet have something of Ether, otherwise it will not be made.
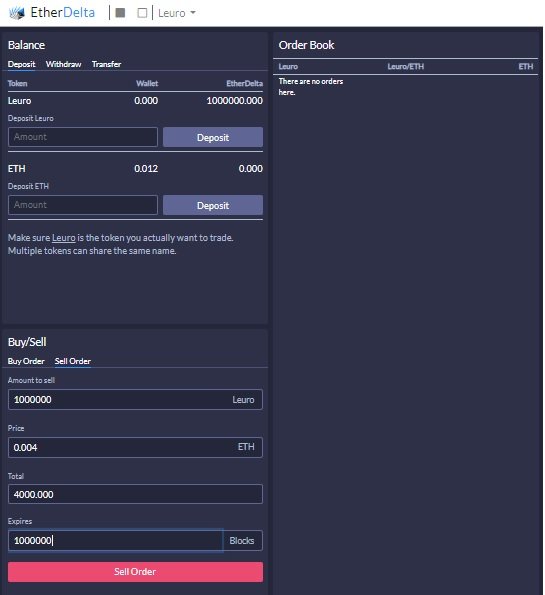
Once deposited (sometimes it takes several minutes to appear), there is a "Sell order" (sales order) where the following aspects will be indicated: amount of token to be sold, price, total profit and blocks until the order expires. sale (is the expiration).
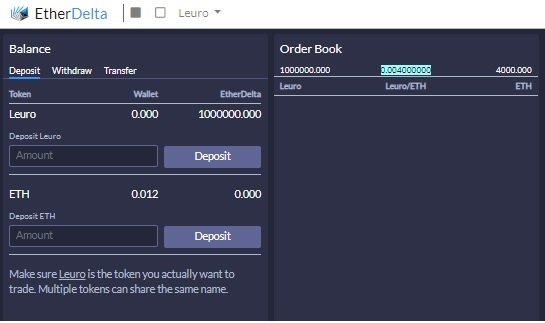
Finally, the sales order will appear in the order book. Now we just have to wait for someone to buy our token