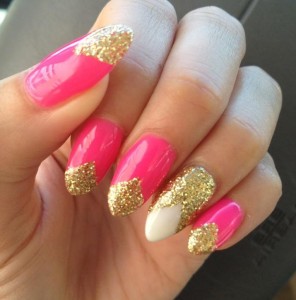
How to put gel nails - step by step

If you are curious, you want to learn to apply your own gel nails or you want to give your friends a manicure they will not forget, you have to know a few very important things and you also need to be prepared with utensils right.
First of all, you need to buy your gel nail kit. In detail I talked about this in this article but I suggest you find one that includes, besides the UV lamp (without which you can not make your gel nails) and the brushes, gels and related solutions. To make it as easy as possible, here's what you need for a basic, gelless manicure without complicated or glittering pattern:
The special gel, which can be transparent, white or pink UV lamp that dries the gel on the nails and strengthens it quickly Primer, TopCoat, Cleanser and Cuticle Oil If you want to try and apply tips (nails) then your set should also contain these tips together with special clamps and an adhesive for attaching them to nails Needed accessories: nail files of various shapes for gloss or "buffer" to take a layer of nails, sticks to push the cuticles and do not apply special application brushes; You can also check if the set you want to order includes a variety of glitter or rhinestone containers for interesting patterns, because as soon as you get the taste of gel nail you'll want to experiment with patterns we!
Further, if you already have this kit, I will show you the main steps for successfully applying gel nails.
First of all, wash your hands well with soap and warm water to have your nails clean and skimpy, and soft cuticles. Using the special cuticle sticks with gentleness, push the skin over the nail, from each finger upwards, to release as much as possible the natural nail. Next, use the nail file to give the shape you want your nails, and with the "buffer" easily remove the nail's natural gloss, evenly.
The first solution in the kit that you will use is the so-called Cleanser, which you apply on a cleansing disc and clean your nails to remove excess oil. The next solution is the Primer, which takes care that your gel nails stay firmly attached, apply a thin layer on each nail.
The next step is to take the special brush and apply gel on the nail in the first layer, a thin layer without touching the cuticles. Take the UV light and put your hand inside for about 2 minutes (depending on how thick you apply the first layer) until the gel is hardened. After passing the two minutes, pull out the hand under the lamp and apply a thin layer of gel to each nail in hand and let it under the UV lamp for another two minutes.
Finally, the nail will be a little sticky, so wipe it with the special gel cleanser solution just as you have removed the nail and before applying the gel and apply the TopCoat solution for extra gloss and durability. For nail and skin nourishment, use the cuticle oil at the base of the nail and massage it until it enters the skin.
Of course, you can experiment with countless patterns and colors, but this is the basis for applying gel nails in a correct and clean way, so avoid getting sick or destroying your nails. Try your own at home, see how simple it is and then leave your imagination free and create the most beautiful nail designs!