How to photograph against the sun and get great shots
.jpg)
Surely, when you took your first steps in photography, you were taught to keep the sun behind you, so that, as the main source of light, it completely illuminates your subject.
When you shoot in the sun, you will most likely have problems, this is a faded sky and a poorly lit main object. In general, not a good disposition of the sun at first sight. But when you learn to use light correctly, you will realize that when the sun is in front of you, you can get great shots. In this photo lesson, you will learn all about the techniques needed to create beautiful shots when hitting the sun.
The effect of glare
If you are not photographing a sunset or sunrise, you should avoid pointing the camera directly at the sun. Try to frame the frame so that the sun is behind the frame.
Fulfilling this rule will result in two effects: you will see that the entire frame has a "glow" from the sun's rays, or it is very likely that you will also see an arc of light passing through the frame. Both of these effects can be used to your advantage to create a more artistic looking photo. If you want to avoid this, use a hood. You can also try to keep your palm on the lens to prevent sunlight from entering the lens.

The effect of the diffraction of sunlight
Sunlight diffraction is technically another aspect of the lens flare. This is a more desirable and beautiful effect, and you can better control its presence.
To achieve the effect of sunlight diffraction:
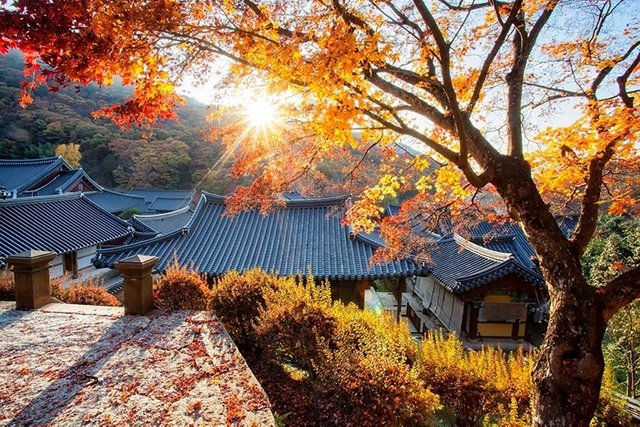
Make a frame so that the sun falls inside it, but it was partly behind an obstacle. The time of day is not that important, but it is easier to control this effect during the golden hour and at sunset or sunrise.
You need to hide most of the sun and leave only a small part of it. If you make it too small, the effect of the diffraction of the sun's rays will not be evident. If you leave too much sun, the frame will light up. Placing the sun behind the leaves of a tree in this is the perfect solution.
This effect is caused by the lens opening. The number of sun rays is determined by the number of blades in the lens diaphragm. 2 rays will appear on each petal.
The effect occurs when you close the lens aperture to a narrow value. The values of f / 11 and already give us this effect.
Photographing against the sun often leads to the fact that only its silhouette appears in the place of the main object, and its details will be lost in the shadows. If you want to view the details of the object to be shot, you need to perform an exposure correction to overexpose the shot. The additional exposure compensation can be +2 or +3.
With a narrow aperture and exposure compensation plus the shutter speed can be slow. Therefore, use a tripod or compensate for this prolonged exposure by increasing the ISO.
Shooting target
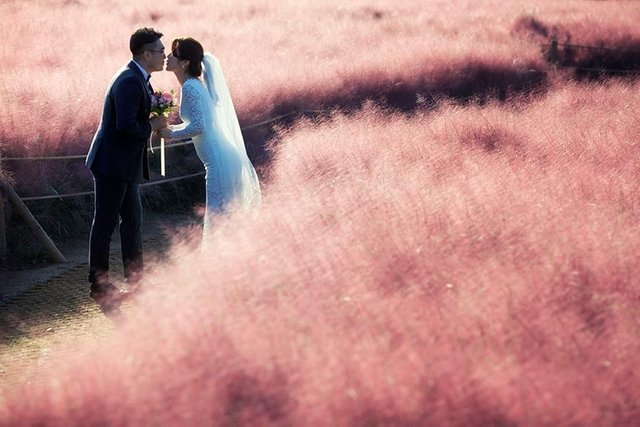
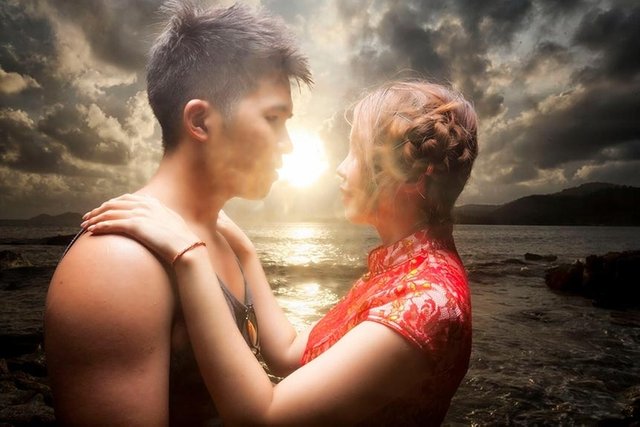
The silhouettes are not only the costs of shooting against the sun, but also the subject itself. When you photograph in the sun, you always have a good chance of creating silhouettes. Getting the best silhouettes requires little preparation. You have to plan a shot and choose the best angle to shoot.
The first step is to decide which object is silhouette. Is it a person or an architectural structure? Maybe this is a lonely tree in the field.
In which direction will you photograph this object? When do you need to get to your place in the morning or evening so that the sun is behind this object when you photograph it?
If you shoot a silhouette of an object only against the sky, you often need to kneel and shoot from the bottom. Removing a large part of your object from a low point will reveal it as a silhouette, as most will be against the sky. As a rule, where the horizon intersects the silhouette, or rather, below this line, the object will not be visible as a silhouette and will merge with the background, so shooting from the lower point is more appropriate.
Look at the position of the sun in the sky. Is it too bright and the light is too bright? Can you hide the sun behind the object? Is it possible to create a diffraction effect of the sun behind the silhouette?
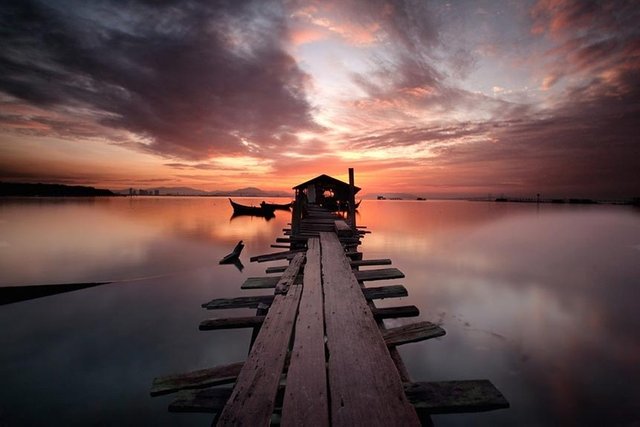
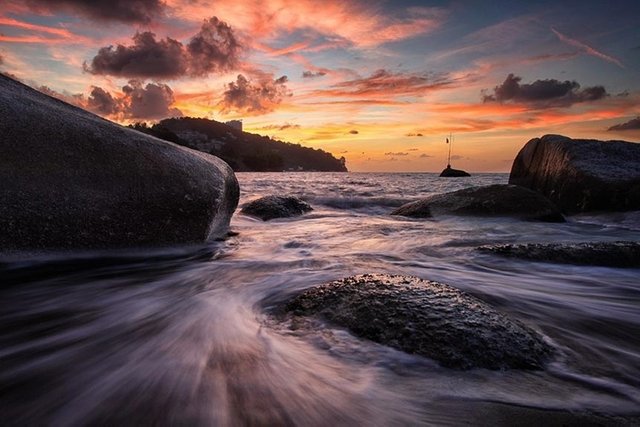
Sunsets and sunrises
Sunsets and sunrises are one of the most popular scenes for almost all photographers. This time of day fascinates photographers of all skill levels, and you definitely don't even need to be a photographer to appreciate these colors in the sky. This time of day is also the best time to photograph against the sun. Especially when it is close to the horizon, as the sun does not overload the photo with too much light.
So what should you look for to get the best result?
Know the sunset point and sunrise - the sun changes its position in the sky in winter and summer. Use resources, such as SUNCALC, to find out exactly where the sun will go down and the sun rises on the desired date at the chosen location.
Check the weather: cloudy days will not give a normal sunset or sunrise. Always check the forecast and try to choose the best conditions. Also, you are not looking for a completely clear day, 30-50% of the cloud cover is what you need. The sky is more beautiful when the rays of the rising or setting sun are reflected by the clouds.
Explore the location - Knowing a great place to get around on a good sunrise is good. Knowing exactly where the best resume point is is even better.
Focus point: If the sky isn't really epic for sunset or sunrise, a focus point is needed to show interest in photography. A solitary tree or structure is often a large object. Likewise, a river that has a reflective surface and possibly a guideline will work well.
Filters: for landscape photography, when photographing in the sun, neutral density gradient filters are often required. Be careful that the sun does not create unpleasant and unwanted gleams when you use them.
Postprocessing: Postprocessing can improve your images. Using techniques like pasting multiple frames with different settings and using gradient filters can improve your shots.
Equipment information
There are many useful accessories that you should have when shooting against the sun. Depending on the type of photo you are taking, you will need something from this list or all of this:
Lens hood: you need to minimize or eliminate the effect of glare on your shots.
Filters: using a polarizing filter is a good idea for landscape photography in general. Taking pictures with the sun means using neutral density gradient filters is also a good idea.
Flash. If you want to highlight a person or object when photographing against the sun, you need to use a flash. Without it, you will have silhouettes of people or objects. If you want to avoid this, you will need extra light.
Reflector - can be used to reflect and direct sunlight towards the person or object you are photographing. They are most commonly used for portraits and can be used alone or in combination with a flash.
Digital Mixing
Digital blending is a post-processing method that uses brightness masks to control the amount of light in the photo. Such a method can lead to an improvement in the quality of landscape images taken against the sun. This is a great topic, described in more detail "HERE"
To get the best results from this technique, a tripod and exposure bracketing are required (when three or more shots are taken from a point with different exposures). So you will have to spend time studying the brightness masks in order to obtain a natural and professional result.
Conclusion
For the photographer, the sun, the main source of light. Knowing how to use it best is essential for getting good photos. In this article you learned to photograph against the sun, this is a more interesting and creative lesson than taking pictures with the sun behind you.
Do you like taking pictures against the sun? What techniques and ideas do you use in your shots? Do you have examples of photos that you can share with our readers? Write your comments!