Oil Change Basics
It has been requested that I do a series on general automotive maintenance and knowledge. So today we begin....
The dreaded and all too frequently occurring OIL CHANGE light pops on in your car....what's next? You can always pay someone else to do it while you write a new blog and sip your latte. ( Both of which I happen to enjoy ) Or you can spend a few moments getting your hands dirty, embracing the bond between man and machine and tackle this simple task like a Man Cave Man would!
This is a step by step of how I performed an oil change this past weekend in our van. You may find your own steps vary slightly and as always, seek specific information concerning your own vehicle in your owners / maintenance manual.
First I gathered all needed materials
- Oil Filter
- Engine oil
- Drain pan
- Towel / Rag
- Gloves
(In the pic is also a drain plug gasket. While not required I knew mine was leaking)
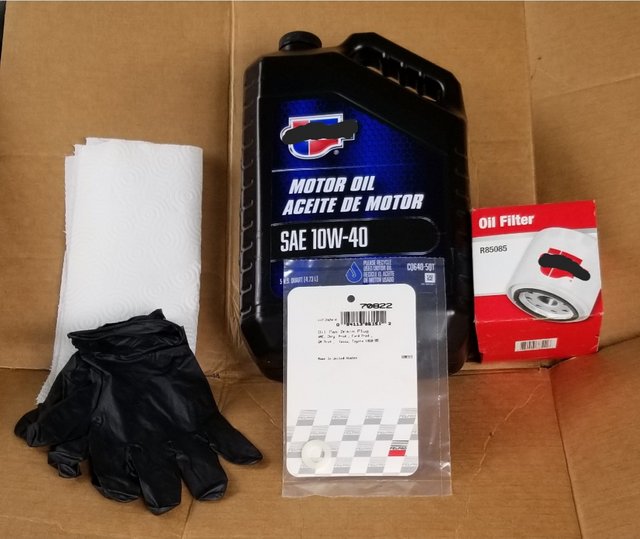
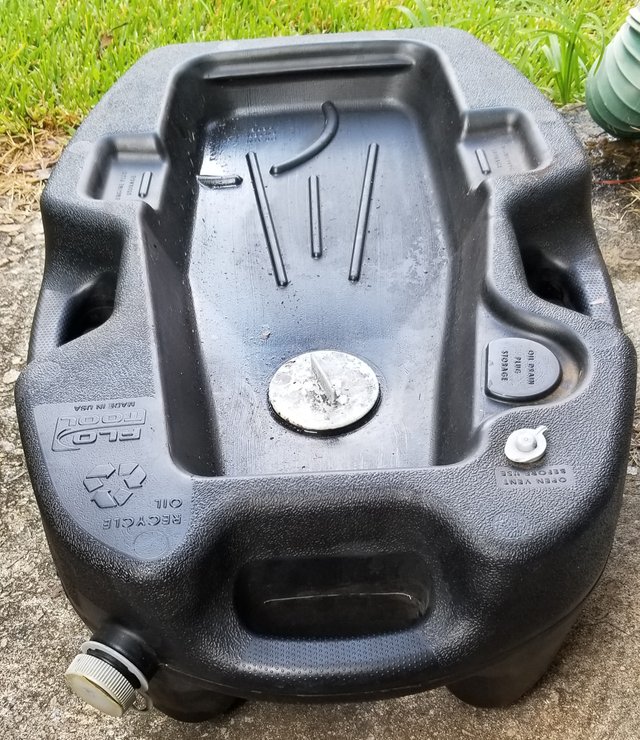
Gloves are worn as a protective barrier between your skin and any irritant you may come in contact with. Oil can stain the skin and solvents / cleaners can cause redness, irritation and in extreme cases chemical burns. I also use towels or rags to clean up any oil drips or residue during this procedure.
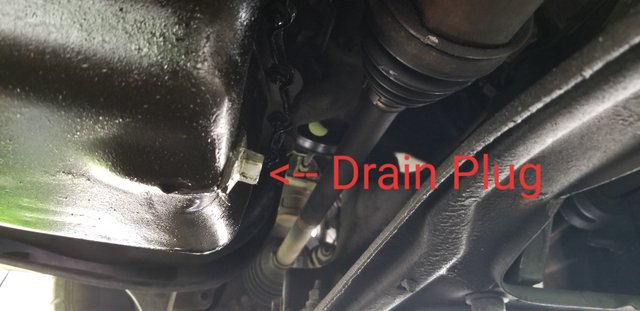
Next you want to locate the drain plug on your oil pan. Remove this plug and let all the oil drain into a suitable catch can. (Used motor oil can be recycled at most auto parts stores.) Once all oil is drained, reinstall the oil drain plug and tighten to spec.
The next step will be to remove the old oil filter. Most can be removed by hand but they do make various styles of oil wrenches for the pesky ones. Make sure to allow the oil filter to completely drain before disposing of it in the trash.
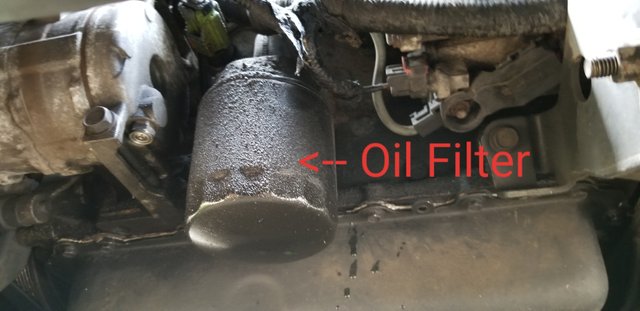
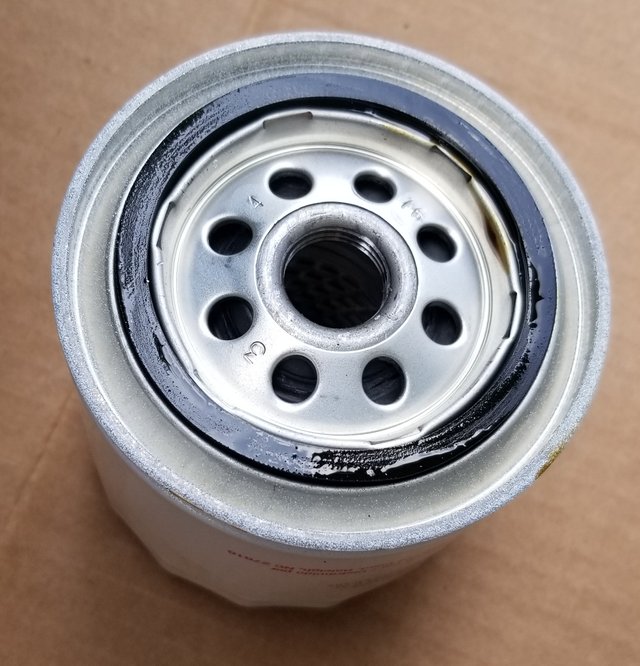
Before installing the new oil filter make sure that the mounting surface is clean of any dirt or residue. Also be mindful that the old filter gasket isn't stuck on there either. Double gaskets make for big messes!
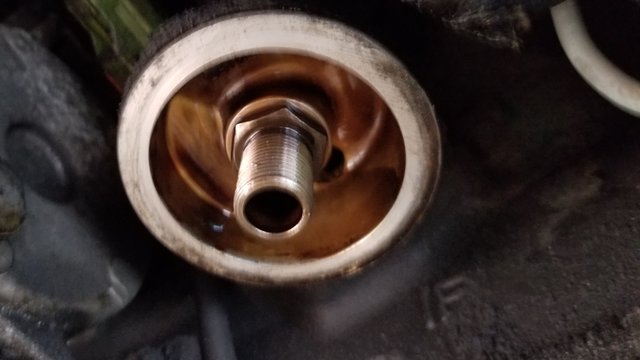
I like to lightly apply some oil to the gasket on the new filter before installing it. Now you can screw the new oil filter on the stand pipe and tighten to spec.
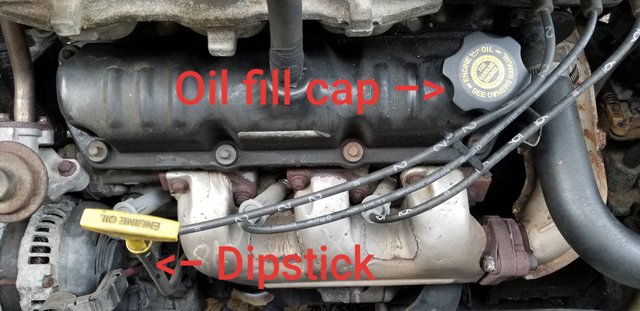
Now we'll move to the top of the engine compartmemt and locate the oil fill cap and dipstick. Remove the oil fill cap and pour in the proper amount of oil. (Our van is a 3.8L which holds 5qts) Once you are done, replace the oil fill cap.
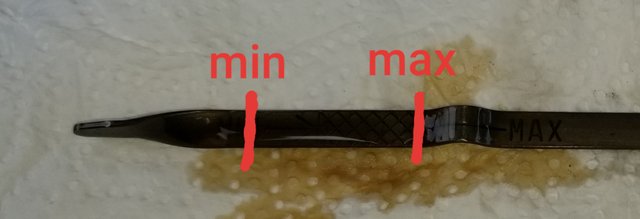
Heres the final step to check the work you've just done. Making sure all your tools, supplies and anything else you may have with you is free and clear of the engine compartment, start your engine. You need to only run it for about 10-15 seconds, this gives oil pressure an opportunity to build and you can make sure you dont have anything leaking. With the engine off, remove the oil dipstick and check the oil level. It should be to the full / max mark. (Dipsticks have hash marks to denote minimum and maximum allowable levels...the safety zone)
Once you are satisfied with the results close the hood. THE END
Now you can sit back and marvel at your handiness or go out for a ride. I hope that this has been informative and helpful. If there are any particular topics you would like to see discussed or questions you have, please feel free to leave your input.

You have a minor misspelling in the following sentence:
It should be completely instead of completly.Has been corrected.
I upvoted your post.
Keep steeming for a better tomorrow.
@Acknowledgement - God Bless
Posted using https://Steeming.com condenser site.
Really great post! Proud addition to the man cave basics!