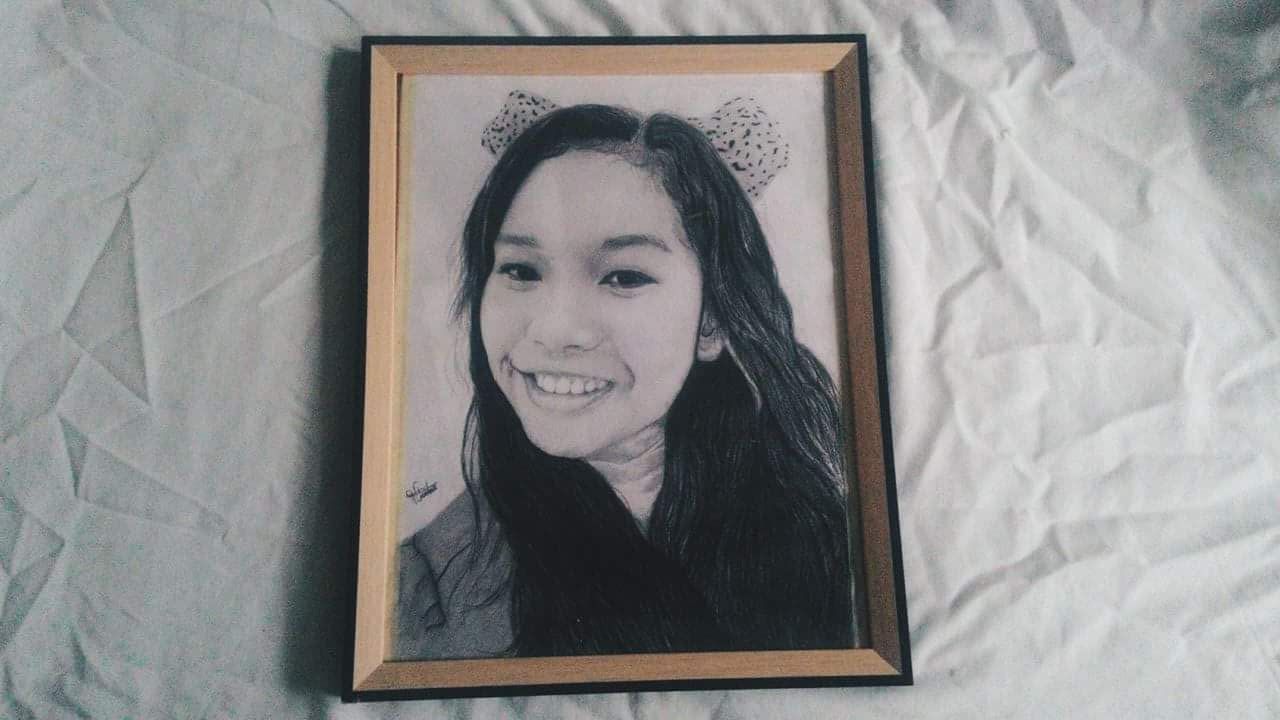
Self-portrait made easy!
It’s been a year since I have received my “self-portrait” sketch. It was given by my artistic yet fantastic admirer hahaha. Since, I really love the sketch I tried asking him how he did it.
He had given me 5 basic steps on how to do your “self-portrait”.
He said making your self-portrait is not an easy task. You need to know the different techniques that you’re comfortable with. Whether, you tried to sketch your look in a mirror or in a picture, it can really teach you a lot about art, yourself and also the art of seeing each other’s uniqueness.
- Start with a very light sketch.
You need to start with a very light outline. You need to know the proportions of your face or the face you chose to convert into an art. Get the major features first, again this is the first step you need to do it LIGHTLY so if you made a mistake, you can erase it easily and it won’t affect the small details you have a hard time creating on.
2.Right then, You can add the shadows and smudge them.
In this part, You need to know the lighting you are into, to find the correct shading of your shadow. You also need to smudge it very lightly because if you don’t your work will be not neat to look at. You can use a smudging tool or your fingers (if you don’t have a wet fingers) to draw out the shadows. You can use different medium like a charcoal, graphite or pastel pencils since it could blend with creating your shadows very well.
3.After you outline, you can now draw your hairlines
You need to start with the head. Thicken the lines you draw from your step no. 1 then you can do highlights and shadowing of your hairlines.
4.Here, you can add some fine details.
After you are done with your hairlines and a little shadowing, you can now add a very fine detail of the eyes, the lips and the teeth (if ever the picture you are copying smiles with a teeth hahaha just kidding) You can add more shadow on your neck so that it wouldn’t look as if you don’t have a neck because it was not emphasized in your sketch. In here you can add more shadows, do some techniques in smudging.
5.Expose your work!
Of course, if you really love your work you will humbly expose it by putting it in frame and hanging it in the wall of your room. Always look for a good frame, black frame or a wood frame would do to maintain its art and to harmonize with the medium you used.
Doing some self-portrait is not easy; I hope I could help you guys. Just practice and eventually without you noticing it, you became good at drawing! Plus, if you are planning to have a good gift, making a portrait of that person is so something special. You know, girls wants effort! Then show it by making a sketch.

day ang last two tags bitaw nimu kay steemph ug philippines para makita ka sa mga pinoy. dayun try ug visit ang @steemph.cebu makatabang na sila nimu.
kuya thank you sa help😊
way sapayan
@originalworks
The @OriginalWorks bot has determined this post by @vanessajoyce to be original material and upvoted it!
To call @OriginalWorks, simply reply to any post with @originalworks or !originalworks in your message!