Crochet Iris Posy
Hey Steemit :-)
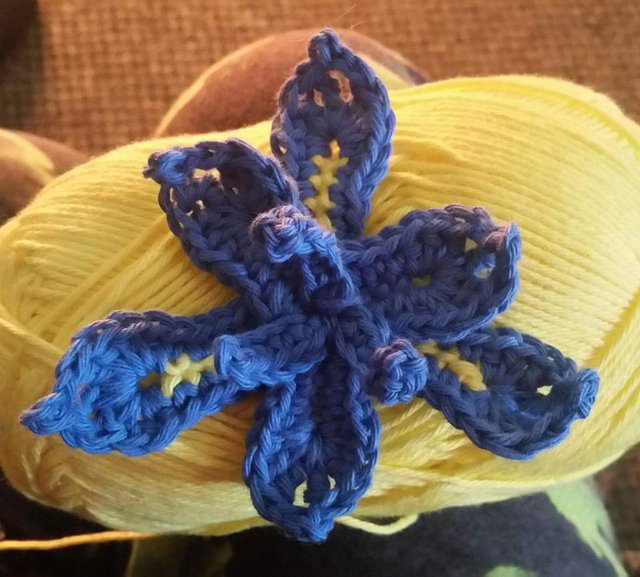
Here is my crocheted iris posy. I really like making these as they were my lovely Nan's favourite flower and her name was Iris :-). They're made in 3 layers, which are tied and stitched together at the end.
Layer 1
1. With yellow wool, *chain (ch) 8, double crochet (dc) in the 4th stitch from the hook (to make a loop) and continue to dc to the end. Repeat from * twice more so that you get three 'petals' and attach the last stitch on the last petal to the first stitch on the first petal.
2. Attach blue wool to the first stitch on the first petal, ch 1, then dc in the next 4 stitches. In the loop at the end, do the following: dc, half treble (htr), treble (tr), double treble (dtr), picout (ch 3, then attach to the first ch with a ss to make a point), dtr, tr, htr, dc.
3. Do a dc in the next 3 stitches down the other side of the petal.
4. In the last stitch at the bottom, do a dc2together to goin it to the first stitch of the next petal.
5. Dc in the next 3 stitches up the side of the petal (as in step 2). In the loop at the end, do the following: dc, htr, tr, dtr, picout, dtr, tr, htr, dc.
6. Do a dc in the next 3 stitches down the other side of the petal.
7. Repeat steps 4 to 6 for the final petal and join to the first stitch on the first petal with a slip stitch (ss).
Layer 2
1. With blue wool, *ch 6, double crochet dc in the 4th stitch from the hook (to make a loop) and continue to dc to the end. Repeat from * twice more so that you get three 'petals' and attach the last stitch on the last petal to the first stitch on the first petal.
2. Ch 1, then dc in the next stitch. In the loop at the end, do the following: dc, htr, tr, double treble dtr, picout, dtr, tr, htr, dc.
3. Do a dc in the next stitch down the other side of the petal.
4. In the next stitch, do a dc2together to join it to the first stitch of the next petal.
5. Dc in the next stitch up the side of the petal (as in step 2). In the loop at the end, do the following: dc, htr, tr, dtr, picout, dtr, tr, htr, dc.
6. Do a dc in the next stitch down the other side of the petal.
7. Repeat steps 4 to 6 for the final petal and join to the first stitch on the first petal with a ss.
Layer 3
1. *Ch 5, dc in each stitch until you get to the end. Repeat from * twice more until you get 3 'petals'. Join the last stitch on the last petal to the first stitch on the first petal with a ss.
I then layer them up with layer 1 at the back, layer 2 in the middle, and layer 1 at the front and join them together with a wool needle and some blue wool. It should only need a few stitches.
Thank you for reading. Hope this makes sense! :-)
Gracias por compartir este material, Me gusta lo que has publicado. Muchas Gracias