How to Print a Picture in a Glass Mug with a press machine
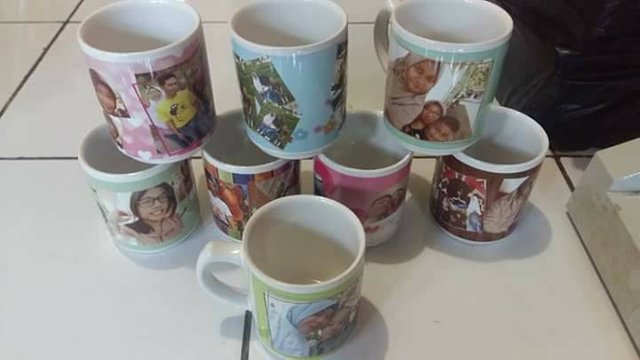
Mug or enamel cup is a cup made of zinc in the past (old school). But who knows who started first, so that this enamel mug becomes ngetrend again. After I find the info was other countries also ngetrend again? Wow can ya? Only me who missed the information, so it's too late to share. In the old days, almost all kitchen appliances wore enamel decorations, from cups, plates, baskets, mugs, and many more all wearing enamel decorations.
Tips on how to make pictorial mugs easily use only inkjet printers and paper transfer paper with special decal paper Sublime, Art Paper and Pigment. Paper transfer paper decal for this mug surface coated glue, so that when there is a layer of varnish on it can be lifted or loose when inserted into the water. And the Varnish layer can be moved or transferred to any media from the surface smooth and not pervasive.
By using paper transfer paper Decal this then the mold can we transfer or applied surface such as; mugs, glasses, ceramics, wood, housewares, decorative candles, plastic children's toys, fishing gear, cars, motorcycles, helmets, frames, book covers or album covers, soap, metal (iron, steel, aluminum ) and others, provided that the surface of the media to be printed smooth and not pervasive we certainly can easily print it.
Here are the steps Make Screen Printing in Glass Mug:
Step 1
Make sure the paper is HVS Coated paper for optimal results.
The surface of the printed paper is shiny or sticky if our fingers are dampened with water.

Step 2
Make sure the image to be printed already in the mirror image first. The printing area for maximum mug screen printing is 22 × 8 cm, or adjusted to the diameter of the used mug. Dry the pre-traced image for about 5-10 minutes for optimal results.
Step 3
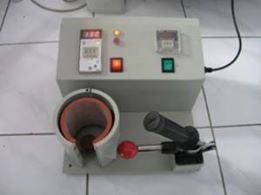
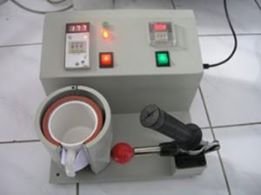
Plug the power cord into the power source, then set the temperature between 180-1850C (1).
Set the pressure pressure of the press machine by rotating the red ball (2), adjust the diameter of the mug to be pressed. Turn on the heat press machine by pressing the power button (3) to ON position, then the yellow indicator light (4) will light up.
Step 4
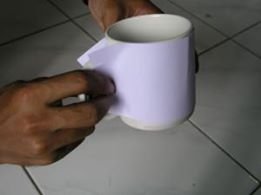
Paste the image on the mug center.
If you need to seal the image with clean HVS paper to surround the mug, so no dirt on the press machine on the mug.
Caution: Make sure that the coating layer on the mug and the screen printing ink is dry and the image is mirrored first.
Step 5
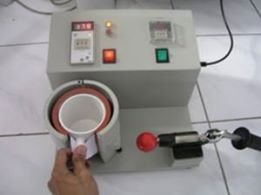
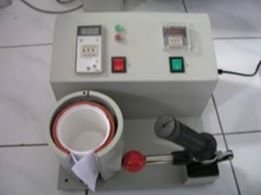
Put the mug into the heat press machine, then turn on the red power button. When the temperature has reached 1800C, input the mug that has been taped image on the press machine by lifting the lock lever (5) first, then in the press. Currently the temperature will drop drastically, wait until the temperature reaches 1800C back.
Then set the timer (6), ie the duration of the mug press between 20-30 seconds.
Step 6
Press the lock lever again. When the temperature is in accordance with the setting of the red indicator light will light (7).
Turn on the timer switch (8) that has been set.
Step 7
Turn off the timer and power when the alarm sounds. Let stand about 2-3 minutes until slightly cool, then mug lifted.
Caution: if still hot mugs do not lift from the press machine, because the image will become shaded.
Step 8
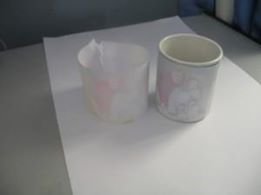
Open the HVS mug coating paper
Step 9
When it is cool, remove the screen printing paper. Retrieved pretty ready-made mugs that have been screened.
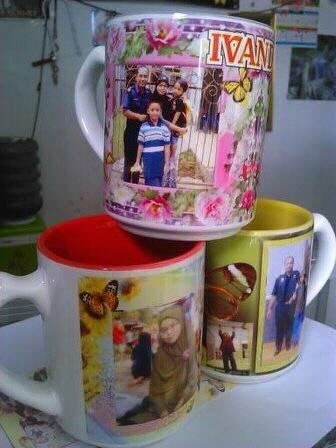
that's the tutorial I managed to give you, I hope you guys like, thank you and happy activity @rizkart