Building a CRaZy Dragon SMOKER !
I cruise the web like most people, admiring all the cool stuff, some that you can purchase if you had a fist full of dollars, and some that you know you couldn't purchase because it was a one off build.
One that kept showing in my news feed was a large dragon fire pit. I saw it during random webness, i had friends share it to my wall, family asking if i had seen it.
YES, i had seen it, and it was amazing !
The build was more technically correct than I have the skill to make, but i had to try SOMETHING.
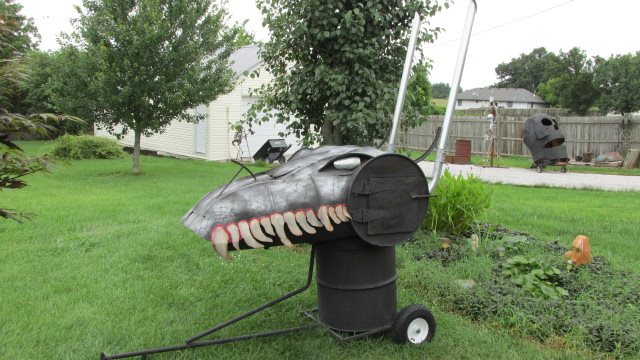
Concept became more than a fire pit in my head, but a smoker, a dragon head smoker. Cooking is good, cooking with fire and smoke is better, doing all this in a dragons head, well this is borderline genius !
I do not generally draw up plans for builds, but I do use a lot of "stare time". Usually just sitting in my shop, listening to some music, and staring at the materials i have to work with.
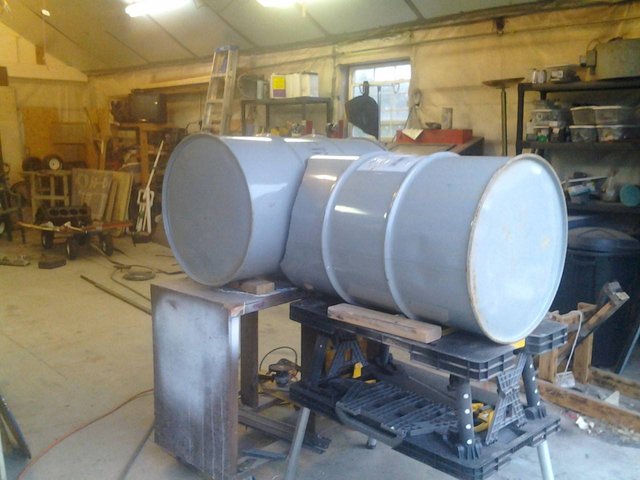
For this, my materials were 55 gallon steel drums and various other bits i had around.
I do not worry about the elusive "food grade" barrel. This relates to a coating inside the barrel, which will have to be burned off anyway. The ultimate option would be stainless steel barrels. They are expensive, and also require different welding materials than what I have on hand.
Tools used in this build are a MIG 135 Eastwood 110V welder, Harbor Freight plasma cutter, power drill with 3M paint and rust stripping disk, sharpie, various clamps, and a selection of hammers. My favorite being a large ball peen hammer.
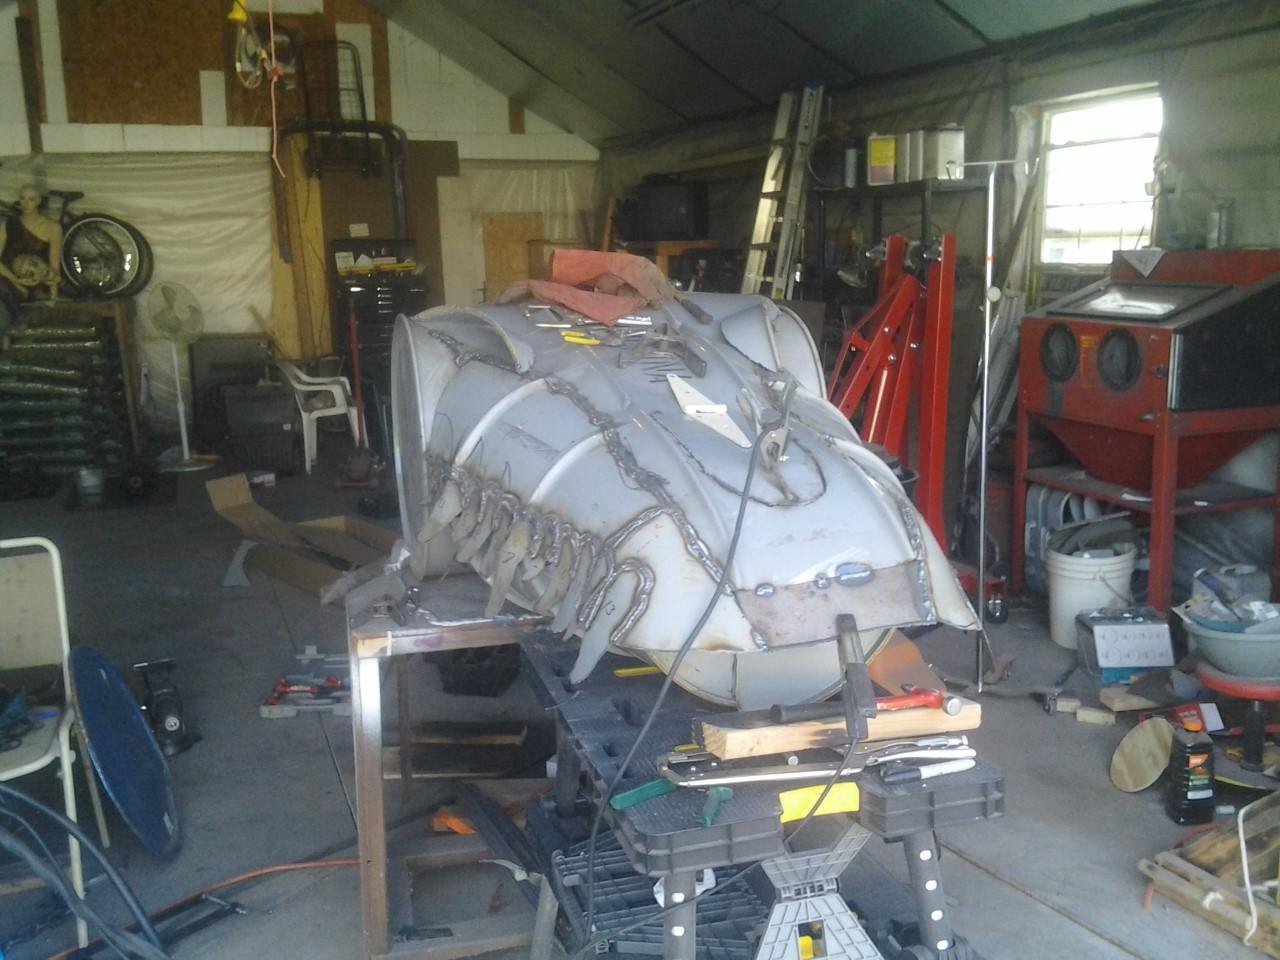
First i lined two barrels up to form a T, rough cutting the one barrel into the shape of the other.
After staring at it sitting like this for a considerable amount of time, it was decided that the front of the barrel needed to be partially cut off, and the mouth barrel needed to be split, along with an area sectioned in to widen the top of the snout.
This build happened well before any thoughts on STEEMIT, so there are many processes that are not photographed. Even at that, i get into "build mode" and just go, forgetting to take pics !
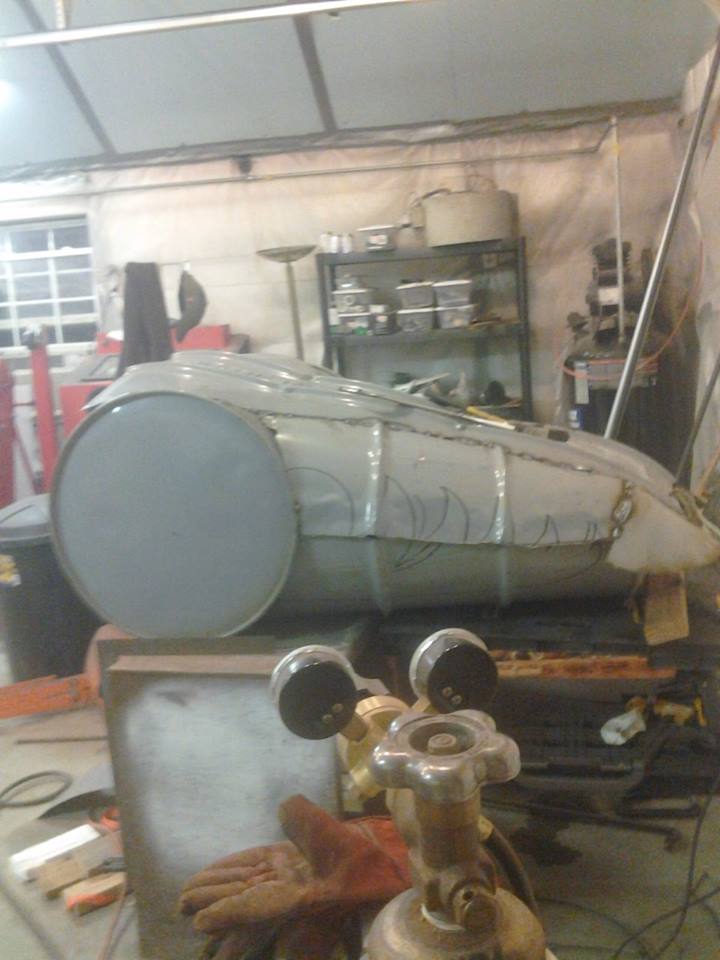
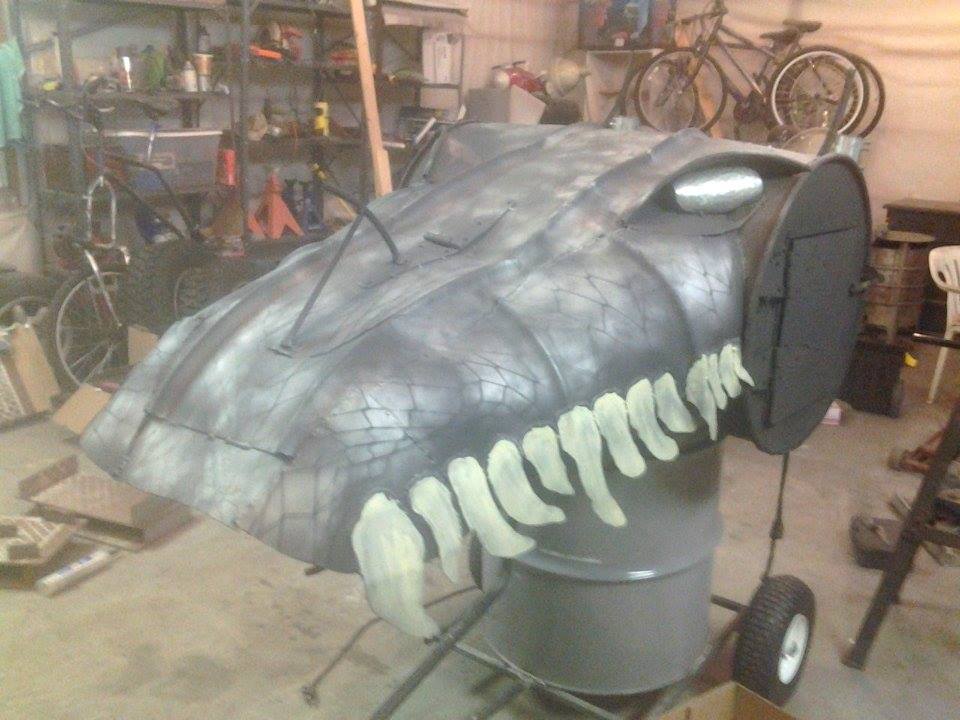
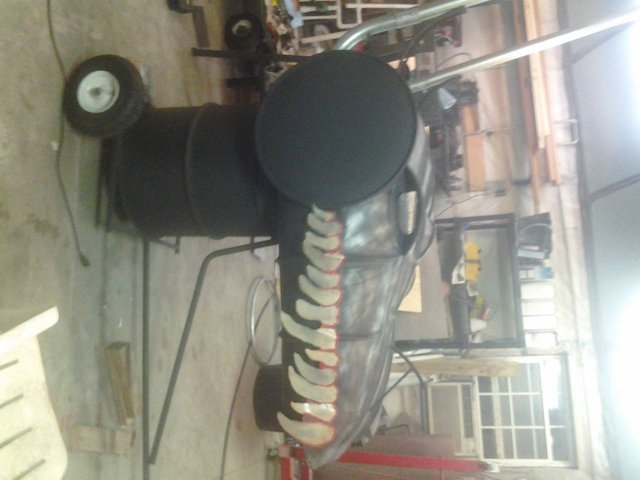
The top was filled in with parts of another barrel. I drew in some teeth to give me an idea of how they should flow, spacing, and size.
Once i got a feel for that, i drew a set of teeth onto a strip of metal i had left from the top fill piece. "there is no scrap metal" is a rule i live by when building.
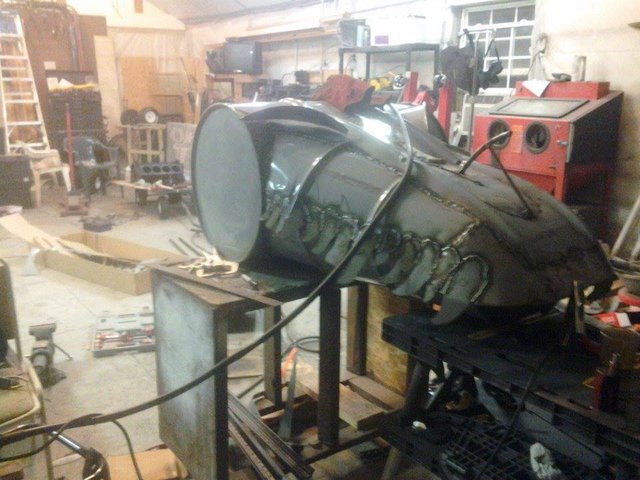
Using a plasma cutter, I cut a set of teeth for each side and welded them on. I am not a great welder, so the welds do not look pretty, but they hold. The sloppiness actually lends to the look. A scrap piece of 2x4 propped the mouth open. Shape is starting to happen.
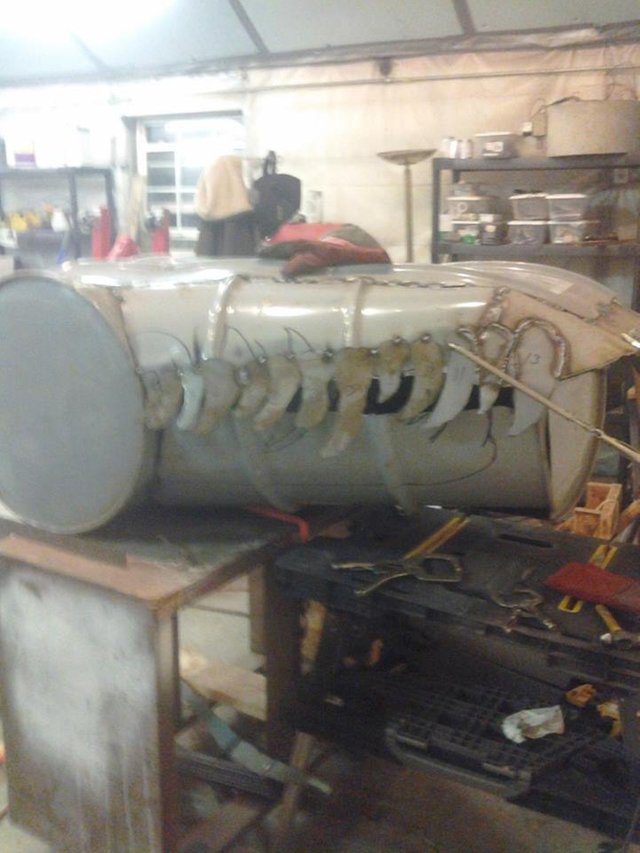
You can see the sharpie marks on the lower jaw. I considered cutting it to that shape, but after some more time staring at it, i decided to leave it alone.
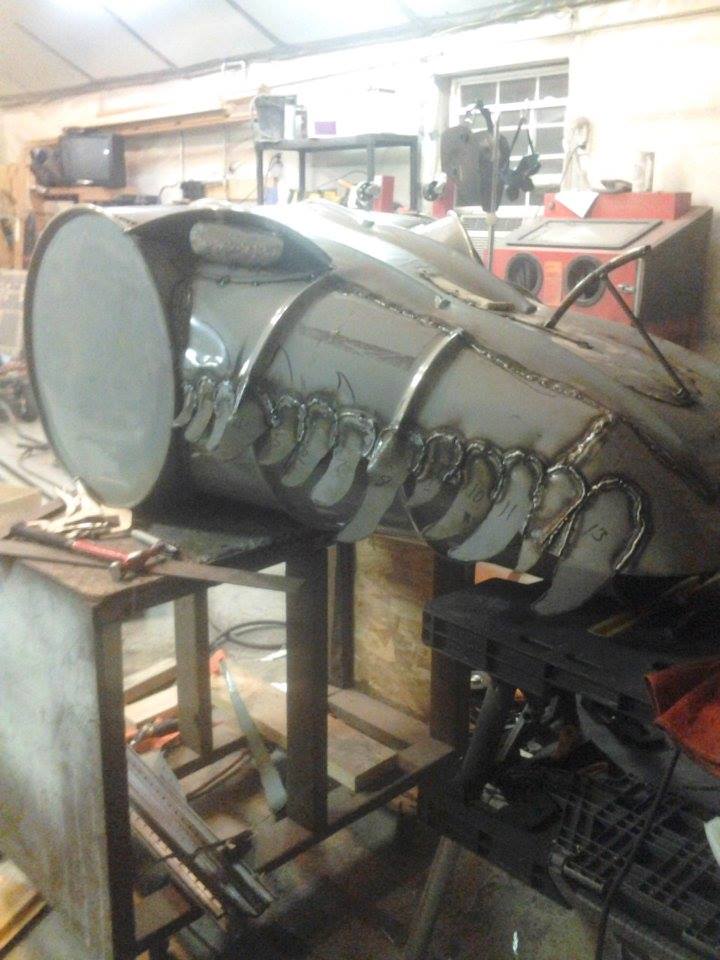
Since I was happy with the shape, I cut a door so there would be a way to add coals and wood. The fire chamber is the snout, with the base of the head being the cook and smoke chamber. Concept was for the heat and smoke to rise along the snout, into a cut out at the highest point entering the smoke chamber.
In my pile of reclaimed materials, i found a hinge, some flat stock metal, and a section of rebar to finish the fire door. Brow lines were also added with some parts from a cut up metal barrel.
Time for EYES !! i cut a couple of ovals out of galvanized metal and hammer formed them into shape. they were tacked into place. Please note that welding galvanized metal will create toxic fumes. It wasnt the best idea, but i was in a well ventilated area.
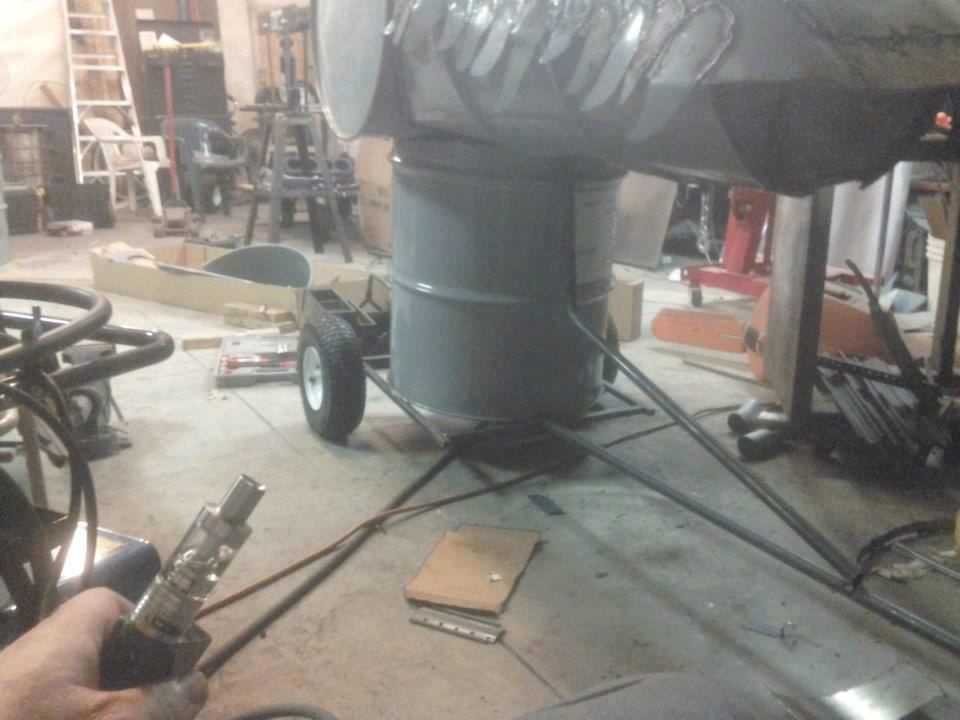
Now smoke stacks were added, and I started to build a base for it to sit on. The smoke stacks are attached lower than the smoke/ heat inlet to force the smoke to circulate inside the cook chamber. The stacks are 2" metal conduit.

with the stand finished, a door was cut into the cook chamber, and it was time for a burn.
I lit a very hot fire to help season the metal and burn off any paint on the inside, and as much as i could on the outside. I LOVE the look of it at this point, bud sadly i have to paint it for it to survive life outdoors.
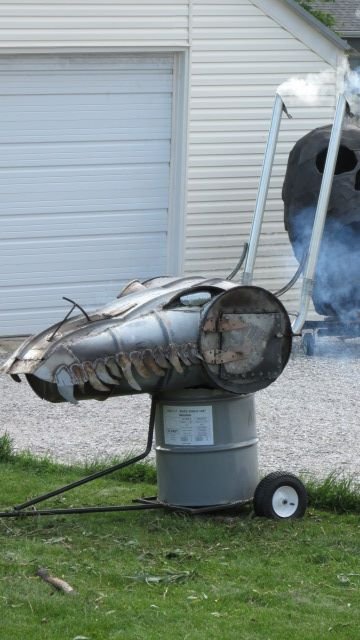
A clean out was cut in the fire chamber floor, and small holes were also cut in the cook chamber and base to allow rain water a place to escape.
After the burn, I removed the last of the paint with a power drill and 3m stripper disk.
A base of flat BBQ black was put down, then i stretched out some large fishnet stockings over different areas in an attempt to create scales using silver. The teeth were hand painted with a paint called "one shot" which is an oil based pin striping paint.
So far is has cooked 2 chickens, 3 pork butts, and 2 chuck roasts. The temps are not as controllable as a traditional smoker, but i find the build well worth the time and effort put into it.
I hope this inspires you in some way to go build something. Even if you screw it up, change the direction, or learn how to fix the screw up.
The most important part is to have fun with it, lose yourself from the day to day stress in your build. No politics, no drama, no nothing except you, your idea, and your materials.
Upvote back please really appreciated. Thank you 😉☺😊