New original print! - Thoughts and photos.
Hi all! :)
How are you this very fine Friday?
To be honest I'm pretty tired myself after a week full of work and appointments, in other words, I welcome the weekend with open arms!
Today I want to share with you a very recent print of mine though and talk a bit about the process.
By the way, I am still trying to figure out a name for this one, I would very much like it to be something a bit more original than my first idea, ''Mermaid''...
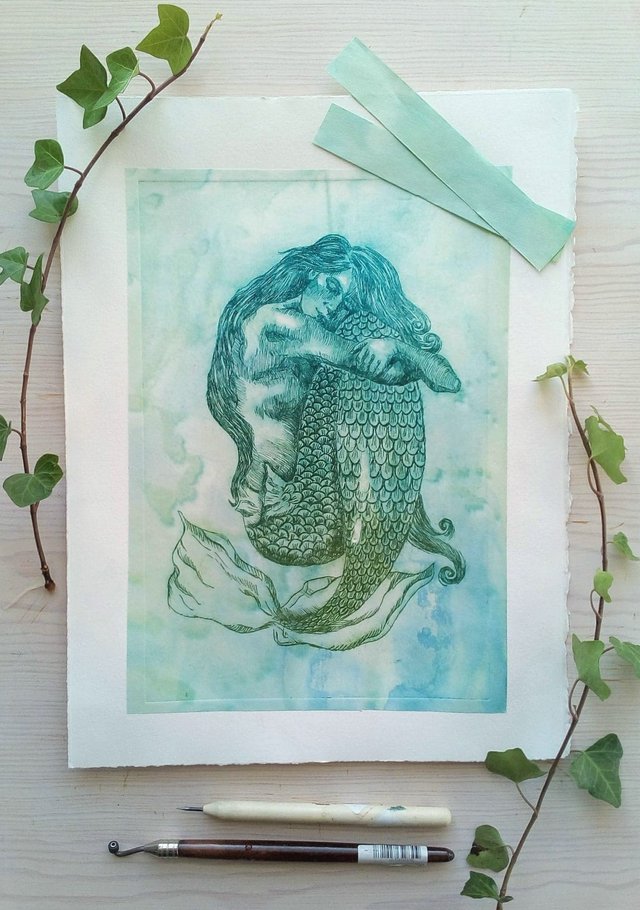
Drypoint printed on Velin Johannot 240 g. paper With the chine- colle technique.
So some of you might remember me talking about this technique called chine-colle, and to most of you this probably is something you have never heard of. Well, to I'm going to try and explain the process as clearly and simply as possible.
Chine-colle is when you print your engraved/etched plate with a thin colored or non colored paper through the press to create another layer to your print.
My favorite paper to work with is something called Japanese paper and I know a lot of people love rice paper as well.
I loke to hand color my papers with water and Indian ink. What I do is have bowls of water which I add the different colors of ink I'd like, then I put down a plastic sheet which I cover with the ink -water with the help of brushes. When I have an area as big a my paper covered with the mixture I simply Place the paper on the mix and it soaks up all the different colors.
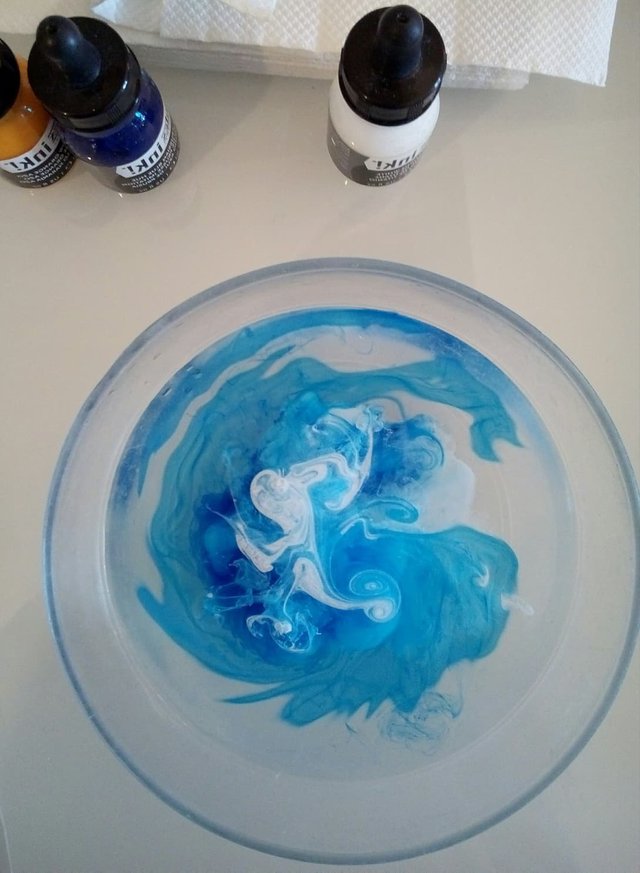
bowl of ink and water.. I love how the ink looks just after it hits the water...
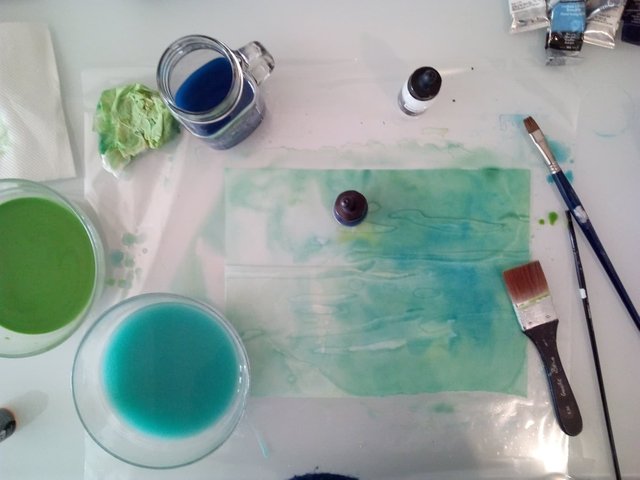
Japanese paper soaking up the ink and water..
After I have the colors the way I like, I put the paper down flat on some newspaper and wait for it to dry.
The Next step is ofcourse to have a plate ready that you want to print with your Japanese paper. I had been working on this mermaid plate in plexiglas for a while and know that I would be using this particular plate, hence the watery colors in green and blue on my colored paper.
The technique I used on my plate is a simple drypoint techinque. You use a tool which looks like a pen but instead of the tip being ink, its a nail/ needel like sharp tip. You use this tip to engrave/ skratch into your plate. You can aslo use cobber and zink, which I do prefer myself, but I wanted to give plexiglas a try as it is much cheaper and you can take advantage of the fact that it is seethrough so you can place your sketch under the plate and copy it quite easily.
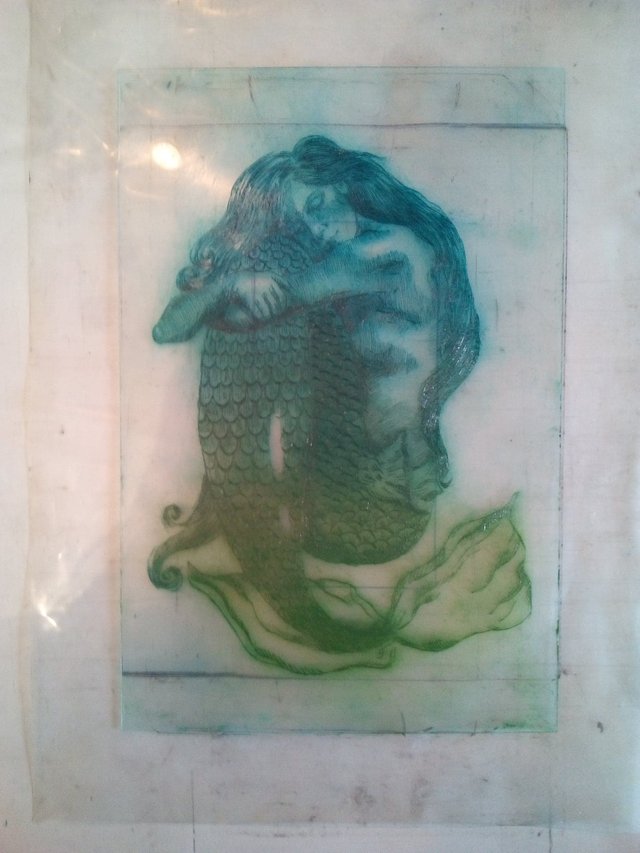
My plexiglas plate inked up..
I wanted to use a mixture of greens and blues for this print, here are my mixes;
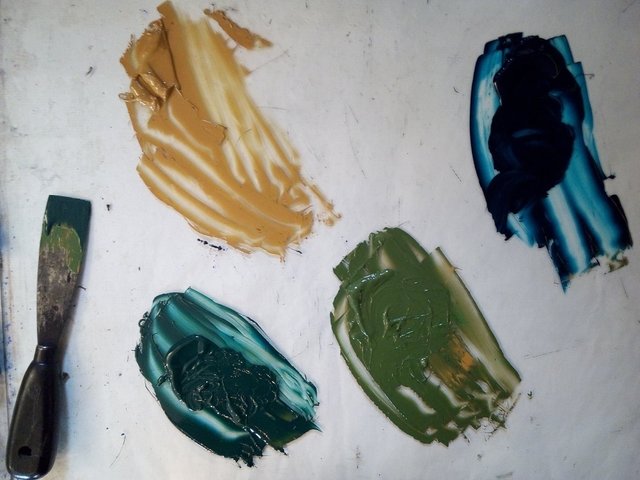
And here is what the plate looks like right after I have applied the ink.
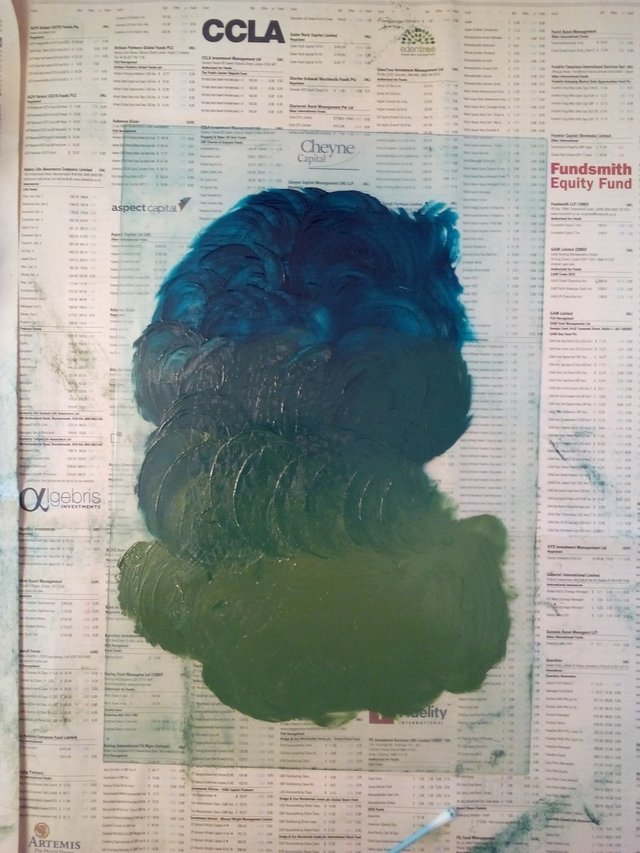
I use wine corks to apply the ink and then tarlatain, chees cloth fabirc, to remove the eccess ink. When the plate is ready to print it looks like this;

Now the steps are as follows;
- Dampen your colored Japanese/rice paper, just make it damp, not wet! This is important. Excess water can be removed by pressing the paper inbetween newspaper.
-Put the paper flat spray a spraycan glue to get a thin, even layer on the whole paper. Remember to spray the side of the paper that you don't want to show in the final print.
Put your plate on the printing press.
Put your sprayed paper with the sprayed side UP ontop of your plate.
Take your dampened normal printing paper ( I use Velin Johannot, but any will do as long as its thicker than 200 g.) And put it ontop of your plate andsprayed paper.
Final step, run it through the press!
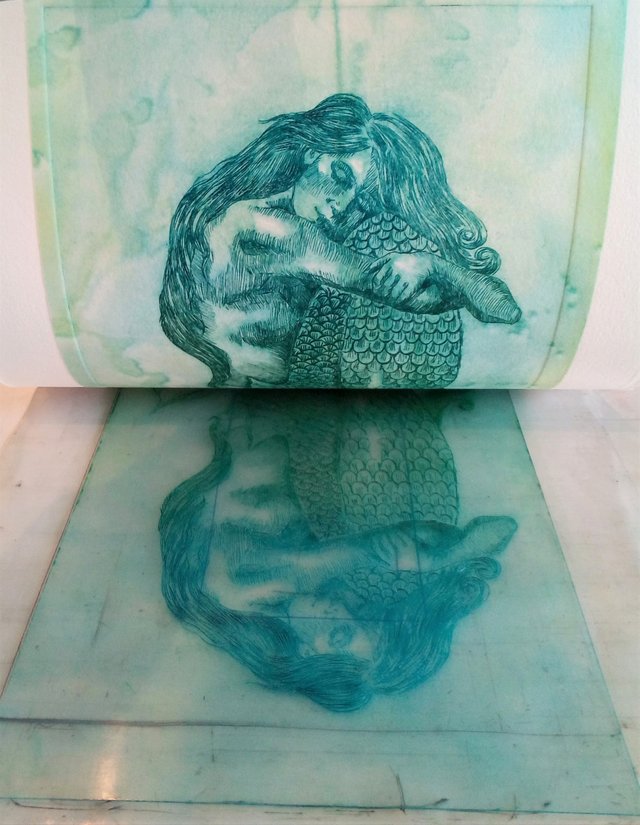
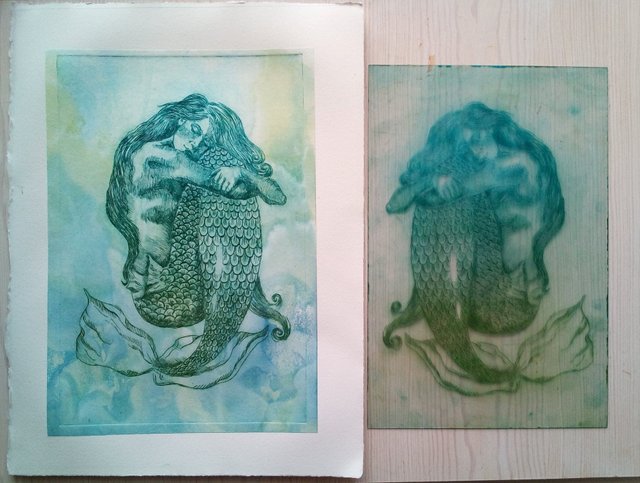
Print vs Plate.
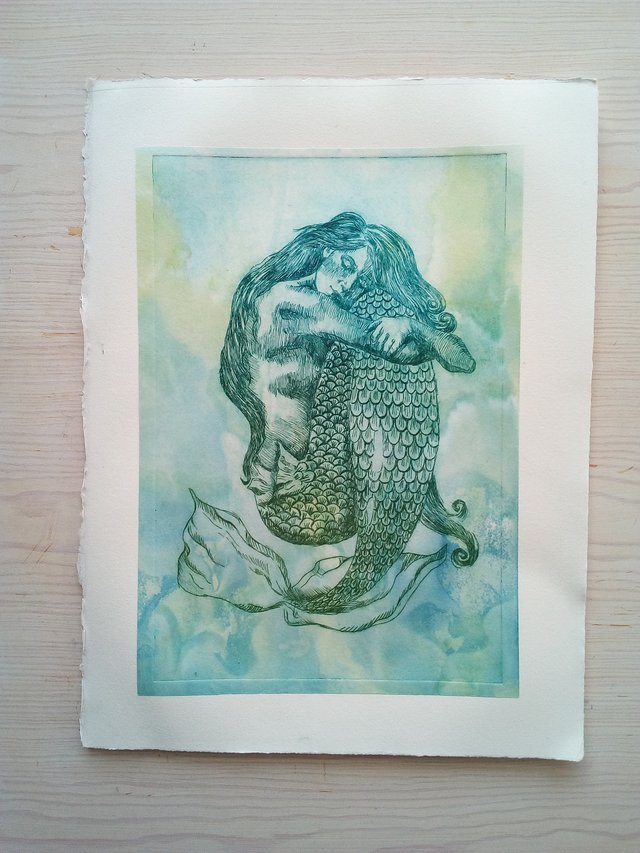
And there you have the finished print!
It's a lot of fun and I really enjoy fitting the paper to the print with different textures and colors in mind. Like for example with this one I was thinking water and tranquillity..
What do you think?
Hi mayasky,
Visit curiesteem.com or join the Curie Discord community to learn more.
Fantastic Work!!! And really interesting to see your porcess.
Thank you very much @maxjoy! :D And I really appreciate your resteem ;)
That’s so so incredibly cool! I need to read the whole article now more carefully :) I wish I would have full power but I dried out today
Posted using Partiko iOS
Thank you so much @mammasitta!! <3 Your support is much appreciated :) Hope you enjoy the read ;) <3
I shared this post to a friend. We had the same like for mermaids. This looks really dreamy and I like the facial expressions on the mermaid. Your art process is interesting, how you made the palette, and other preparations. How many years did it take you to master this craft?
Thank you @adamada! :D That's so kind. My palette here, where I mixed the colors is just a big normal plate of glass. I find its great for mixing colors and easy to clean. The colors are yellow ochre and cyan blue straight from the jar and then I used a combo of the two to mix the two shades of green. I've just been working With prints for about a year now. Before that though I've been working With oilpaint and drawing seriously for about 15 years, which I absolutely think eased my way into printmaking. :)
Wow, what a great print. The result looks really lovely too, the colours that you chose here are really suitable for a mermaid, blue and green and yellow :D.
Congratulations for your curie vote ^_^.
Thank you so much @scarwly! :D I'm glad you like it!
Chine-colle. That is interesting. I just discovered a new way of art painting from your post. The finished print does not look like it came from a plate but worked on by hands. Thanks for sharing your mermaid here! Why is she lonely by the way? 😊
How did it take you to finish this? Do you also paint? I am just curious to know if you have comparison between chine-colle and painting.
Hi @macoolette! :) That's cool that I helped you Discover something New ;) From start to finish I would say about a week :) I also Paint, yes. :) I've been painting all my life but just started printmaking a year ago, I guess that is why I love chine-colle because it adds that painterly element to it :) Also, I don't think she is lonely, she's just alone ;)
Lonely and alone. Yes, indeed those are two different words with different meanings. Not even synonyms. With your perspective that she is only alone and not lonely, I think you are a very independent woman. Which is great! That's the girl power, yeah? 😊
That is fantastic, I have never realized you can create such a beautiful prints not only on paper but transfer them on other surface. There are many different ways in Art and we still can learn much more from each other. Your tutorial is made very easy to understand and I appreciate you for showing every single step and your explanation, because there might be always misunderstanding with such a unusual technique. Thank you for sharing it :)
Thank you so much @stef1! :) I am really happy you enjoyed my process, thank you for the support, I appreciate it! :)
I think your painting transmits peace and tranquillity as you said, it is really beautiful. The way the technique is explained step by step is very well detailed in the text and the pictures. Congratulations, excellent post!
Thank you so much @leilanyarevalo! :) That is so Sweet of you :)
I think it's perfect and beautiful. The sirens are too apt to do wonders with art, is what I have noticed in great artists as you show here. Thank you for sharing this amazing thing.
Congratulations and my respect. Greetings
Thank you very much @fernando.lubezki! How true your observation about sirens, hehe! Thank you again, you are very kind, I appreciate your support! :)