Mountains and Valleys or a Flat Desert
..:: * ::..
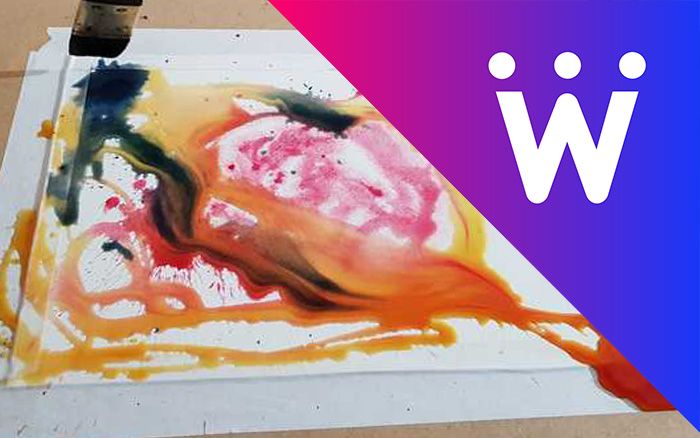
Original art by @jnart
..:: :: :: * :: :: ::..
This is nr #5 in the Water-Art tutorials and still just the start of really cool posts to come. Running watercolor up and down a paper and see how shapes take form is really trilling. I am on my way to learn to to manipulate and control the color the way I want, but there is a lot left to be explored! This post is similar to what @jungwatercolor posted about in a previous post- techniques on how to stretch watercolor paper. But I thought there was some more things to say.
 There is an really interesting and important choice to be made when it comes to watercolor paper and how to stretch it or not stretch it. In my previous post I showed many ways to attach a paper to a board. All of them with their own pros and cons. The artistic choice is about if you want to control or be controlled, if you like accidents or hate them. Because the fibers in any paper will expand when wet, painting with lots of water will cause thin paper to bend. I like that sometimes and hate it more often - it is really irritating when you are trying to create even transitions or consistent color over large areas of the paper. Some would say - do not do that - It is the point of watercolor to make varied fields of color - yet I think it is nice to create certain effects - when I want them to happens - the craftsmanship.
How To Skip Bending Paper

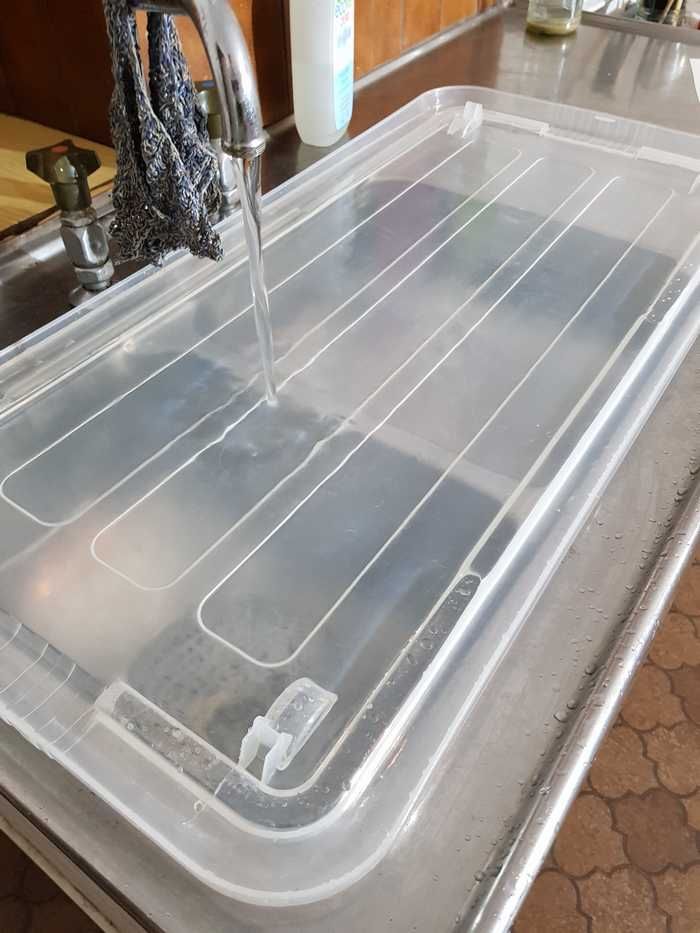 First wet your paper for 5-15 minutes - the thicker the longer time it takes to expand the fibers to its maximum. It is ready when it feels sloppy :)

 You can wet several papers at the same time this way. Use something to place the paper under the surface.
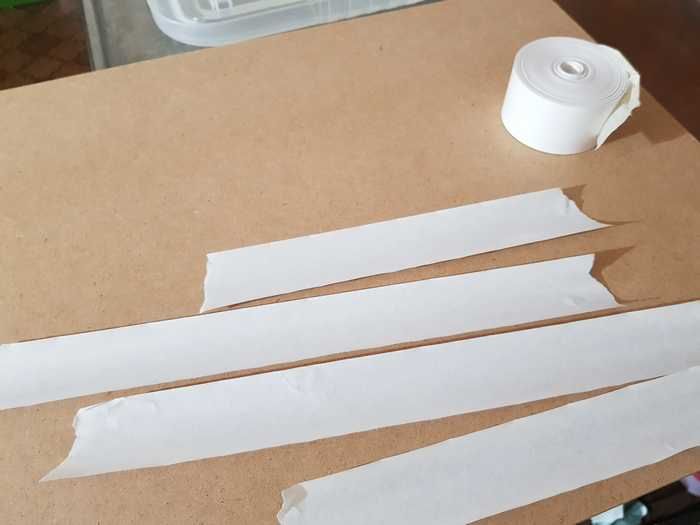 Prepare the watercolor gum tape. It is activated when you place water on the glue.
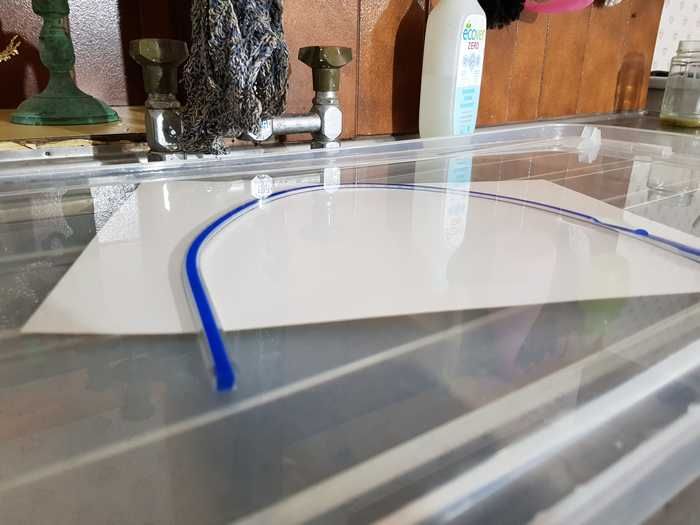
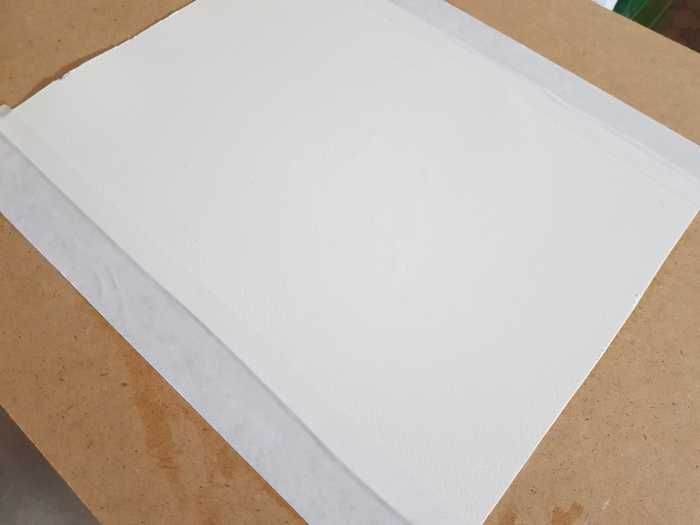 Place the paper on a board. The thicker and larger the paper - the more force when it shrinks. Only hold the tips of the paper - otherwise your fatty fingers will leave marks later on in the painting process.
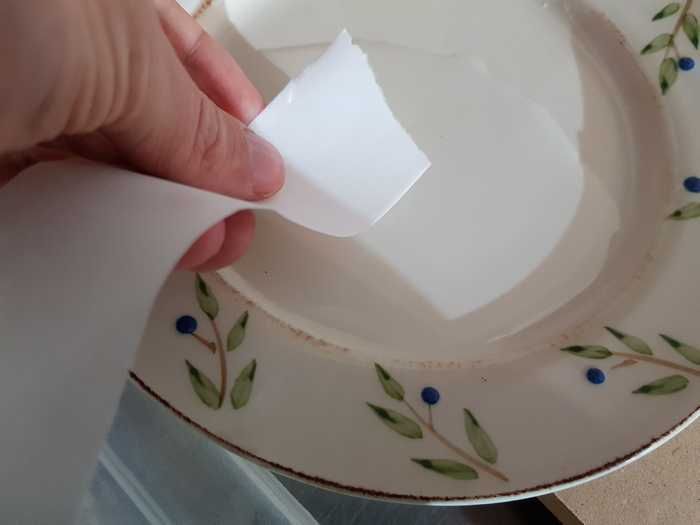 Activate the gum tape - I use a simple method of running the tape in a tiny bit of water in a small plate. You can also use a wet sponge of spray bottle. But do not work the glue away.
 And here comes the super tricky part
There is (of course) a relationship that decides if the glue will hold. What I know the following variables are involved:
And here comes the super tricky part
There is (of course) a relationship that decides if the glue will hold. What I know the following variables are involved:
- The thickness (how many g/m2) and how large the paper is.
- How many centimeters of the paper you out on tape (above 1,5 cm)
- If the tape works on the board and paper
- How wet the paper is when you apply the gum tape (some say the paper should just about to loose the shiny surface to be ready).
- How fast the paper is drying (slower in colder temperature and higher humidity)
- An even drying of the paper makes it more stable - therefore dry it horizontally and wet it evenly.
All of the above makes a complex formula that will make it hard to explain how you should do this work. You have to experiment to some degree to see how your board, paper and gum tape work. But I have given some guide lines here:
 1.5 cm overlap is sometimes not enough for a 300g/m2 in a4 size (20x30cm) stretch with only gum tape - thinner paper is preferred when stretching or bigger overlap. A thinner paper is also cheaper - 300g/m2 is suitable to use with the staple. masking tape or in the block techniques explained in my previous post.
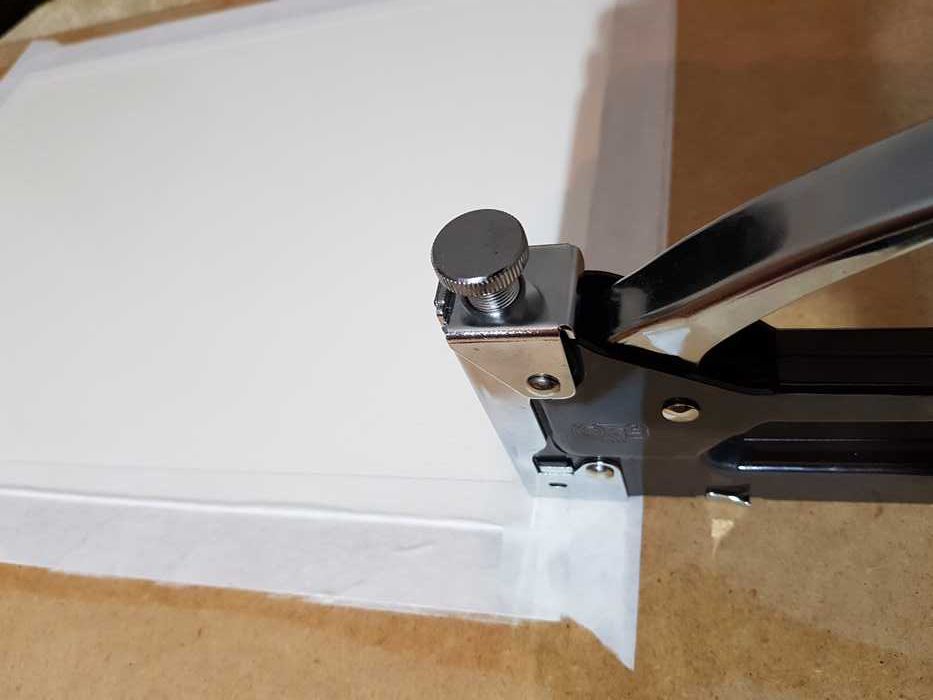 But if you want to stretch a thicker paper like a a3 (30x40cm) paper in 300g/m2 thickness there is a great way to skip the random results with only gum tape. Use the staple gun on top! The more tight and evenly spaced the better results.
But why not just skip the tape then? I find it important to be able to let excess paint and water to be able to rut out of the paper freely - without the tape it can be stuck water underneath the paper and cause unpleasant surprises.
But if you want to stretch a thicker paper like a a3 (30x40cm) paper in 300g/m2 thickness there is a great way to skip the random results with only gum tape. Use the staple gun on top! The more tight and evenly spaced the better results.
But why not just skip the tape then? I find it important to be able to let excess paint and water to be able to rut out of the paper freely - without the tape it can be stuck water underneath the paper and cause unpleasant surprises.
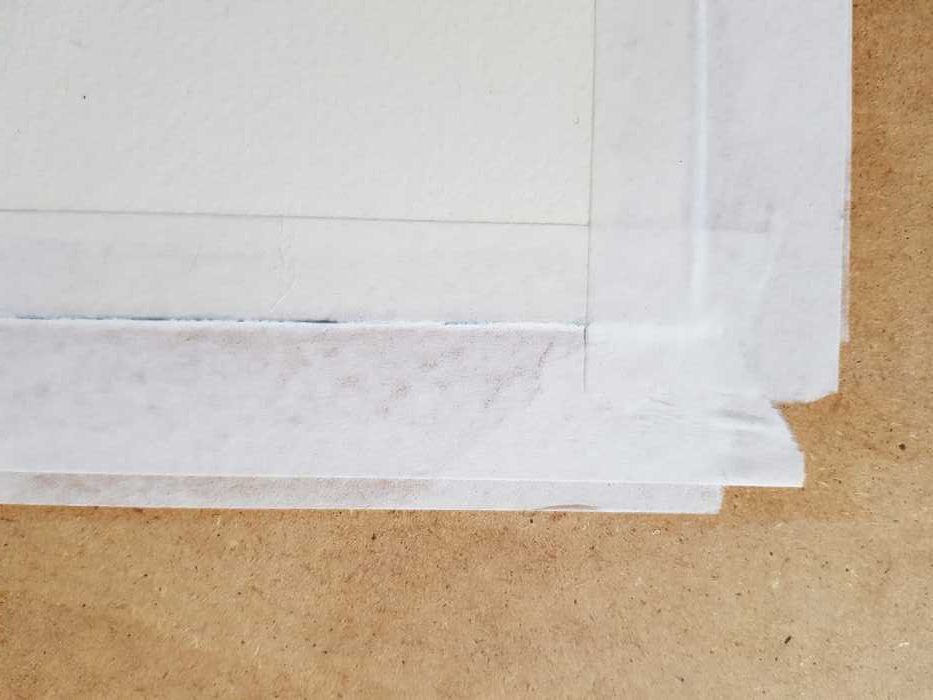
 This is what in looks like if you have to start over again - and you can actually retry - just peal of the tape and wet the paper again - although the paper quality is reduced for every try.
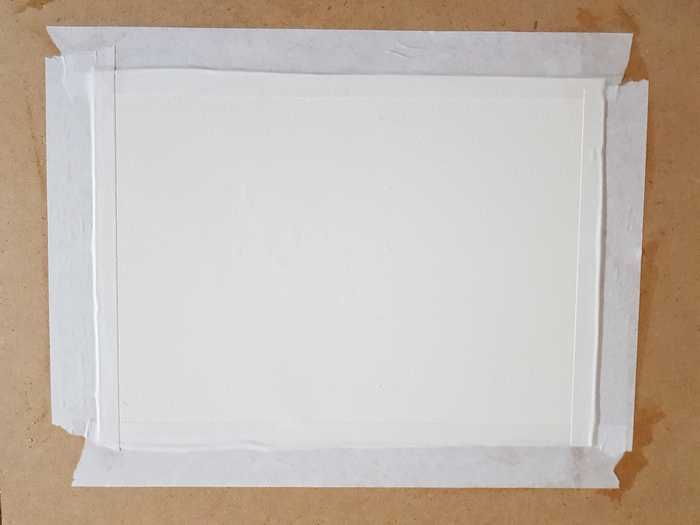
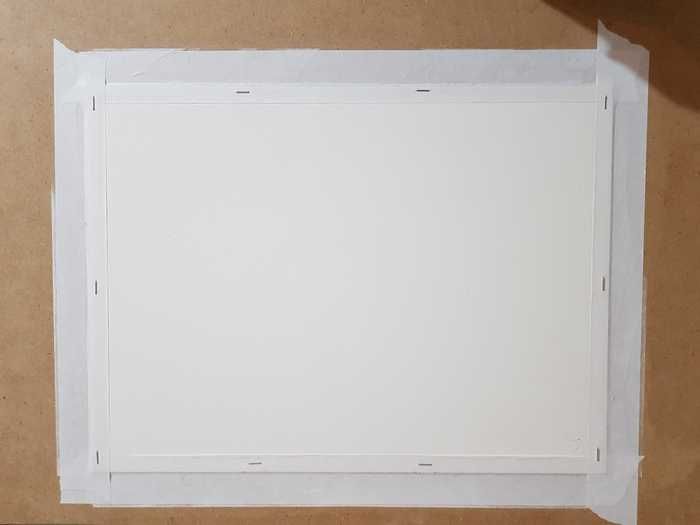 This is what you are looking for - now the most marvelous this can happen - the painting can literately paint it self and you can be in charge at the same time!
Hope you enjoyed! My next one will be about some of my other tools I use. Cheers!
This is what you are looking for - now the most marvelous this can happen - the painting can literately paint it self and you can be in charge at the same time!
Hope you enjoyed! My next one will be about some of my other tools I use. Cheers!
Want to recieve all posts of Water-art project? Follow @water-art! @jungwatercolor, "marty-arts & @jnart,
You can order portraits via my website: http://jnart.se/hem. Paying with crypto currency is possible.
..:: :: :: * :: :: ::..
Follow if you like! Steem out!
Instagram: jnart.se

Nice demonstration here. You're really helping me out with the reminder to let the paper soak for a long time–I've been neglecting that part, only soaking for a quick minute. And of course my paper has been slipping from the tape and wavering as the water keeps getting added. I hadn't thought of stapling the edges, so I'm sure that'll help too. Appreciate ya!
Cool! We'll teach each other :)
I like how much time the trio in water art has spent talking about one of the fundamentals of the skills required which is working with the paper. It gives a really good appreciation of just how much knowledge and experience there is in this form of art, and covers a lot of the details that you don't get unless you go to art school or practice yourself. Excellent job and keep up the great work!
I am sure that you probably don't make the mistakes that beginners will, but it would also be good to show some of the things that can go wrong so that we can learn from the mistakes as well (without wasting any of your materials and equipment of course) :D
Well @plushzilla, mistakes can happen even to most experienced :) Thank you for your suggestion and idea, sure we will show here and art that isn't ''good''.
Good point! There are endless many mistakes possible to me made. I do them all the time. And some things I haven't yet figured out. More mistakes tuts to come and just ask if you are curious about something.
Wow, great job done and it's reflecting as the water colours are dancing and making an amazing art and design, you have done an great job and i really like to see your creative work and i saw this kind of work after so much time, in my opinion art gives great pleasure because we throw our vision into art and then sometimes results really surprise us with the great art and thanks for sharing this tutorial post and wishing you an great day. Stay blessed. 🙂
Thanks! You2
Welcome. 🙂
I didn't know you still have to soak the paper in doing water color art. This is really good! I haven't done water color arts before but, I'm thinking these past days of trying to learn how to do it. :)