Art: How to Draw Lips 💋
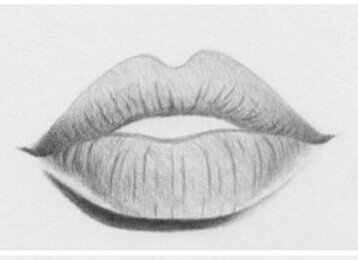
◆Step 1: Draw a Triangle
●●Draw a long isosceles triangle. Partway down draw a curve (similar to a “u” shape). Draw a straight horizontal line between the “u” shape and the base of the triangle. The longer you draw the horizontal line, the wider the lips will be. The shorter the line, the more plump they will be. 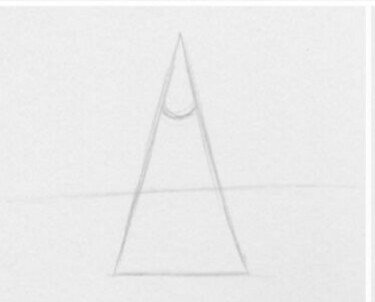
◆Step 2: Draw a bow
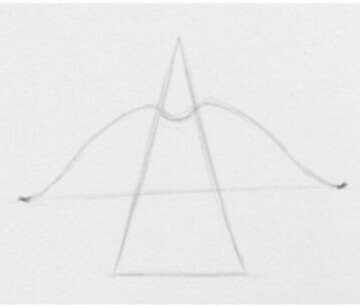
◆Step 3: Draw the bottom lip
●● Create the bottom lip by drawing a curved line which goes no further than the triangle’s base. Complete the opening of the mouth by using the horizontal line as a guide.
◆Step 4: Decide on the light direction
●●After erasing the triangle, determine where the light source is coming from. For this example, the light source is coming from the top right. I’ve outlined the areas I want to highlight as well as added a cast shadow on left side of the bottom lip.
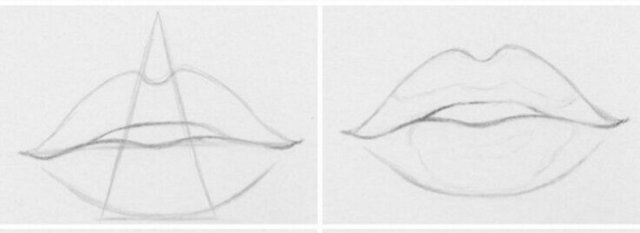
◆Step 5: Shade the top and bottom lip
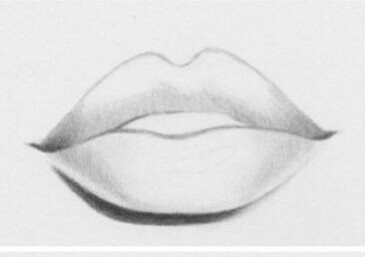
●●Shade both the top and bottom lip leaving the areas mentioned in STEP 4 the lightest. As you can see there is a dark shadow under the bottom lip. It starts to fade on the right side to show that the light source is coming from the upper right.
◆Step 6: Add lip wrinkles
●●Create some lip wrinkles using a 0.5mm HB pencil. You don’t want to press too hard or else it will be difficult to achieve the effect in the next step.

◆Step 7: Blend the bottom lip
●●Using a blendWant to find out how to incorporate lip wrinkles in your drawing without making them look unnatural? Try the contour shading technique . You will notice that the lip wrinkles slowly start to blend in with the shading. But they shouldn’t disappear!
◆Step 8: Clean up highlights
●● Go over the lighter areas with the pointed end of a kneaded eraser and clean up the highlights to create the glare effect.