Finger Puppets: Kevin the PA (Construction Process)
This puppet is actually from a couple weeks back. I only really have a chance to get any work done on these guys during the weekends, so I tend to take my time posting about them so as not to run out of content for all you lovely Steemians.
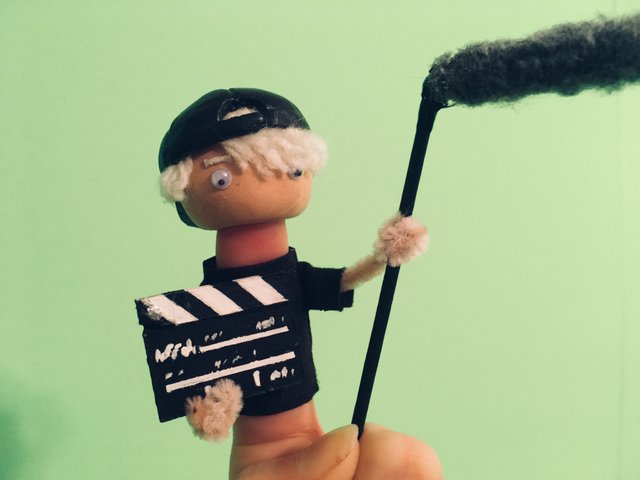
This is Kevin, the production assistant. He’s actually the first original character I’ve created for the finger puppet series that I’m (slowly) working on. Kevin’s not the brightest bulb in the box, but one of the few goals he’s managed to hold onto in life is to work in the movies.
As you may have seen in previous posts, I have an Aliens theme going. That being said, I don’t plan to just recreate scenes from the movie, so additional characters and props are needed. I thought I would use Kevin as an example to show how I make a basic wardrobe piece like his shirt.
I’ve been sewing for a while, so some of this knowledge has become second nature. As such, I don’t really want to go super in depth on the intricacies of using a sewing machine. Partly because I’m not really that much of an expert, but also because a complete step by step would really bog down this post with text. If you would like me to do a more in-depth tutorial on using a sewing machine, let me know in the comments below and I’ll start working on a post.
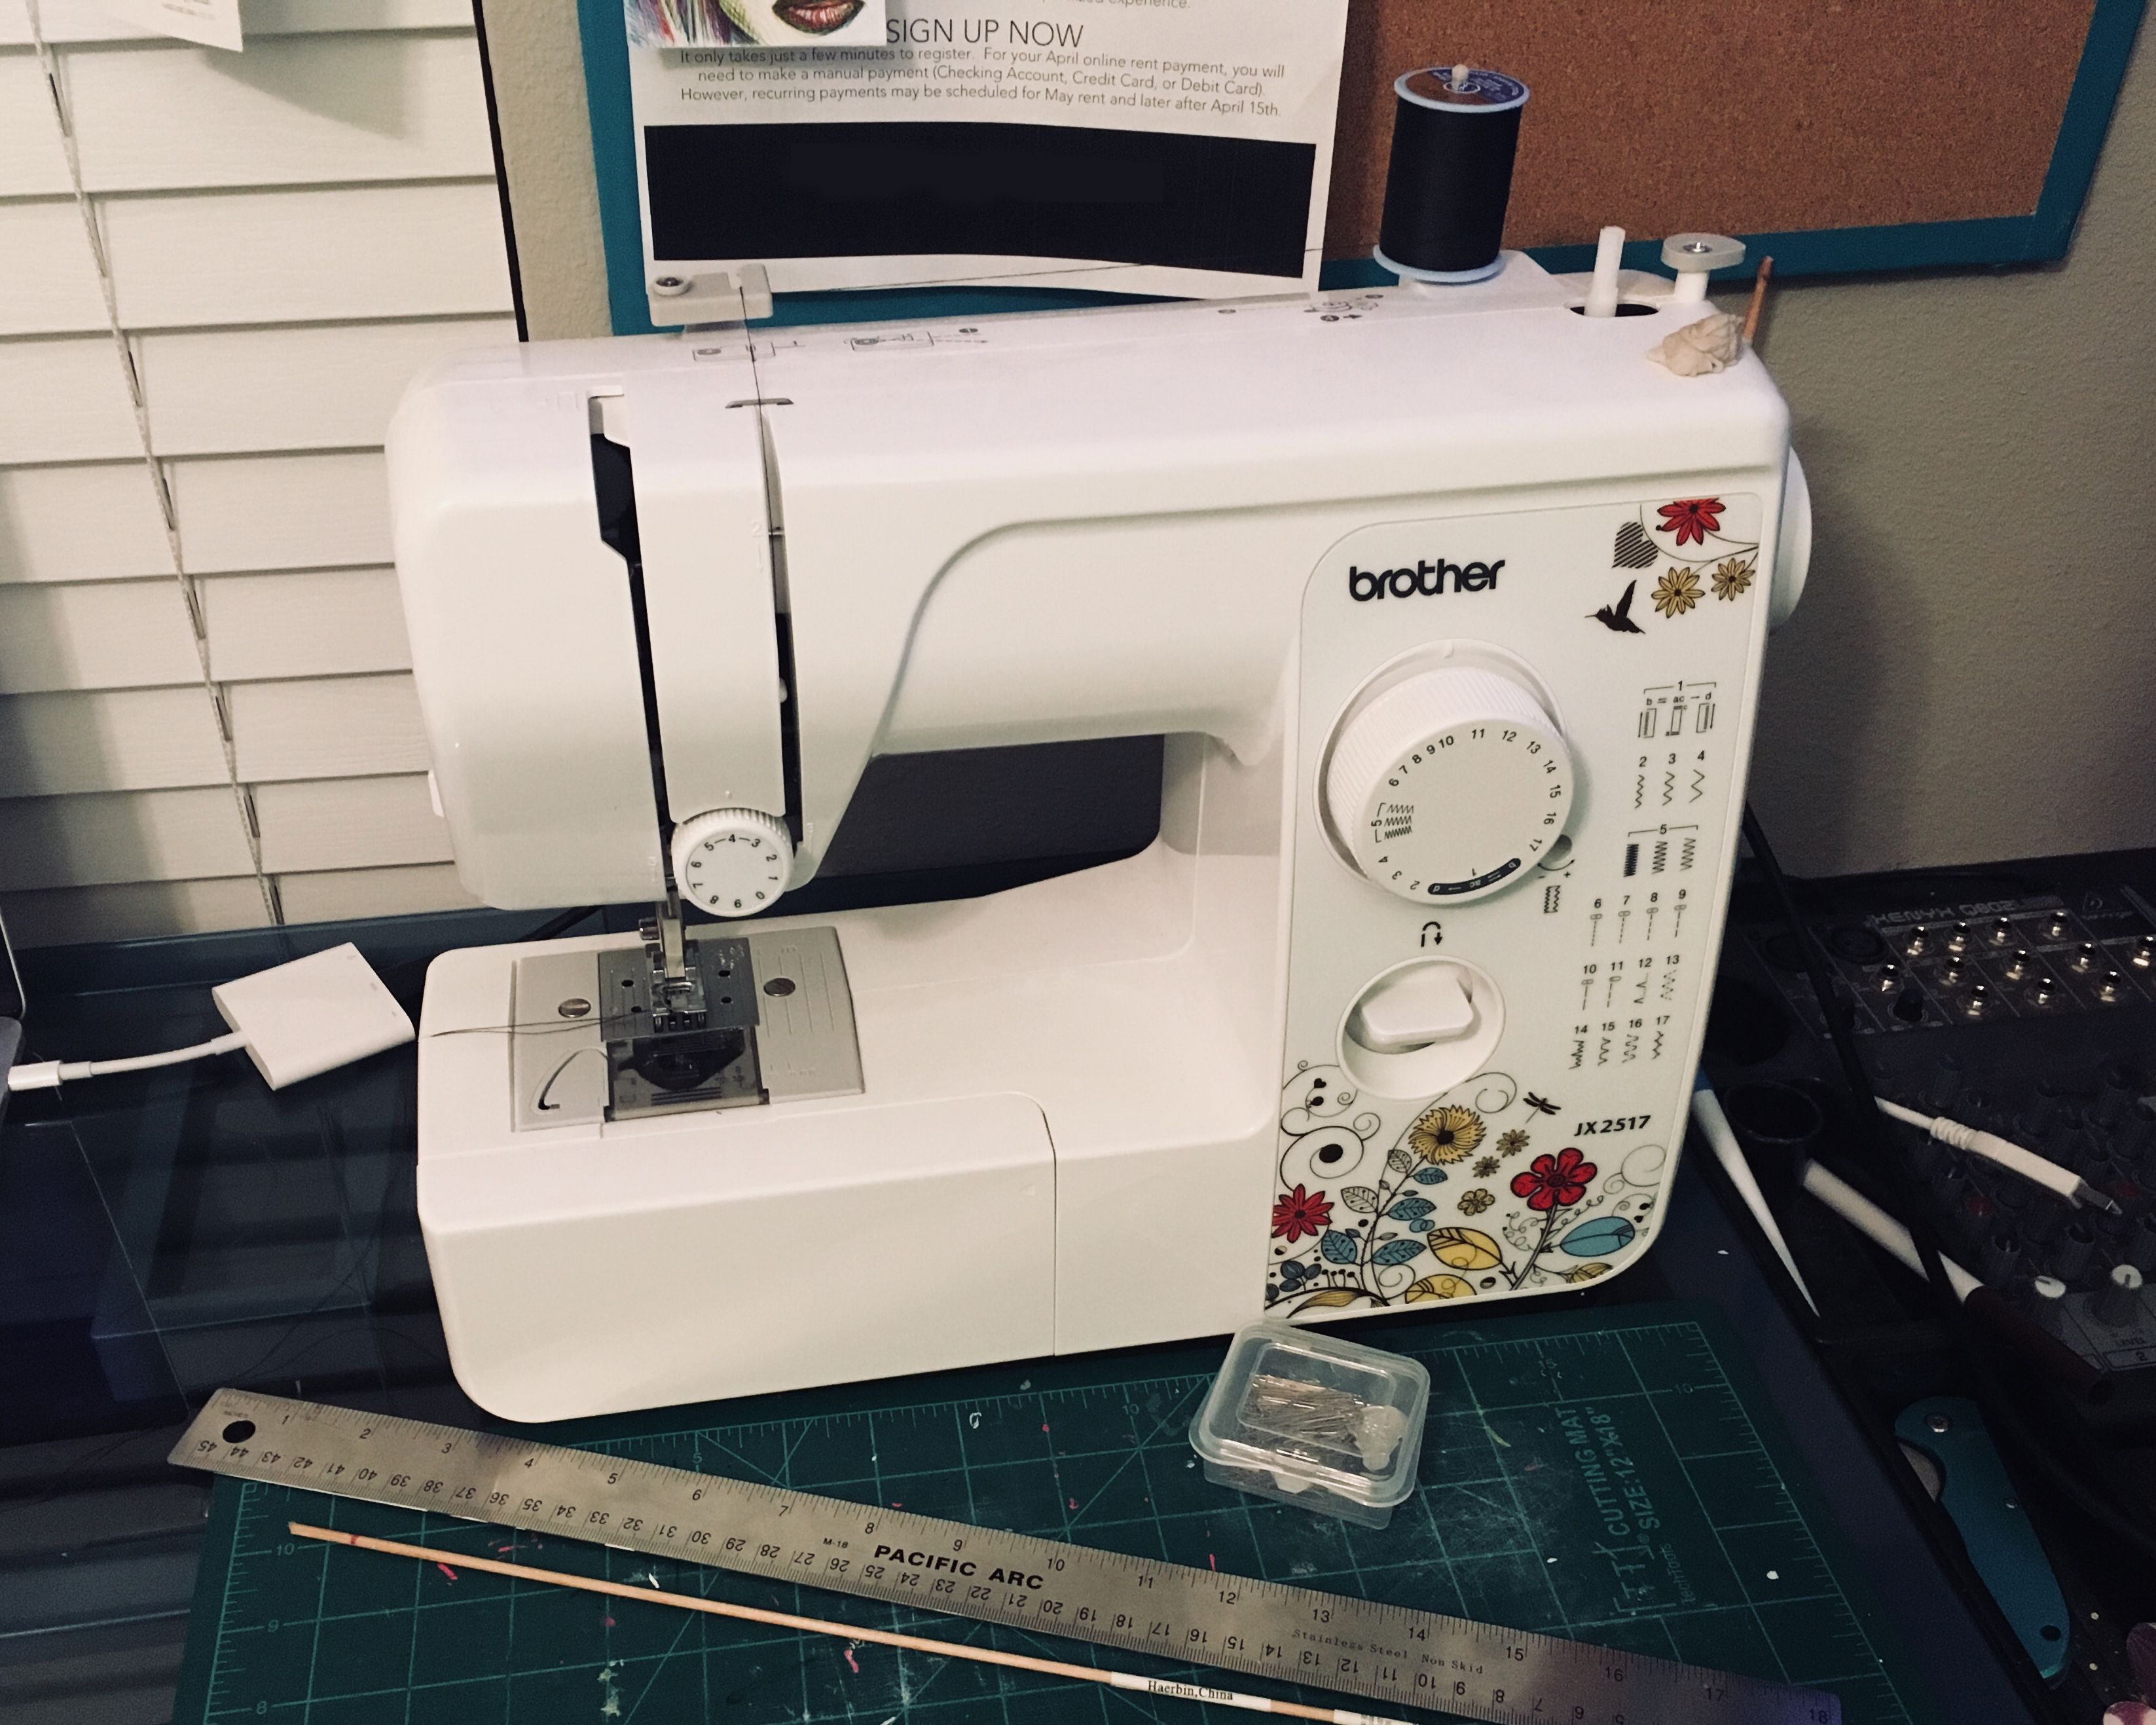
I will say that I find simplicity is key when purchasing a sewing machine. I was a little strapped for cash when I bought my Brother JX2517. Honestly, though, the less bells and whistles these things have, the less moving and computerized parts there are to break down. Just do your research and stick with a reliable brand that has good reviews.
For fabric, I usually use the fat quarters that are available at Walmart in the crafts section. They come in a lot of different patterns and colors and, because I work on such a small scale, they usually provide more than enough material to last me for a while. I also like getting these because no one is ever around to cut fabric at my Walmart, so this is a quick way to get only what I need without waiting around awkwardly for half an hour until someone finally comes over to cut me less than a yard of fabric.
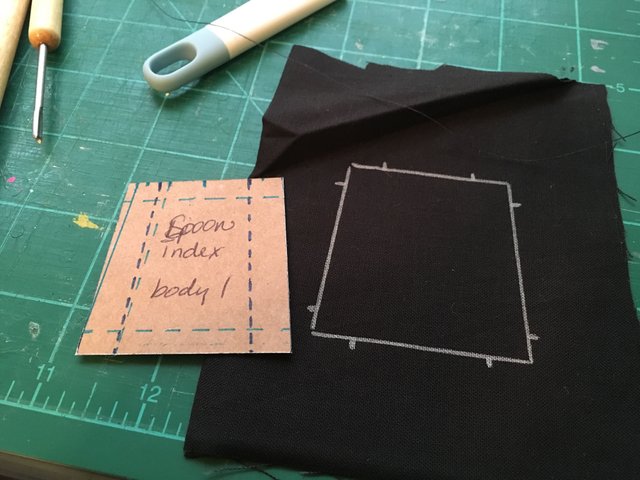
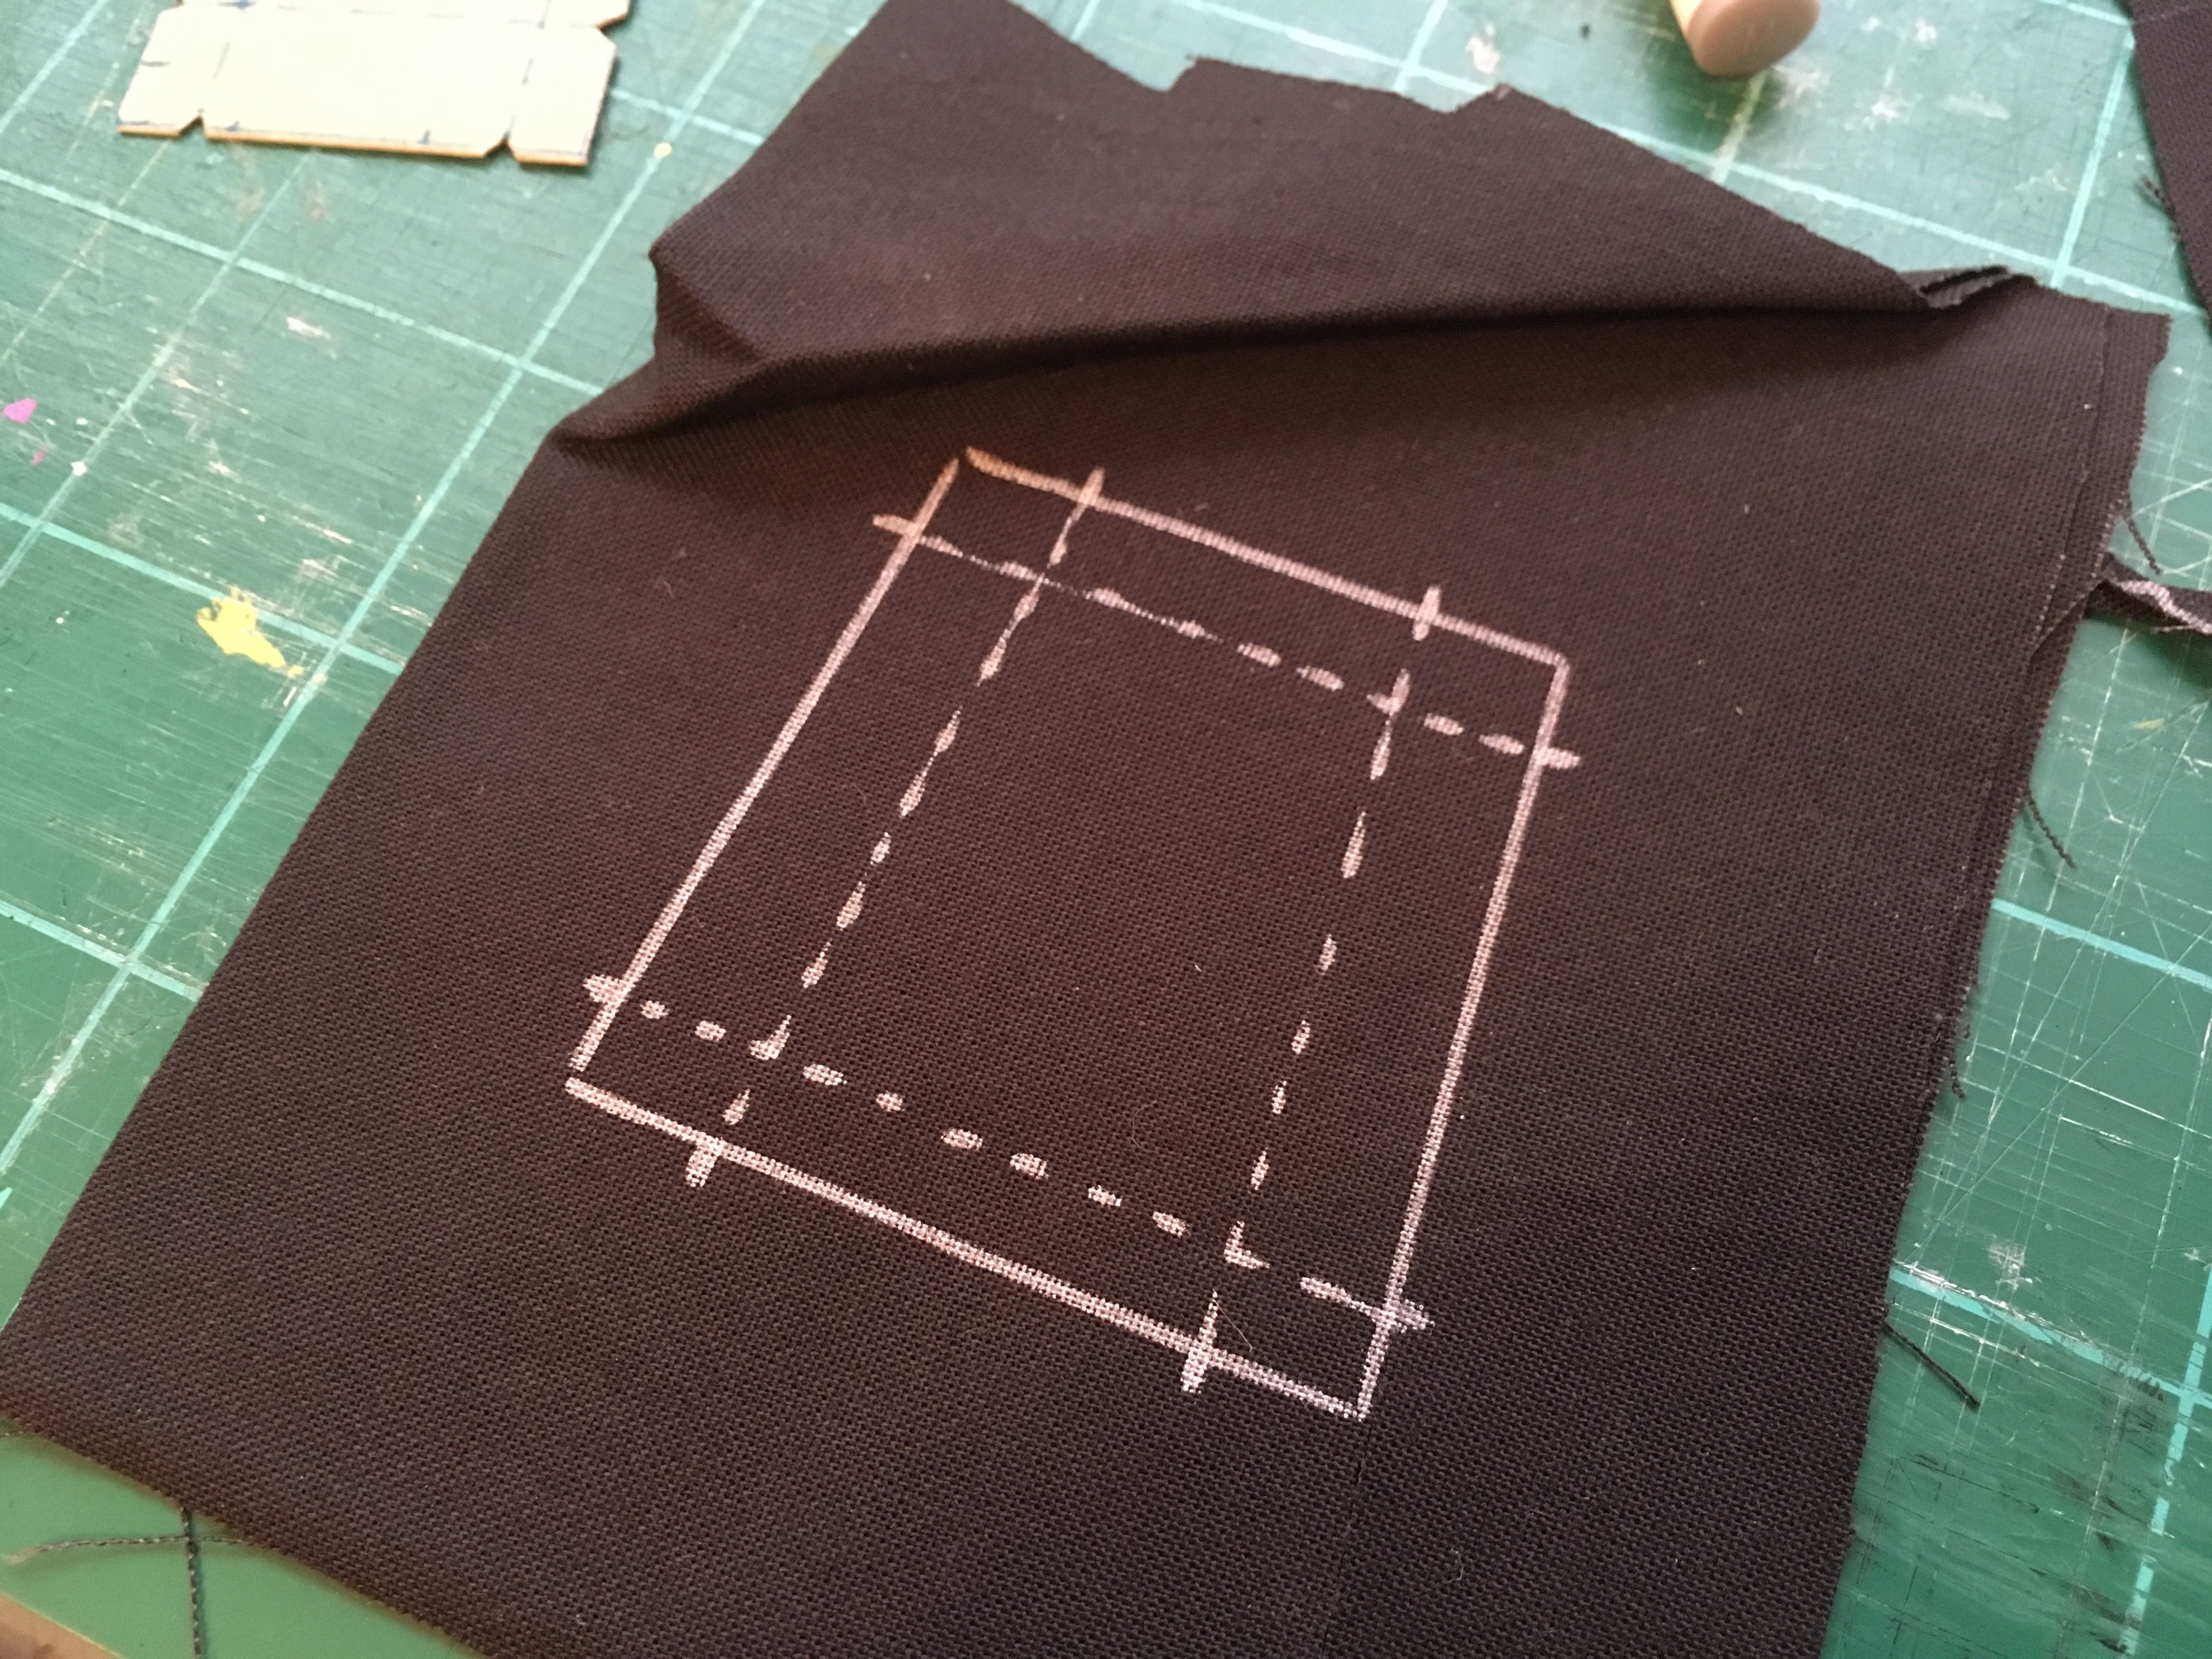
I made a pattern a year ago for simple shirts. Using a silver marker, I outline the pattern for body of the shirt and the sleeves.

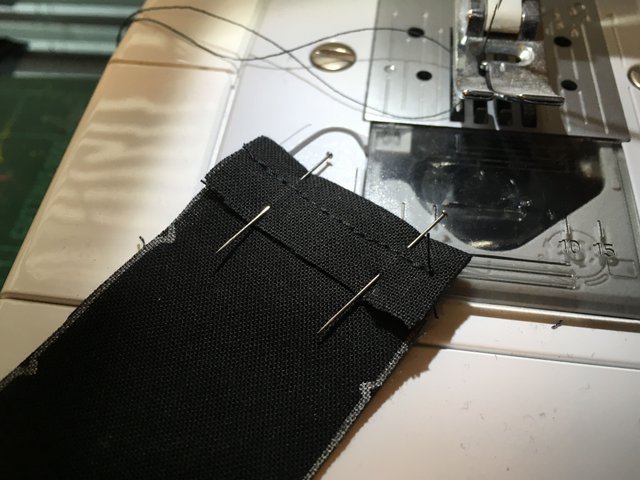
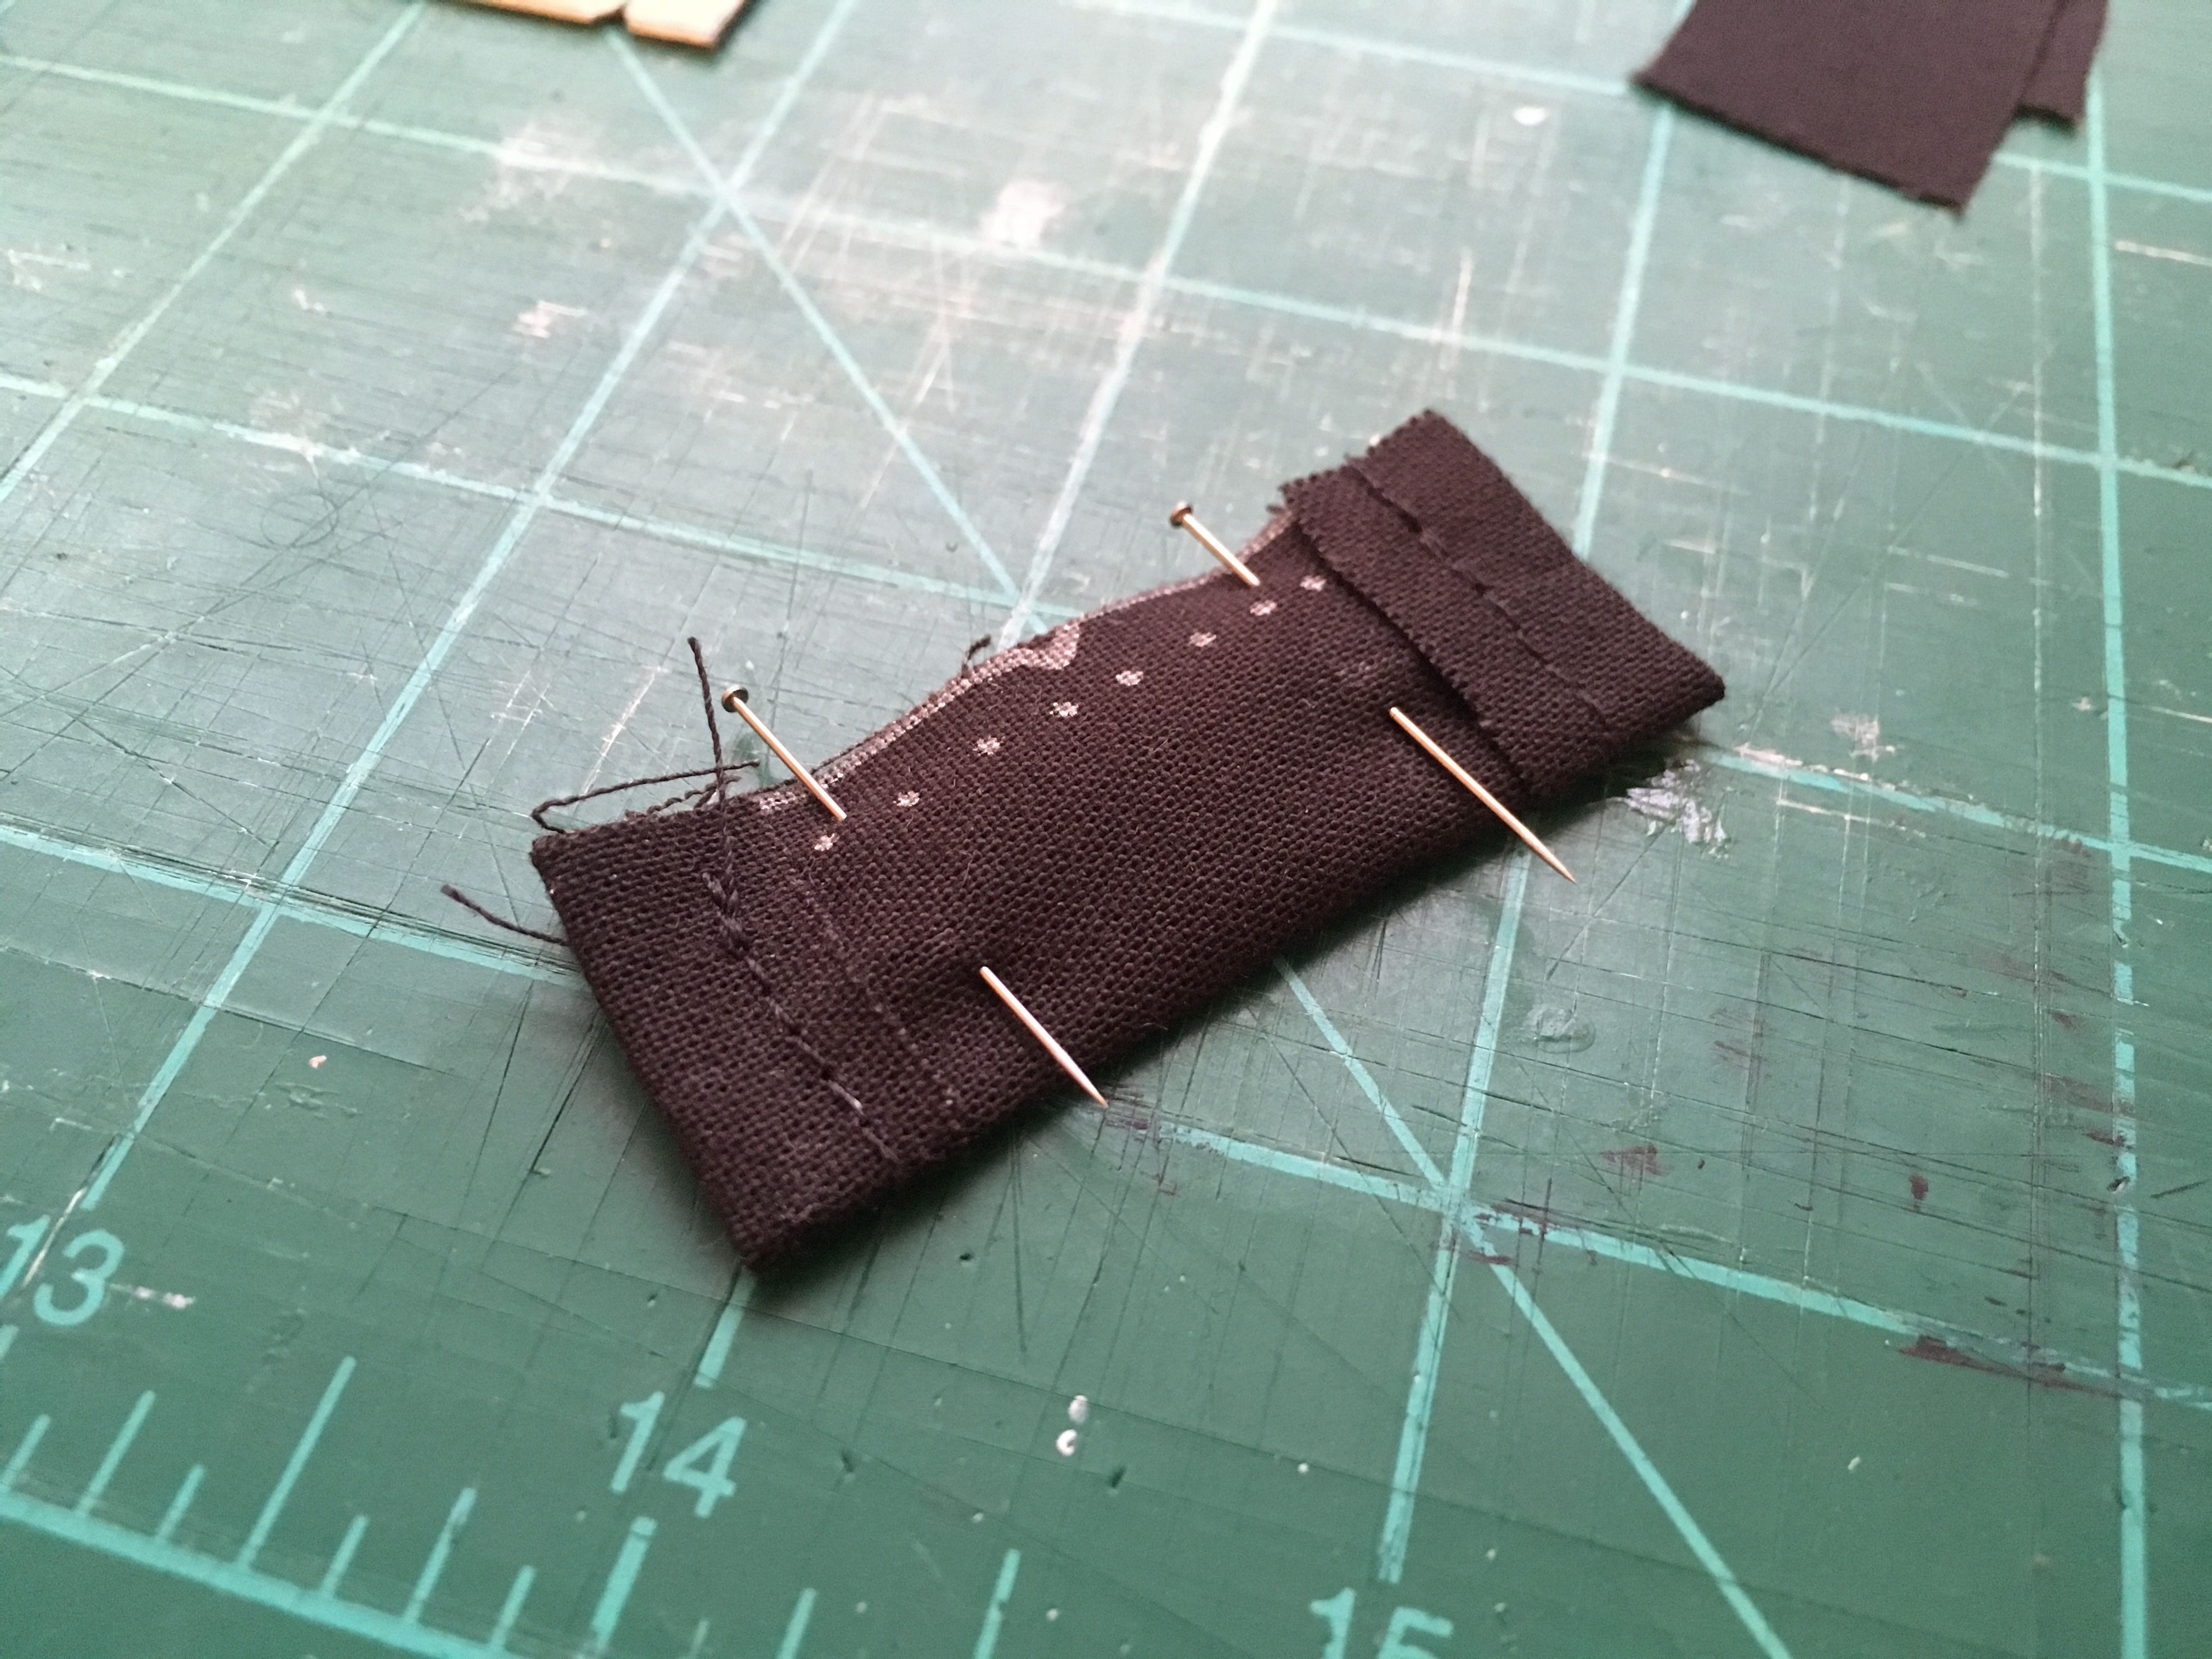
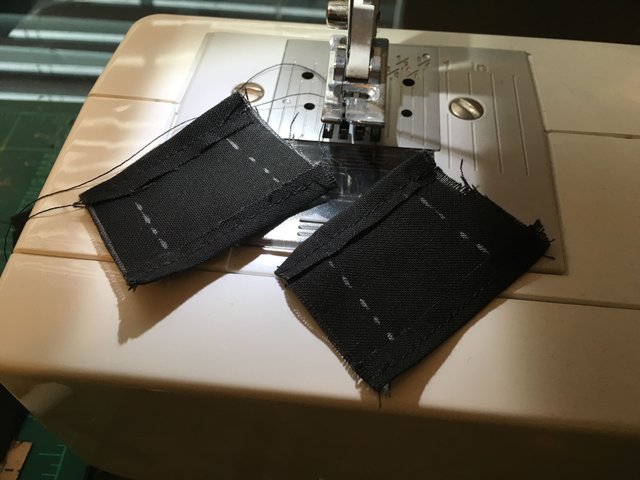
From here, I start with the sleeves. I use straight pins to hold the hem in place and sew as closely to the edge as possible while maintaining a stitch parallel to the edge of the fabric.
Once both hems are sewn (this single piece is going to be use for both sleeves), I fold it long ways, inside out, to sew the final seam.
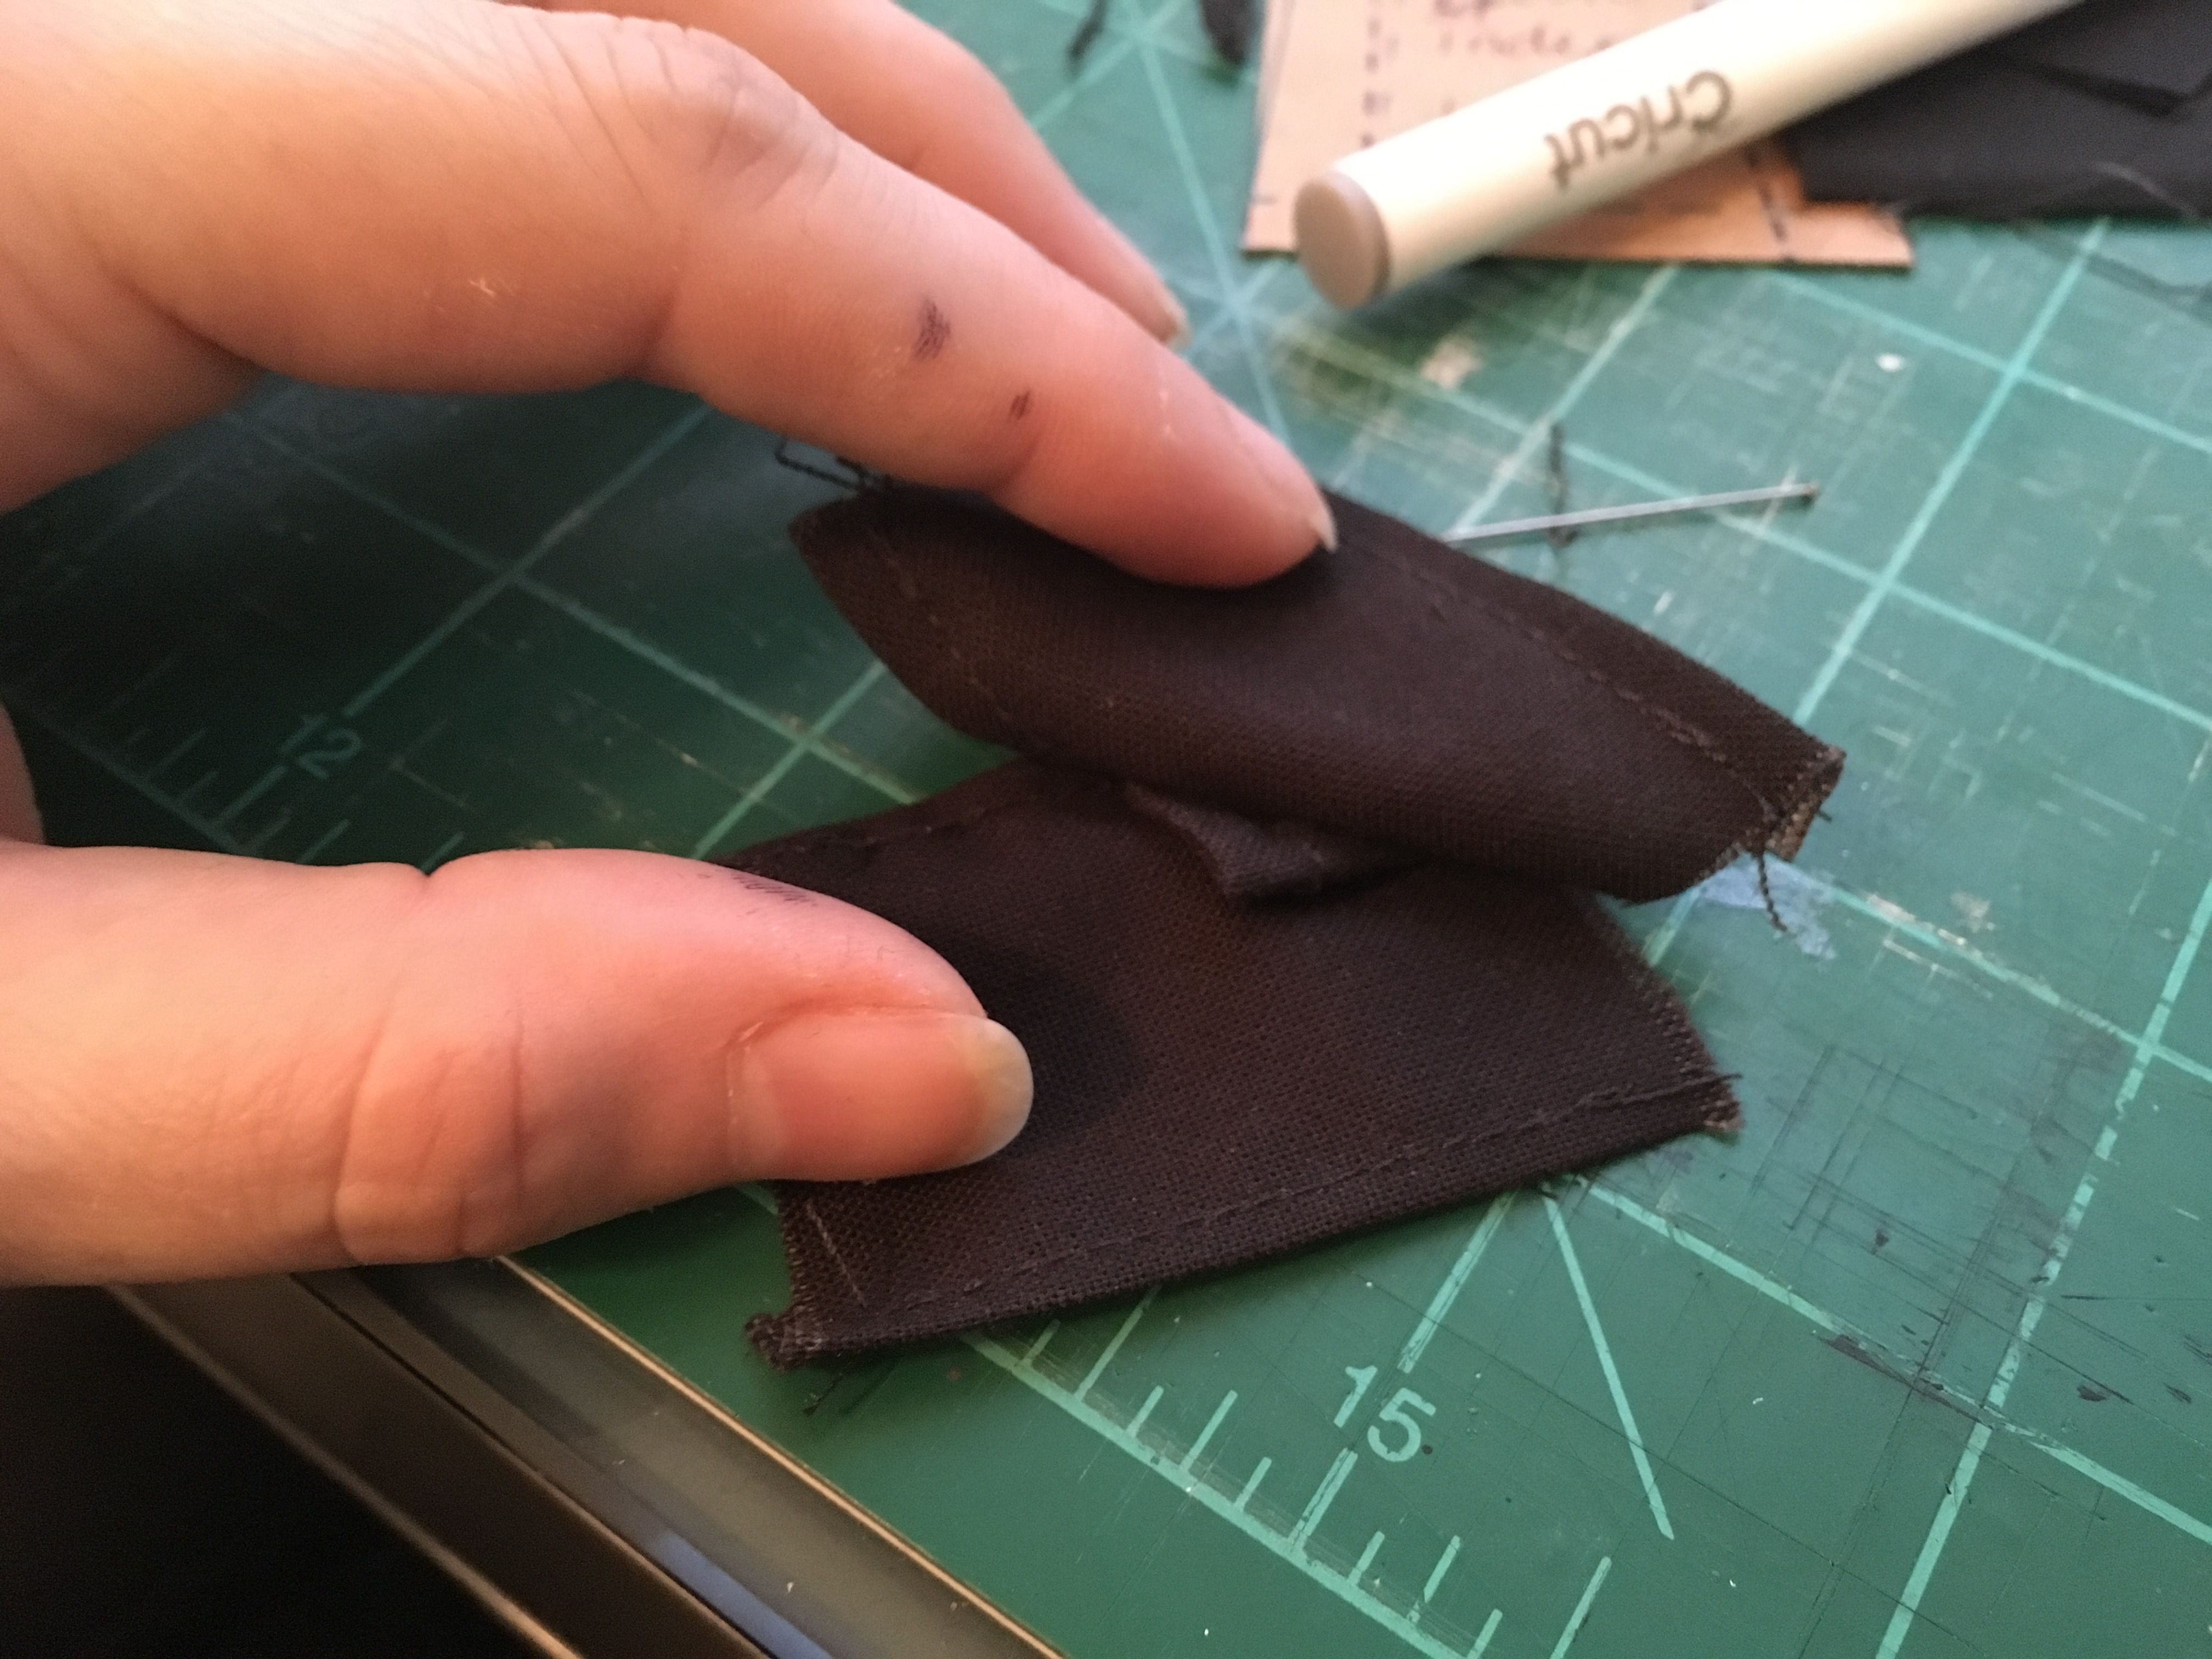
I’ll then trim off excess fabric and add just a touch of fabric glue to help prevent unravelling.
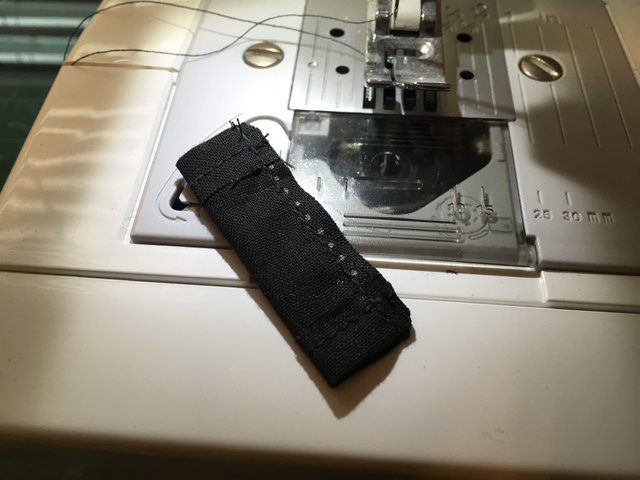
The final step for this piece is to cut the fabric tube in half to make 2 sleeves and turn them right side out.
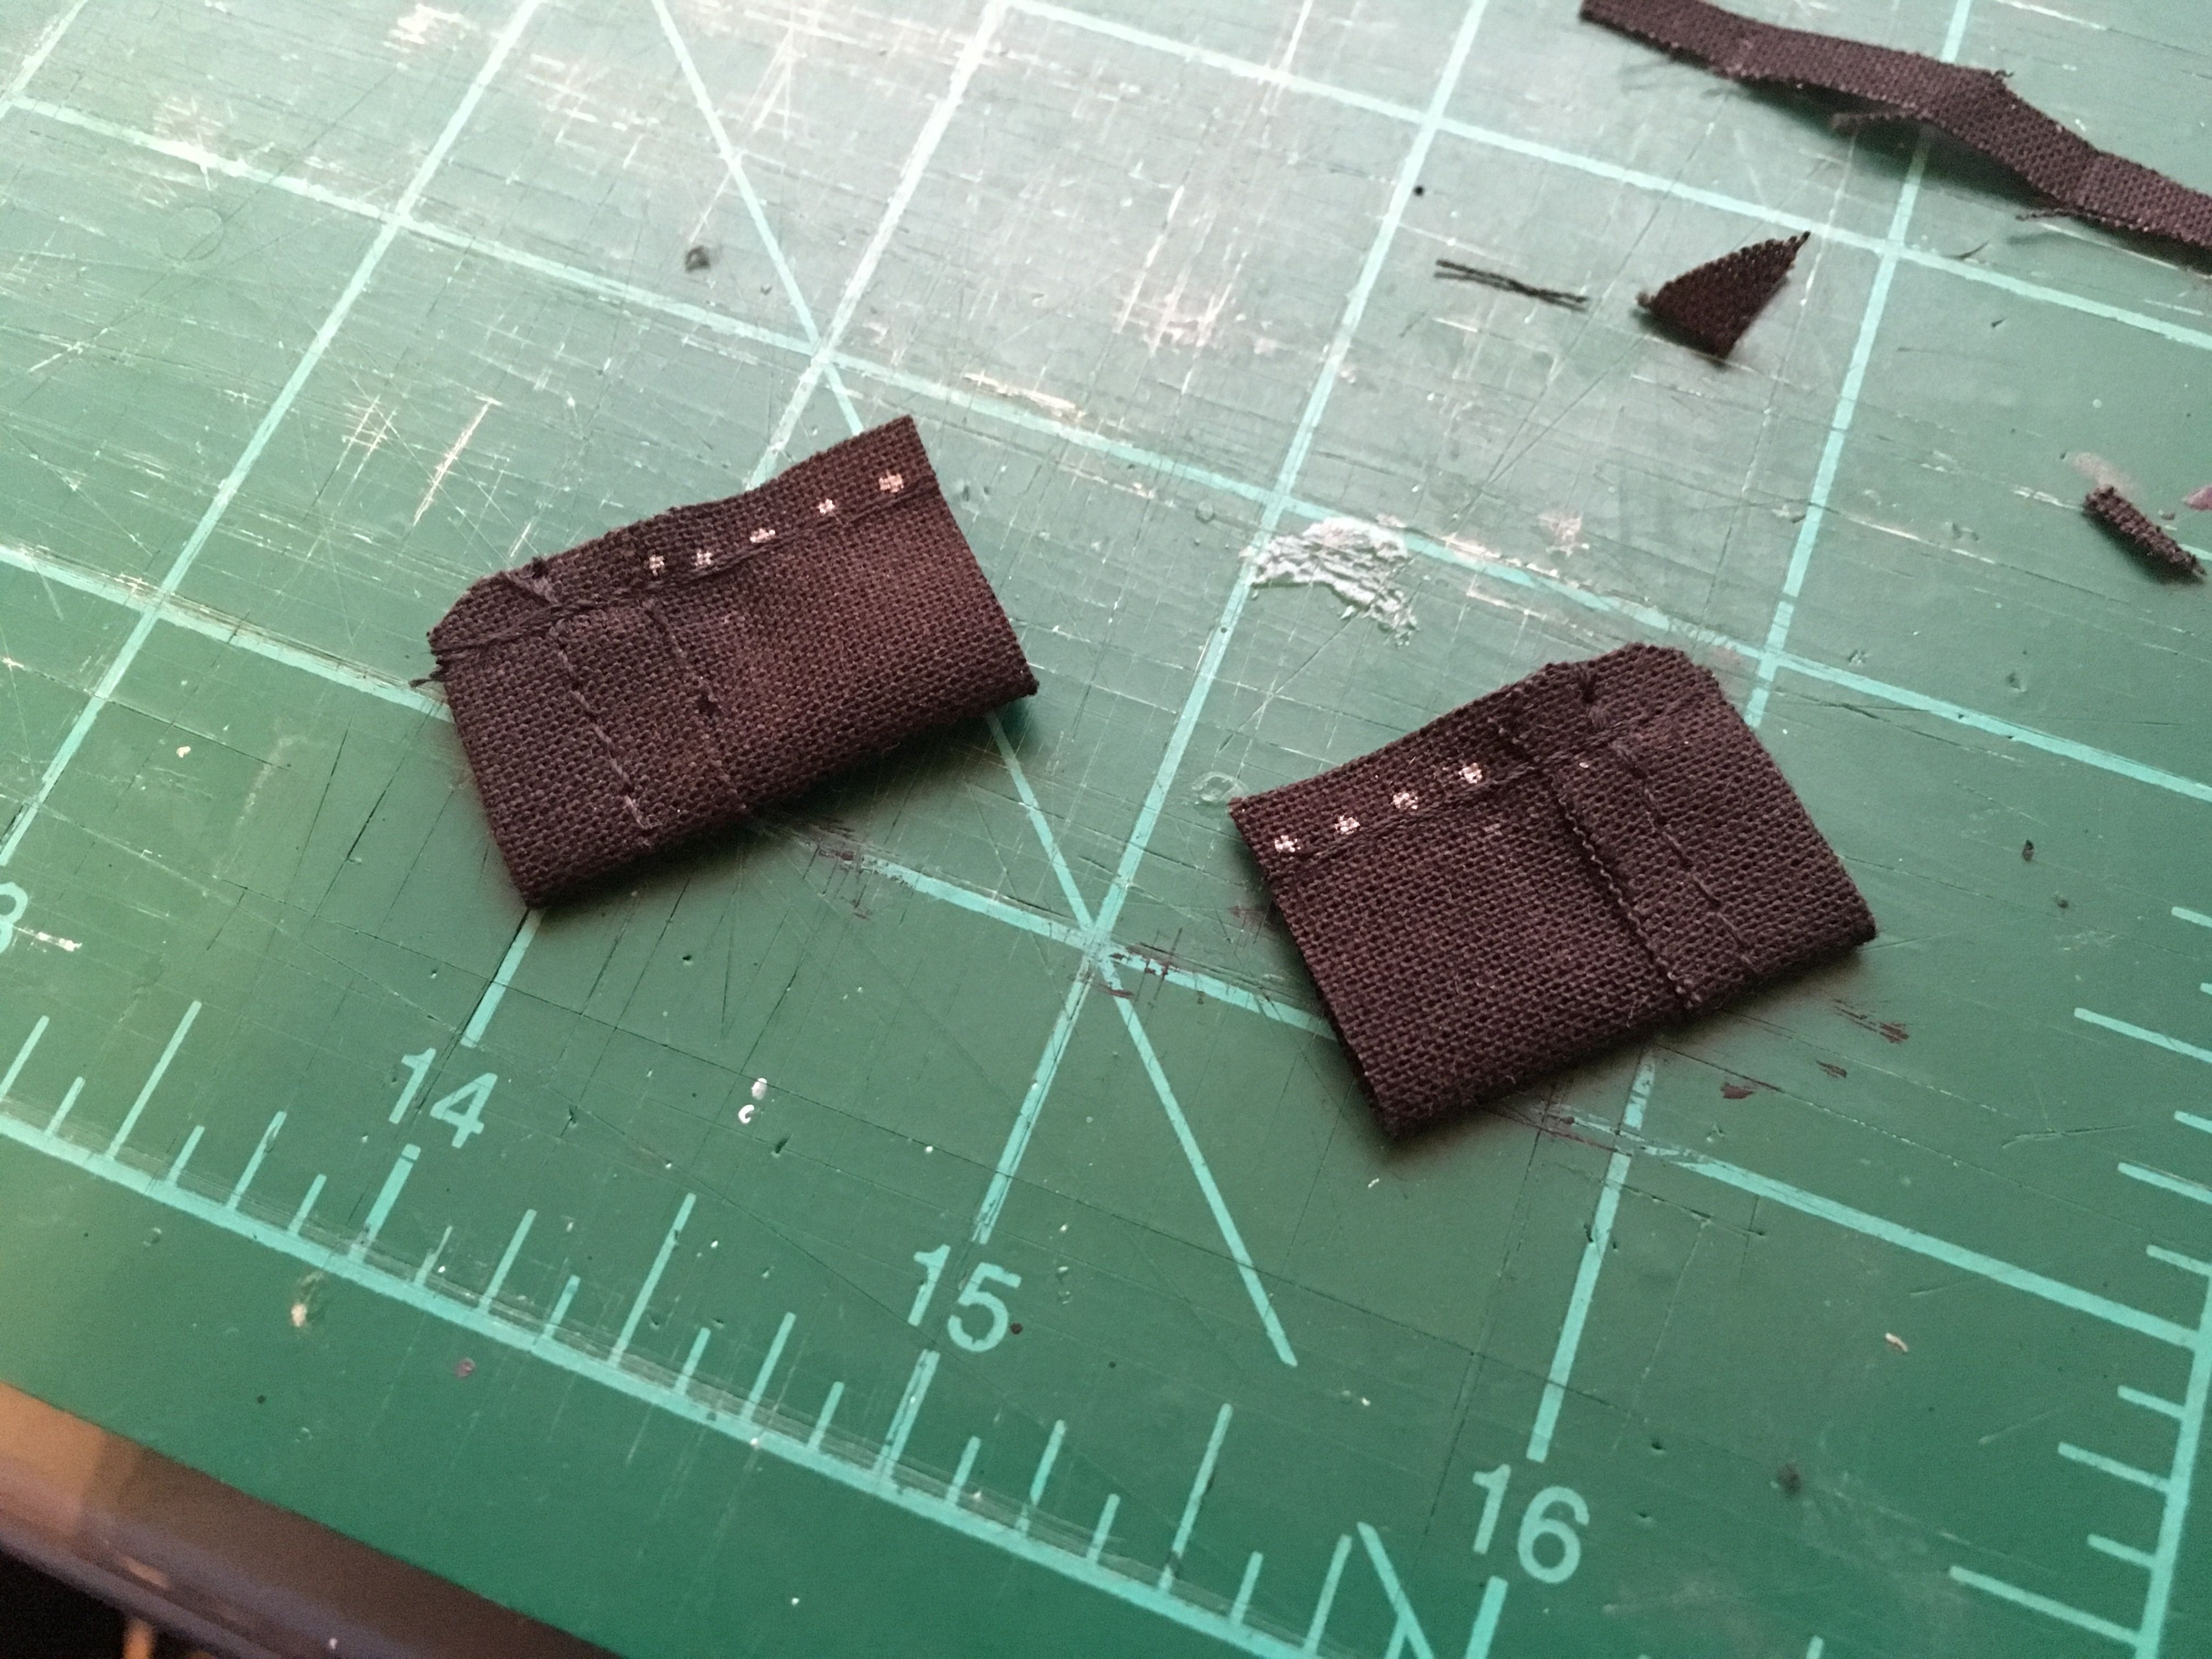
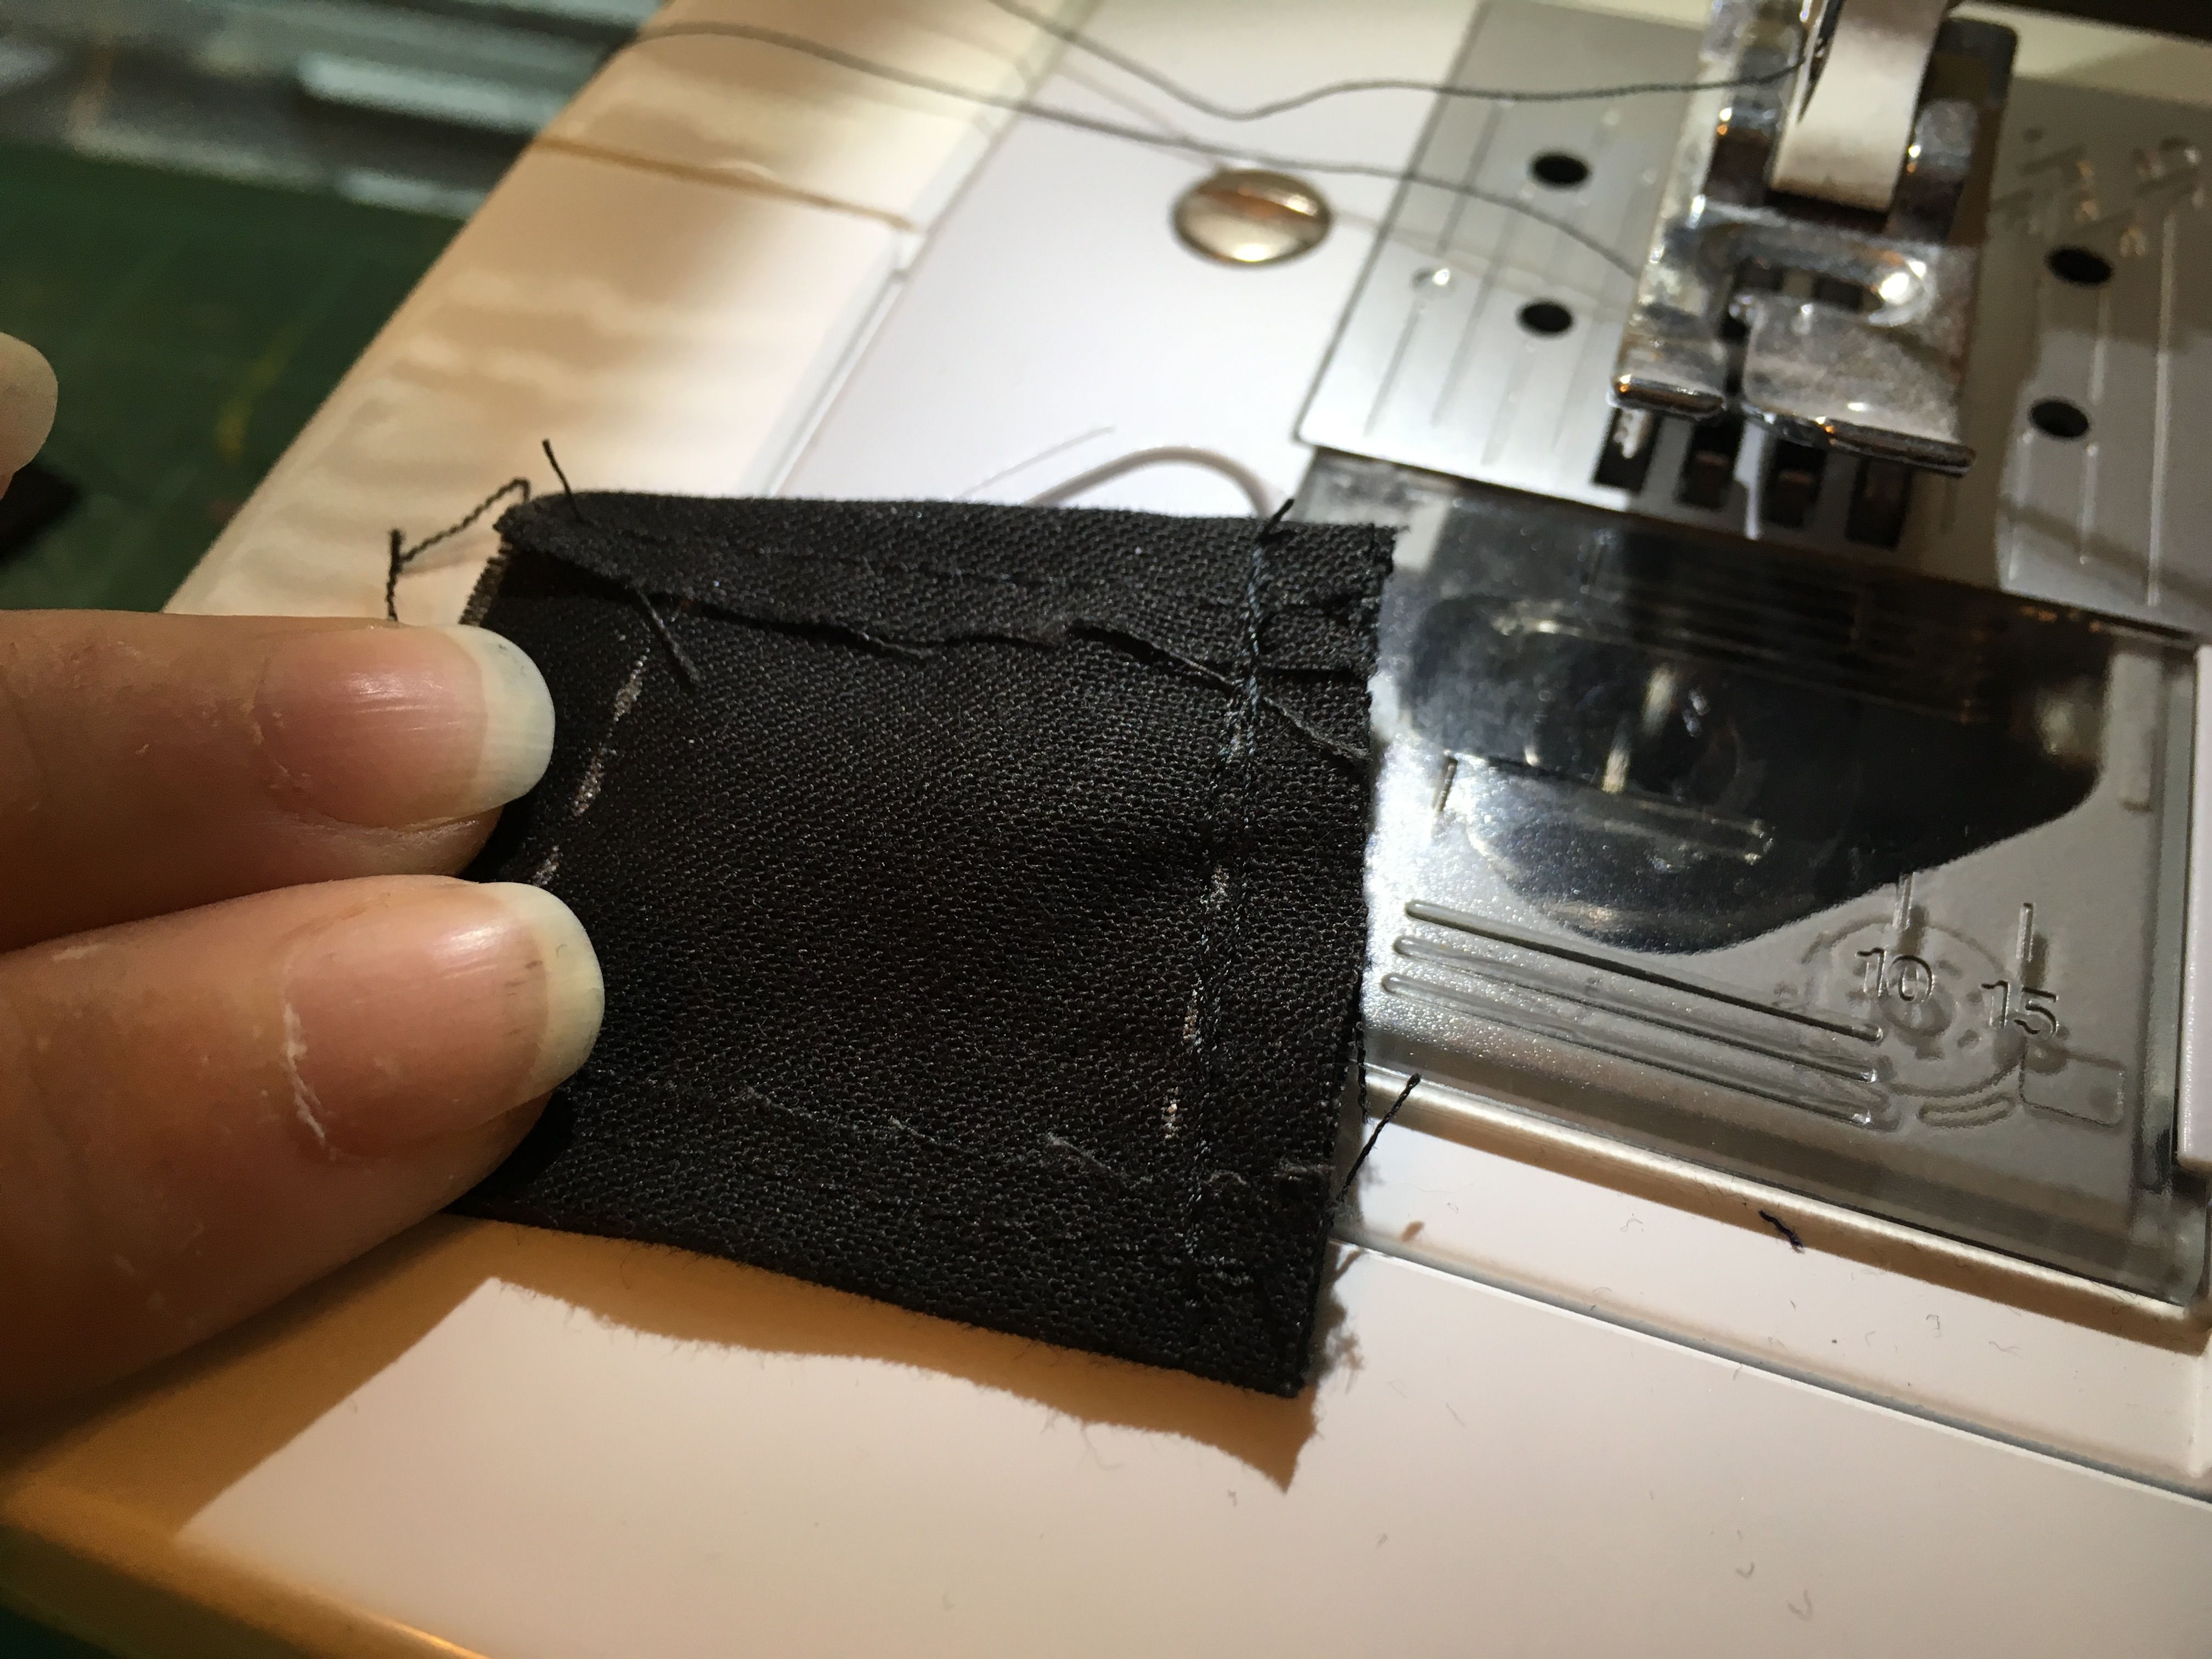
Now, I move onto the body of the shirt. I used the pattern to cut out two pieces (front and back) and mark where the stitches will go. This isn’t necessary, but I find it helps me to avoid inconsistencies and wiggly stitching. Much like the sleeve piece, each of these pieces will need to have the hem sewn for the neck and base of the shirt.
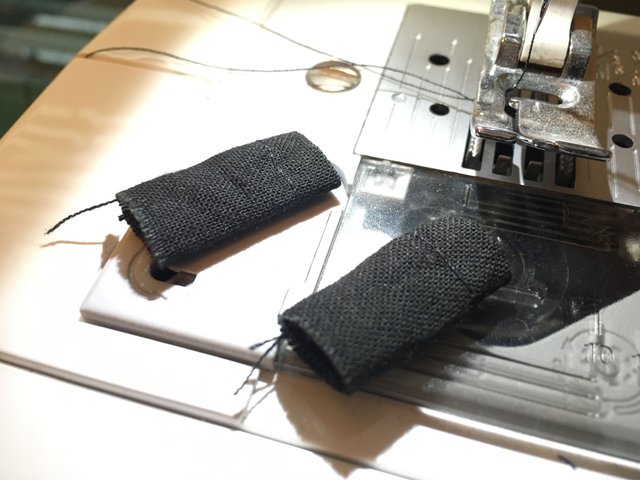
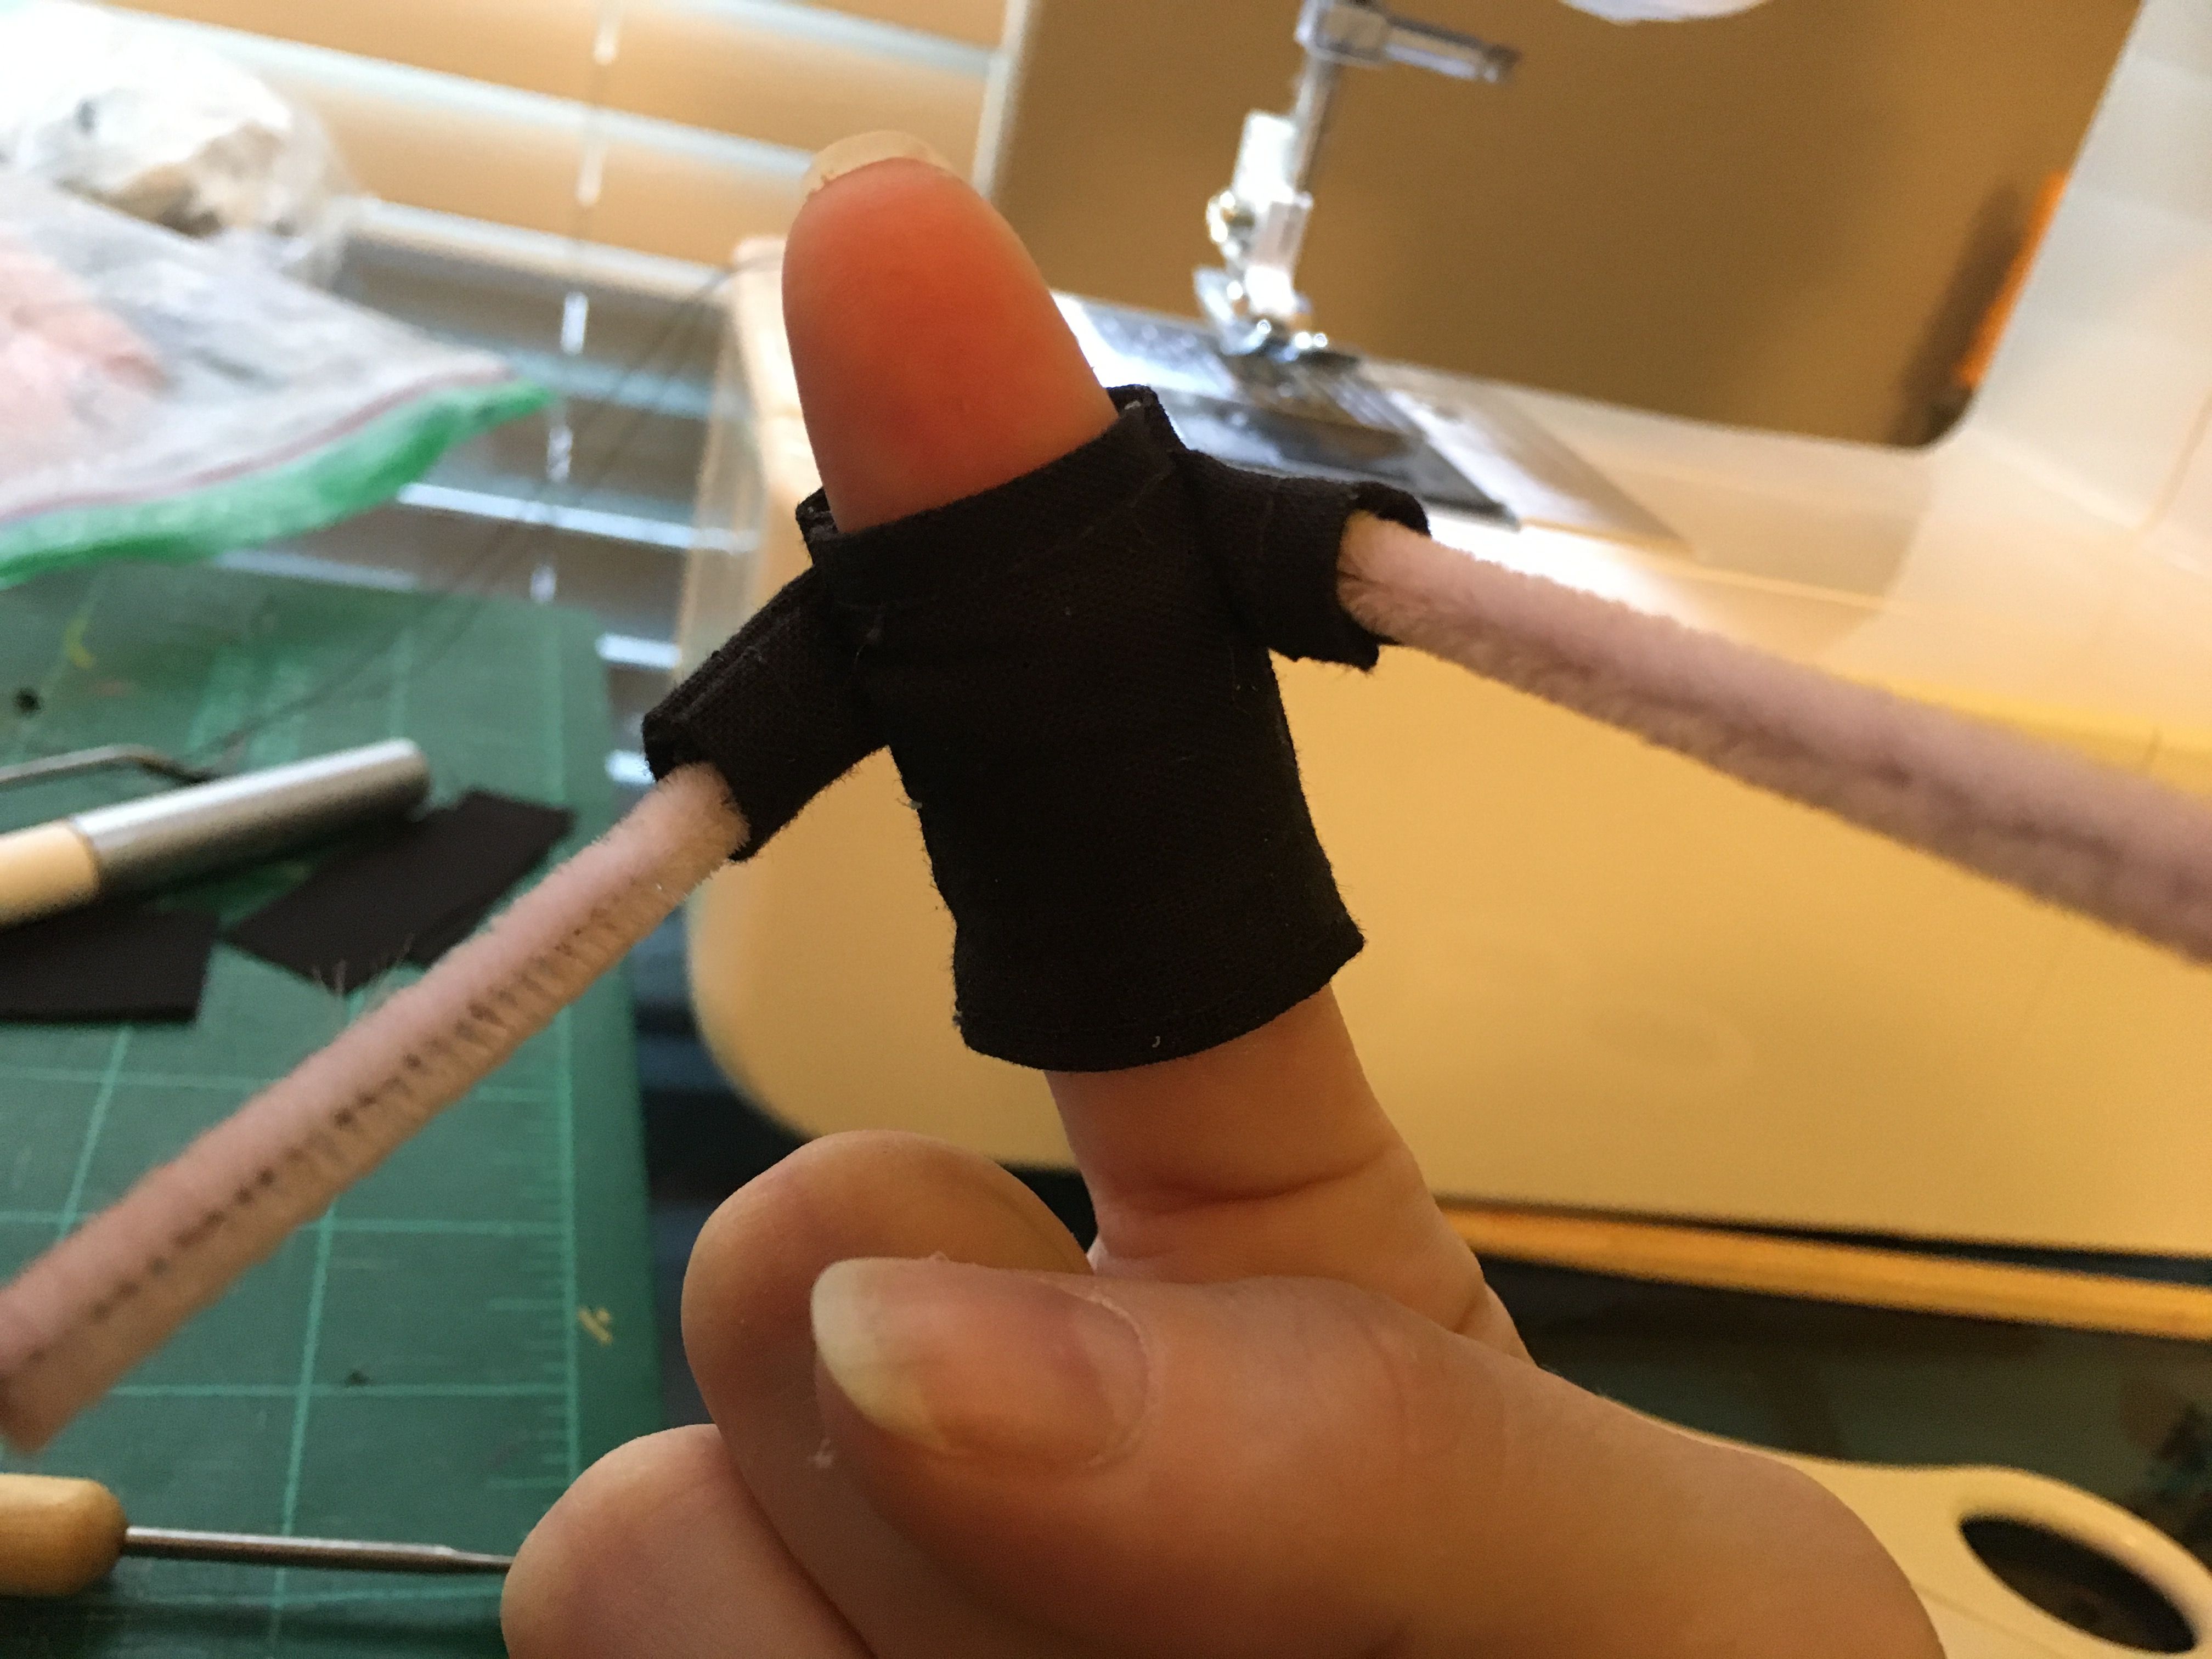
This is where things start to get tricky. I now have to sandwich one of the sleeves in place in between the front and back body pieces and sew them together (inside out).
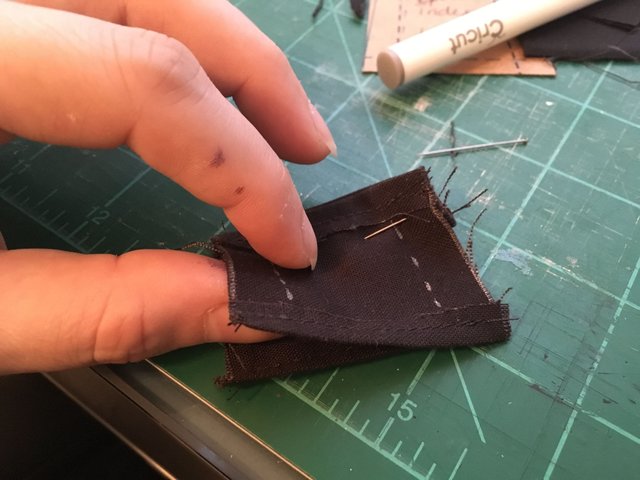
I then sew along the guideline so the seam is holding all three pieces together.
Since there is no longer an opening for the little arms to go through, I will bond the stitches using tacky glue and then use a seam ripper to pull out a couple of threads that are holding the sleeve shut. Once the seams are ripped, I can fit Kevin’s little noodle through.
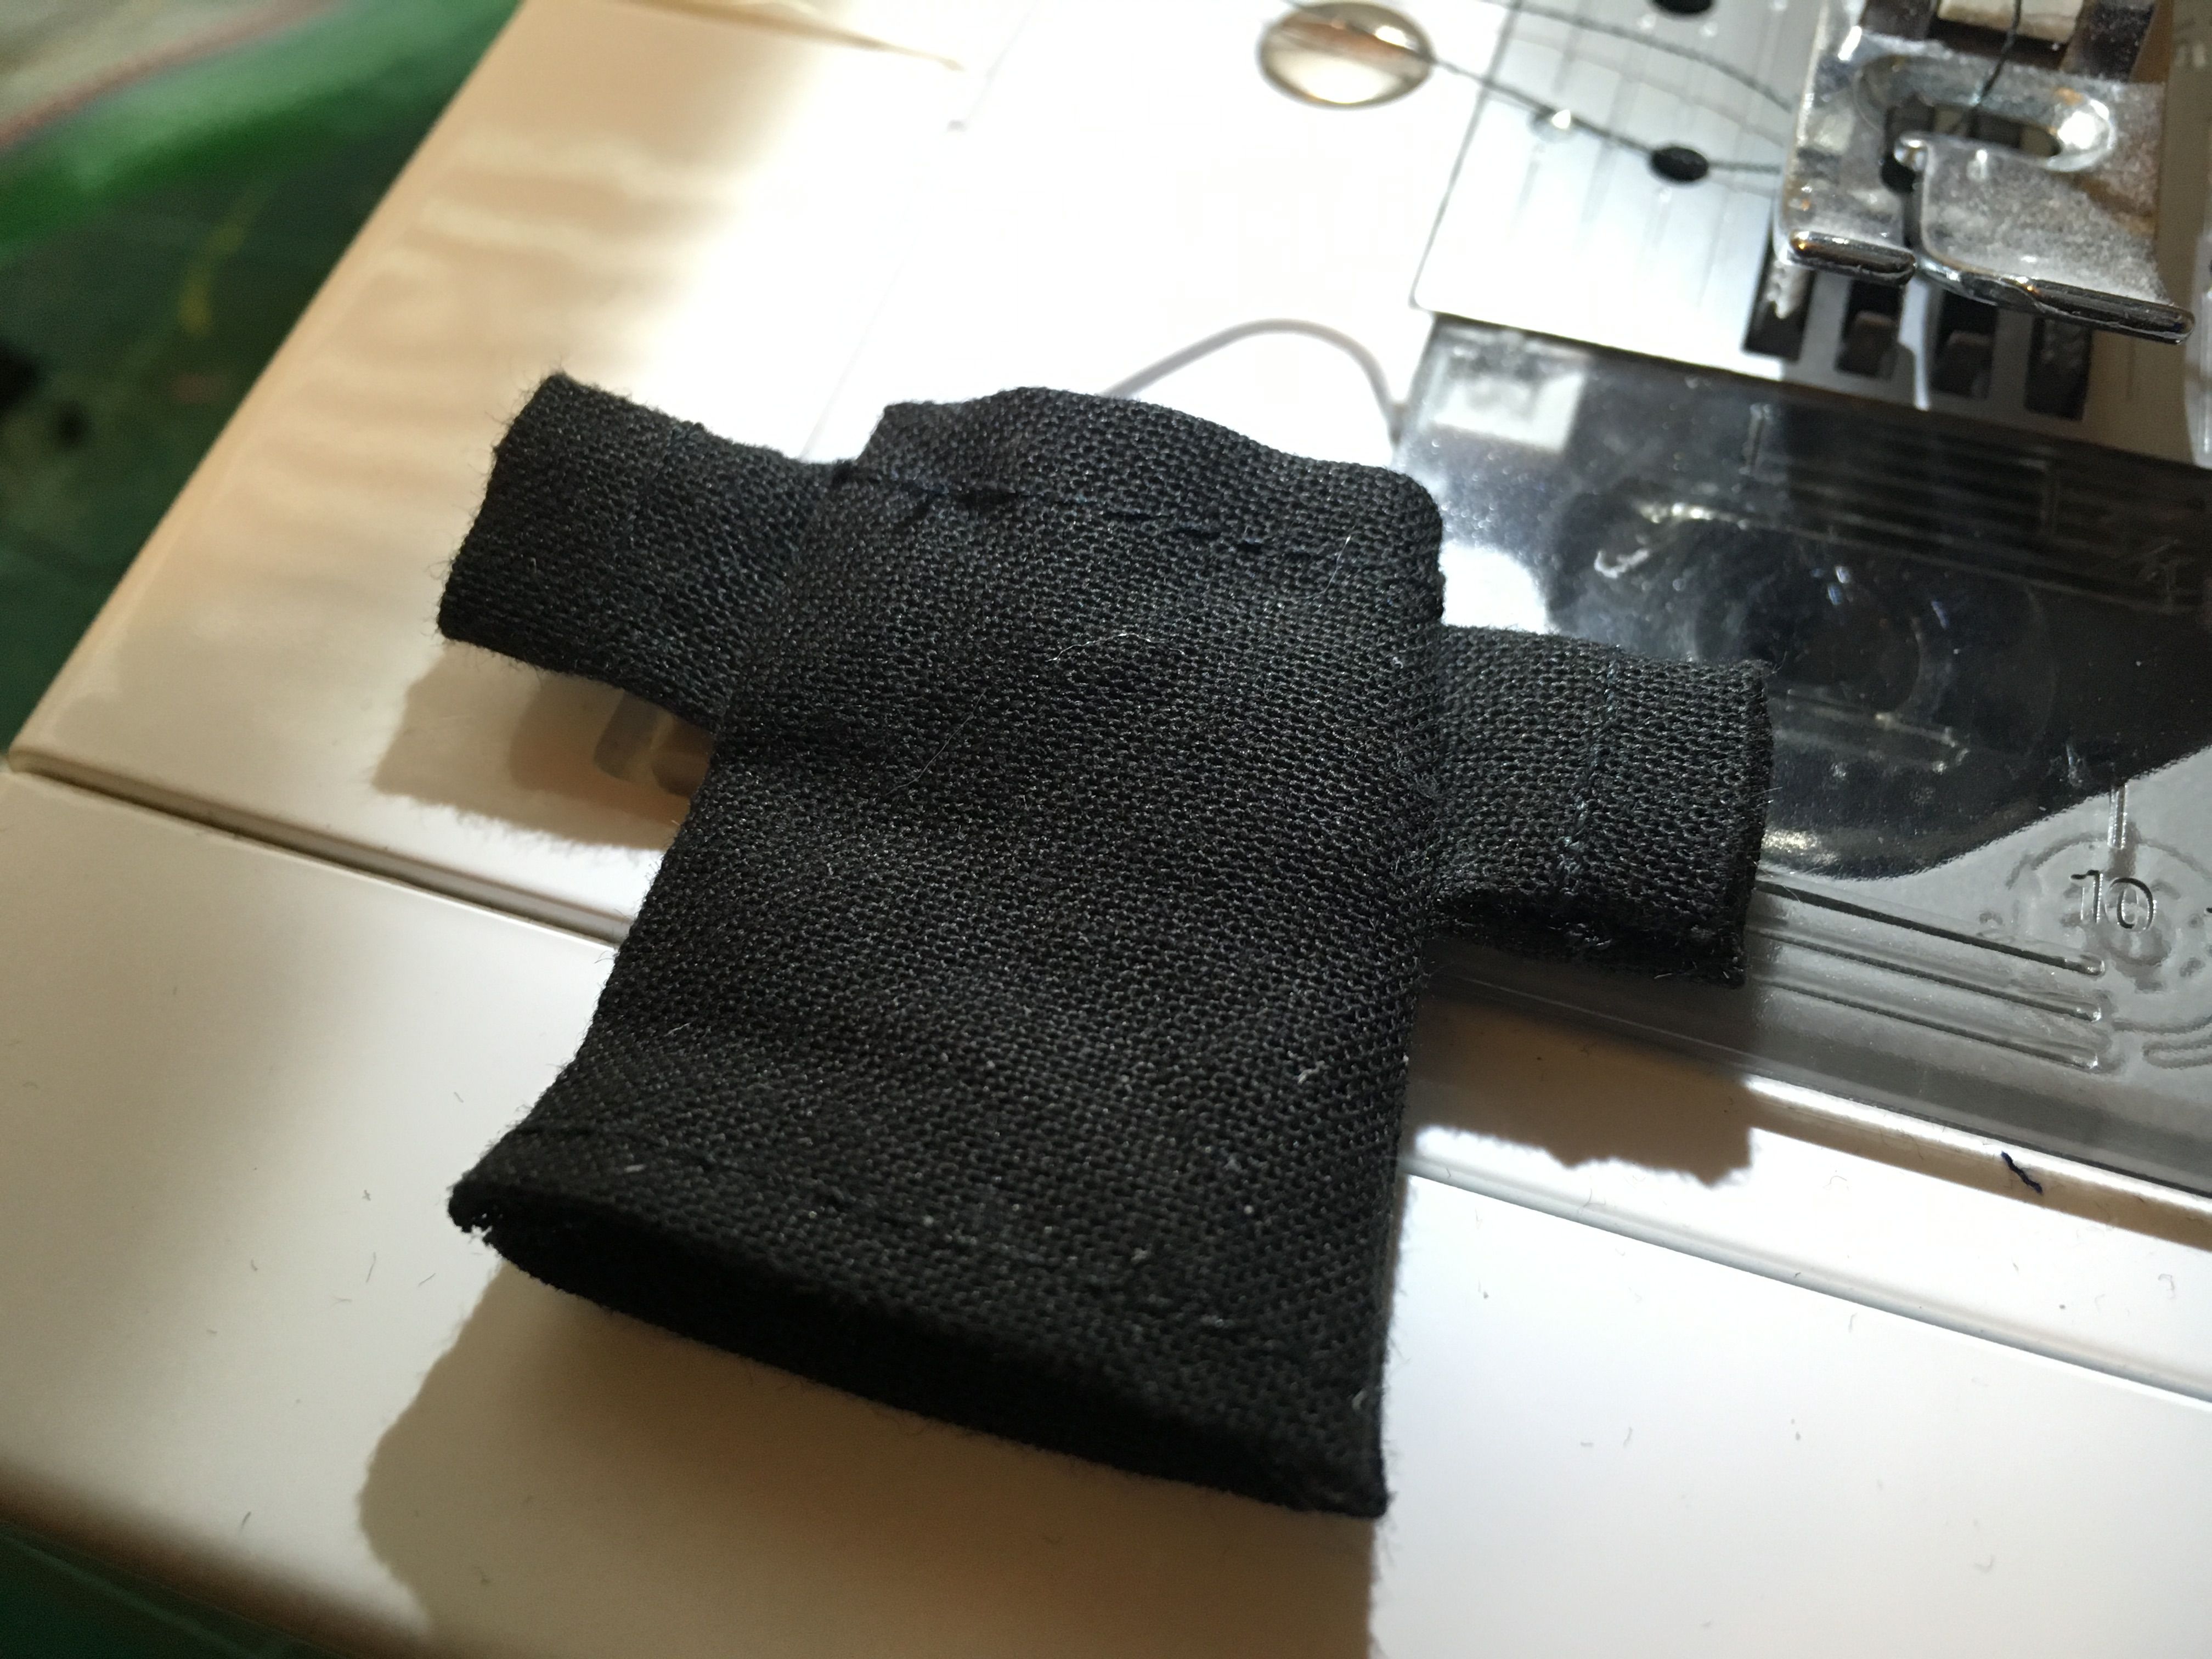
If this were a normal sized shirt, the process would be much different, but because of the challenges of working at this scale, this is the easiest way I have found to handle attaching such tiny sleeves to such a tiny shirt. I will repeat the process on the other side and then turn the whole shirt right side out.
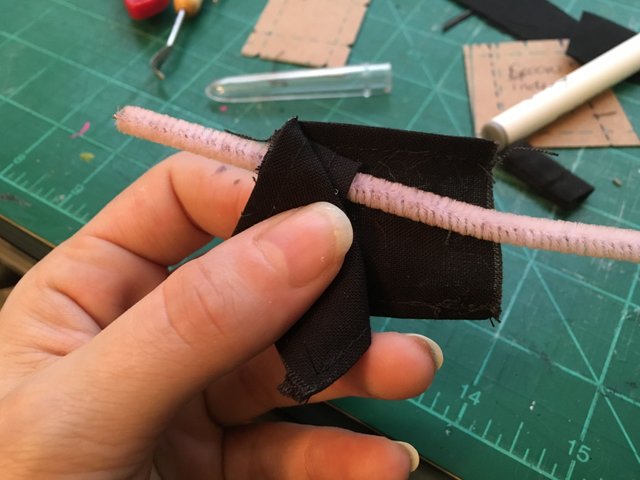
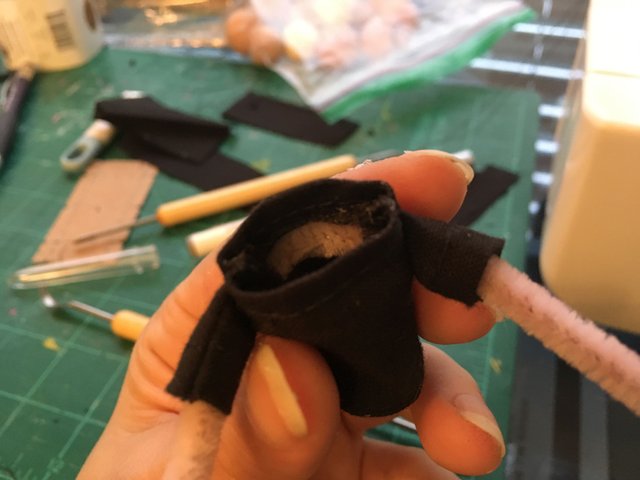
I use a singular pipe cleaner threaded through the shirt for both arms and then bend his little hands. I like to use a single piece because it adds stability to their arms.
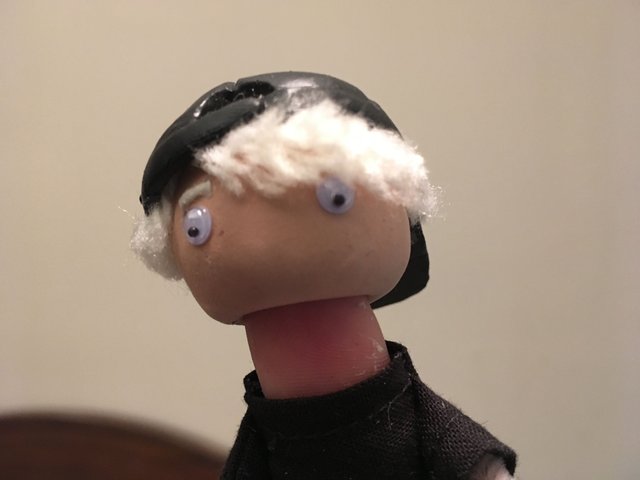
Because I am the worst person ever (and also because I was kind of figuring it out as I went) I didn’t get any process photos of how I made the hat. I considered using fabric, but quickly abandoned the idea as I started going cross eyed trying to imagine sewing together such a tiny, complicated little piece of material.
Sculpey Polymer Clay was used to mold the ball cap over one of my extra extra puppet heads and sculpting tools were utilized to carve out the details. The bill was made as a separate piece and glued on after. I baked both pieces while still molded onto the extra Model Magic head because attempting to pull the sculpey clay off while still malleable would have ruined all my work. In the oven, the little Model Magic head shrivelled up like a little peach-colored raisin that I peeled out of the hat once it had dried.
After that, I simply painted the hat black, glued a row of blonde yarn inside the hat, glued the whole thing to a non-oven-shrivelled head, and gave our little PA a quick haircut. The final touches were to glue on the mini-googly eyes and add a little eyebrow (made of a half strand of yarn molded into a line using Tacky Glue).
There are still a few more things that Kevin needs in order to do his job properly, but rather than drone on, I will save that for another post (because it was actually a somewhat in-depth process, too). So please let me know what you think in the comments below and I look forward to posting more very soon!
Until next time!

I love feedback, so if you have any questions, ideas, or requests, make sure to leave a comment below. And, if you need more fun stuff to shove into your eyeballs, hop over and check out my YouTube channel, Chimp Skipper, or my online portfolio.
#art #crafts #movies #puppets #toys #funny #miniature #sculpture #sewing
I really salute people that have the patient to do these miniature things, it needs details, creativity and great patient. Cool stuff!
Thank you so much! It's probably fair to mention that there has been a lot of undocumented trial and error for creating these little dudes :)
I can imagine that, practice makes perfect I supposed... :D
I wish I had the patience and talent for that kind of stuff.
Thank you! All talent is is practice, you just gotta find the thing you like doing enough to do over and over :P
#funny
Your posts are interesting and funny maybe when you post other interesting things you will succeed in steemit
#funny
but people will find it funny when they are entertained
Resteemed by @resteembot! Good Luck!
Curious?
The @resteembot's introduction post
Get more from @resteembot with the #resteembotsentme initiative
Check out the great posts I already resteemed.
Very cute! The little eyebrow you added really gives him a lot of character.
Thank you! Eyebrows can do a lot for a characters personality :)
I love this! I've looked through your blog and your finger puppets are so awesome. You're so talented at making them. I have sewed a lot in the past so I can only imagine how fiddly this is--you must have so much patience.
Thanks for the process work here, how you attach the sleeves is really interesting. You're right, totally different to normal clothes. It wouldn't have occurred to me to glue them in place.
I'm glad I found your blog. I'm totally following you now.
Thank you so much for all your kind words! I imagine there is a more effective way to make the teeny, tiny shirts, but I haven't figured it out just yet, so my gluing and seem ripping method works best for me now.
I'm hoping to make more time for my little puppets now that the holiday is over (we were out of town for a couple of weeks), so there should hopefully be more puppet posts soon. I'm definitely planning at least one a week, but if I can carve out more time to work on them, I may start posting updates more frequently.
Thank you so much for following me and the upvote. Again, I really appreciate the kind words and your support! I have a lot of fun making these little guys, so it feels good to know others like seeing them, as well.
It is so cute, I wish, I noticed it earlier, You do great things here, will keep an eye on your posts
Well thank you! I would follow back, but I already followed after seeing your Chameleon :). I'm glad to hear you like me work, too!
https://steemit.com/introduceyourself/@hilmerwhite/hello-steemit-i-tell-you-about-my-life