The Complete beginners guide to Adobe Photoshop Lesson #36 - How to resize the canvas in Adobe Photoshop With Oliver Queen From Arrow
Changing the image size is the most popular operation, whether it's a Photoshop or another editor. Usually, this action implies a change in the number of pixels in width and height, that is, it turns out that the picture is oscillating on a scale.
Photoshop offers another option for increasing / decreasing the number of pixels in an image - resizing the canvas.
this is a canvas in the photoshop
A canvas is a space exclusively in which pixels of an image can be displayed.
Imagine a sheet of paper. You can draw only on it from edge to edge. Everything that is located outside its borders is a non-working space, it is impossible to draw there. This sheet of paper will be an analogue of the canvas in Photoshop.
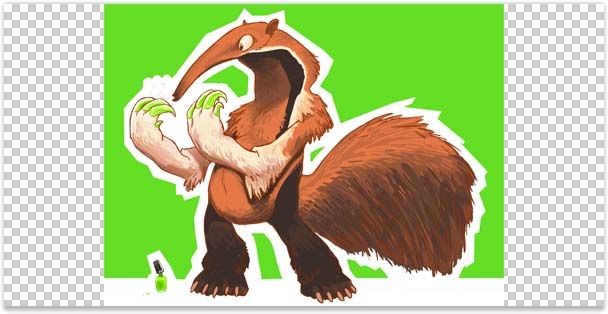
When you create an image, you create nothing but a canvas. You set it the size, resolution and background color, then you will draw on it. Canvas can be of any size, and when you open a picture in a program, it automatically places on a canvas, which in turn is created in the same sizes. For example, I opened a picture in the size of 2560 × 1600:
![]()
this means that a canvas of the same size was automatically created and created, where the given picture was placed.
Remember: the image can not be smaller than the size of the canvas!
Changing the size of the canvas
You can resize it. It is important to understand the difference: working directly with the canvas, we do not touch what is depicted on it. Let's consider two cases.
Increase the canvas
In this case, Photoshop adds additional space to the image. For example, you need to add another 200 pixels wide to the picture, here's how they added:
By default, the canvas is transparent, and the transparency is displayed as a chess board. Spaces to the right and to the left are a new work area with which you can work.
Reducing the canvas
By subtracting pixels from the workspace, Photoshop will cut this space together with all its contents. For example, now we will make the width of the image 200 pixels smaller, that's what happened:

What is the absolute size?
The screenshot above shows that the Width and Height fields have the same values as the current size. If instead of 400 pixels in width indicate 600 pixels, then the canvas will total 600 pixels wide. So, by choosing the absolute size, just specify which width and / or height you want to eventually get a canvas.
What are the relative sizes?
By ticking the Relative setting, you will see that the values for the Width and Height fields will be 0.
Location
By adding / cropping the space of the canvas, by default, the entered width and height values are split into halves and the canvas is symmetrically changed. That is, if you want to increase the height by 200 pixels, then by default the new space will appear 100 pixels above and below. Or, for example, when at the very top of the article I increased the width of the image by 200 pixels, then the chess background was displayed to the right and left of the image by 100 pixels.
Configuration Anchor allows us to choose the direction in which the photoshop should change the size of the canvas. Arrows show 8 possible directions.
Moreover, the mechanism of pressing these arrows is interesting. Clicking should not be on the arrow to which you want to direct the changes, but to the opposite of it.
It works this way: pressing the arrow, you delete it, and all the others move to the vacated place. As a result, squares of 9 cells appear empty cells. It is the location of the empty cells and indicates in which direction the change of canvas will occur.
Color expansion of the canvas
You can specify the color of the new space by using the Canvas extension color setting. By default, there is no color, it is transparent (denoted by a chess board).
Note that in the screenshots above this setting is painted gray, that is, it is inactive, you can not click on it. This kind of view is related to the fact that only one background layer is displayed on the layer palette and it is locked (this is signaled by the lock icon). I have repeatedly said that the blocked background layer deprives us of a lot of possibilities for editing it.
To enable the Canvas Extension Color to become active, you need to unlock the background layer. To do this, double-click on it in the Layers palette. A new window appears in which you do not need to change anything, just click OK.
Great