Step by Step Tutorial In Adobe Photoshop - Making Polygonal Portrait
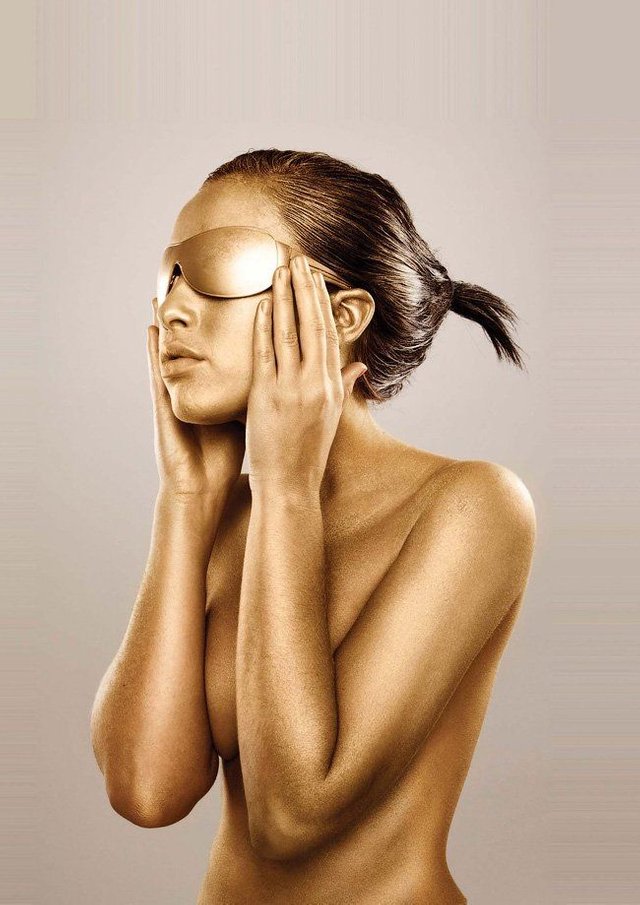
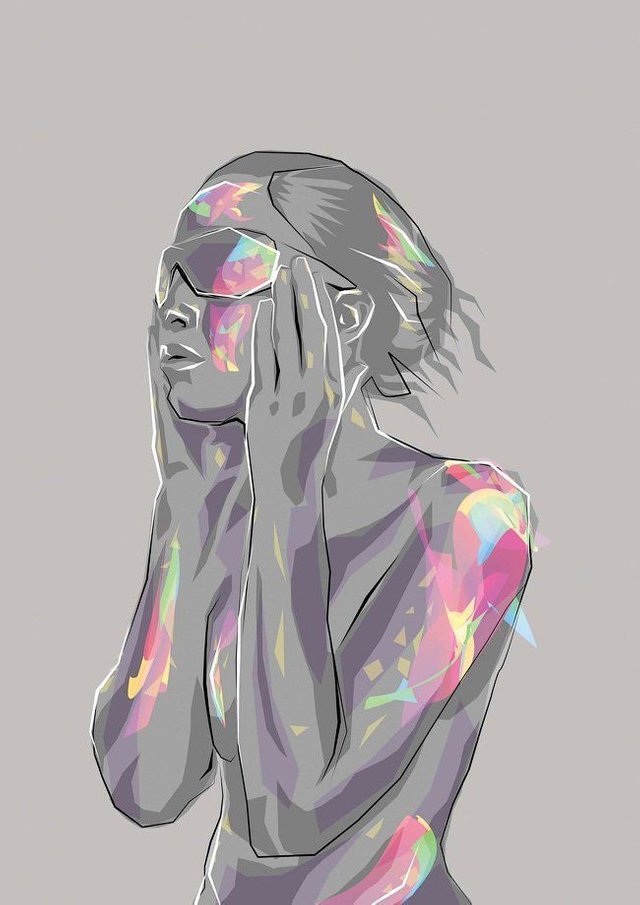
Final Result:

Step 1
The first step to create a work style is to choose the right photo.
Place the photo in a new portrait Photoshop document sized A3. Make sure there is enough free space around the fields for effects.
Step 2
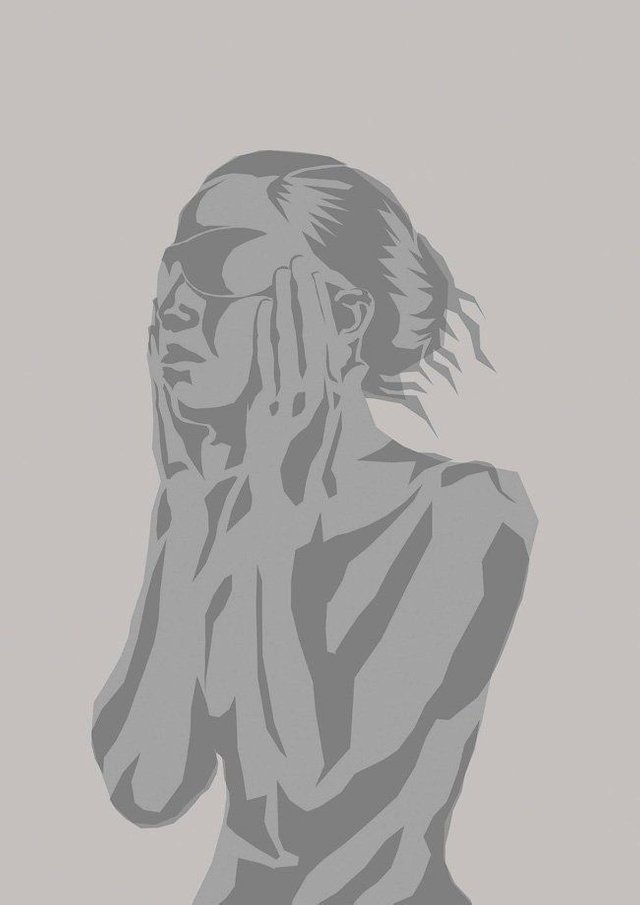
Create a new layer under the photo, fill it with a muted color. This will be the background of our work. Add one more layer above the photo and carelessly circle the outline of the model with the Pen Tool  , filling it with a darker color. Hide this layer.
Create a third layer above all the others and circle the shadows, filling them even darker. You do not need to leave much detail.
Step 3
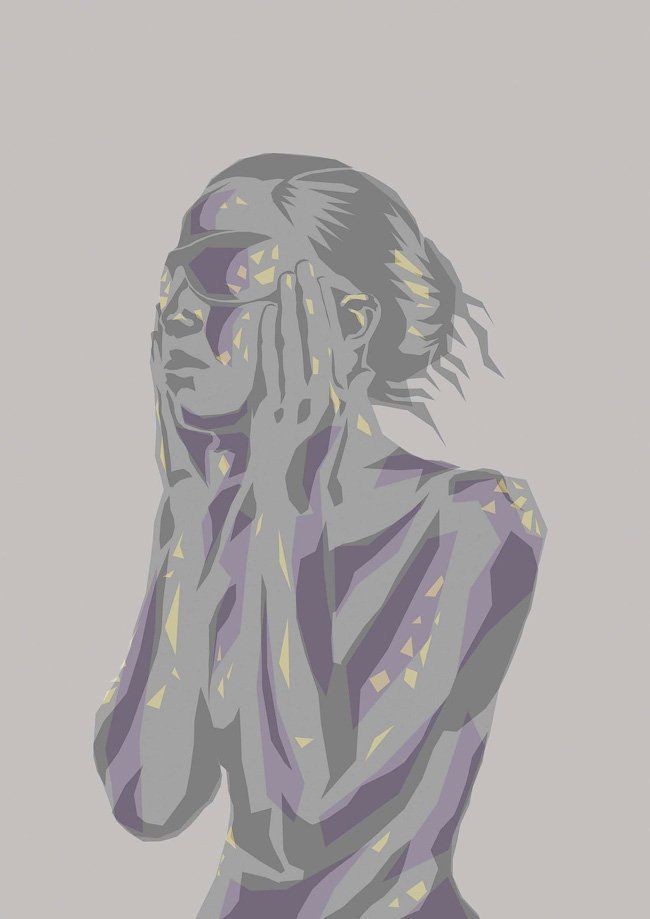
Include a layer with a stroke, then repeat the previous step using different colors and blending modes to lighten the work. Again, do not be too zealous with detail. Be sure to brighten the areas on which there are glare in the original photo. Also do not forget to darken out the areas without lighting.
Step 4
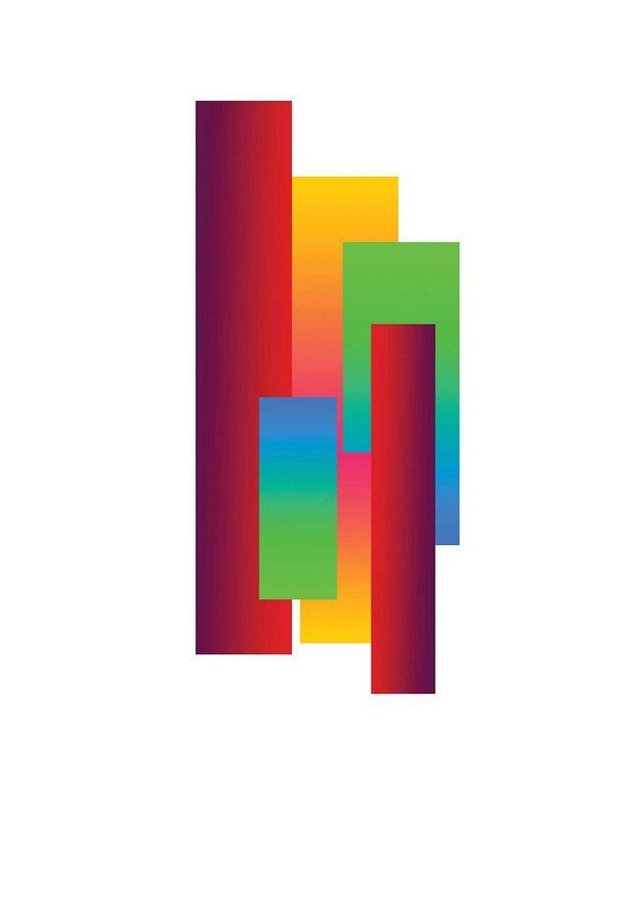
On the new layer, draw a rectangle with a bright gradient. Duplicate it several times, change the size and fill it with different colors.
Create different variations using Edit> Transform> Warp. Give yourself the will by creating a few abstract forms. Now place the figures in the glare places and change the blend mode to Screen.
Step 5
Some zones (such as hands) need to be visually separated. For this we use the Pencil Tool  . Set the size to about 19 px, if you are using a graphics tablet, make sure that the Simulate pressure checkbox is checked. Draw black lines in dark places and white in light.
Step 6
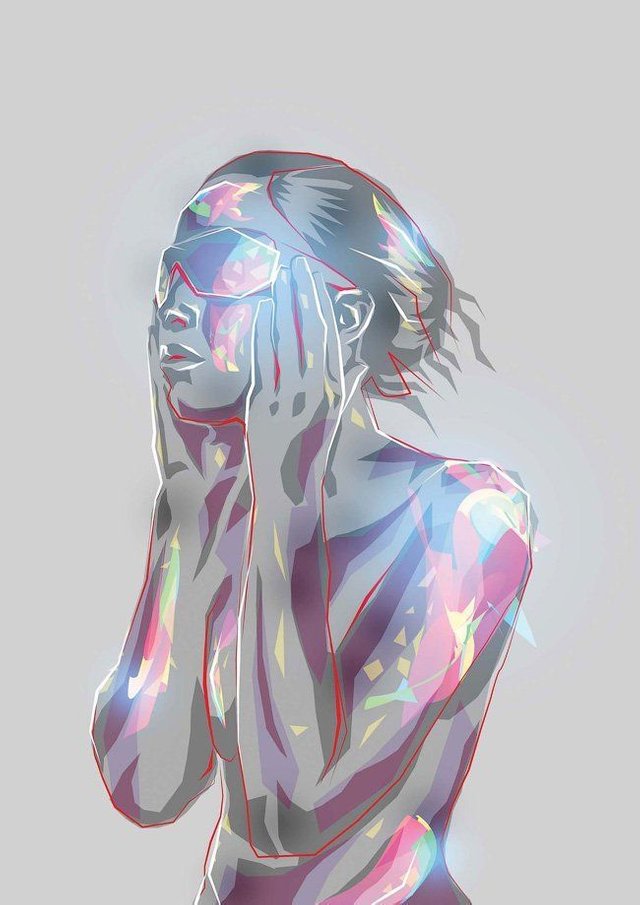
At this point, I was not happy with the color scheme, so I added a red-green gradient map layer. If you want to repeat this step, set the Blending Mode to Lighten with Opacity 100%.

Step 7
The drawing is still a bit flat. To give it a depth, create a new layer, set the blending mode to Screen. Use a large round soft brush of light blue color, coloring the areas that need to be clarified.
Create another layer, set the blend mode to Soft Light, Opacity to 58%. Black paint over the areas in which you need to strengthen the shadows.
Step 8
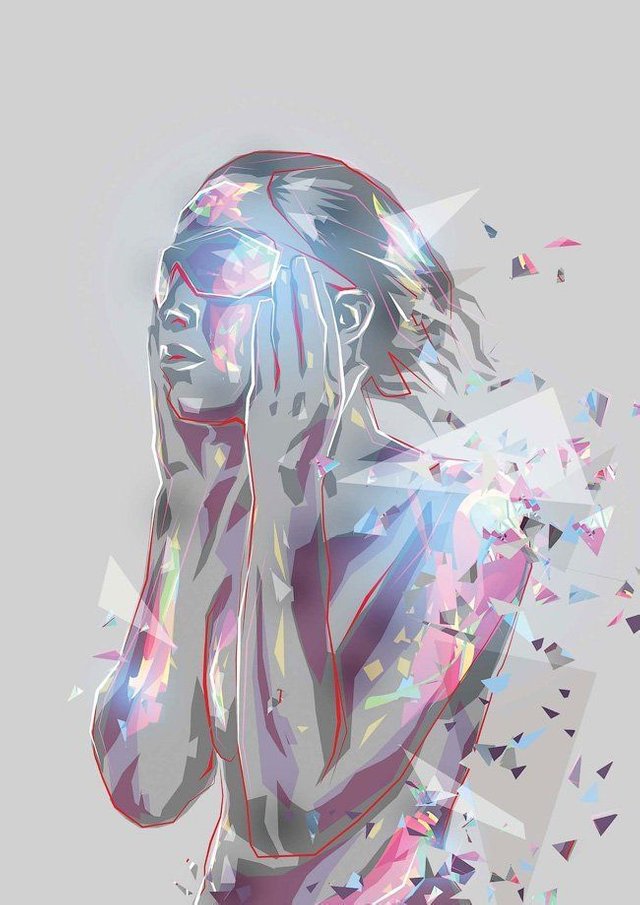
Now add the "broken" effect with the Polygonal Lasso Tool  . Select small parts of the image, press Ctrl + Shift + C to copy the combined version of all layers, and then paste it all onto a new layer. Move the resulting pieces and repeat the step as you like.
Step 9
Complete the work by adjusting the colors and adding a few strokes with the Pencil Tool , making the overall appearance coarser. A similar effect is easily achieved if you go to the Filter> Stylize> Find Edges menu, but the result may turn out to be substandard. Fortunately, with our image the filter works well, since there is only a set of shadows and colors that the filter can easily traverse.

i love the final result. thanks for sharing. keep it up.
easy-art
easy theft
easy flag
:-)