Step by Step Tutorial In Adobe Photoshop - Drawing Bird From Angry Birds

For begin you need to download those pictures those pictures not a joke:
- Create the Base
Step 1
Create a new document in Photoshop with the following dimensions 600 × 600 px, resolution 300 dpi. Collect your favorite images with angry birds, and then select one image as your source. In this lesson I will create an image of a red bird - the main character of the game. Using a hard round brush, draw a simple contour drawing of the bird on a separate layer.
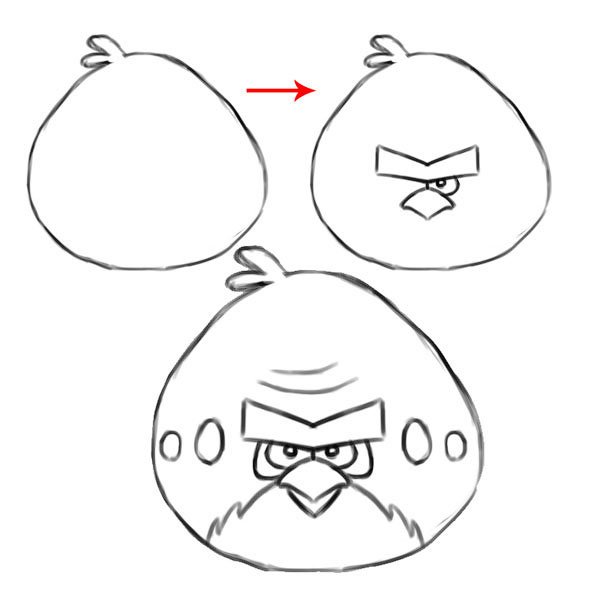
Next, gradually, draw the characteristic features of the bird. Use simple shapes to create beaks, eyes, eyebrows. You can use symmetry, for this, at first, simply draw one characteristic detail, and then duplicate / reflect the horizontally drawn part of the head.
Step 2
Fill the background layer with black. Using a soft round brush, brush color is white, draw a spot in the center of the image.
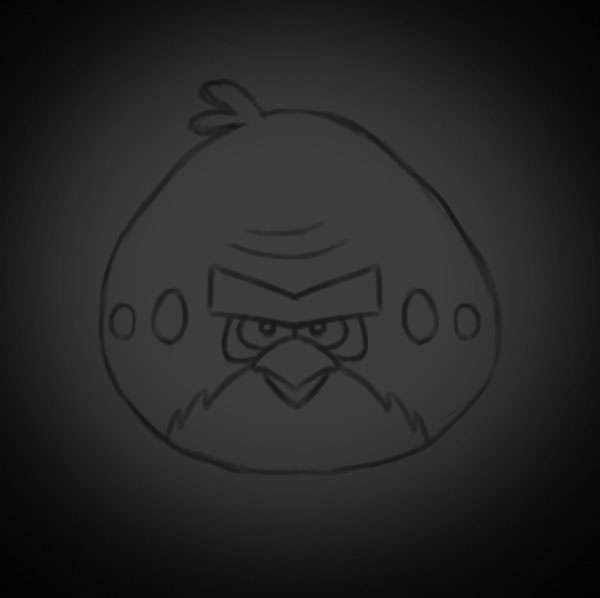
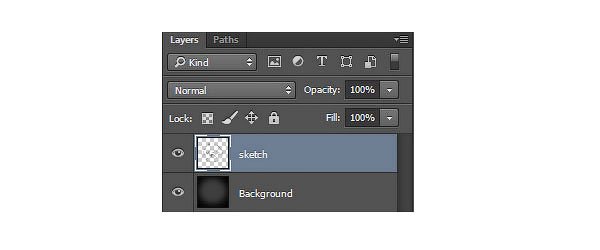
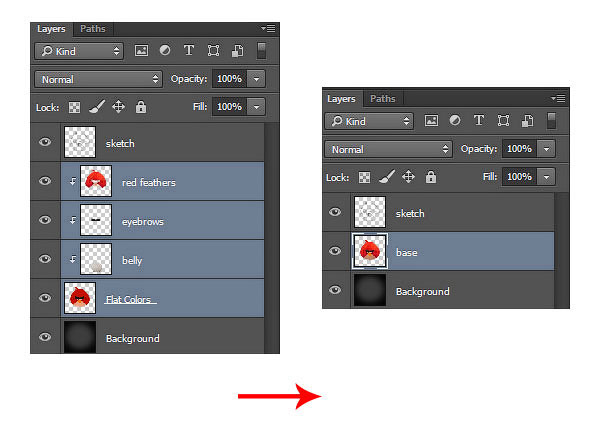
The layout of the layers in the layers palette should be as in the screenshot below. If you name the layers according to their purpose, this will help you during the work, for example, give the names of the corresponding layers a background or sketch.
Step 3
Now let's add color. Create a new layer below the sketch layer. Name this layer a different shade (flat colors). With the help of a rigid round brush, paint the base with different color shades. To combine the drawn sketch with the base, just change the blending mode for the layer with the outline to Soft Light.
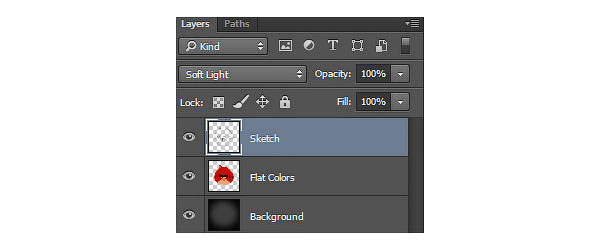
In the screenshot below, you can see the difference after we softened the hard black outline lines by changing the blending mode.
- Strengthen Realism with Photo Texture
Step 1
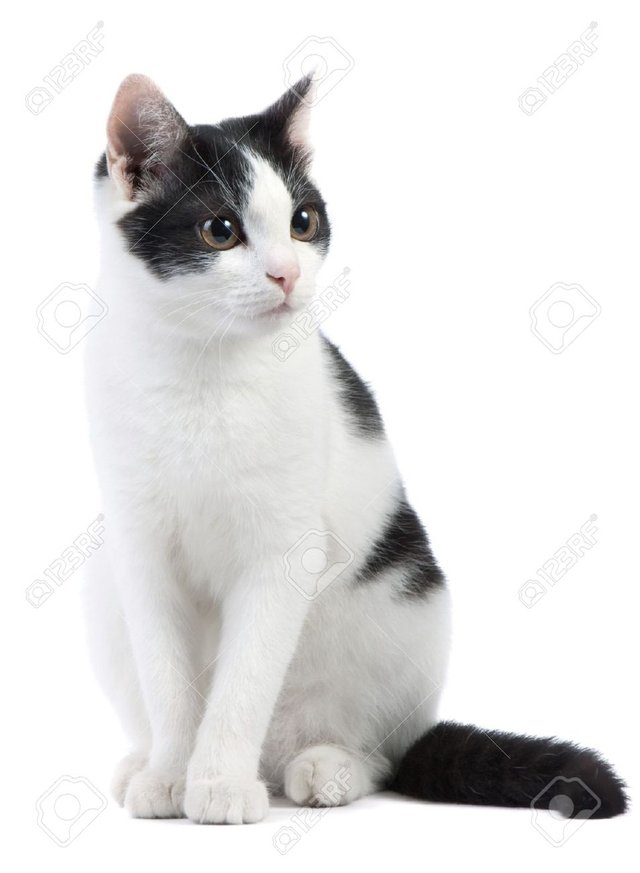
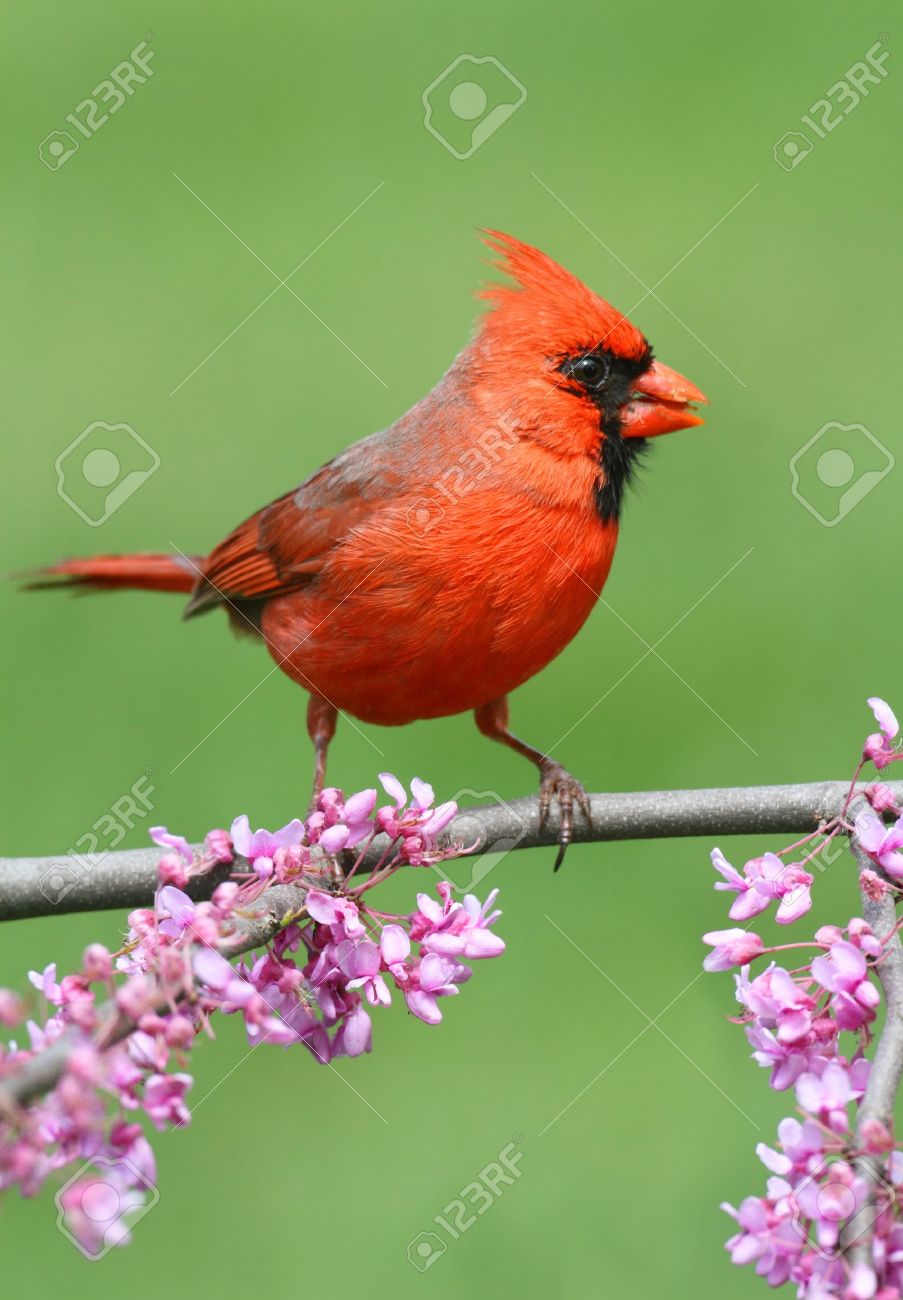
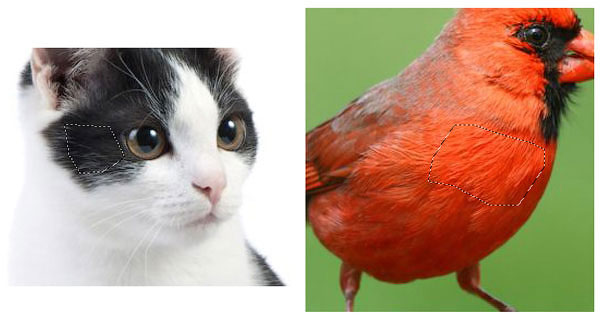
To make our bird look more realistic, we use fragments of feathers and furry from other original images. These details will help us to recreate our bird. First, select the source images that will help us. Because our bird is red, then I use the original image of the Red Cardinal, as well as the image of the cat. Fragments of textures, which are highlighted by red arrows, I use in my work.
Translator's note: Red cardinal, or virgin cardinalis (Latin Cardinalis cardinalis) - a species of birds from the Cardinal family (Cardinalidae).
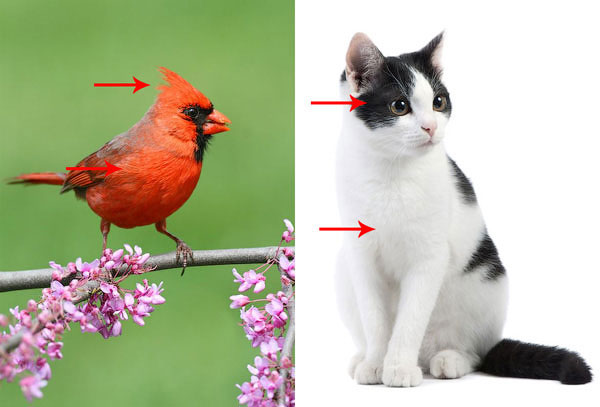
Using the Polygonal Lasso Tool  (L), select the areas with the fragments of feathers and the coat that you would like to use. Copy / paste on our image with an angry bird. Use the Free Transform Tool (Ctrl + T) to scale and position the textures in place.
Step 2
Let's start with a fragment of the cat's fur. Copy / paste a piece of the cat's fake to our working document. Convert the layer with the cat's fur to the clipping mask to the base layer (translator note: the layer with the base is a layer of different colors (flat colors)). Use the white texture of the fool on the tummy of a bird. Correct the edges of the texture with the Eraser Tool  (E).
(E).
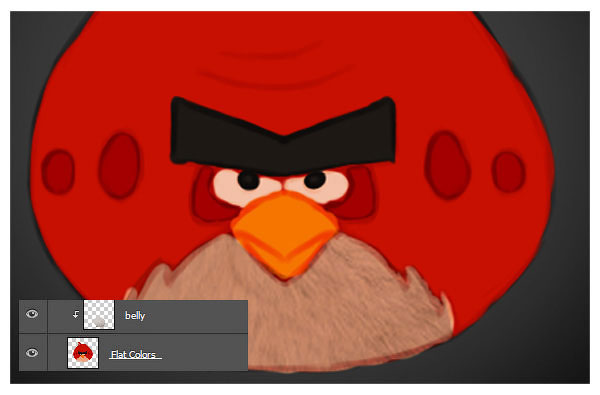
Now use the dark sections of the fur to recreate the eyebrows in the bird. Once again, correct the edges of the texture with the Eraser Tool ![brush.png]
() (E).
Step 3
Do the same, using the red feathers from the original image of the bird. To give the feathers the shape of roundness, use the Free Transform tools (Ctrl + T) and Warp.
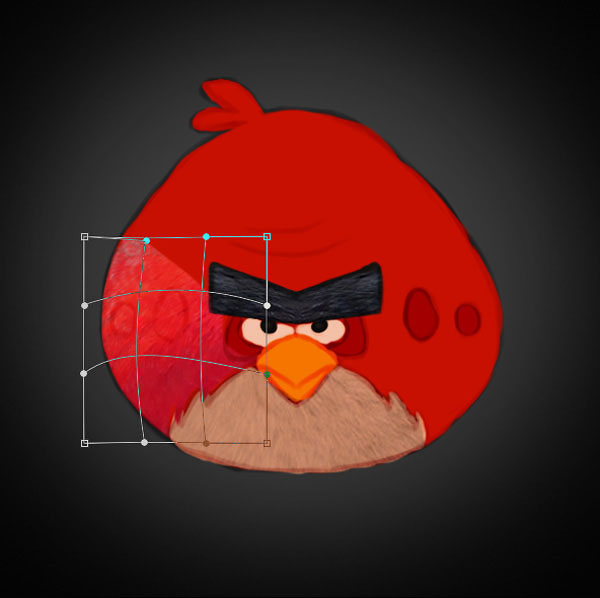
Continue adding feathers to our bird, you can simply use the original fragments of feathers on the same parts of our birdie. Try to keep the feathers repeating the curves of the bird's image.
Once you have finished working with the textures, select all the layers with textures that you added, as well as the layer with the coloring of the different shades (flat colors), then right click on the selected layers and in the appeared window select the option Merge Layers. . Just like before, you again need to have 3 layers (a layer with a background, a layer with a painted bird and a layer with a sketch). Name the new unified layer with the base drawn by the bird.
Step 4
Now it's time to use the technique of digital drawing, so that our image would look more like 3D. With a hard round brush with rough edges and with a Hardness of 100%, paint the beak and eyes in a solid tone.
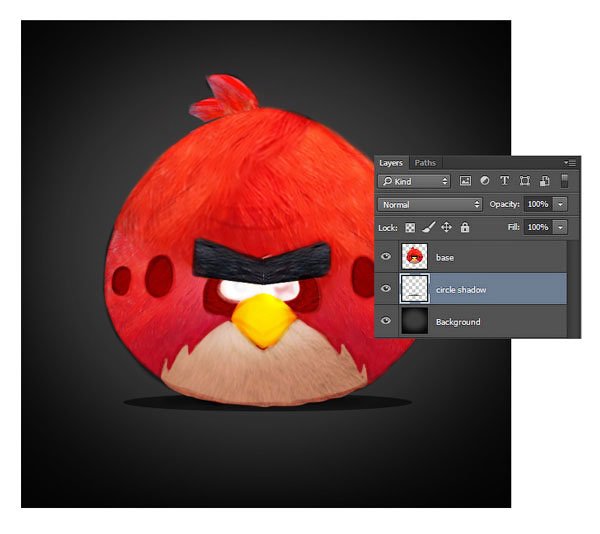
Let's add shadows! Using the Ellipse Tool  (U), draw an ellipse of a dark color under the bird's image to create a shadow.
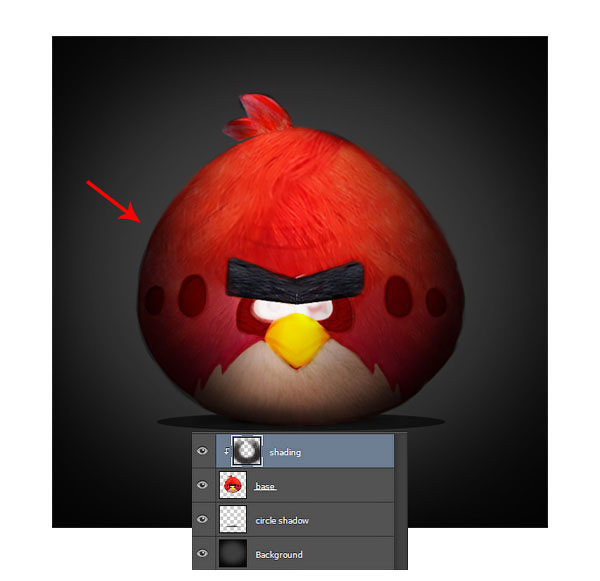
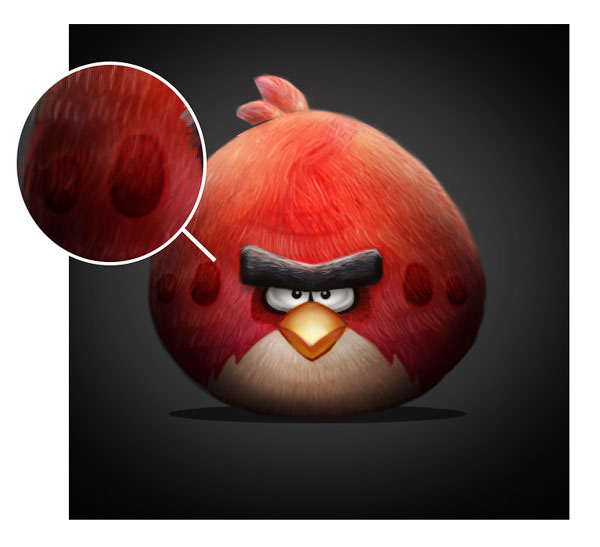
Next, create a new layer on top of the base layer as a clipping mask. Change the blend mode for this layer to Multiply and use a soft round brush of black color, draw the shadows along the contour of the round shape of the bird. Continue adding shading to the image of the bird to give it a more rounded shape.
Layer with shading is called shading, the author adds shading to the outline of the bird's image except for the top part of the image.
Step 5
Continue to paint over the brush on additional new layers, converted to clipping masks to the base layer. Use the Polygonal Lasso Tool (L) to select small areas around each individual bird line. Additional selections help you add more shadows, and staining within the selected area will not allow you to spoil the image!
Step 6
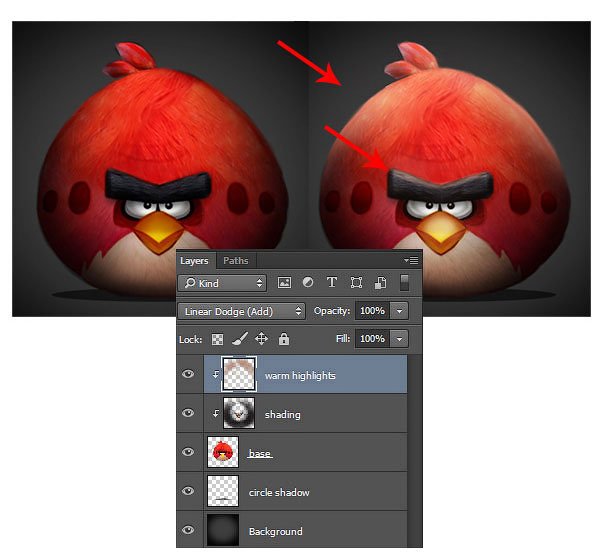
It's time for a glare! Create a new layer on top of the shader layer, change the blend mode to Linear Dodge (Add), and use the light brush to add light flashes to the upper sections of the bird's image. Add glare on the eyebrows, which immediately make them expressive.
Translator's note: do not forget to convert the layer with highlights into a clipping mask.
Step 7
Work on the texture of feathers, by adding light glare to the image of the bird, using the same layer. Use thin white strokes in the direction of feathers to make them more expressive.
Also add love on the edges! Recreate the texture of feathers along the edges of the image so that the edges do not look like clear lines. You will succeed if you add white highlights on top of the texture to create a beautiful light effect.
Step 8
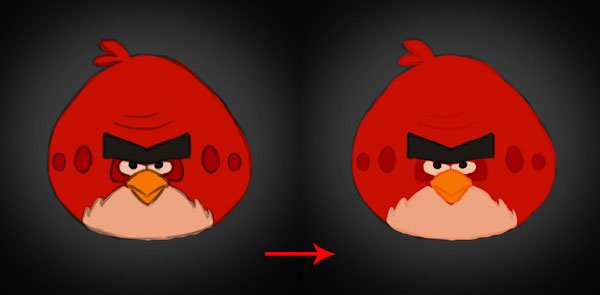
We have almost finished the lesson! Combine all the layers, and then continue to work on the details of our picture. Add a prominent shadow under the beak to enhance our character's trait. Next, with a hard round brush with rough edges, paint the edges along the entire image of the bird.
Finally, create a new Curves adjustment layer. Correct the curves for the RGB channel and the Blue channel to add light blue tones to our picture, and also to balance the warm tones.

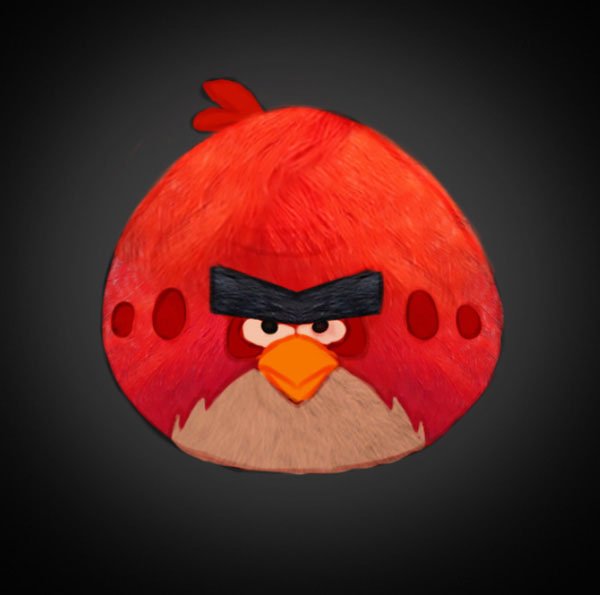
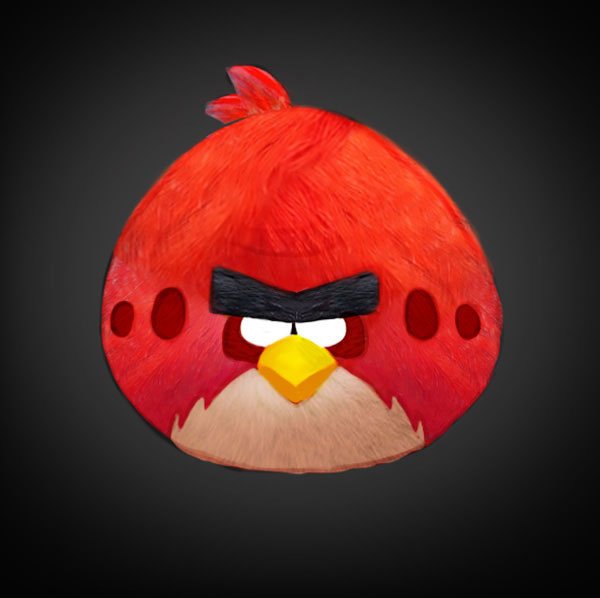
When you finish the work on creating your angry bird, then load it into the launcher to destroy something! I hope you enjoyed this fun lesson. Using this technique, now you can create any favorite character in the style of fan art. Good luck!
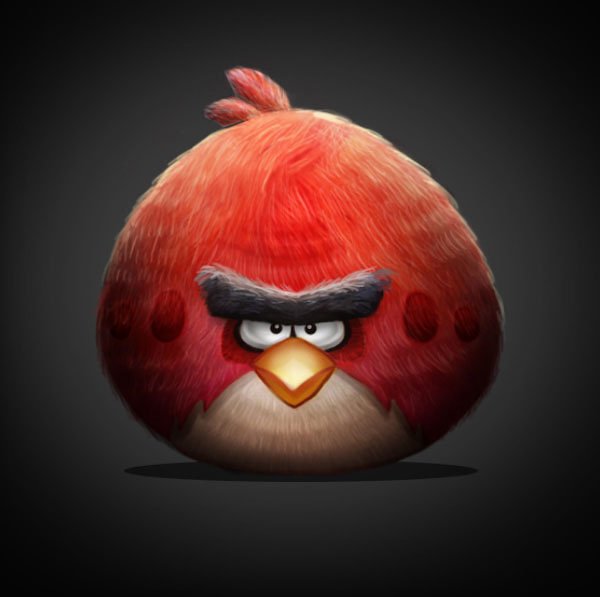
The final result:
Excellent tutorial and well described. I think I could do it with such great instructions! Thanks for sharing @easy-art
thx you for good words
hey, this looks like a really good tutorial. the couple of places you need to improve is better writing translation. this is a minor issue. the bigger issue is that you do not credit your photo sources. these are not your photos, so you may be using photos that are copyright protected. below is a good article to refer to when using images.
https://steemit.com/writing/@rhondak/if-you-publish-an-image-you-d-better-own-the-license-for-it
yes thx you i really work on my translations right now.