How to tattoo yourself - My Trial
Some time ago I dared to tackle a long-planned project: I tattoed myself!
Of course, I had doubts about whether I would be satisfied with the result, but if you do not dare, then you do not know if you even can do it!
By now I can tell you that I am very satisfied and won´t be my last self-poked tattoo :)
About the motif:
I decided to use the Om symbol because I have a certain spiritual vein and the symbol is also quite small - so ideally suited for a first self-poked tattoo!
As place on the skin I have chosen the inside of my foot, because of the fact that the spot is easy to reach.
SETTING
As equipment I ordered needles that are meant for tattoos, 3er round liner. With these needles, 3 very thin needles run together at the needle head, between which the ink gets stuck when it sinks in and is transported into the skin when the needle pierces through the skin!
The tattoo ink is also ordered from the Internet and is a high-quality, pigment-rich ink, which is used especially for this purpose.
In addition to the needles and the ink you definitely need disinfectant to work sterile, and cream for treatment and care of the tattoo.
Furthermore, the ink is best filled into sterile small capsules so that it can be filled out of the bottle in small quantities. This is important because the ink dries exposed to the air and thus has to be refilled or replaced several times during a longer stinging time. There's a trick to make sure the capsules do not topple over and the ink runs across the work surface: smear a layer of vaseline on the work surface and place the capsules on top so that they stick to the work surface and can not tip over!
You also need tissues that do not go bobbly, with which you can clean up your skin from the ink and the blood.
What is not absolutely necessary, but indispensable for an inexperienced engraver or a complicated motif, is stencil paper, with which the tattoo motif can be transferred to the skin. However, I did not need this for my very simple motive.
Again to the overview:
- Needles
- Ink
- Desinfectant
- Caps / small container for ink
- Vaseline
- wound healing ointment
- preferably sterile wipes
- (stencil-paper)
At this point, it should be mentioned, of course, that it is reckless to tattoo yourself, as you inflict a wound and it can inflame!
In addition, the ink remains under your skin for life and the result can of course be very unpleasant and ugly ...
However, I carry the responsibility for my body by myself and have tattoos of professional tattoo artists, too... so I made the decision very easy.
And then I could start poking
To beginn I started to stitch the motive point by point with my hand. I did not want to use a machine because you can do a lot wrong!
It is important not to poke too deeply into the skin, otherwise the ink gets into a too deep skin layer and it comes to a so-called "blow-out", in which the color runs out uncontrolled under the skin and your motive is ruined.
Poking not deep enough results in the ink not being visible after wound healing, as it has not penetrated deep enough into the skin. However, I do not think it's that bad, because you can always add more ink to your skin afterwards - but you can´t remove ink! That's why I was more careful than rueful :D
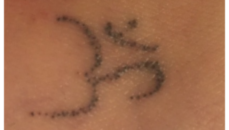
When the points were set, the tattoo was already finished for me and looked like this

I wanted to the motif to be set together from individual points ...
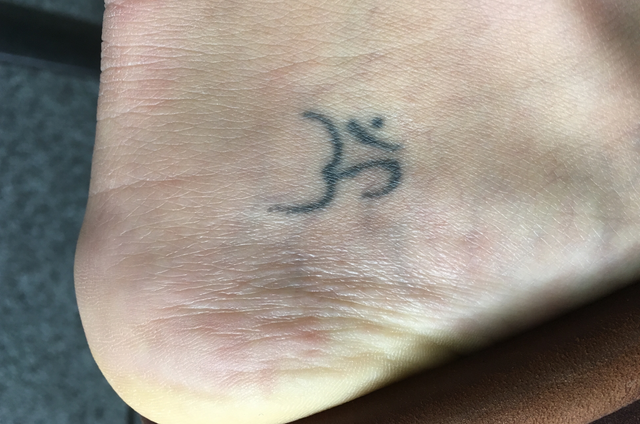
However, as it was not easy to see the motif from distance I decided to poke the tattoo again in a second session and make lines from each point by adding even more points, after the wound had healed.
The finished tattoo looked like this


Thank you for reading!
Congratulations @arliden! You received a personal award!
You can view your badges on your Steem Board and compare to others on the Steem Ranking
Do not miss the last post from @steemitboard:
Vote for @Steemitboard as a witness to get one more award and increased upvotes!