Drawing process #4: Miyo-chan
Greetings to everyone, today I bring a drawing of an original character that I personally think it looks very cute and I will explain to you the creation process.
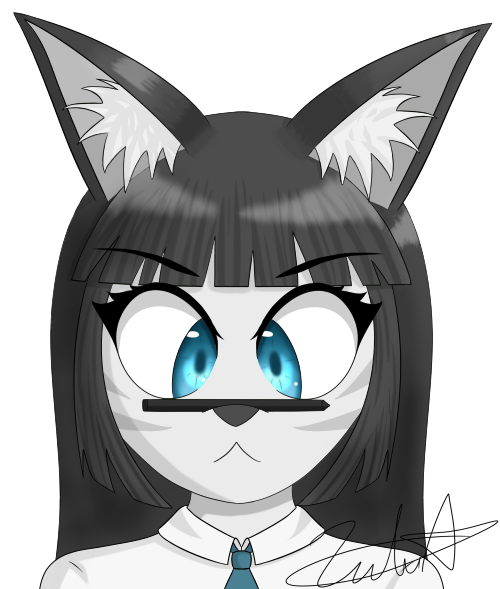

The drawing is made in form of a portrait, which means an image or photograph whose main focus is the face of a person/persons. There’s no character background this time, so let’s start with the explanation:
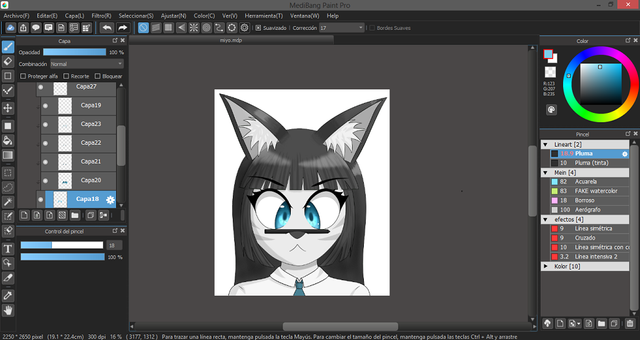
Something I forgot to mention was the tools that I use for my drawings. For the software I use MediBang Paint Pro and for the hardware a Wacom Art Tablet. However this kind of drawings can be done using a mouse without a problem since MediBang has tools that aid in the creation of drawings with mouse.
So, the first thing would be thinking on what character you want to draw, or in case of an original, the factions of the face, hair color, eyes, hairstyle, ears, scars (if it has any), etc.
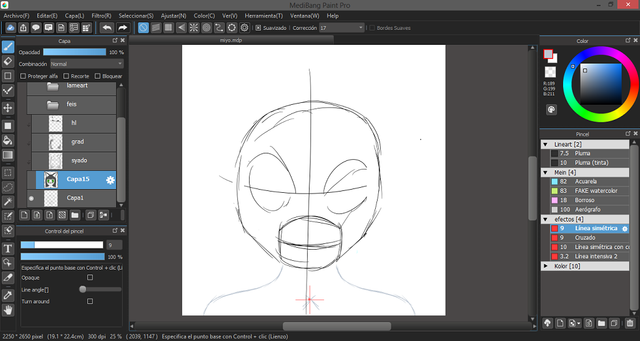
Then we proceed to create the sketch of the drawing which (for me) is easier to do like this: first I draw a circle for the head, I do a cross to mark the center of the face and a measure the areas where the mouth and eyes will be. For the body I use the tool “simetric line” and pressing the “Control” key I click on the cross to fix it to the center of the drawing then with the same tool I do the possible shape of the shoulders.
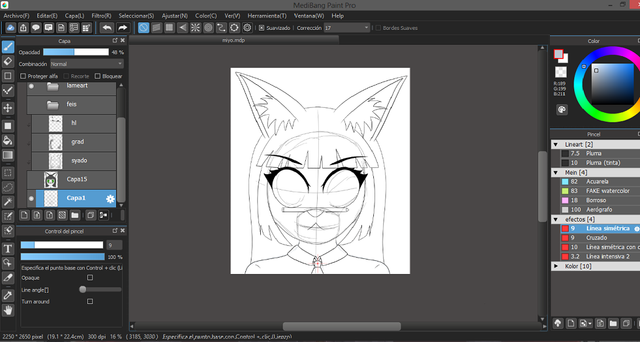
After the sketch that is basically a kind of skeleton of the drawing we make the definitive lines of the drawing, remember that part of “thinking about the character factions”? well, here’s where that comes into play.
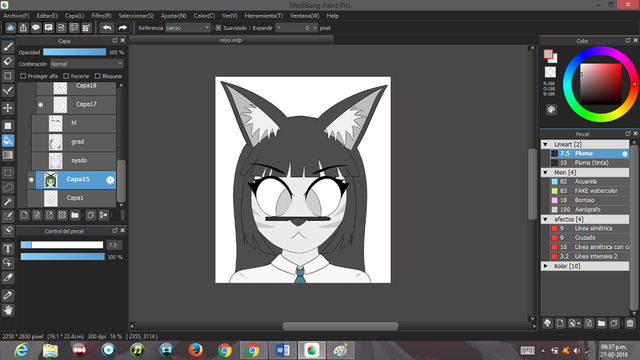
Now the flat colors: we select the exterior of the lines with the magic wand tool and then we use the “invert selection” option and in a new layer we place the base color for the silhouette of our drawing. Then we proceed to create layers with the clipping option activated and we paint each area with its color. At the end we use the “merge down” option to combine all of the colors in one layer which should be the base color one.
To make the shadows can be done in a new layer with the options of multiply and clipping activated. Using the pen tool we a gray tones in the areas where the shadows will show, then we soften the edges with the blur tool.
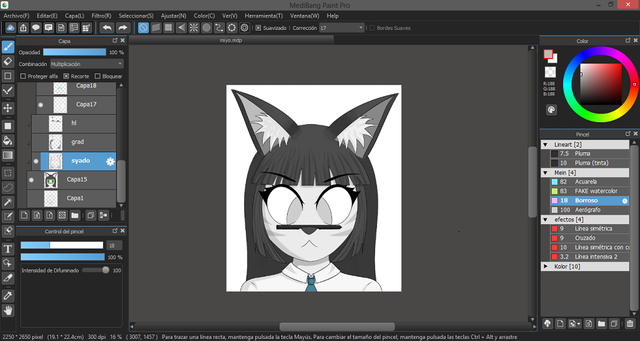
Now we create a layer over the shadows with overlay and clipping option activated. With the airbrush tool we apply clear gray tones over the places where the light would be and darker grays on the opposite side to create an illusion of depth.
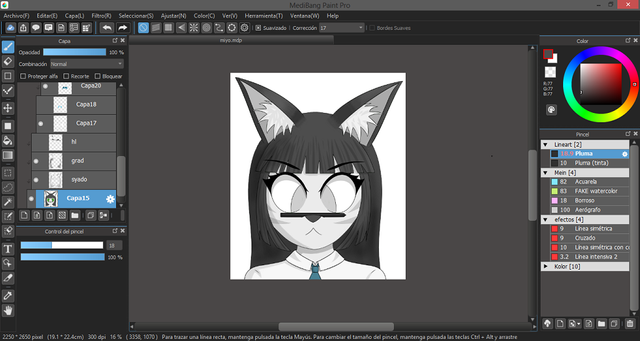
Then we create another layer with the add and clipping options activated. In this one we will use the pen with darker grays on the areas that can reflect the light and then we soften the edges with the blur tool. For the reflections on the hair I draw a lot of lines on the edges and then I use the blur tool to make it look like there’s strands of hair.
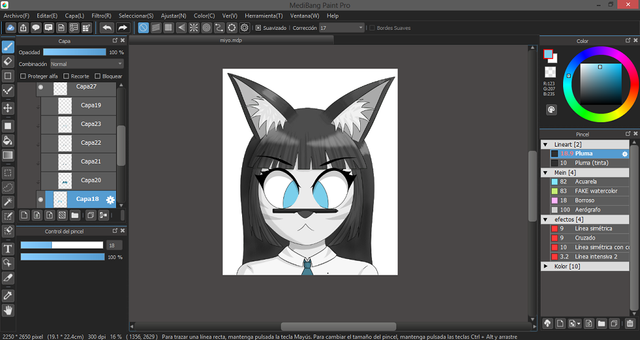
And finally one of the thing that I consider to be the most important on portraits: the eyes. For the eyes you pick the eye’s base color and add it on a different layer. After that I usually do 5 steps on 5 new layers with the clipping option activated.


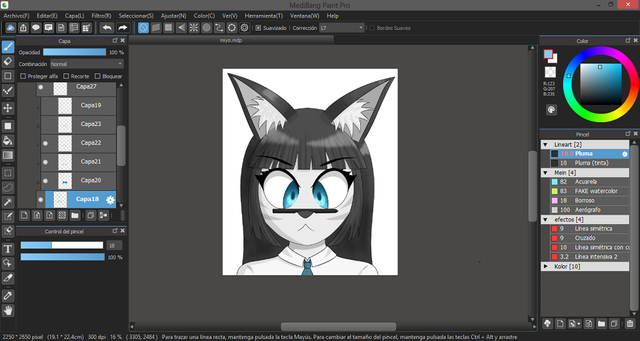


And that’s all, I hope you liked this pseudo-tutorial. It’s worth mentioning that there’s a lot of art software’s out there that have the same tools I’m using here so feel free to use whichever you like.
By the way, I should also metion that I have a DeviantArt account where I upload most of my… less refined drawings. If you’re feeling bold you can check my account Clicking here.


The drawing is made in form of a portrait, which means an image or photograph whose main focus is the face of a person/persons. There’s no character background this time, so let’s start with the explanation:
Something I forgot to mention was the tools that I use for my drawings. For the software I use MediBang Paint Pro and for the hardware a Wacom Art Tablet. However this kind of drawings can be done using a mouse without a problem since MediBang has tools that aid in the creation of drawings with mouse.
So, the first thing would be thinking on what character you want to draw, or in case of an original, the factions of the face, hair color, eyes, hairstyle, ears, scars (if it has any), etc.
Then we proceed to create the sketch of the drawing which (for me) is easier to do like this: first I draw a circle for the head, I do a cross to mark the center of the face and a measure the areas where the mouth and eyes will be. For the body I use the tool “simetric line” and pressing the “Control” key I click on the cross to fix it to the center of the drawing then with the same tool I do the possible shape of the shoulders.

After the sketch that is basically a kind of skeleton of the drawing we make the definitive lines of the drawing, remember that part of “thinking about the character factions”? well, here’s where that comes into play.

Now the flat colors: we select the exterior of the lines with the magic wand tool and then we use the “invert selection” option and in a new layer we place the base color for the silhouette of our drawing. Then we proceed to create layers with the clipping option activated and we paint each area with its color. At the end we use the “merge down” option to combine all of the colors in one layer which should be the base color one.

To make the shadows can be done in a new layer with the options of multiply and clipping activated. Using the pen tool we a gray tones in the areas where the shadows will show, then we soften the edges with the blur tool.

Now we create a layer over the shadows with overlay and clipping option activated. With the airbrush tool we apply clear gray tones over the places where the light would be and darker grays on the opposite side to create an illusion of depth.

Then we create another layer with the add and clipping options activated. In this one we will use the pen with darker grays on the areas that can reflect the light and then we soften the edges with the blur tool. For the reflections on the hair I draw a lot of lines on the edges and then I use the blur tool to make it look like there’s strands of hair.

And finally one of the thing that I consider to be the most important on portraits: the eyes. For the eyes you pick the eye’s base color and add it on a different layer. After that I usually do 5 steps on 5 new layers with the clipping option activated.
- Gradient: with the airbrush tool we darken the colors while you go up the iris and then we add the darkest tone around the borders. We soften with the blur tool.
- Illumination: we apply the add option to the layer and with a watercolor we make an “U” shape under the place where the pupil should be. Soften with the blur tool.
- Pupil: we Paint the pupil with an almost black color and soften the edges. We can also add shapes in the case the character has particular eyes.
- Depth: in a layer with the multiply option activated and with an airbrush we add the darkest tone of the eye around the edges of the iris.
- Reflections: with the pen we add reflections to the character eyes.
And with your art piece done fell free to sign and publish it.


And that’s all, I hope you liked this pseudo-tutorial. It’s worth mentioning that there’s a lot of art software’s out there that have the same tools I’m using here so feel free to use whichever you like.
By the way, I should also metion that I have a DeviantArt account where I upload most of my… less refined drawings. If you’re feeling bold you can check my account Clicking here.
It is very cool to see the drawing process of your character.