My Art in the Making - Seascape Part 2 - Modelling Individual Zones and Refining the Image
Hello There
I've missed you all!
Apologies for waiting so long for the Part Two.
I have been away in Alaska and Canada for a month and just got back to NZ a week ago.
I'm really looking forward to sharing some incredible landscape from that part of the world very soon.
If you missed it, check out the link to Part One:
https://steemit.com/minnowsupport/@andrew.tischler/my-art-in-the-making-seascape-part-1-sketching-and-blocking-in
Otherwise lets get into Part Two, Step 3 and 4 !
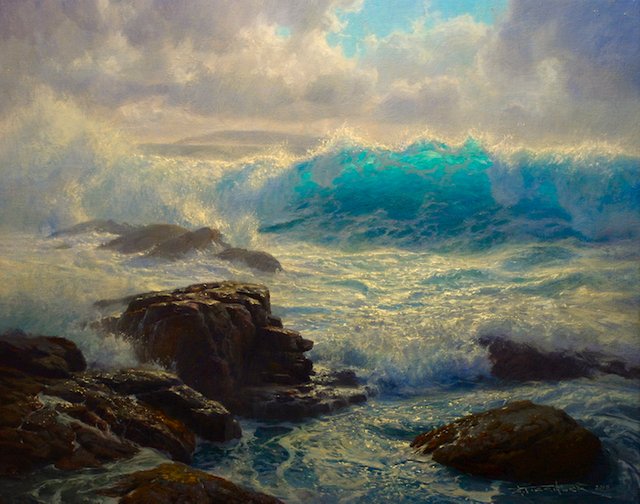
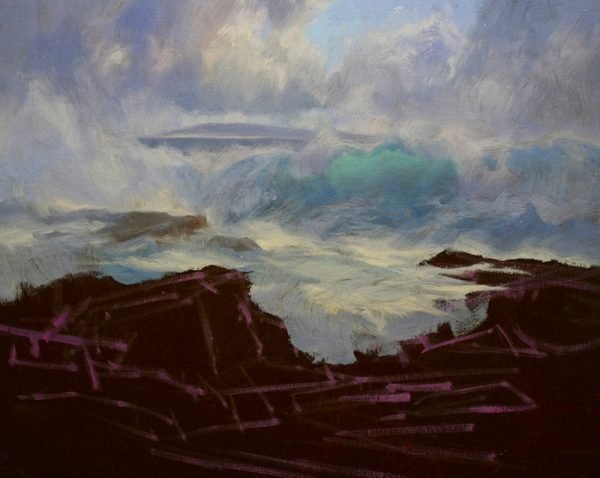
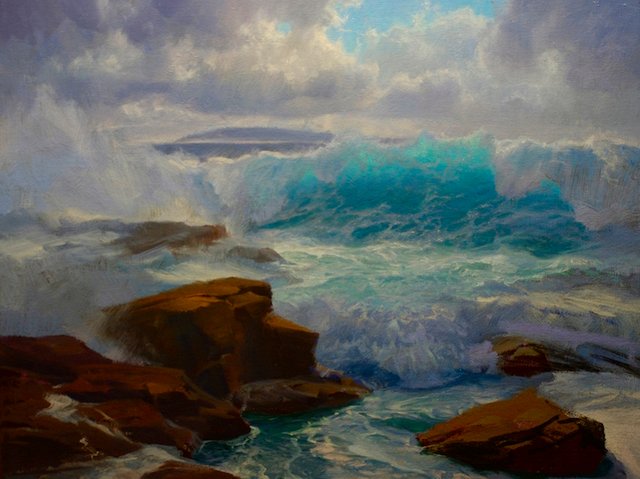
Final Painting:
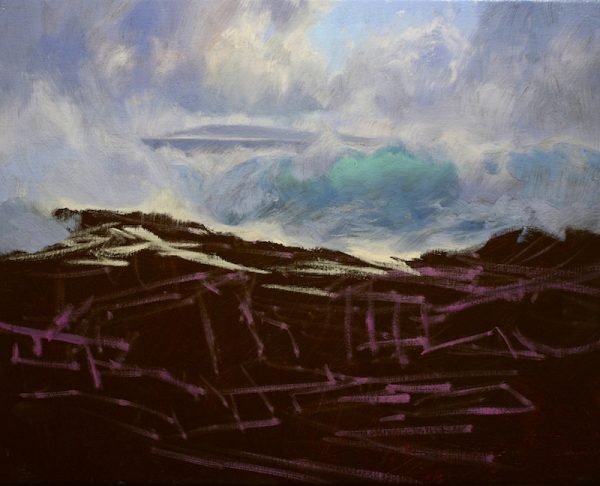
Step Three – Modelling Individual Zones
As I bring the scene forward, the next zone becomes apparent. I focus my efforts on the wave, and a bit of distant sea poking through. The wave has eaten up most of the space where the open ocean behind may be visible. I block in loosely the character of this breaking wave, allowing for splash and white water to occur towards the terminating ends of the wave, and also provide an opportunity for the interesting glow to show through in the central portion of the wave.
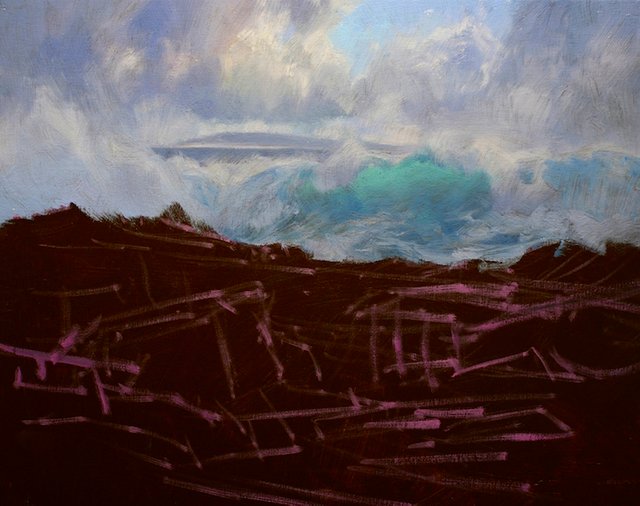
Again, tone is important. I still have not introduced my brightest brights. I am also trying to focus on a few colours at a time. I don’t introduce too many varied colours at this stage, they can be added later. I strive for the Albany-esque bottle-green, using Ultramarine Blue, Cobalt Blue, and Cobalt Teal, and the slightest amount of Pthalo Green in the curl of the wave.
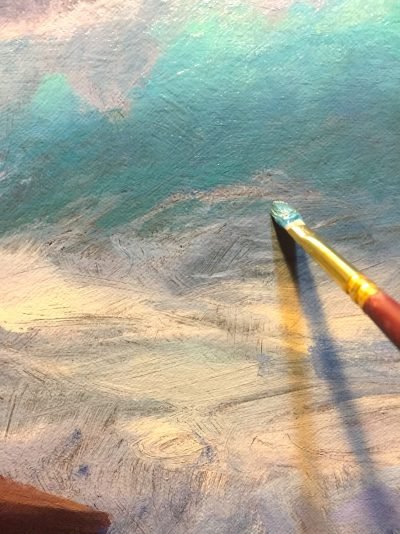
There is always a temptation to rush straight into a final detail. That may be appropriate in places, however, with this process; I focus on layering the paint. Each layer is completely dry before adding the next. The accumulation of brushwork remains visible as the image is built up layer by layer.
Step Four – Refining the Image
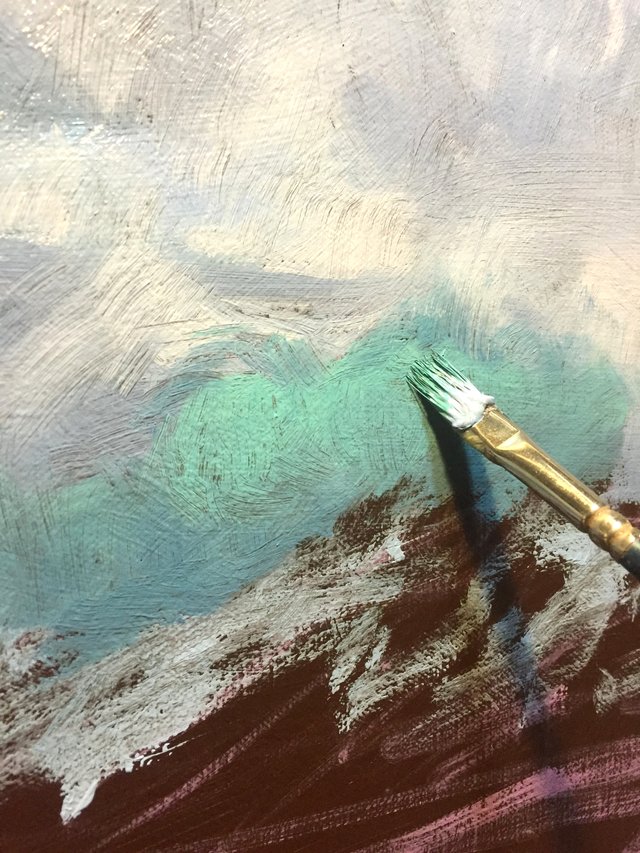
This turbulent scenario must have some believability. In order to make it feel feasible, I focus on what the water will do in individual areas. How does it interact, bend, warp and move with different solid elements. Here I focus on scallop-like shapes where the water rolls over the rocks in the foreground. This moving water provides lines of force that draw the eye through the scene.
Greater dimensions of tone are added into the shadow areas of the white water. I have a little rule that states: white water is not white! Tonally speaking, things can get out of hand rather quickly. I have in the past, had the tendency to go overboard with the white. This pushes your tones up to a very high value, and you eventually loose the effect that subtle changes in tone can have.
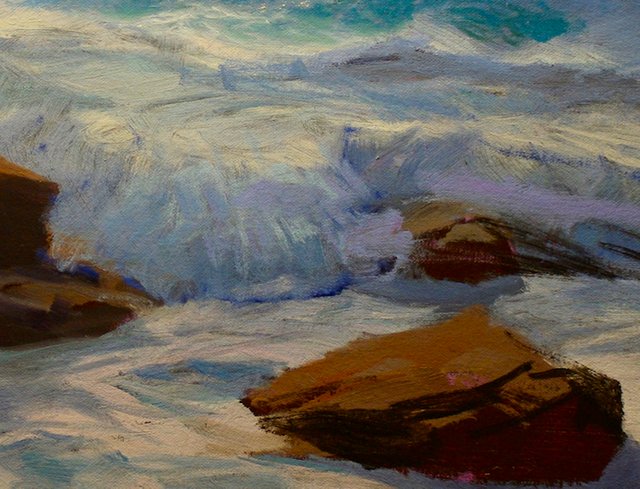
The shadows are made with the same blues used in the sky, Cobalt, Ultramarine, and Cobalt Teal, as such, this zone coordinates with other elements in the scene. In addition to my trusty trio of blues, I have added in Pthalo Blue. Again, when added with Yellow Oxide and Burnt Sienna, I begin to achieve the desired greens and shifting blues of the white water break-zone.
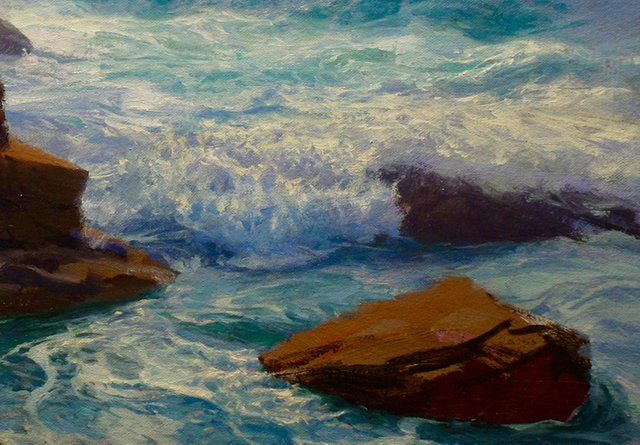
Spider web-like tendrils move up the curl of the wave defining its’ form. I use a variety of brushes to achieve this effect. Synthetic rounds of a small size, in conjunction with rugged small bristle brushes allow for interesting linear textures, formed by broken lines.
For more video tutorials you can find me on YouTube @ youtube.com/user/AndrewTischlerArt/
or hit me up on my website @ www.andrewtischler.com
Part 3 coming shortly....
ENJOY! and let me know what you think.
You are an artistic genius - that is a fabulous piece! I love the sunlight effect passing though the crest of the wave - I hope you get many upvotes cos you deserve it!!!
Cheers @kate-m
GREAT award winning post! Follow me @lurehound
Wow nice piece.
amazing work and great tutorial ! definitely learned a few tricks . lol @ spider web like tendrils haha ! you have a new follower !
Hi Andrew, I think your seascape paintings are awesome. Somehow I never got around to paint waves 🌊 in such depth like yours. Its on my list tho. I really do appreciate you sharing your knowledge, I've been following you on other platforms and Im impressed about the quality of content you putting out there. Hope we can meet one day in person and go out painting en plein air. Im based in Auckland, just let me know if you heading this way. 😊 (I have resteemed your post)
Thank you for your comment and resteem and if I'm ever in Auckland for a while, i'll hit you up for a paint!
This is simply amazing! You're so talented!
Outstanding lighting through the wave, looks like some Hudson River / American school stuff in the American Art Museum in DC. First of yours ive seen, followed.
They are some of my painting heroes so thank you for the complement.
Stunning. I love it!
Nice post, beautifully presented and explained. detail oriented with nice pics. thank you for sharing this with us, Upvoted
Thank you and Cheers for the Upvote.
Welcome
welcome
Terrific
amazing artwork, upvoted