Behind the Scenes - Painting the Great Australian Egret - Part One
It's good to be back, I've missed you!
This post is about how I painted The Great Australian Egret, so enjoy!
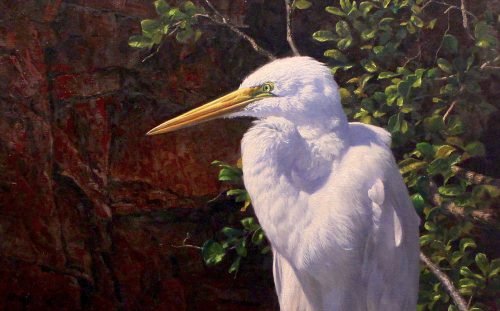
PART ONE
Once on a trip to the Kimberley I made a conscious effort to get to know the Great Australian Egret better. After a long drive out of Kununurra, far north Western Australia to a place called Parry’s Lagoon;
I made a stop at a bird hide to view this brilliant bird up close. There was a moment when an Egret was perched right in front of me and I filmed it as it moved. Taking several photographs as well, I prepared for what I thought at the time would make a sound painting. I was wrong.
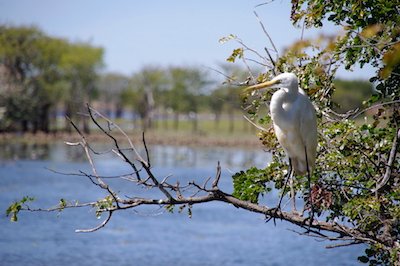
It struck me that the missing component from this concept, evident in my reference photo was a vehicle for strong tonal contrast. What if I placed the bird against a dark background, like a shaded out Kimberley-esque cliff? This I felt would allow dark and rich red hues to counter light blues in the shading on the Egret itself!
So before painting this piece, I was clear that the composition must be sound. I also needed to have a strong tonal contrast. I needed to void the scene of extraneous details to allow for a tight and controlled working of the paint on the Egret itself. This I felt would help the subject command the viewers’ attention. I was starting to realize at this point that there was real potential for my Egret reference I collected at parry’s lagoon, but I was going to have to get a little creative. With my thoughts clear, and a definite plan of approach, I began to paint!
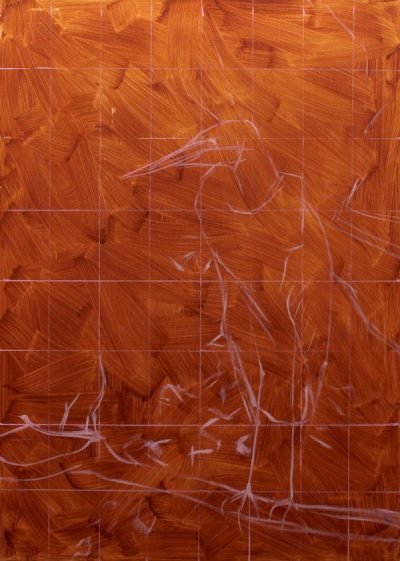
The drawing must be to scale, otherwise our image will distort. My bird is going to take up the right hand portion of the canvas, with strong diagonal vectors running through. Now, I am using a Langridge Burnt Sienna background for this painting. I find that this colour works on such a wide variety of subjects, as it adds a level of warmth and richness to the subsequent layers.
The lines are drawn up with an angled brush and after the drawing is complete I get ready for the block-in!
Quick Tip, I find it easier to block-in the painting straight away, after drawing in your lines. This way you can mix the wet paint from the grid into your block in layer, and avoid dealing with “ghosts” later on.
I go for some Yellow Oxide, a synthetic colour with more punch than yellow Ochre, and then here and there bits of Cadmium. Our colour combinations mustn’t be monotonous or even. We are not painting a house after all! I want this background section to “crawl” and have plenty of variation and interest. It’s time to introduce Raw Umber, and Raw Sienna in places. Some of these combinations may get a bit “hot” so I tone it down and cool it with these Raw colours.

Now it’s time to block in our bird, and this is where the real tonal dynamic is set in motion. One of the things that I have noticed in old master paintings is the preservation of tonal values. A beginners mistake that I have fallen prey to many times, is getting to heavy handed with light tones too early. This can “wash out” the delicacy from the arrangement.
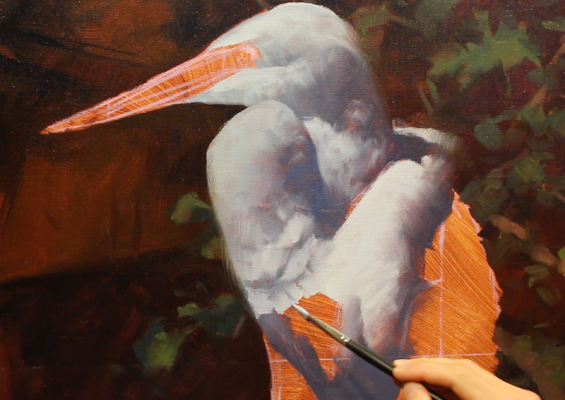
We think that light is afforded to the painter with liberal amounts of Titanium White. Remember: white is not light! CONTRAST is LIGHT! It is the difference between colours and their tonal variation juxtaposed with adjacent colours that give us the illusion of light.
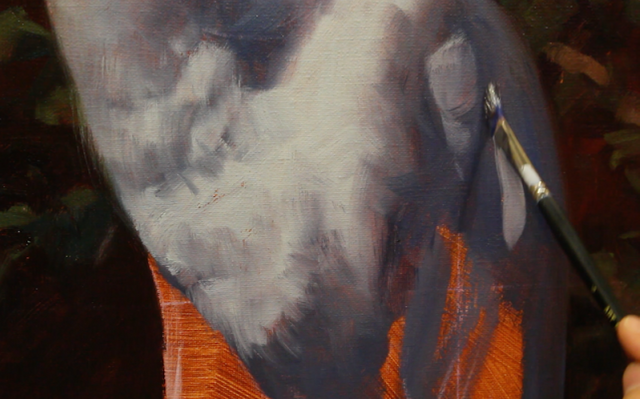
Though our egret is against a wall, I can imagine that there would be justification for ambient light from an open sky in front of it. The light from an open sky will be predominantly blue, thus, the shadows take on a blue tinge. To avoid this colour getting too one-tracked and insipid, I vary it with both Quinacridone Magenta and Manganese Violet.
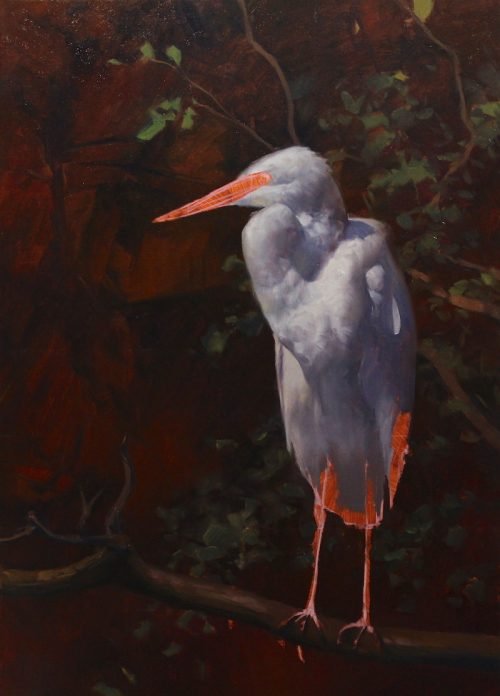
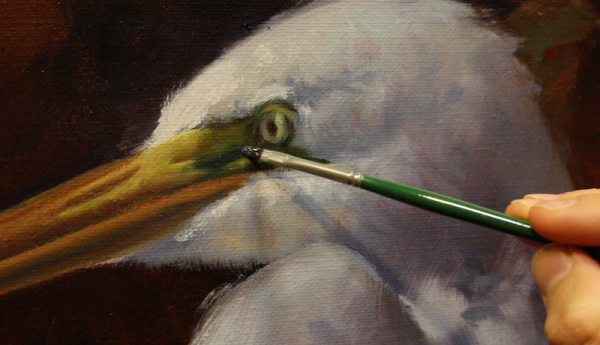
Each bird has its own unique character. Lines and facets of the face define the bird’s particular “look”. Being sensitive to the way in which the beak exits the head, and the direction and placement of plumage is critical. This Egret has an intense grumpy decisiveness to it that is given by a harsh line sitting above the eye, and a smooth portion of bare flesh directly in front of the eye.
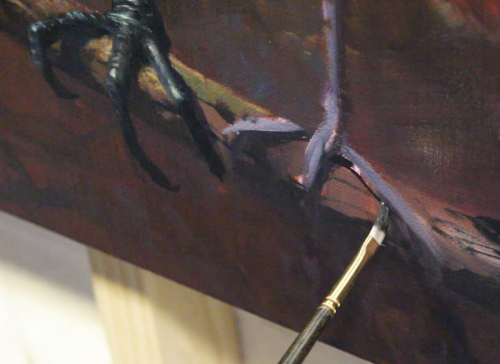
The legs and feet are blocked in with just enough dark tone to contrast with my dark background; Pthalo Green, Burnt Umber and Quinacridone Magenta. The legs almost fade out. Good…they are strange gangly things!
Tones in the feathers of the body are subdued. The shadows could go another step in the deeper tones, but I hold back. What gives the form life and substance is the gradual application of paint both in terms of light and dark. There is always another step further I can take.
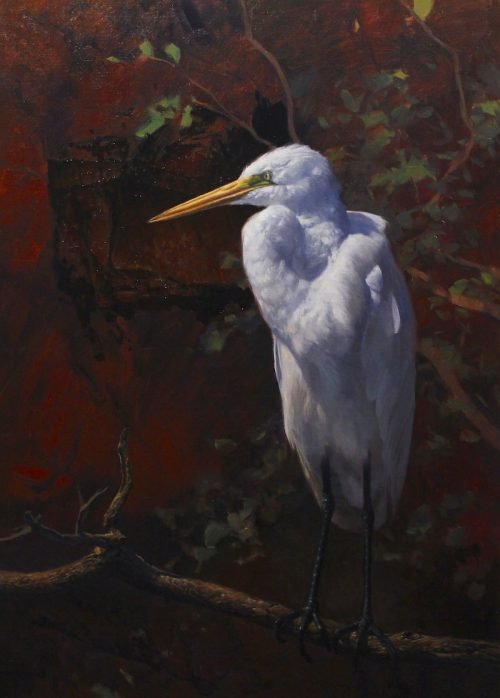
The relationship between the bird and the space in which the bird resides hinges on the branch. This provides a context for our subject, and thus must be illuminated in a similar way, though I wish to play down the intensity as not to compete with our subject.
Watch out for The Final Detail and Light on this Egret painting tomorrow.
If you enjoyed, let me know and you can find lots more info on my YouTube channel @ Andrew Tischler Artist
Hey Andrew, nice to see you back on Steemit!
i am robot vote for you i painting too
Good to be back!
i am robot i vote for you
This is an awesome post. Nice step by step. The blue shadow on the bird looks really good and makes him stand out so nicely on the background. Nice to see another oil painter on here. I'll be following and hope there will be more
i am robot i vote for you
Cheers dude, I'll check out your posts too.
great post
i am robot i vote for you
i am robot i like painting
Wow awesome! I'm so glad I found this post, I'm working on a painting now with blue herons in it. I'll come back to this for some reference on the finer details I can see in your close ups!
i am robot i vote for you
Would love to see your finished painting, hope you post it.
I will, I posted some progress already but I was still only about 35% done in those posts, now closer to 55%. I'll make a new post later tonight :)
i am robot i vote for you
Enjoy the vote and reward!
Very nice work!