Easy Step by step guide on how To Make A Good Pencil Art Drawing
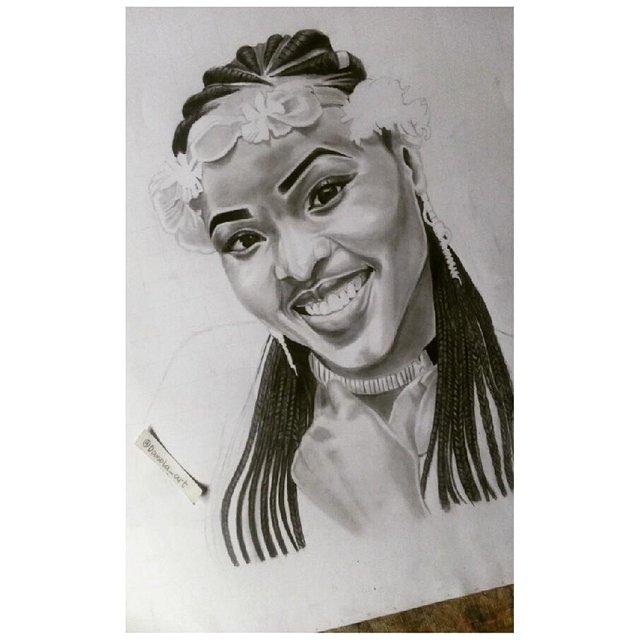
STEP 1
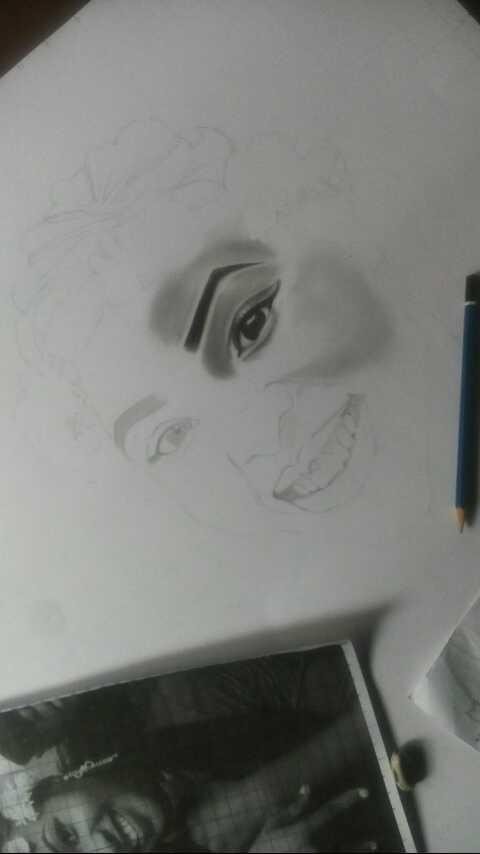
When trying to achieve the best output in art aside from inner creativity, the tools you use plays an important role too. In creating this art i choose to use alabaster cardboard (16by20) ,steadler graphite pencil (all grades),blending stump,eraser and cotton board. I made use of 'H' out of the grades of the graphite pencil to make a faint grid lines and sketch out the shape of the image. With same 'H' i brought the shape of the eye and shaded the right side of the skin.
A New cotton board to blend the right side of the skin and paying close attention to the highlights to bring the image to live
STEP 2
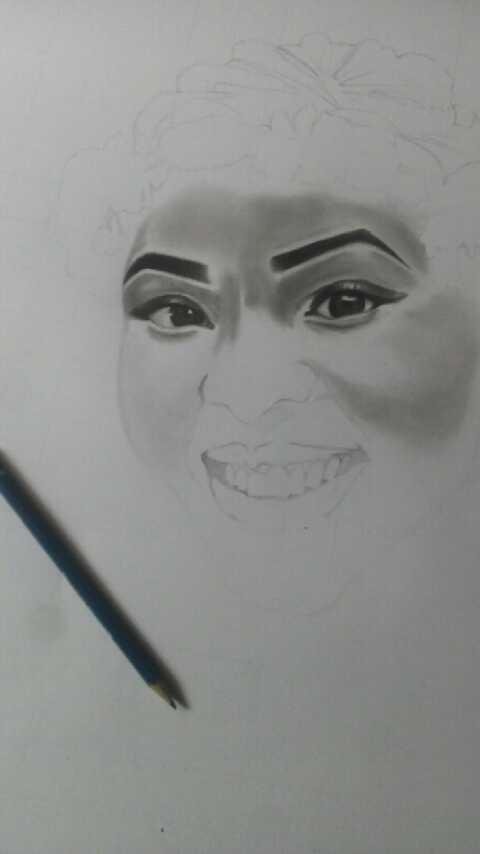
At this point i move the shading to the left side of the face. Making the other side of the eye bold than before little by little is what i was focusing on also still applying the same 'H'.i enjoy using 'H' to create the first layer of the skin because It is easy to erase whichever portion i will like to make corrections and moreover going from light to dark is my style of creating a perfect skin layers .In this stage you will realise the eye brows and pupil of the eye are thicker.i was able to achieve that with "HB" grade. If you are constant with drawing you will notice that whenever you blend your shading you loose little of the graphite of that portion on the paper. So what i do is, i apply and blend "more than once" till am satisfied with what i have created.
STEP 3
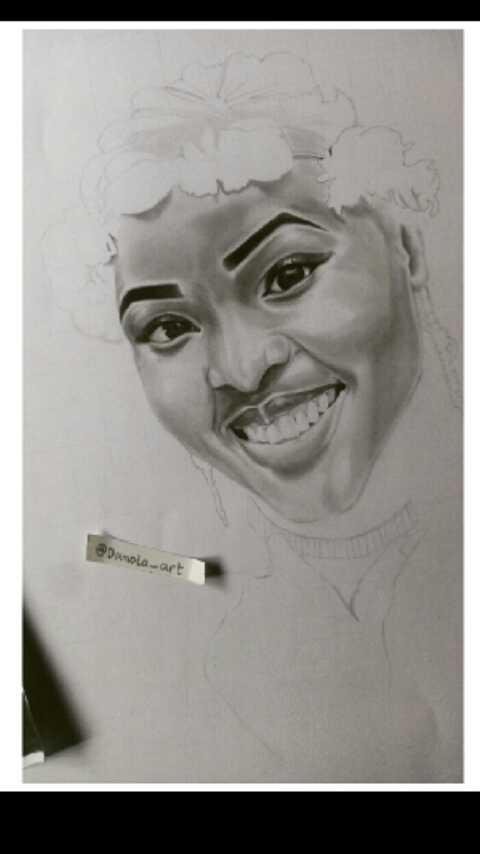
When the important part of the face are in perfect shape the art is yet to be done.I already completed the nose and the mouth of the image.Their isn't any special trick in achieve this, once you have mastered your pencils very well.you will know what to apply and when to apply. While trying to achieve this stage,i made use of "H" , "HB","B" ,and "2B" grades of graphite. I mix "H" and "HB" to create the skin tone. While the dark part of the face was done with "B" after shading and blending more than once. If you pay close attention you will notice the left and right side of the image cheek is white. Thats to indicate where the ray of light is resting on to make it more realistic and not flat. I move down to the shadow below the nose in which i made use of "B" to create it. After to the top part of the lips.
I shaded and blend the top part of the lips with "HB'' to create the first layer and after i apply "B" and blend as well. After have done that, i made use of "B" again only this time i don't blend the shadings am creating to differentiate the darker portion from the light part. I did the same technique to the lower lips only this time i created the first layer with lighter grades. Applying "H" and "HB" for the darker part.i shaded the "gum" with just "H" without blending,only using the hatching technique. And finally for the teeth was left untouched.
STEP 4
When creating the hair of an image you would have to move far way from the light grades of the graphite rather you apply the dark part.At this point i made use of "B" ,"2B","4B", and "7B"
The first layer i applied "B" and ,"2B" then blend with new cotton board. After i made use of 4B for the dark portion and 7B at the adge is each end of the braid.
At the end of everything i use eraser to clean the center of of the layer to indicate where the ray of light is resting upon.The hair stage takes time but the result is worth it. Patience is the
Key to every successful and amazing art we see around us everyday
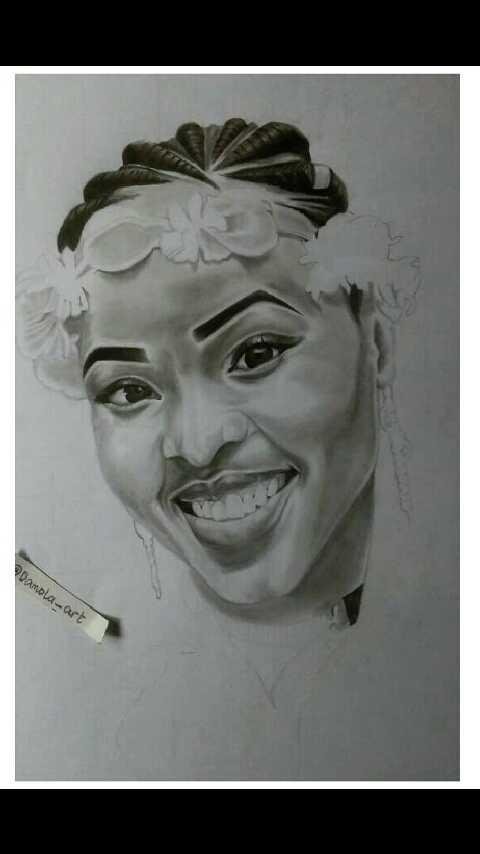
STEP 5
Finally the hard part about this point is that you have to pay close attention to each strand of the hair.i made use of the same set of grades i used in step 4.took me almost an hour to complete it but i was satisfied with the finally result. Don't be afraid to try it.. Pick up the pencil and start practicing you will get there eventually. Just like the usual saying "practice makes perfect "
Tell me what you think about this post
Stay tuned for my next post

This is so beautiful! I wish I am as talented as you..
Thank you expect more if you follow the steps there is big possibility of getting yours done.
This is a great talent display.
Keep it up
Thank you bless you 😊
Congratulations. This post has be selected and curated by @steemnaira community.
Join On Us on Discord on Steem Nigeria Server
https://discord.gg/PDEFpzg