How to Put a Standard Android App onto Android Wear

What you will need:
- one Android™ wear watch
- one phone running Android 4.3 (KitKat) or above*
- a computer with at least 6 GB free**
- a usb cable from your phone to your computer*
*these items are only needed if your watch doesn't support Wi-Fi connections
** If you are connecting to your watch without a phone you will need networking capabilities (Wi-Fi or Ethernet)
Note: Some apps may crash unexpectedly when on Android wear
Step One: enabling developer mode
On your Android Phone: (only required for connections via bluetooth )
Note: Some Android phones' menus are different
Go to settings then hit "about phone"
Then click "Build number" seven times
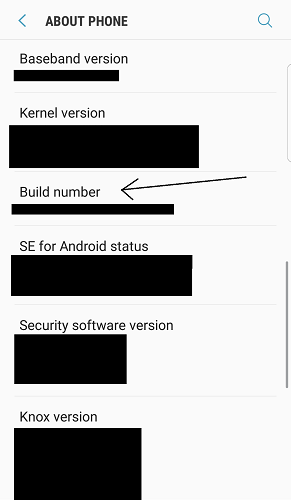
Now Go back to the main settings menu
You should see a new option (it usually is at the bottom) called "Developer options"
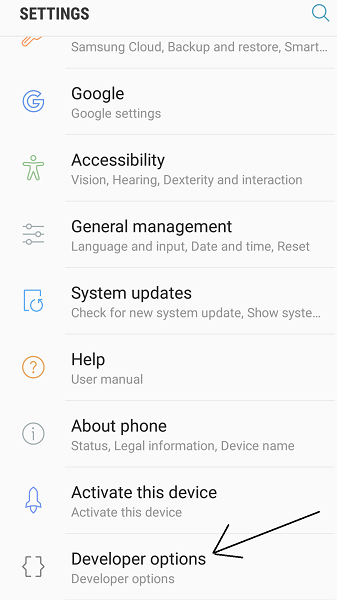
Now tap on "Developer options" and see if it is off (this is the case on some phones) if it is turn it on
Scroll down until you see something that says "USB debugging" and click on it
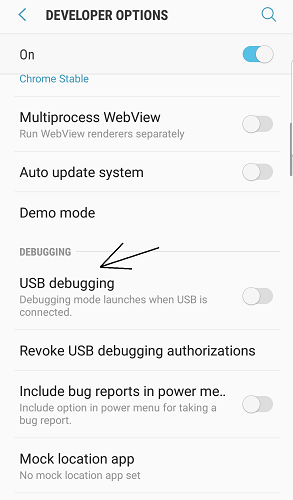
Now your phone is ready
Setting up your watch:
Note: Android Wear 1.0 is different than the instructions listed below (tested on Android Wear 2.0)
Swipe down so you see this screen below:

Now click the settings icon
Scroll down until you see an option called "System"
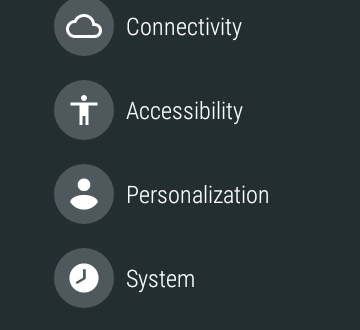.png)
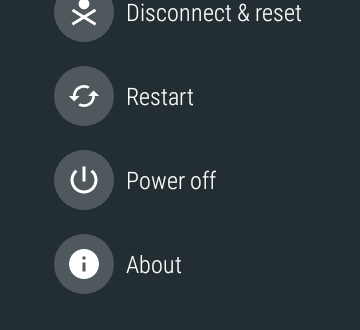
Now Scroll down until you see an option called "About":
.png)
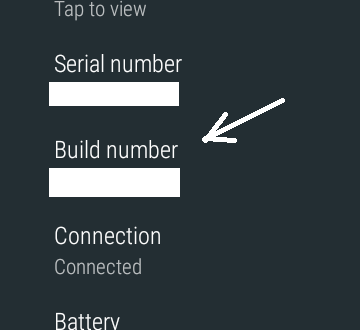
Now click on the "Build number" seven times
.png)
Now swipe right three times, then swipe down, now click back on the settings icon
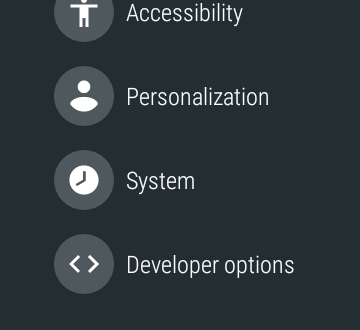
Once you have done that scroll down until you see something that says "Developer options" then click it
.png)
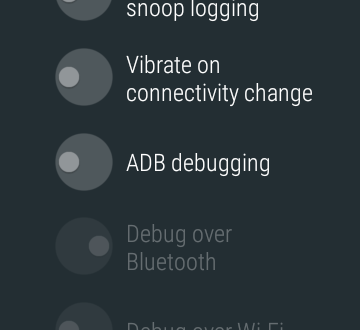
Now Scroll down until you see "ADB debugging" and then click it
.png)
Now you have new options that you can turn on
If your watch is connected to your phone using bluetooth turn on "Debugging over bluetooth" and if it's over Wi-Fi turn on "Debugging over Wi-Fi".
Lastly, changing settings your phone (If you are on Bluetooth)
On your phone open the Android Wear app.
Click on the settings icon in the app.
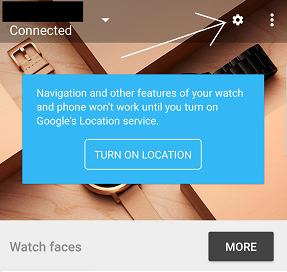
Scroll down until you see the category "Debugging over bluetooth"
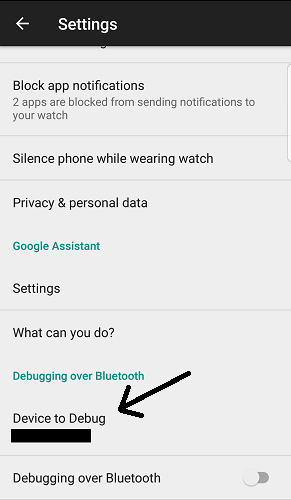
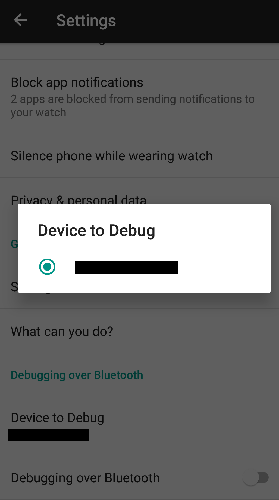
Now click "Device to Debug" and make sure it is the correct device
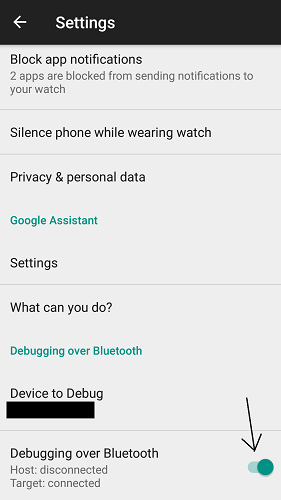
Once done click "Debugging over Bluetooth"
Step Two: Setting Up Your Computer
For Windows Users:
Go onto your computer and go to this link here https://developer.android.com/studio/index.html
Now download the package for your system (this will take a long time)
Once it finished downloading, run it.
It will ask for admin permission click yes
Now a window will pop up, click next
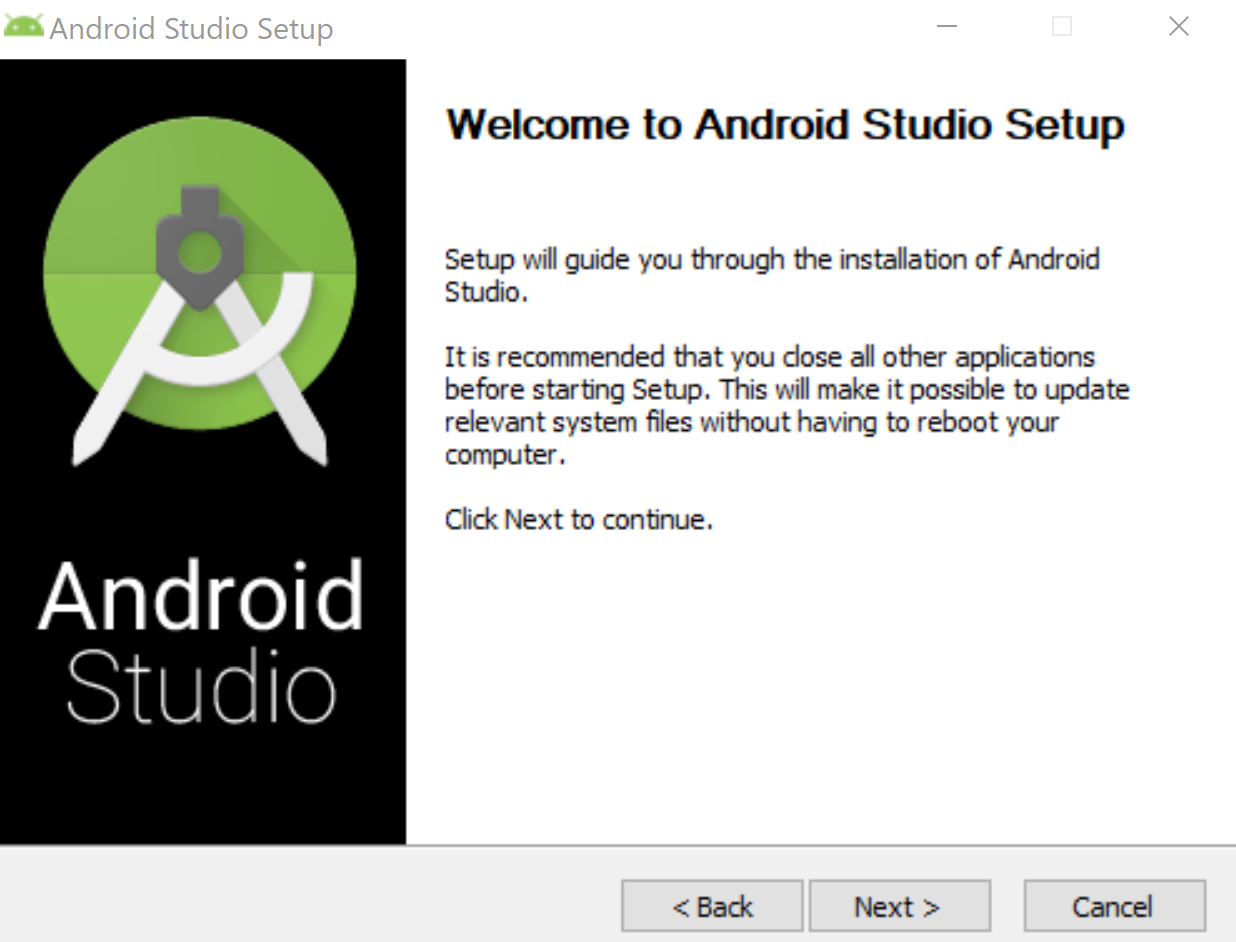.png)
Now make sure Android Virtual Device Is not checked (You don't need this) Then click next
Hit "I agree"
Now click next

Click install (this will take a while)
Once done click next

Then uncheck the "Start Android Studio" Now click finish

Windows 10, 8.1, 8:
Press Windows button then Q and type in control panel
Now go through System and Security->System->Advanced System Settings (on the sidebar) And click environment variables
Scroll down in the "System Variables" category NOT the "User variables" until you see "Path"
Now click on it and then click on the lower edit button
Now click "new" and type in the following:
C:\Users[YOUR WINDOWS USERNAME]\AppData\Local\Android\sdk\platform-tools
Click Ok in the different windows until none are left
Windows 7:
On the desktop right click on "Computer" then click on properties
Click on the advance system settings (on the sidebar)
Now click the advanced tab and then click the environmental variables
In the "system variables" (on the bottom) Scroll down under the until you see Path
Click on it then click the lower edit
Scroll all the way to the left and add in after the semicolon C:\Users[YOUR WINDOWS USERNAME]\AppData\Local\Android\sdk\platform-tools; (make sure you end with a semicolon)
Older Windows Versions:
Instructions of how to change the path variable are here
Add in the following to the path:
C:\Users[YOUR WINDOWS USERNAME]\AppData\Local\Android\sdk\platform-tools;
Now open up command prompt by hitting the windows key then pressing and R then typing "CMD"
For Mac Users:
Download the file located here:
https://developer.android.com/studio/index.html
Once you have downloaded it run the file
Now a couple different windows will popup and close. Eventually you should see this:
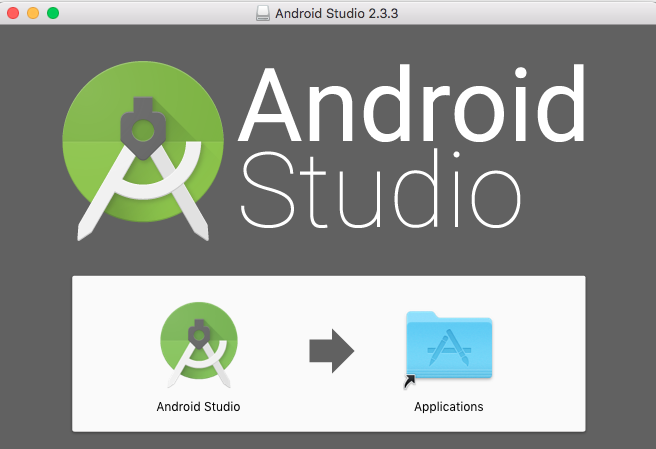
Double click on the Android Studio icon (It may ask you if you want to open it, if so click yes)
Once that is done a new window should pop up that looks like this:
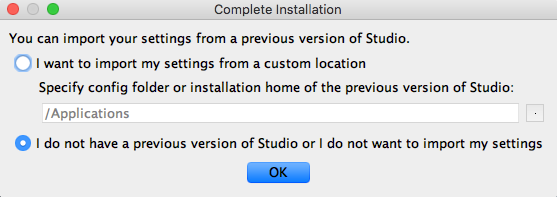
Click ok
Now a different window should popup
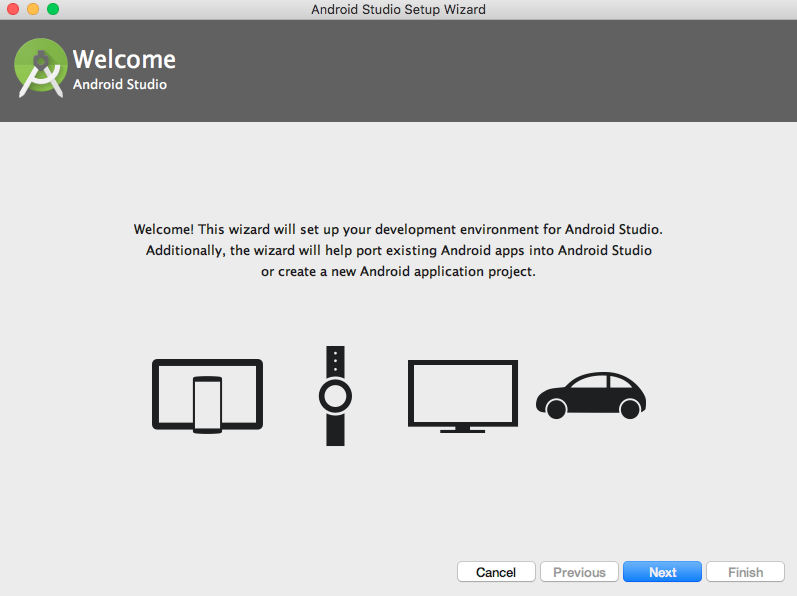
Click Next
Now It will ask you what type of install you want click, custom
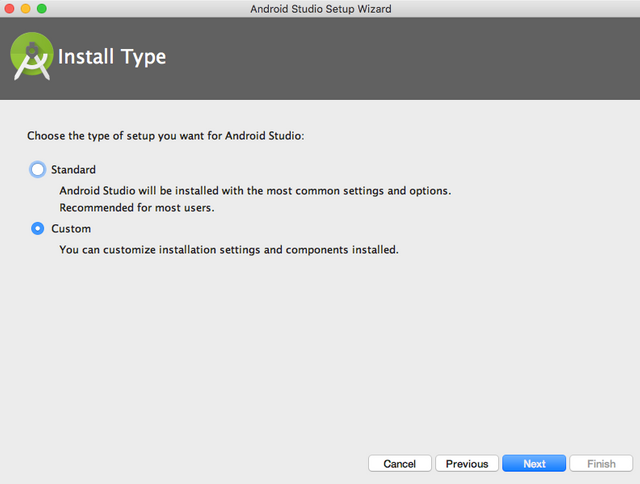
Now uncheck all boxes except the Android SDK It should look something like this:
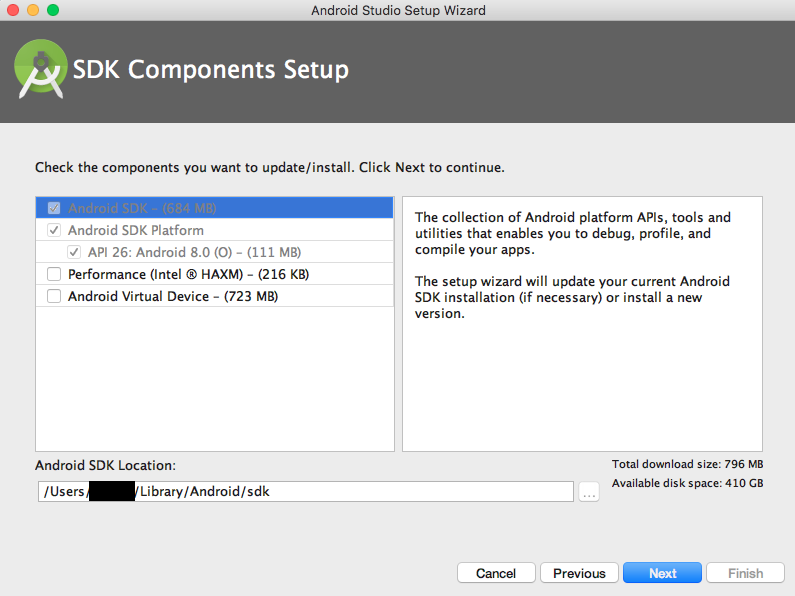
Once you've done that click next
On the next window click finish.
Now it will take a while to finish up. Once that is done you hit finish again on this last window.
Android studio will popup, just close this window
Now open finder and on the top toolbar click Go, and then click utilities
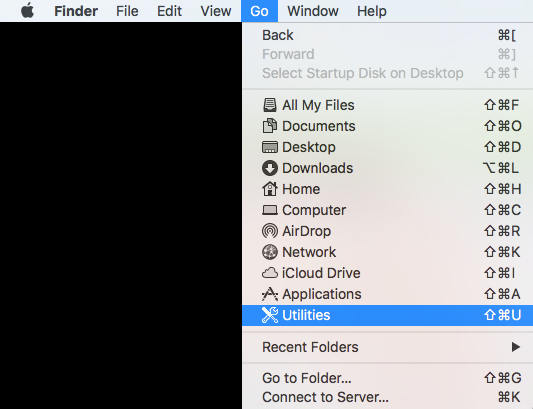
Once you have done that, go back to the finder window and scroll down to terminal
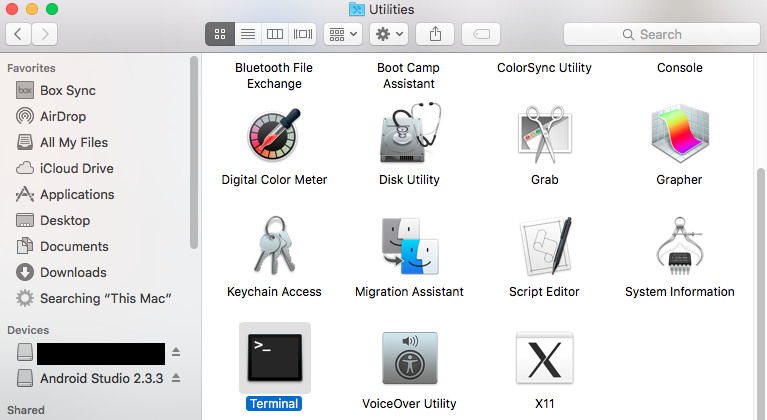
Now double click the terminal icon
A window should popup
Click on the window and type in the following
cd /Users/[YOUR USERNAME]/Library/Android/sdk/platform-tools
For Linux Users
Open the terminal then...
For those with apt use:
sudo apt-get install android-tools-adb
For those with yum
sudo yum install android-tools
That is the setup
Step three: Installing the app
First on your computer you need something downloaded called an APK (Android Package Kit) file, it is an installer for apps on Android for both regular Android and Android Wear. Apkmirror.com is a good place to get APK files. WARNING APK files from unsafe sources can contain malware, spyware and other threats.
If your phone is connected to the watch via bluetooth:
Plug in you phone to your computer via USB
On your phone and watch it will ask to give your computer permissions to connect, click yes
Run the following commands:
on Windows via command prompt and Linux via the terminal
adb forward tcp:4444 localabstract:/adb-hub
adb connect 127.0.0.1:4444
To install the APK on the watch use:
adb -s 127.0.0.1:4444 install [APK FILE LOCATION]
Mac via the terminal:
cd /Users/[YOUR USERNAME]/Library/Android/sdk/platform-tools
./adb forward tcp:4444 localabstract:/adb-hub
./adb connect 127.0.0.1:4444
To install the APK on the watch use:
./adb -s 127.0.0.1:4444 install [APK FILE LOCATION]
if your using Wi-Fi as your connection type
NOTE: connections via Wi-Fi may unexpectedly close due to some bugs in Android Wear
Connecting to a Wi-Fi network if you haven't already:
NOTE: if you have a Wi-Fi network with a password that you haven't connected to already with your watch, you will need a phone with the Android wear app installed
Swipe Down and click the settings icon

Click connectivity:
.png)
Click Wi-Fi:
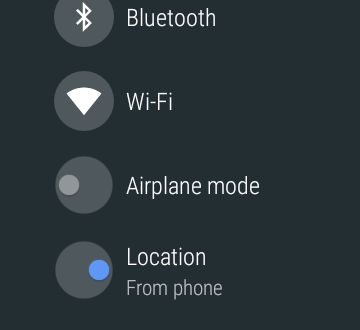.png)
Click "Add Network":
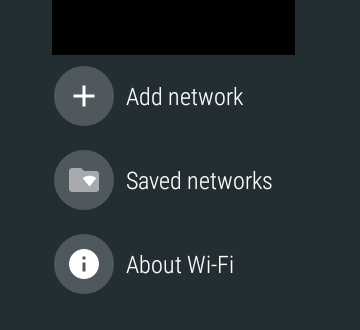.png)
Tap on your Wi-Fi network name. If it is an open Wi-Fi (no password) it can just connect, if not, it will require your phone.
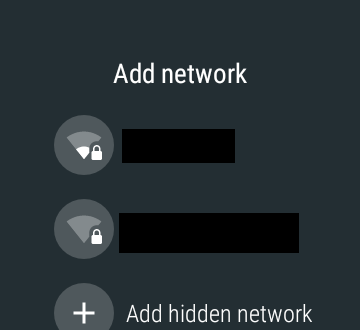.png)
Now swipe right three times, then swipe down and press the settings icon again
Scroll down to "Developer options" and tap it.
.png)
Scroll Down to "Debug over Wi-Fi:
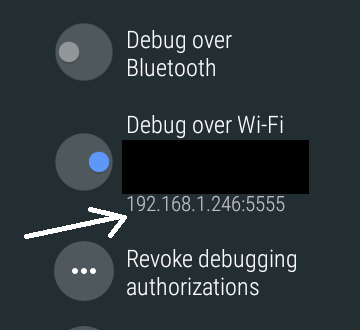.png)
Now, write down the IP address (the numbers at the bottom not in brackets)
Connecting to your watch from your computer:
Make sure your watch and computer are connected to the same network
On your watch it will ask you for permissions for your computer to connect, click yes.
On Windows in the command prompt and linux in the terminal enter:
adb connect [THE IP ADDRESS]
adb -s [THE IP ADDRESS] install [APK FILE LOCATION]
On Mac in the terminal:
cd /Users/[YOUR USERNAME]/Library/Android/sdk/platform-tools
./adb connect [THE IP ADDRESS]
./adb -s [THE IP ADDRESS] install [APK FILE LOCATION]
Now you can install your apps on your Android Wear device
For Safety, make sure you turn of "ADB debugging" on both your watch and phone once you're done.
Sources:
https://www.java.com/en/download/help/path.xml
https://web.archive.org/web/20130127201724/http://www.itechtalk.com:80/thread3595.html
https://forum.xda-developers.com/android-wear/development/guide-how-to-connect-adb-wifi-t3368602
https://www.youtube.com/watch?v=u24oMKZMAaA
https://www.youtube.com/watch?v=oaNM-lt_aHw
https://developer.android.com/training/wearables/apps/debugging.html\
The Android robot is reproduced or modified from work created and shared by Google and used according to terms described in the Creative Commons 3.0 Attribution License.
Wow that is pretty epic and such an in depth tutorial. Thank you for sharing and taking the time to make such a great how-to.