Best Amazon Kindle eBook and Book Self Publishing Course for Beginners in 2019?
You are about to experience the best Amazon Kindle Self-Publishing course in 2019 for beginners.
If you'd like to get your books published, like I've got my own books published, I imagine you will love this course.
Why is this the best?
I say this is the best, because a lot of the courses out there including a course that I made previously, are made by authors that really don't have that much in terms of results.
This course is not by me. It's by Brian Jackson who has over a half million dollars in sales on Amazon Kindle, who was one of the original Kindle authors, who's published a ton of books and who makes a course that will help you to get started and learn from his vast inventory of experience.
I'll give you the first half of the course here for free thanks to Brian's generosity to allow me to give you this information so that you can get started and get better results than me. I've actually lost money publishing my books.
You want to follow Brian's course and not mine on the same topic.
Let's take a look and show you what you're getting a preview of right here.
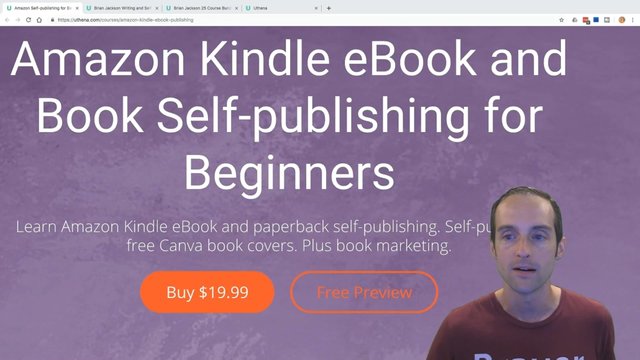
The name of the course is Amazon Kindle eBook and Book Self-Publishing for Beginners. This course is available for $19.99 on Uthena although if you check in the YouTube video description, you will find some links that give it to you for even less.
If you will enjoy reading and contributing to the discussion for this post, will you please join us on the YouTube video above and leave a comment there because I read and respond to most comments on YouTube?
If you find anything helpful in this video or funny, will you please leave a like because you will feel great helping other people find it?
If you'd like to get answers to your questions, Brian is available when you take this course to answer your questions and to me that's what makes the course really worth buying.
Let's take a look at what this video will actually cover.
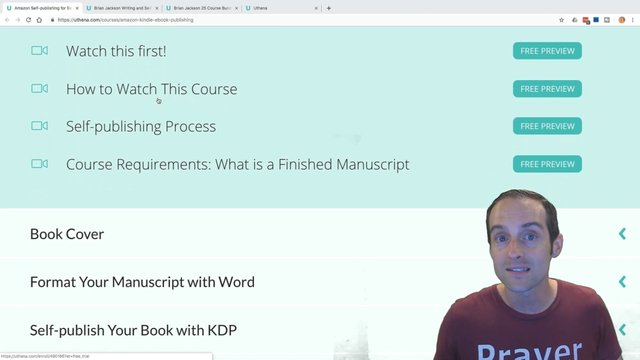
We'll start with some of the basics like how to watch this course. If you're brand new to self-publishing the videos that follow by Brian will show you exactly how to get started and give you the basics.
Then we'll go into the fundamentals of book cover design, then we'll go into how to format your manuscript from self-publishing options and traditional document formatting, then we'll get you to the point where you are ready to self-publish your book on Amazon.
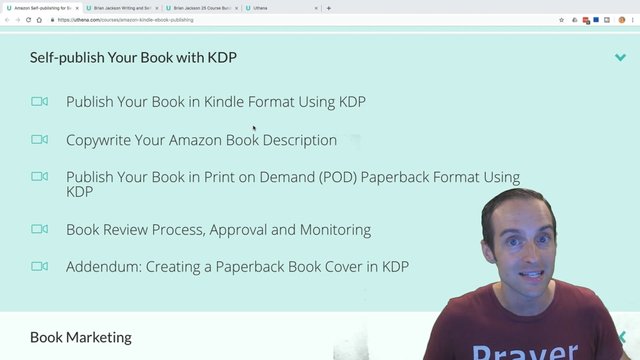
This is something you can absolutely do.
Finally, Brian will give you 20 book marketing tips.
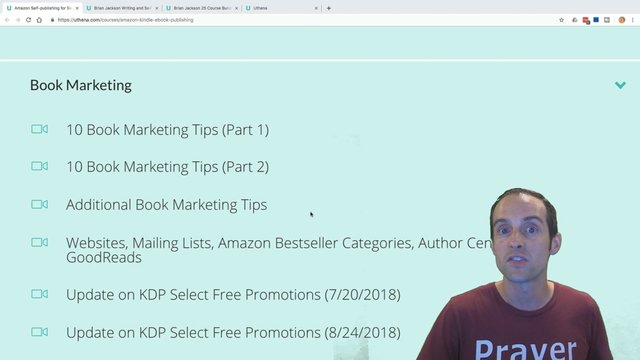
These are at the end of this video. These are some of the things you might find most valuable. You can go in the YouTube video description and skip ahead if you want to go straight to this. I've listened and talked to Brian, Brian's one of the partners with me. He has some amazing book marketing tips that help you to get your book ranked higher, to help you focus your energy correctly, to maximize the characters in your description.
Brian knows what he's doing with Amazon Kindle self-publishing and I'm grateful for the chance to share this with you.
If you'd like to take the course, will you please use the link in the YouTube video description, because Brian will get 80% of the sales you make going through the link in the description. Brian also has a bunch of other courses that you might enjoy if you'd like to publish children's books.
If you'd like to get into different methods to publish, Brian has a five course writing bundle that you can get a link to in the description also.
And the best value with Brian is he's got a 25 course bundle. If you love listening to Brian and watching his instruction you can get 25 of his courses for $48 that's under $5 a course.
Brian's got a great teaching style. He makes slides that are really engaging and explains it and leaves it so you can understand it.
I'm Jerry Banfield, the founder of Uthena.
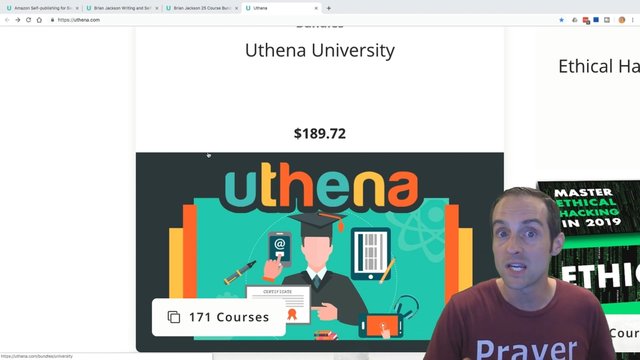
If you want the most courses for the lowest cost, we have a Uthena University bundle 171 courses for $189. The cost of the bundle may increase as we keep putting more and more courses. We intend to have over 1,000 courses in this bundle by the end of the year.
I've talked long enough till now to give you a thorough introduction to show you what you're watching here.
I appreciate Brian partnering with me to get this out to you on YouTube, I'm the YouTube marketing guy, and on Facebook as well.
Thank you for getting started with this. Here's Brian to give you an introduction to the course and to help you see exactly how you can succeed with self-publishing.
I trust if you find this video helpful you'll drop a like and subscribe for more videos just like it.
Amazon Kindle eBook and Book Self Publishing Course for Beginners in 2019
Hello and welcome to this course. I'm going to begin the course in a strange way by discussing how to watch the course. You know, thinking about it that's actually not an odd thing to start with, but what's unusual is going to be the way that I recommend you watch the course.
Let me explain. As you're about to learn this course follows the self-publishing process pretty closely by having sections on book cover, formatting your manuscript, publishing your manuscript and marketing your finished book.
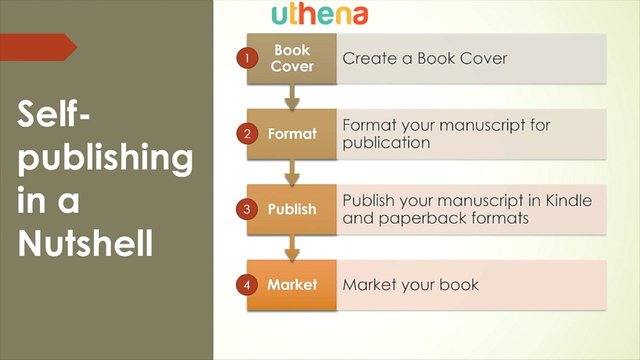
Now the problem is with book marketing I put it last, because that's naturally when people think about it. You publish your book then you market it. However, many marketing decisions need to be made before publishing.
However, many don't care about making money and just want to self-publish so that's why the marketing is at the end in the natural order in which you'd expect it to occur.
However, you should really review the marketing stuff before self-publishing and on and on. It's a chicken and egg situation, but I found a solution. This is how I recommend you watch the course.
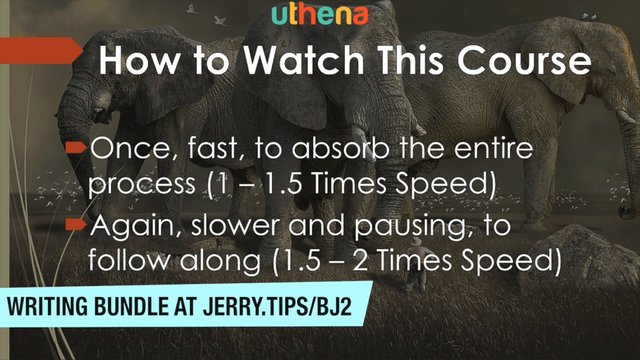
Watch it once fast to absorb the entire process and to get all that marketing stuff that's in the fourth section before you start publishing. So watch it at one to one-and-a-half times speed and then watch it again slower and pausing to follow along.
That's right. I want you to actually publish your book as you watch this course, but the second time through. What I'm recommending watch fast once through and then watch slower while pausing to follow along.
You're going to have a published book by the time you get done with this course, but notice the course is becoming very interactive and it includes section projects at the conclusion of each section.
However, beginning your life as an author is really the course project. So what I'm asking you to do is to respond to section projects by sharing your steps towards becoming a published author.
Remember, by the second time you watch through this course, you're going to be a published author.
Next is the self-publishing process during which I'm going to explain the structure of this course.
Hi, in this lecture, I'm going to provide an overview of the self-publishing process and since my course follows this process very closely, at the same time I'll be providing an overview of my course contents.
Now let's begin by looking at the self-publishing process in a nutshell, it begins first with creating a book cover. You need to have a book cover before you publish. Now there is a book cover creation interface within the publishing interface, but I recommend not to use it, because it creates tacky book covers that everybody recognizes as being Amazon Book Creator Book Covers. So we're going to use Canva instead to create a really nice professional-looking book cover.
The next step we'll do is we'll format our manuscript for publication. This involves a lot of clean-up and making your manuscript look really good in both eBook and paperback formats.
Once you've cleaned up your manuscript, we're going to use an interface called KDP, Kindle Direct Publishing to publish your interface. This is the free interface provided by Amazon for indie authors to publish their works on the Amazon site.
Now we'll be publishing both a Kindle eBook and a print-on-demand paperback.
The final step of course, is to market your book. If you don't market your book you're not going to get your book into the hands of readers and then really what's the point of writing?
Now let's take a look at these one at a time.
First, Canva create a book cover.
Canva is a free and easy to use web-based graphic design tool. In fact you can use it to create more than just book covers. We’ll use the free Canva themes to quickly create free professional-looking book covers.
Canva is the free quick and easy way to make book covers and other graphic design elements. Now I want to point out too that we'll also be including free images from Pixabay. A huge site where you can get images that are free for commercial use.
So we've got millions of images to choose from in making our book cover.
And this is what Canva looks like.
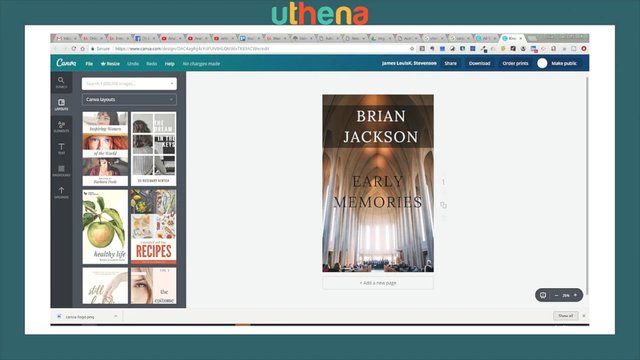
It's an easy-to-use web-based interface.
Now once our book cover is created, we're going to use Microsoft Word. You can use any version from 2010 and on. I'm going to be demonstrating Word 2016 to format our manuscript.
Word is a standard editor used by many writers so you may already be using it. In fact, you may have used it to write your manuscript. We'll use Word to clean-up the manuscript before publication and we'll be employing the free Kindle Create Word plugin to simplify the formatting process. We’ll be augmenting this process with some additional steps to make your manuscript look even better.
Now formatting your manuscript is a needed step in preparation for publication and this is what Word looks like with the Kindle Create extension. You can see you have a new Kindle menu item and when you go to it, it gives you formatting options for formatting your manuscript for publication.
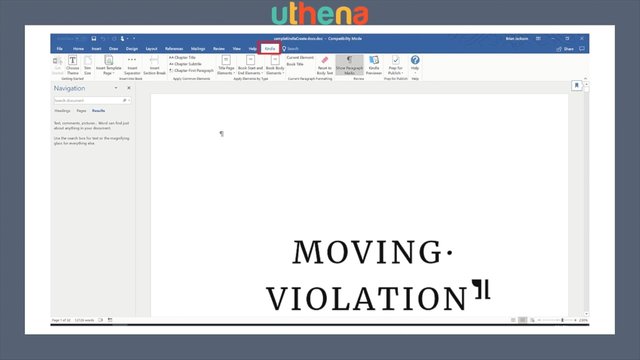
Now after we’ve formatted our manuscript, we're going to use the Kindle Direct Publishing (KDP) interface to upload our manuscript for publication on Amazon.
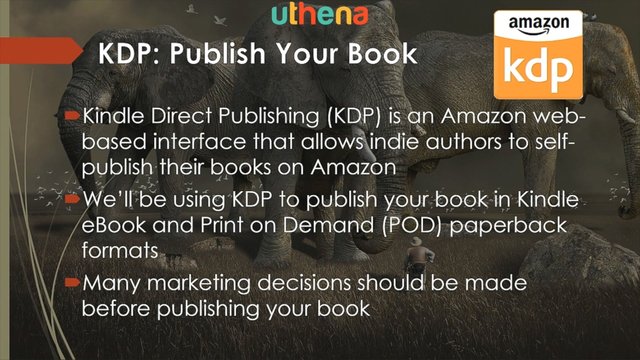
This is the indie author interface that Amazon has provided for publishing books. We’ll be using KDP to publish our book in both Kindle eBook and print-on-demand paperback formats.
Now print on demand print-on-demand is an interesting format, in the past, if you wanted to publish print books, you would have to buy a bunch of them through a vanity press and then you'd store them in your garage and you'd actually ship the paperback books.
In this case, Amazon prints the books on-demand so as they're ordered they print them and ship them for you. You don't have to buy anything ahead of time. In fact this entire process that I'm talking about is free.
Now many marketing decisions that you need to make should be made before publishing your book and that's why in the previous lecture, I talked about skimming through and particularly watching the marketing section of this where I talk a lot about a lot of marketing issues that you need to incorporate into your publishing process.
Now KDP, the publishing interface, is once again a simple web-based interface that looks like this.
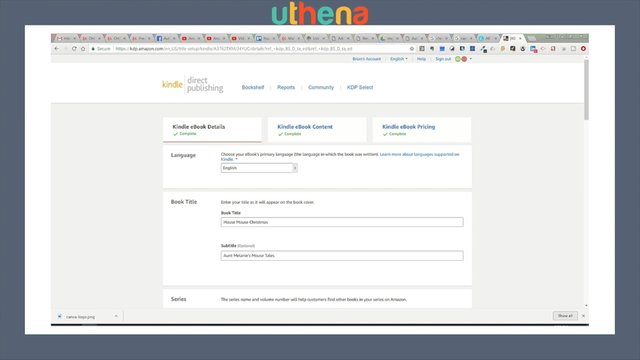
You just fill in a bunch of fields that describe your book and define your Amazon product page. Now the final step that many self-publishing courses on Udemy skip, is marketing and you're not going to get your book into the hands of readers unless you do some minimal marketing. And we're going to get you started marketing, selling your first few books by going over several items.
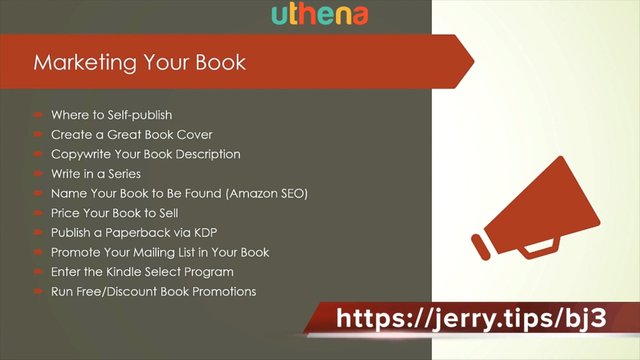
So if you had to look at the entire process graphically, it would look something like this. You would use Word to write your manuscript and you'd have a finished manuscript and we're going to talk a little bit more about what is a finished manuscript in the next lecture.
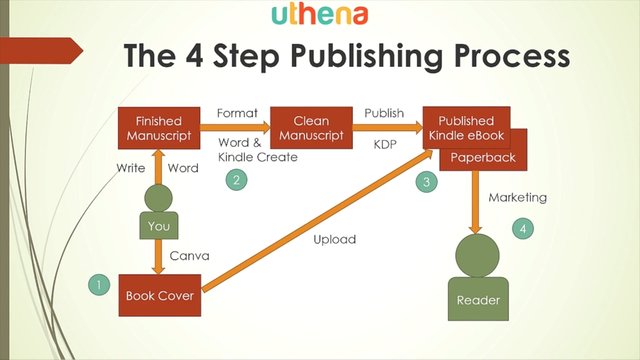
Then you would create a book cover using Canva. You'd format your manuscript to clean it up using Word and Kindle Create to produce a clean manuscript. That's step number two. And then you would publish via KDP incorporating your book cover and your clean manuscript to produce a published kindle eBook and a paperback. That's step number three.
And finally step four, the last step, is to market your book and to get it into the hands of readers.
Now the last word I want to leave you with is about Smashwords.
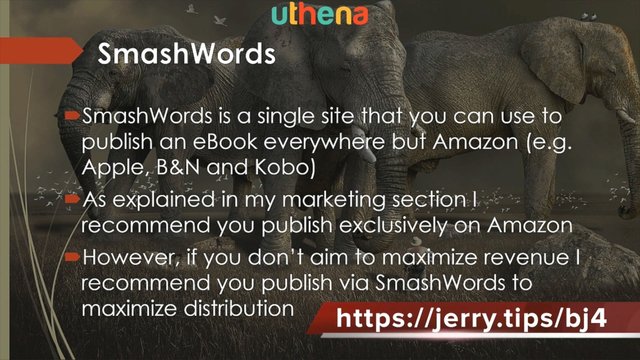
Smashwords is a single site that you can use to publish an eBook everywhere but Amazon. For example, to Apple, Barnes and Noble and Kobo. And why wouldn't you want to publish everywhere?
Well as explained in the marketing section of this course, I recommend you publish exclusively on Amazon. There are great perks to revenue generation and advertising available if you stick with Amazon exclusivity. However, if you don't aim to maximize revenue I recommend you do publish on Smashwords to maximize distribution.
Now I don't cover Smashwords publication here, but I'm sure once you've seen KDP publication, you'll be very familiar with the Smashwords interface. Look it up if you're interested in distribution as opposed to revenue.
Next is course requirements in which we address what is a finished manuscript.
To conclude this course introduction, I want to talk about the course requirements and specifically I want to talk about just what is a finished manuscript.
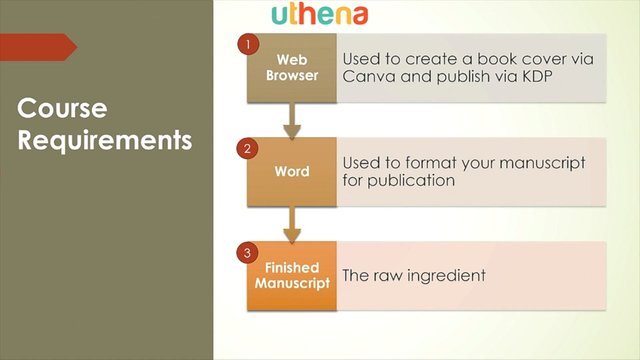
Let's begin by looking at all the requirements.
You only have three. You need a web browser. Any browser will do. Chrome, Firefox, Safari or Opera. Whatever you can run that will get to a web page so that we can use Canva, an online graphics design tool and KDP, the Kindle Direct Publishing web-based interface to publishing your manuscript. And just about any computer will do too. You're not talking about really heavy system requirements to run Microsoft Word and a browser. And Microsoft Word is the next requirement. I suppose you could try and use Word online. It would be fun to see if you could do everything absolutely free using free software. But I'm going to show you the use of Word 2016.
You can be running Word 2010 on upword. We're going to be adding the Kindle Create extension which requires Word 2010 or on and you're going to have to translate from 2016 backwards. Some of the things may be in different locations, but it should be fairly easy for you to translate. And the final thing, you need a finished manuscript, right?
This is the raw meat. It's the center of everything we're doing, and I'll supply the rest.
Now just in case you thought I was going to let you off that easy I want to do a little dissertation here on just what is a finished manuscript, the third essential requirement.
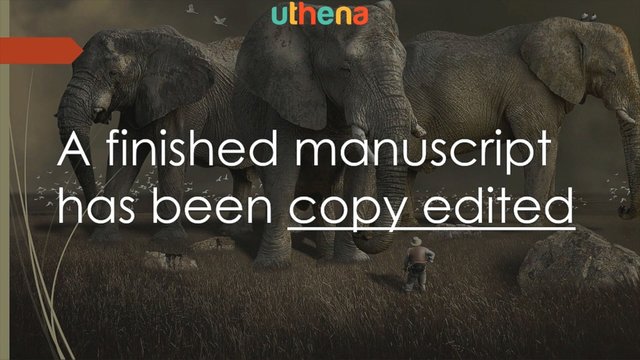
A finished manuscript has been copy edited.
Now in case you don't know what copy editing is let's look at the two most common forms of editing.
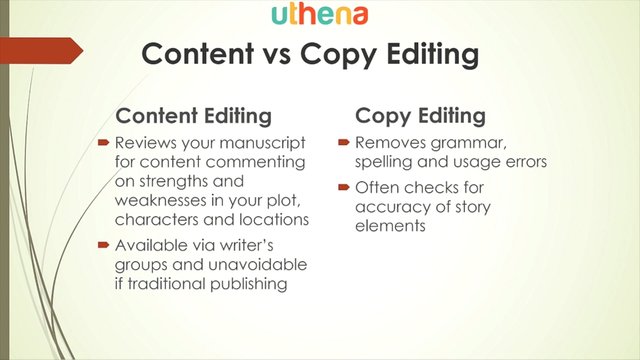
Content Editing.
This reviews your manuscript for the content commenting on its strengths and weaknesses in your plot and characters and locations. It's usually available through writers groups and unavoidable if you go the traditional publishing route. Your editor is going to do content editing on you. I find it annoying.
Copy Editing,
This removes grammar spelling and usage errors. So content editing has to do with what you say and copy editing has to do with how you're saying it. You want to say it correctly so it makes sure everything's correct and it leaves what you're saying alone. However, it often does check for the accuracy of story elements. So if you're talking about Prague they might actually research some of your references to Prague and make sure it's correct. That's a nice additional feature to copy editing.
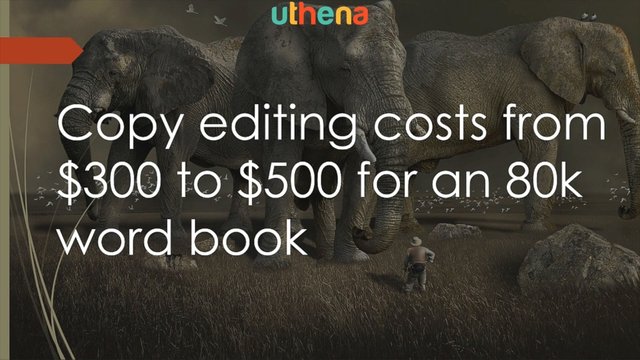
Now the problem is that copy editing costs from $300 to $500 for an 80,000 word book. That's a lot of money, but it's virtually unavoidable. I'm going to show you how to do everything free in this course from making a book cover, through formatting, publishing and even marketing, but the one thing I can't get for you for free is copy editing.
Let me tell you the Moving Violation story look at Moving Violation here it's got 73 reviews and it's got a three and a half star rating.
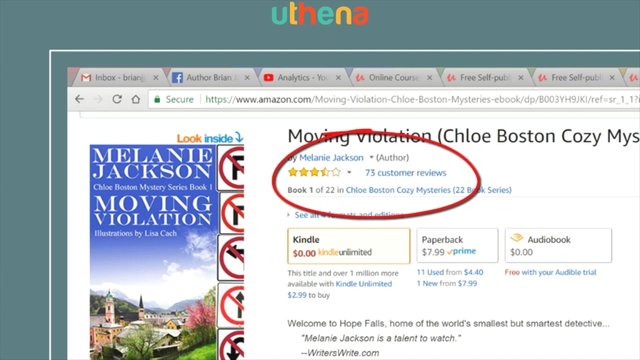
Let me explain a little history. This was released August 4th 2010. Can you believe that? We're coming up on eight years. And in March 2011, it set a personal publishing record. I sold 3,005 copies of it at 3.99 for a total revenue to me of $8,392. That was a record for one book.
It had virtually no editing and bad reviews started to come in citing the poor editing. Eventually a reader volunteered to copy edit our books, it was so bad, and we eventually, my wife and I, ended up paying this reader to be our copy editor.
Later we moved on to professional copy editing services and eventually fully professionally copy edited Moving Violation, but were still stuck with those bad reviews.
Now I don't want to just set you up for failure. I could show you how to create a book cover, how to publish your book and even how to begin marketing it, but if your book is poorly copyrighted it's going to fail.
Now if you must self-edit here are three words of advice. I know copy editing is expensive. Self-editing is an appealing option. Okay, here's some advice.
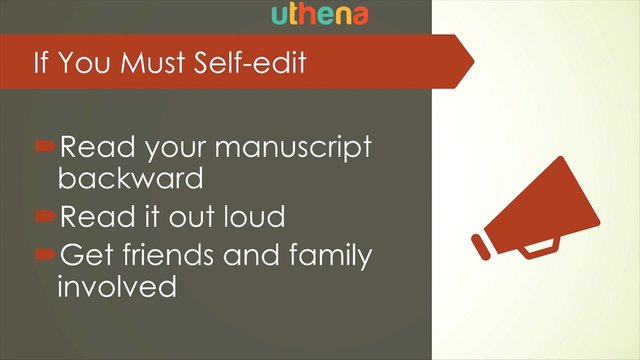
Read your manuscript backward. When you copy edit a manuscript you don't want to get stuck in the story, you're not reading for story. So if you read backwards you'll lose the story and you just see the words. Read it out loud. You'll quite often find errors much easier if you actually have to articulate them. Something in saying them makes the sentence incorrect and you'll find the correction for it and get friends and family involved. So that's my final words on the requirements for this course which is a web browser on some kind of computer, just about anything, a copy of Microsoft Word 2010 and above, and a finished manuscript.
Next is the fundamentals of book cover design
In this section, we're going to discuss first impressions or why your book cover is so important in the first place. Now consider this, the purpose of your book cover.
Why are you creating one?
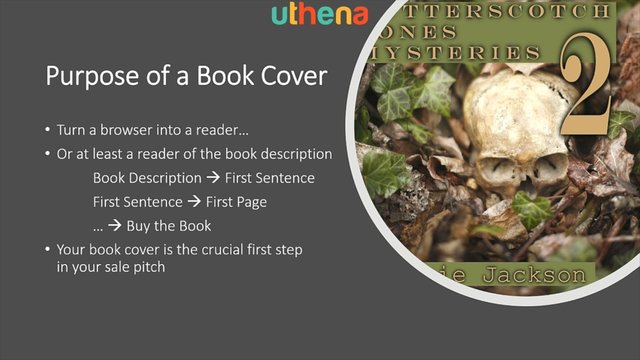
To turn a browser into a reader, you want people that are browsing for a good read to read your book or at least to read the book description. So if you get them to read the book description then maybe they'll read the first sentence. If they read the first sentence they'll read the first page on and on till they buy your book. So your book cover is the crucial first step in your sales pitch.
Now how does it accomplish this purpose?
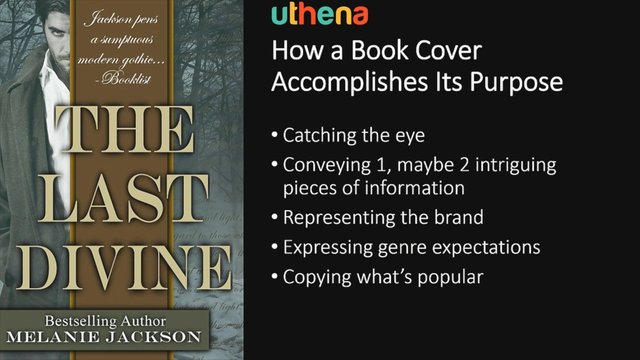
First, by catching the eye you want an eye-catching cover and you can do this through colors, through images, through text. There are several mechanisms that you can use to catch the eye and you have just a brief moment to convey maybe one or two intriguing pieces of information, right?
Maybe the title or the author is something intriguing. Something to grab the reader and you're going to be representing your brand.
Now a brand can either be a series of books and you can do it through the names or through common pictures or fonts or colors. It can be your author name. Whatever your brand is, your book cover needs to express that as well.
It also needs to express genre expectations. So if you're writing a cozy mystery book, you better not have anything gruesome as far as a murder scene on the cover. If you're writing a romance book you know naked guy’s chest seemed to be the most popular and copying what's popular. I really encourage you to go out and take a look at your genre, see what your competitors are doing and mimic it.
Not exactly copy the cover, but mimic it. Use the same elements. So that's how a book cover attracts attention.
Now we talked about brands and I want to talk about, what is branding?
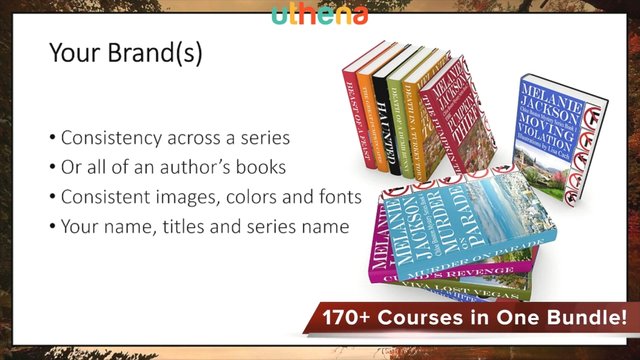
Branding can be a consistent look across the series of books. In fact here I'm showing you a series of books that are my wife's Chloe Boston Mystery Series. And you can see that I've got a common look and feel to all the book covers so that you can tell one book in the series from another.
Another thing that you might be consistent about is all of an author's books. So you might always use the same font for the author's name. You might use images that are common across author or a series. You might use colors or fonts. All of these things, you have to bind and make consistent either a series of books are all books by an author. And notice also your name and the titles that you use, the words that you use in a series and so on can be a binding factor.
For instance, if you're writing donut shop cozy mysteries you might have the sweet death or something like that you'll have all kinds of sweet kind of things in your title and so on as part of your brand for that series.
Here's another brand to a series that's less tight, but you can see that I use the same kind of lettering for each and they all have to do with walls and there's some piece of art on the wall typically.
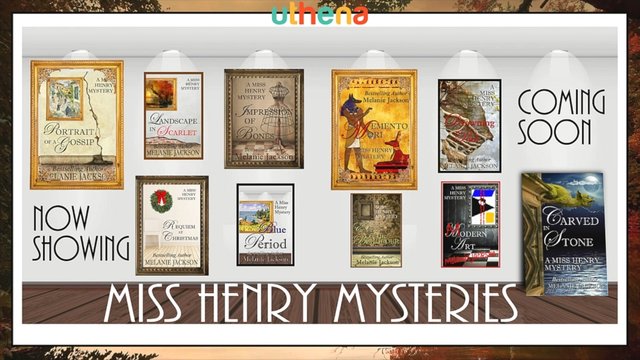
So that's what unites the Miss Henry brand a series written by my wife.
Now what about covers sources? Where can you get book covers?
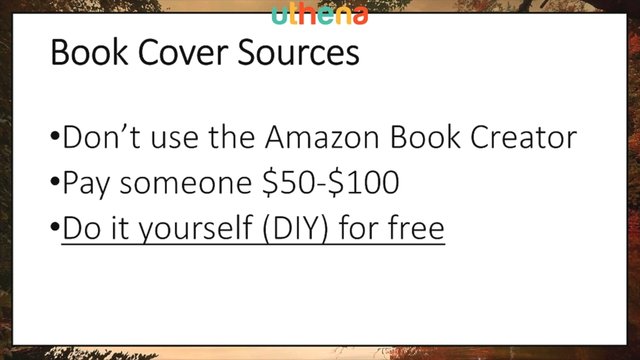
First of all, don't use the Amazon built in book creator. It creates recognizable covers. Anybody that's in the industry recognizes a book cover that was created with that and they look just kind of tacky.
You can pay someone $50 to $100 to create a book cover for you or what I'm recommending is that you do it yourself for free and get exactly what you want. A professional-looking book cover for free. That's what this video is all about.
Now why create your own book cover?
Because it's free, it's easy, it's fast and it's fun. Why would you give away the fun of creating your book cover to somebody else and then pay them?
Now let's look at book cover fundamentals.
We now understand why the book cover is so important and hopefully you agreed to at least look into creating your own. Now we're going to look at what you need to consider when building your book cover.
First of all, the book cover elements are this.
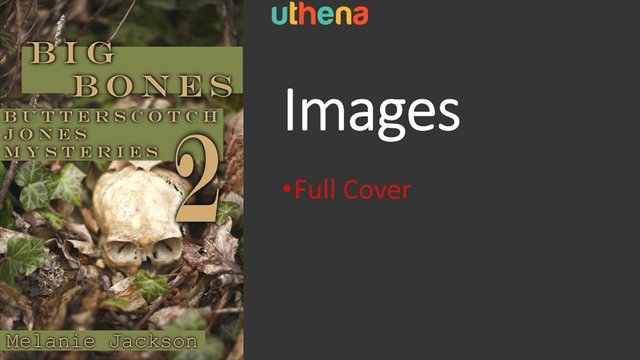
Images, text and colored boxes. That's what you got to work with. So it's not going to be that complicated. Let's look at images first. So when you pull an image onto a book cover you have two options, you can do a full cover image as in this example where the image covers the entire book cover and then you have text and colored boxes on top.
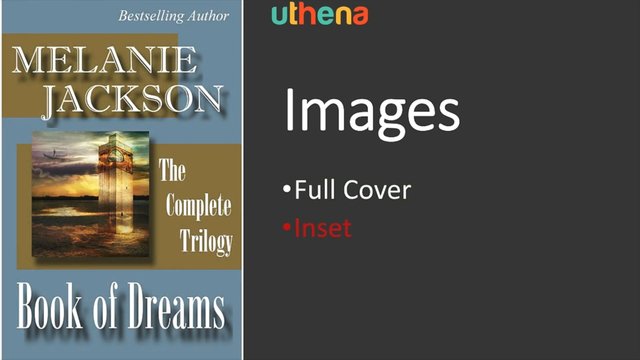
Or you can do an inset type of image as in this example where you've got a lot of boxes all over the screen and a solid background.
Now let's look at text, background, colors and images. There's two rules that you want to follow in putting this together. Do light on dark when it comes to text on something and do dark on light.
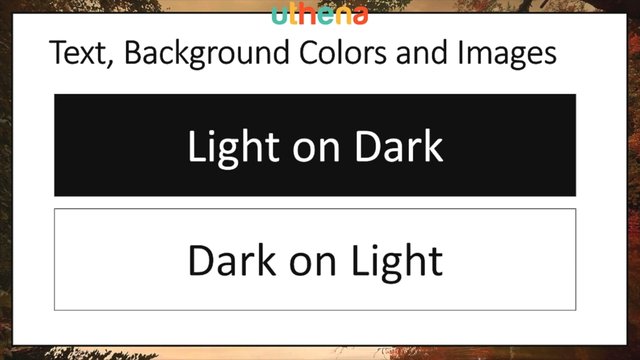
These are the two kind of options. You're always going to be playing at grays in between, but try to make your text pop by making it light if you put it over something dark and making it dark if you put it over something light.
You want your text to be readable. That's one of the big goals of making a book cover.
Now what else can we say about text?
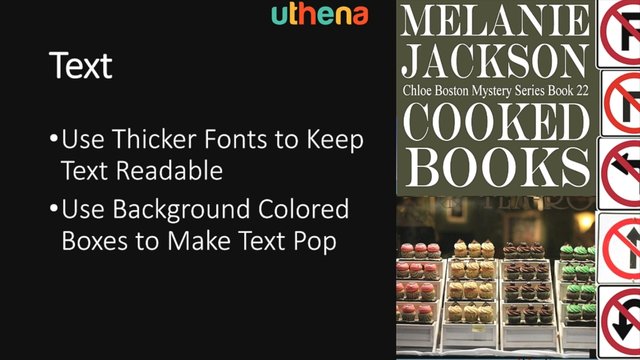
Use thicker fonts to keep the text readable. Notice in this book cover on the right how I got nice bulky fonts. If you go for those willowy nice handwritten type of fonts, as the image gets smaller and smaller those little willowy lines begin to disappear and pixelate.
So use big bulky fonts and keep the text readable. And also use background colored boxes. If this text had been over the image, it would have gotten really complicated, because the image has light areas and this is light text. In fact I wouldn't have known whether to use dark or light text on it. So I used a colored box for the background of the text to make the text pop. That's one of the purposes of colored boxes.
So let's look at coloured boxes. You use them to create designs, you can make entire book covers of just colored boxes of different colors at different angles kind of an abstract book cover or you use them to make text pop.
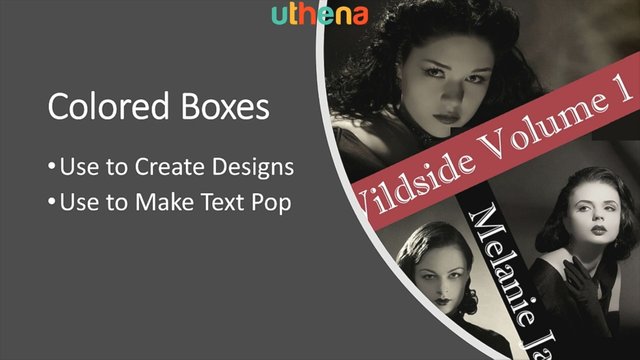
So you make the text stand out by putting a colored box behind the text as in this example to the right.
Now let's take a look at some colored box techniques.
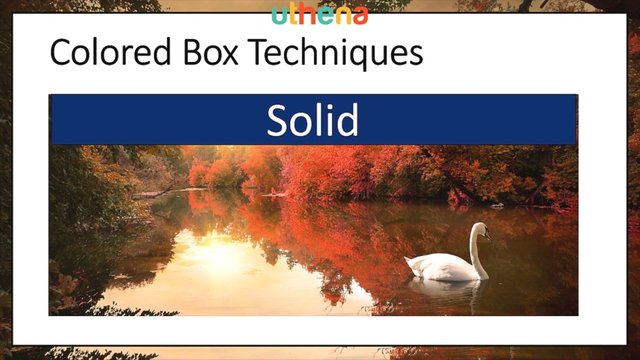
The first one you have is to use a solid colored box. That will really make things stand out. It lacks a little in sophistication and is a little in your face, but don't worry, there are other options for doing coloured boxes in the background.
Like one is transparent.
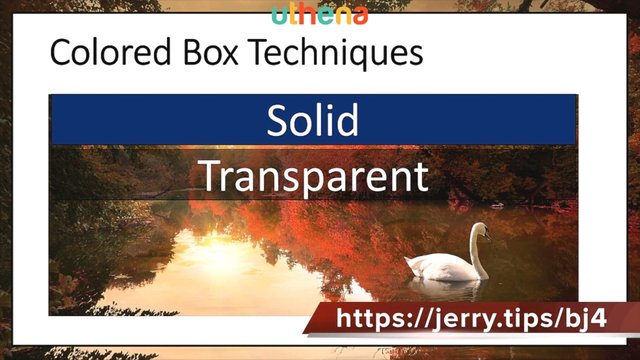
Have it blend into the background a little bit so you can actually see the background, but it does darken things up to make the text pop.
Another option is to do a gradient where you do one color to another.
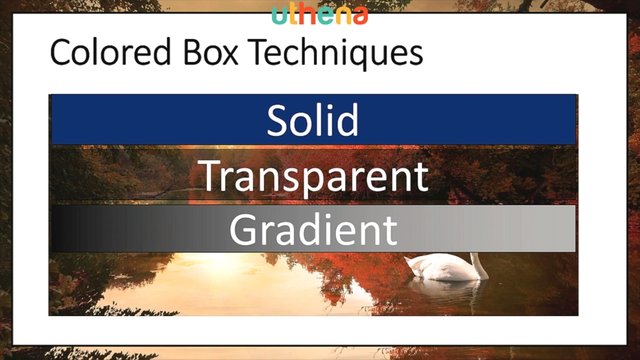
And the final option is to do a drop shadow.
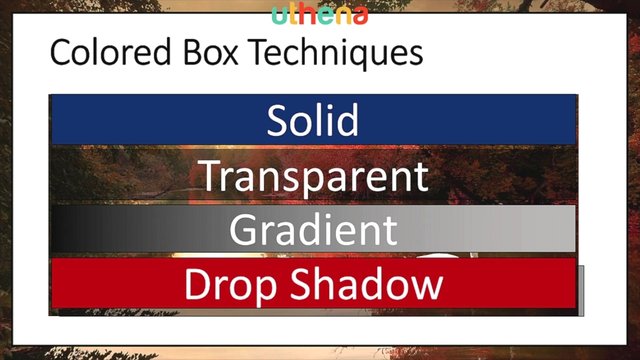
Now here you can just barely see my drop shadow, but trust me there is one and you do this by putting a darker box in the background and making it transparent by offsetting it just a little bit too.
So there's some box creation techniques.
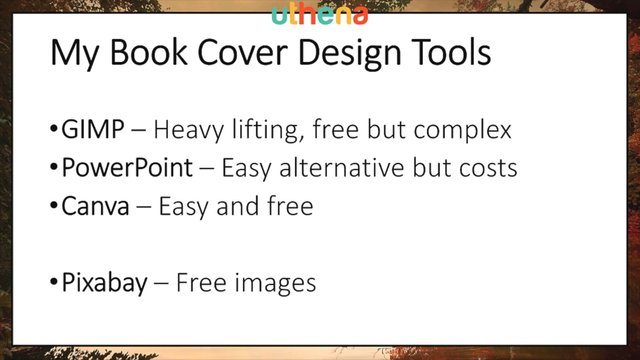
Now my book cover design tools include a tool called the GIMP. The GNU Manipulation Program. This is a free program and I use it for the heavy lifting, because it's kind of complex. It's not real easy to do everything. Now I started a while ago using PowerPoint to create a book covers, because it was easy and I'm using PowerPoint all the time.
I used PowerPoint to create the slide that you're looking at. Now the problem is that it costs so you've actually have to license PowerPoint. Now I've come up with a third option that I'm beginning to push called Canva. This is an online book cover creator so all you need is a browser, it's easy to use and it's free. Now free you know some of their templates and so on they start trying to tempt you with the neater templates and the neater images to charge you, but if you discipline yourself you can actually keep things free on Canva. And one of the ways that I keep things free is by using Pixabay for free images.
So as we go through creating a book cover, which we're about to head into now I'm going to show you the use of Canva and Pixabay to create a book cover.
Now we're going to begin with a simple way using Canva themes and in the next section, we're going to use a blank white page and begin from scratch and build everything up so you will understand Canva book cover design in detail.
Self-publishing options
In this lecture, I'm going to discuss your self-publishing options and how they've changed over the years to produce a traditional manuscript formatting method and a new method using the Kindle Create Word plugin. So in this series of videos, I'll discuss how to format a manuscript for Amazon publication both with and without Kindle Create. Remember, that Mac users must utilize the traditional formatting techniques while Windows users can utilize Kindle Create or both. Kindle Create is only available on Windows PCs.
I'll be using Microsoft Word to format a sample document.
Let's begin with formatting and publishing options which have changed of late.
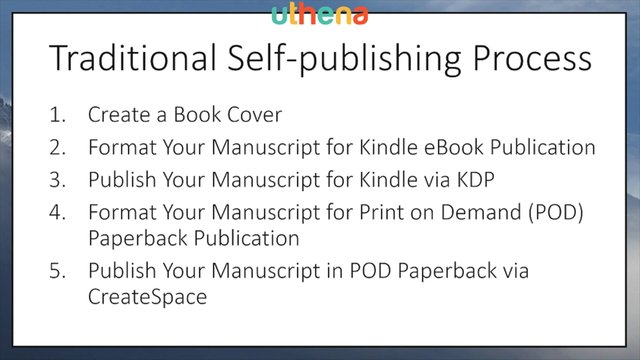
The traditional self-publishing process that I used to teach went something like this. First, you create your book cover, then you format your manuscript for Kindle eBook publication. You publish your manuscript for Kindle via KDP, the Kindle direct publishing web-based interface. Then you format your manuscript for print-on-demand, POD paperback publication. Then you publish your manuscript on POD paperback via the create space web-based interface.
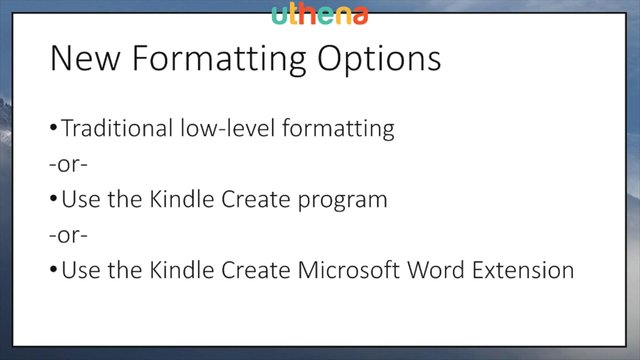
Now as I say, things have changed over the years. First, there are new formatting options. There's the old traditional low level formatting option which I like, because you have complete control over everything and understand what you're doing. Or you can now use the Kindle Create program which is a standalone program that will format your manuscript for publication or use the Kindle Create Microsoft Word extension if you prefer to work within Word.
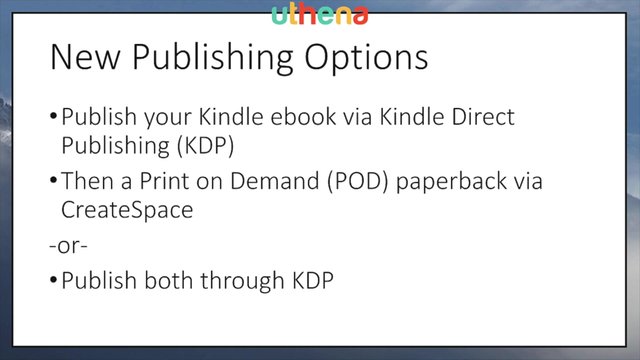
There are also new publishing options. It used to be that I would publish my Kindle eBook via the Kindle Direct publishing web-based interface and then in a later step, I would publish my print-on-demand paperback via CreateSpace. Now you have the option of doing both through KDP.
In this lesson, I'll teach you how to format your manuscript using the traditional low level methods. This way you'll understand what's being done and you can modify higher level methods if you don't like the results they're producing.
Then I'll teach you how to use the Kindle Create Microsoft Word plugin to format your manuscript for publication. In a later video, I'll be teaching how to publish a Kindle eBook and a print-on-demand paperback both via KDP.
So you can see that there is a new self-publishing process.
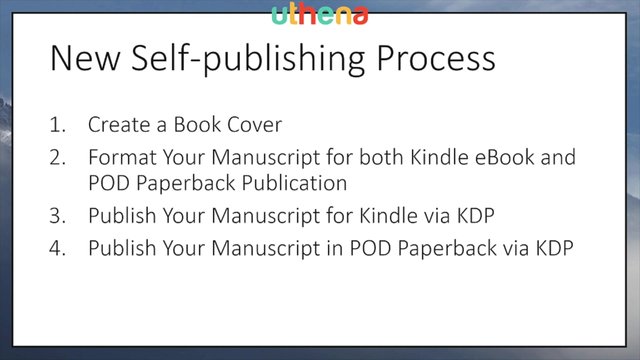
Create a book cover yes, format your manuscript for both Kindle eBook and POD paperback publication using Microsoft Word, publish your manuscript for Kindle via KDP and then publish your manuscript in POD paperback also via KDP.
This is the process that I'll be showing you.
Next, traditional document formatting.
Let's begin with traditional formatting.
This is a nine step process.
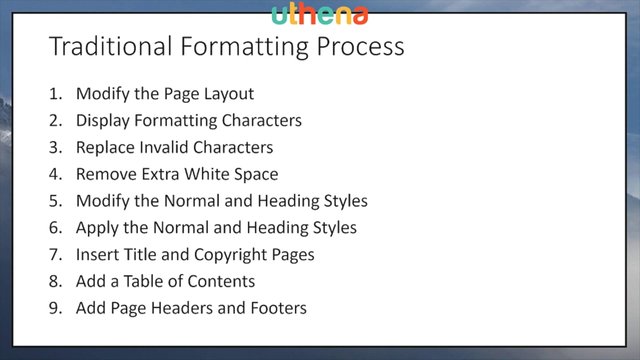
You begin by modifying your page layout. In the past I would modify a page layout for Kindle publishing and then later modify the layout for POD publishing. Now I realize that I can do them both at the same time and have one manuscript. Display formatting characters and then replace the invalid characters and remove extra whitespace then we'll modify the normal and heading styles and apply those styles to our document.
We'll insert a title and copyright page and add a table of contents if we'd like. That's optional. And finally we'll add page headers and footers to be displayed by our print-on-demand paperback and ignored by the Kindle eBook.
So here we go with a demonstration of traditional formatting. I'm going to bring up a copy of Word and then within it I'm going to open a sample document. This document I trimmed down to only have a few chapters so that we can go through it quickly. I'll go to ‘Open’ and ‘Sample Document’.
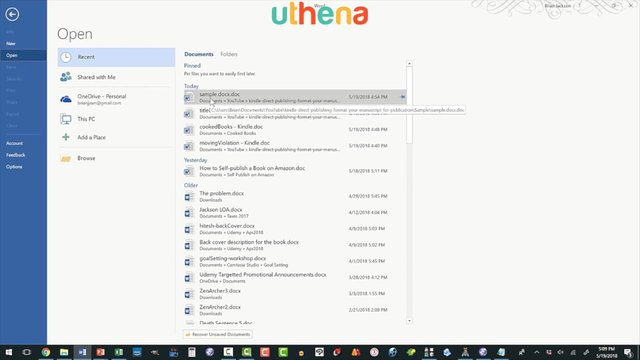
Now immediately I'm going to save this document as ‘sampleTraditional’ and we'll go to the docx style, the latest format.
Step one is to format our page dimensions we do this through the layout menu item, choose layout and choose size.
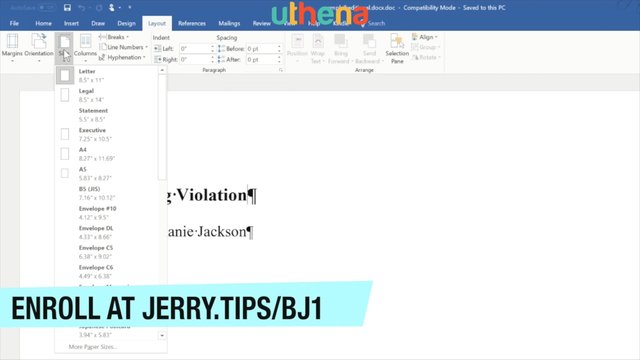
Now size doesn't matter to Kindle publishing, because it's going to make it the size of whatever screen is reading it. This is primarily for setting print-on-demand paperback dimensions and you want to set it to the dimensions you want to use. The most common and cheapest size is a width of six inches by a height of nine inches.
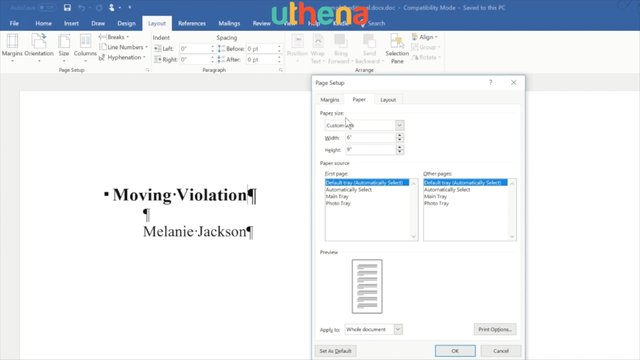
So we'll set that as our paper size, next we'll come down to margins. Now you can get fancy and set a three quarter inch margin for the inside so that you get extra room where the book bends and then half inch all around, but what I like to do is just keep it simple and set a three quarter inch margin all the way around.
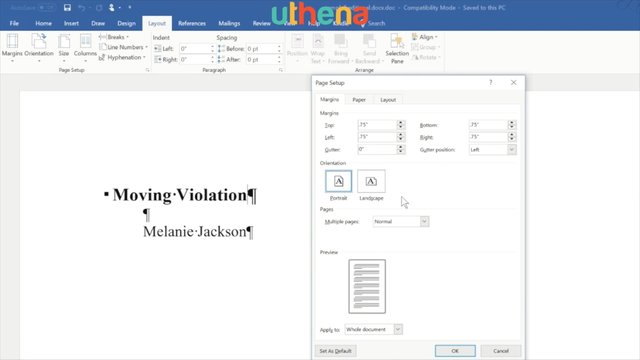
There we go. We've just set our page layout. Let's say ‘OK’.
Now that our page is laid out for the print-on-demand paper size that we want the next thing that we want to do is to go to ‘Home’ and turn on ‘Display of special characters’.
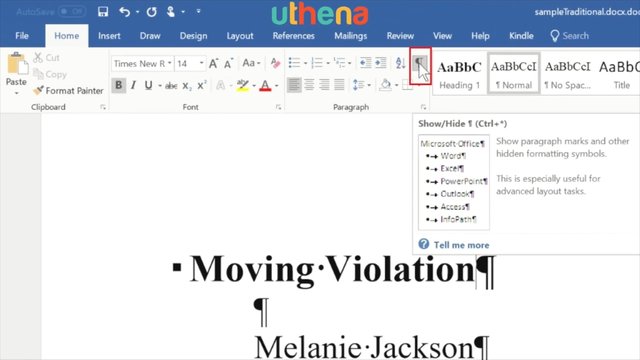
Now it turns out we already have this turned on if I click on it they go away. Did you notice those little Ps? What this will do is it will show us the white characters that normally don't show up in a document. At first this seems a little strange, but once you get used to it, you can actually end up writing a document and typing and not even realize that these special characters are here.
Let me scroll down a little further and show you what they look like in a document. Here's some significant text and you can see that the little backward Ps represent a paragraph break and then you have dots for spaces.
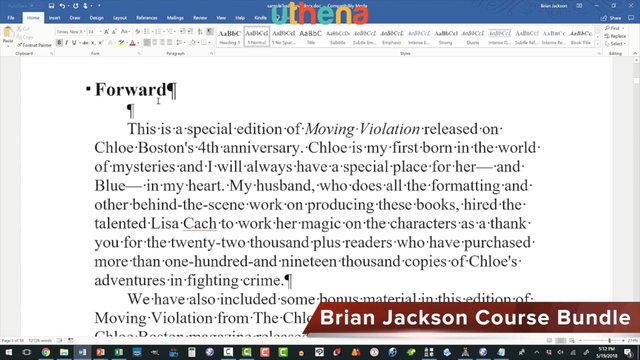
And one of the things I can see now is that I have a lot of excess space at the end of this chapter. I would want to remove that, but I'll do that in a later step. First, we'll go to the top and we'll remove invalid characters. Now the invalid characters that you can have in a document include the Tab character and extra spaces and I also like to translate - - to an Em Dash, because my wife uses M-'s a lot and sometimes Word doesn't properly translate - - - to Em Dash while she's typing.
Let me show you how to do this. We go to the ‘Home’ menu item and then I come over to ‘Replace’.
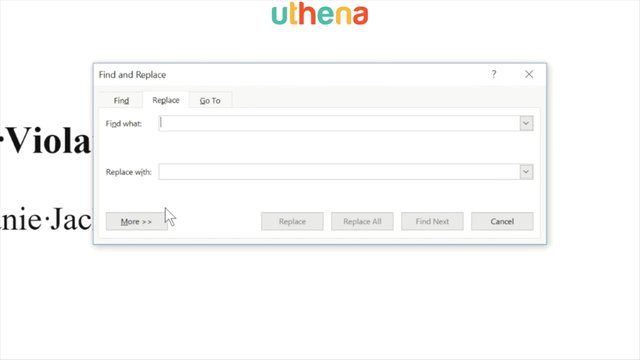
Now the first thing that I want to replace is a Tab. Now how do I get a Tab character? Well you go down to ‘More’ and you say ‘Special’ and here we can select a ‘Tab Character’.
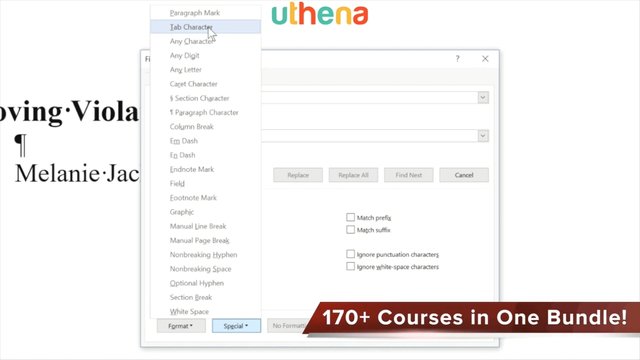
Notice that caret t is the way to type a tab character.
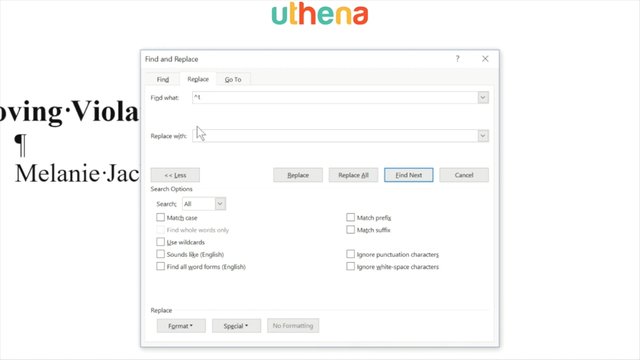
What we want to replace it with is nothing so let's ‘Replace All’. And you can see that there were zero replacements.
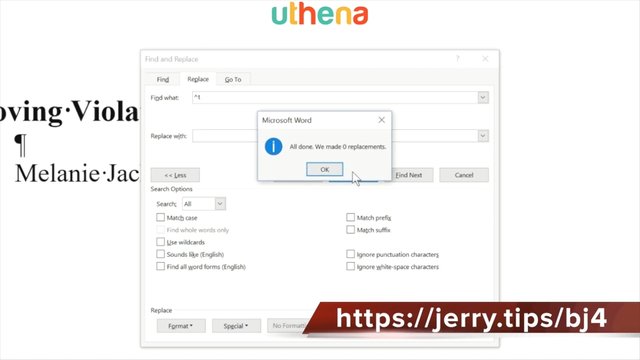
The next replacement that I want to do is I want to take - - and I want to replace that with an Em Dash. Again to get the Em Dash we open up ‘More’ ‘Less’ here and we go to ‘Special’ and we say give me an Em Dash and you can see that caret + is what I want to replace.
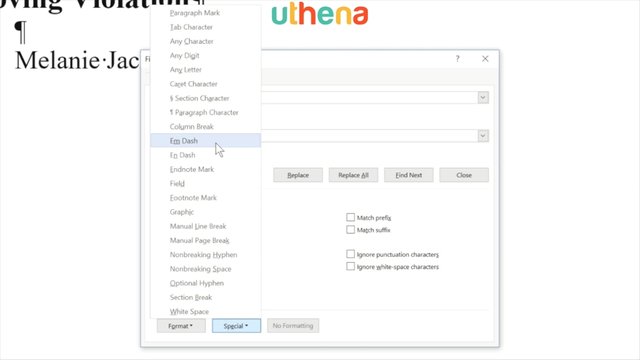
Unfortunately I need it down here so I can say caret + and what I wanted to replace was - -.
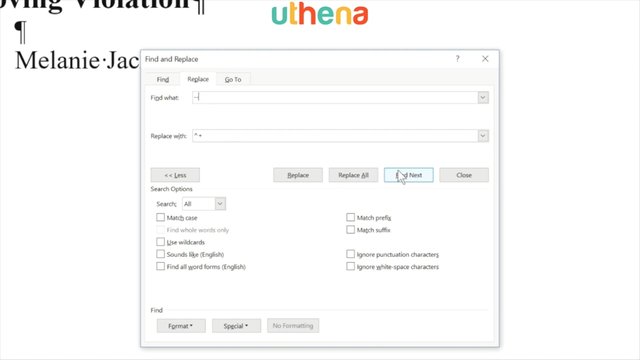
So let's do - - into one of those and there I replaced one of them.
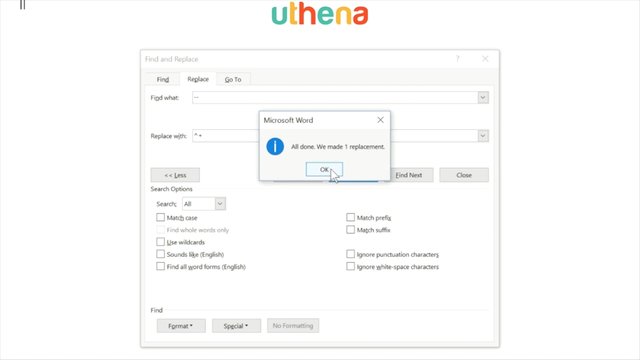
So I found one in my document. The next thing that you might want to replace has to do with spaces. For instance, if you type five spaces to start the indent of a paragraph we're going to do that a little bit differently.
GET MORE OF THIS COURSE
Would you like to continue learning about the Amazon Kindle eBook and Book Self Publishing Course for Beginners in 2019? If you are interested will you please buy the complete course, Amazon Kindle eBook and Book Self Publishing Course for Beginners in 2019, on the Uthena Education Platform..
You can also get the first two hours and seventeen minutes of the course completely for free on YouTube.
Thank you for reading the blog post or watching the course on YouTube.
I love you.
You’re awesome.
Thank you very much for checking out the Best Amazon Kindle eBook and Book Self Publishing Course for Beginners in 2019 and I hope to see you again in the next blog post or video.
You may like his post: Books on Amazon and Audible Written and Narrated by Jerry Banfield
Love,
Jerry Banfield.
Posted from my blog with SteemPress : https://jerrybanfield.com/best-amazon-kindle-self-publishing-course-beginners-2019/
Are you still upvotung people?
Posted using Partiko Android
Congratulations @jerrybanfield! You have completed the following achievement on the Steem blockchain and have been rewarded with new badge(s) :
You can view your badges on your Steem Board and compare to others on the Steem Ranking
If you no longer want to receive notifications, reply to this comment with the word
STOPVote for @Steemitboard as a witness to get one more award and increased upvotes!
Jerry it seems Steemit is a town hit by a nuclear bomb and robots(Bots) and your the mayor building it back up from the ashes!