How to watermark your photos the rightway
How to watermark your photos with Adobe Lightroom
Hello Steemians here I will let a little short tutorial for all those steemians that will love to watermark thieir photos.
I be using for this tutorial Adobe Lightroom because I have been using it for more than a decade on pc then also in mobile in both of my devices smarphone and Ipad pro.
The good thing about this software is a freemium app with paid option if you planing to use the extras. is not so big in size is very well maintained and its has a very nice clean UI (user interface).
> Well lest go to the tutorial now shall we.
First if you don't have the app installed. please download the app, is avaliable for the OS (opertaing system) you use on pc or mobile in the appstore or playstore. once downloaded open it and it will open in the main menu where you will need to add some images to edit, in this case to watermark and protect your photo collections.
Here is how it looks in the main window in my case i already have some photos i have been working on lately.
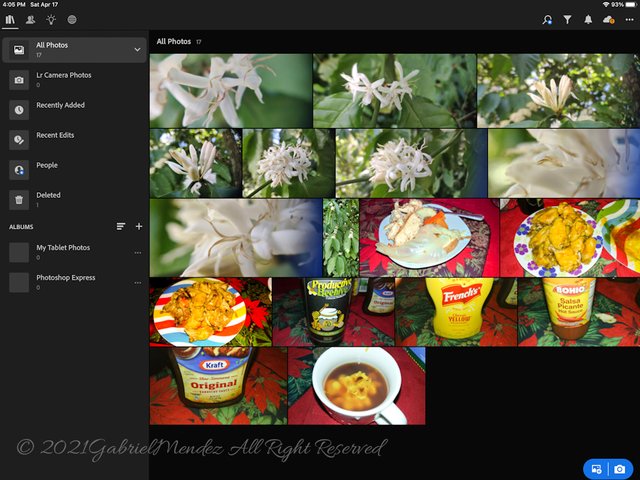
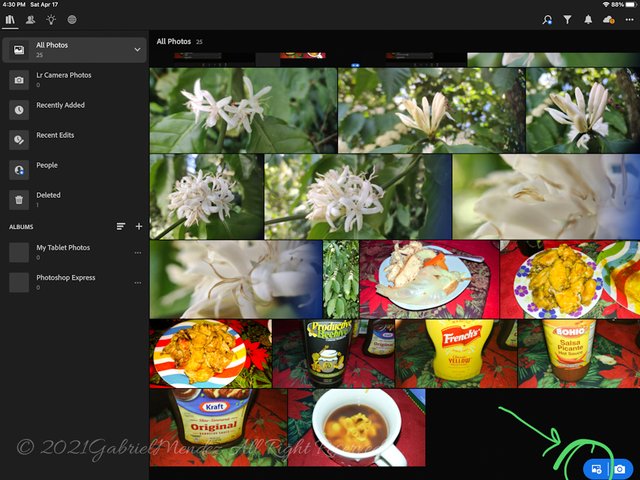
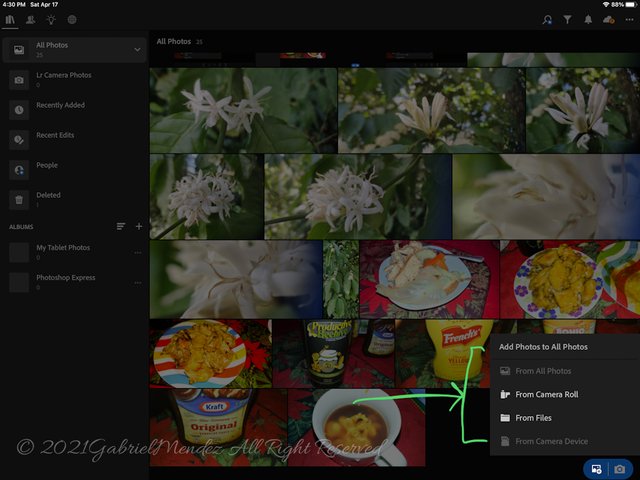
Then on the lower corner to the right theres a little icone with and image and a little cross, press it to add some images you can uploan single or in bulk. then you will see a menu from where you can search your photos like here in the illustration bellow.
then you will see a pop up menu where you can chose the directotry of your images, like in the illustration bellow.
once your images are in Adobe Lightroom should look similar to this.

Then select the images you want to add the watermark
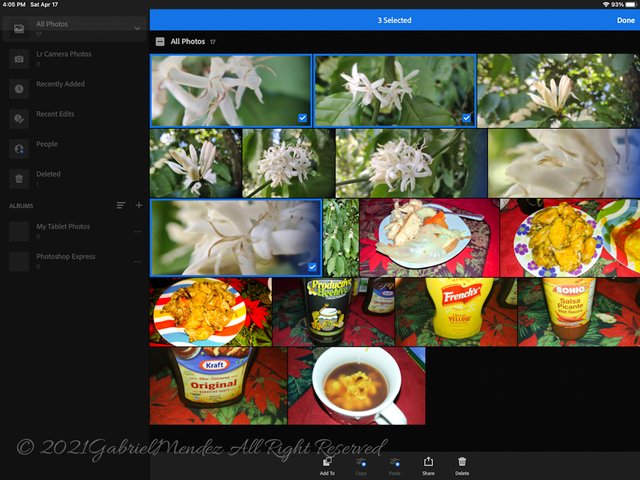
once theres just select the images you want to watermark like in the ilustration bellow.
once you have selected your photos just go and press the little share icon.
![]()
then you will see another pop menu the export menu like in the illustration bellow.
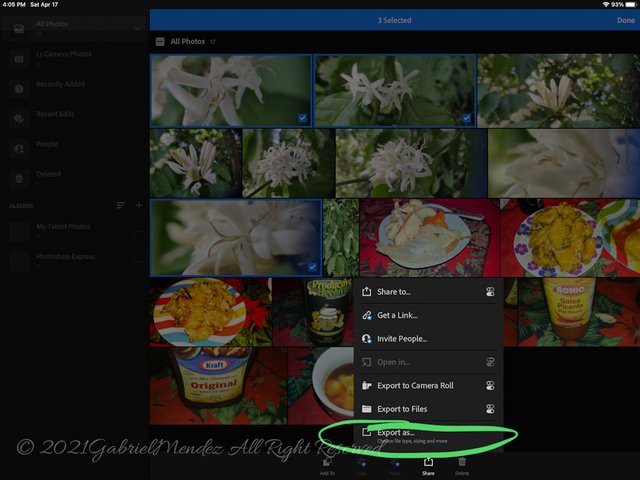
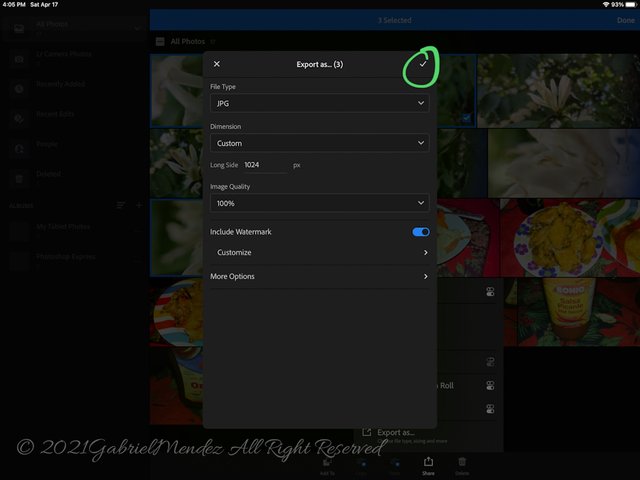
select the export option and from theres another pop up menu will open and then there you will see the option to turn on the watermark option and another option to customize your watermark.
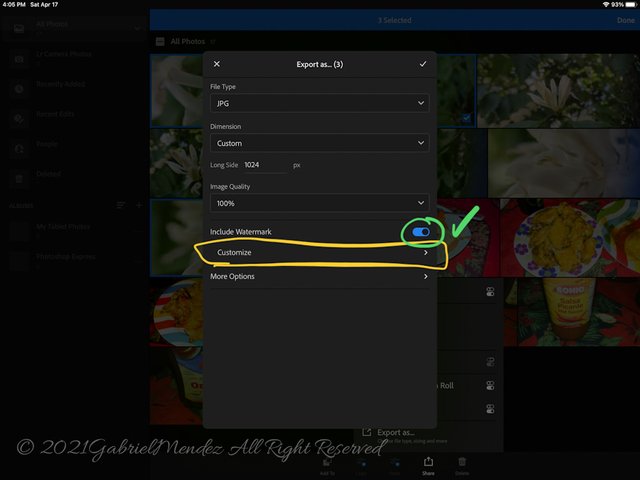
now here you will play with all the option you have to customize your logo before you export your photos.
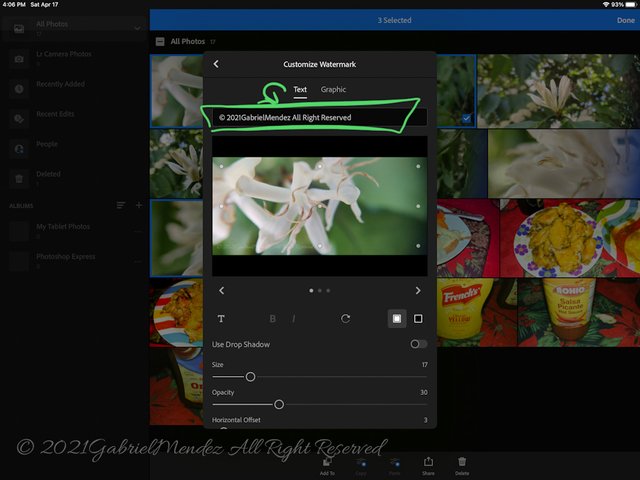
Now i believe the text option is selected by default if not then select the text section unless you prefer an image like a logo for example.
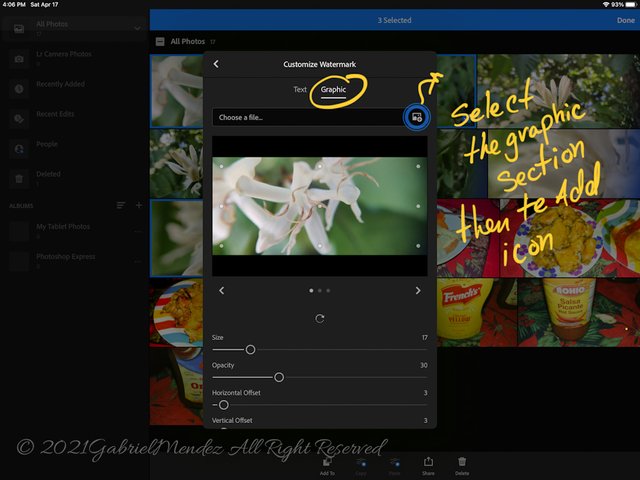
image logo watermark section illustration.
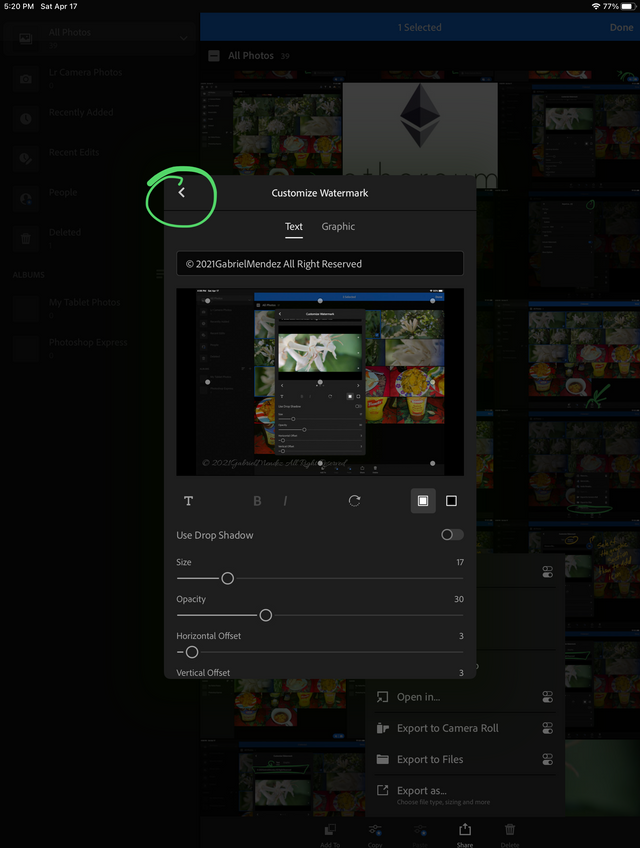
Ok once you select the text option there in the text box you can write the words you want as a watermark then you can see many options here to play with but you play with that later jaja for now lets concentrate on the basics and more importan.
Press the T if you want to change the font type then in the scroll bars section you have the option to change size and opacity you will see two little squares one white and the other black for bright images select black and for dark images use white. I believe you can use other color but the most used are B/W.
Then if you deside to go for an image the setting are practically the same. Now let say you already place the watermark and you are ready to go.
Ok lets say your ready to export the photo with the watermark. the just press the little arrow in the left upper side to go back and then press the little green check mark.
Then once you press the little check mark... yes jaja you guess right another pop up menu.
And here the last pop up menu gosh i thout there was no ending for the pop up menus jaja just kiding.
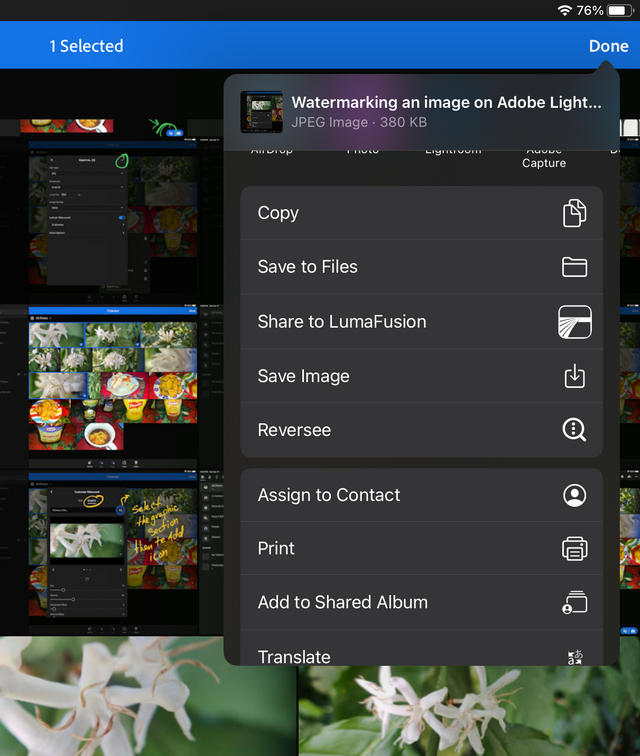
Well once you select the directory to export and save your watermarked photos you will see a few numbers % animation until is 100% done and thats it now you have some great watermarked photos.
later on i will record a video about all this for the ones that prefer a video over reading jeje. so dont forget to follow me my Steemians friends that way you wont miss any of my awesome contents.
and if you have any question, request, ideas just let me know in the comments bellow. well my friends i hope you enjoy this tutorial and until the next one Steemians to one Steemians😃