[React Native] 인스타그램 UI 만들기 #3

리액트 네이티브(React Native)로 인스타그램 UI를 구현하는 세 번째 강의입니다. 이번에는 홈 화면에 스토리 헤더를 구현합니다. 이 포스팅은 아래 무료 동영상 강의를 참고하여 작성하였습니다.
인스타그램 UI 코딩 동영상 강의는 총 5편입니다. 이제 앞으로 2편 남았네요. 이번 강의 내용은 저번보다 조금 짧습니다. ㅎ
스토리 헤더 만들기
./Components/AppTabNavigator/HomeTab.js 파일을 수정합니다. 그리고 피드 목록 바로 위에 스토리 헤더 영역을 구현합니다. 먼저 스토리 헤더 영역 위치를 잡기 위해 기본 컴포넌트를 사용하여 구현합니다. 그리고 앱을 실행하여 확인해보겠습니다.
export default class HomeTab extends Component {
    render() {
        return (
            <Container style={style.container}>
                <Content>

                    {/* 여기부터 스토리 헤더 시작 */}
                    <View style={{ height: 100 }}>
                        <View style={{ flex: 1, flexDirection: 'row', justifyContent: 'space-between', alignItems: 'center', paddingHorizontal: 7 }}>
                            <Text style={{ fontWeight: 'bold' }}>Stories</Text>

                            <View style={{flexDirection:'row','alignItems':'center'}}>
                                <Icon name="md-play" style={{fontSize:14}}></Icon>
                                <Text style={{fontWeight:'bold'}}> Watch All</Text>
                            </View>
                        </View>
                    </View>
                    {/* 여기까지 스토리 헤더 끝 */}

                    {
                        this.state.feeds.map(feed => (
                          <CardComponent data={ feed } key={ feed.url }/>
                        ))
                    }
                </Content>
            </Container>
        );
    }
}

// ... 일부 코드 생략 ...
스토리 헤더의 heigh는 100입니다. 그리고 텍스트 "Stories"와 "Watch All"을 양쪽 정렬(
{ justifyContent: 'space-between }) 하였습니다.
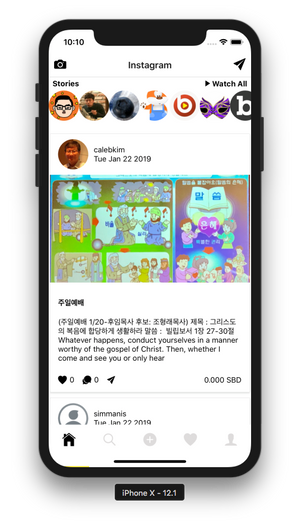
여기까지 작업한 화면입니다. 피드 상단에 스토리 헤더가 생겼습니다.

스토리 헤더에 스크롤 뷰 만들기
HomeTab에 ScrollView와 Thumbnail 를 추가로 import 합니다.
import { View, Text, StyleSheet, ScrollView } from 'react-native';
import { Container, Content, Icon, Thumbnail } from 'native-base';
그리고 앞에서 작성한 View 바로 아래에 ScrollView 를 추가합니다. 그리고 ScrollView 안에 Thumbnail 을 추가합니다.
{/* 여기부터 스토리 헤더 시작 */}
<View style={{ height: 100 }}>
  <View style={{ flex: 1, flexDirection: 'row', justifyContent: 'space-between', alignItems: 'center', paddingHorizontal: 7 }}>
    <Text style={{ fontWeight: 'bold' }}>Stories</Text>

    <View style={{ flexDirection: 'row', 'alignItems': 'center' }}>
      <Icon name="md-play" style={{ fontSize: 14 }}></Icon>
      <Text style={{ fontWeight: 'bold' }}> Watch All</Text>
    </View>
  </View>

  <View style={{ flex: 3 }}>
    <ScrollView
horizontal={true}>
      <Thumbnail source={{uri: 'https://steemitimages.com/u/newbijohn/avatar' }} />
      <Thumbnail source={{uri: 'https://steemitimages.com/u/jacobyu/avatar' }} />
      <Thumbnail source={{uri: 'https://steemitimages.com/u/blockchainstudio/avatar' }} />
      <Thumbnail source={{uri: 'https://steemitimages.com/u/gomdory/avatar' }} />
      <Thumbnail source={{uri: 'https://steemitimages.com/u/bbooaae/avatar' }} />
      <Thumbnail source={{uri: 'https://steemitimages.com/u/codingman/avatar' }} />
      <Thumbnail source={{uri: 'https://steemitimages.com/u/bukio/avatar' }} />
    </ScrollView>
  </View>
</View>
{/* 여기까지 스토리 헤더 끝 */}
Thumbnail 에는 제 팔로우 친구들의 사진을 임의로 가져와서 출력하였습니다.
여기까지 작업한 화면입니다. 피드 상단에 팔로우 친구들이 보입니다.

스토리 헤더 스타일링 하기
ScrollView와 Thumbnail에 스타일을 지정합니다.
<ScrollView
  horizontal={true}
  showsHorizontalScrollIndicator={false}
  contentContainerStyle={{
  alignItems: 'center',
  paddingStart: 5,
  paddingEnd: 5
}}>
  <Thumbnail
    style={{ marginHorizontal: 5, borderColor: 'pink', borderWidth: 2 }}
    source={{uri: 'https://steemitimages.com/u/newbijohn/avatar' }} />

{/* ... 일부 코드 생략 ... */}
스팀잇에서 팔로잉 친구 가져와서 출력하기
마지막으로 스팀잇 팔로우 친구를 가져와서 출력하는 기능을 구현하겠습니다. HomeTab 클래스에 팔로잉 친구를 가져오는 함수를 구현합니다.
export default class HomeTab extends Component {

    // 팔로잉 친구 가져오기
    fetchFollowing() {
        const data = {
            id: 2,
            jsonrpc: "2.0",
            method: "call",
            params: [
              "follow_api",
              "get_following",
              ["anpigon", "", "blog", 10]
            ]
        };
        return fetch('https://api.steemit.com',
        {
            method: 'POST',
            body: JSON.stringify(data)
        })
        .then(res => res.json())
        .then(res => res.result.map(({following}) => following))
    }
그다음 state에 followings 변수를 선언합니다. followings에는 팔로잉 친구 목록을 저장할 것입니다.
export default class HomeTab extends Component {

  state = {
    feeds: [],
    followings: []
  }

// ... 일부 코드 생략 ...
그리고 componentWillMount() 함수를 수정합니다. 이 함수는 컴포넌트가 마운트 되기 전에 실행됩니다. 여기서 스팀잇 서버에서 팔로잉 친구 목록을 가져옵니다.
export default class HomeTab extends Component {

  componentWillMount() {
    // 피드 가져오기
    this.fetchFeeds().then(feeds => {
      this.setState({
        feeds
      })
    });

    // 팔로잉 친구 가져오기
    this.fetchFollowing().then(followings => {
      this.setState({
        followings
      })
    });
  }

// ... 일부 코드 생략 ...
마지막으로 스크롤뷰를 다음과 같이 수정합니다. 팔로잉 친구들 사진을 출력합니다.
<ScrollView
  horizontal={true}
  showsHorizontalScrollIndicator={false}
  contentContainerStyle={{
    alignItems: 'center',
    paddingStart: 5,
    paddingEnd: 5
}}>
  {
    this.state.followings.map(following => <Thumbnail
      style={{ marginHorizontal: 5, borderColor: 'pink', borderWidth: 2 }}
      source={{uri: `https://steemitimages.com/u/${following}/avatar` }} />)
  }
</ScrollView>
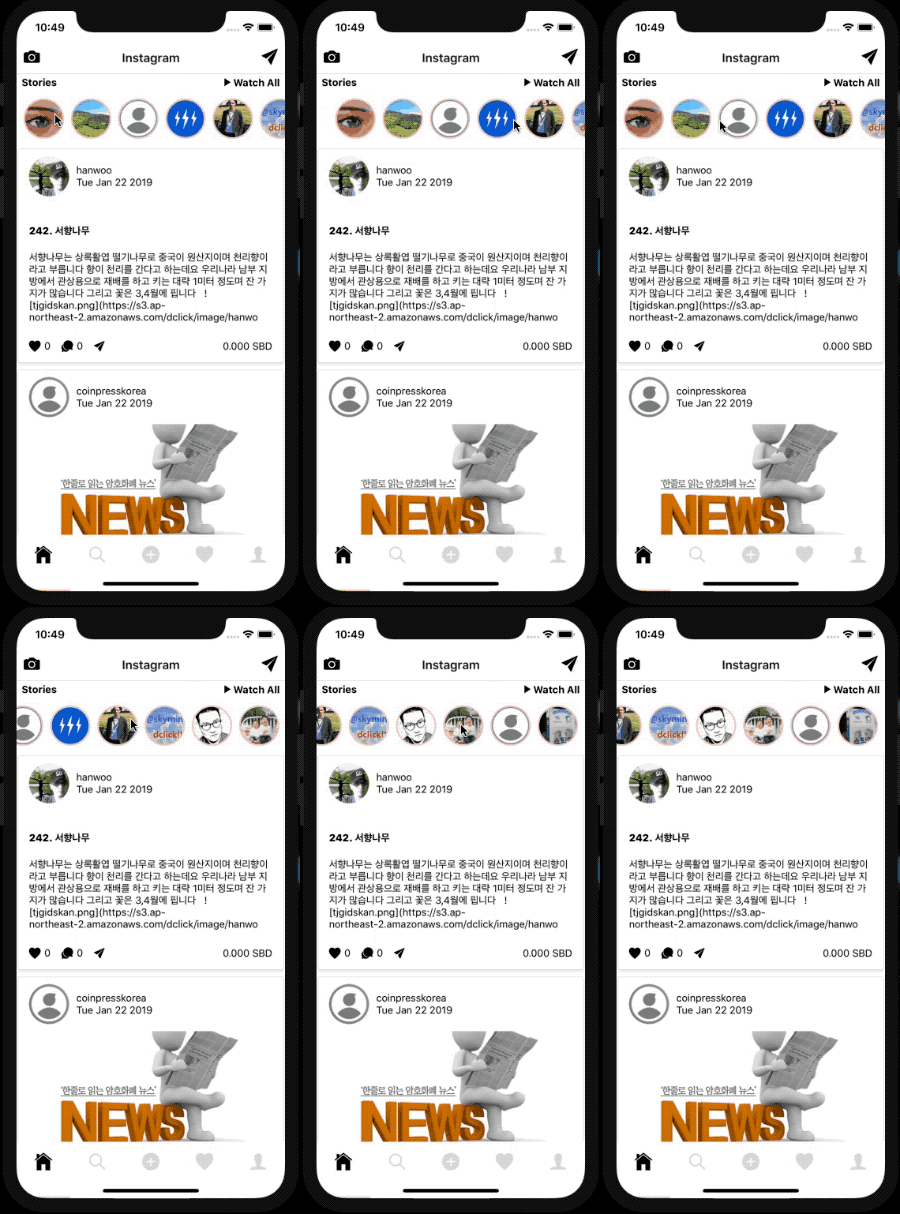
여기까지 작업한 화면입니다. 피드 상단에 팔로우 친구들이 보입니다. 그리고 좌우로 스크롤 가능합니다.

작업한 코드는 모두 깃허브에 업로드되어 있습니다.
https://github.com/anpigon/rn_instagram_clone
여기까지 읽어주셔서 감사합니다.
시리즈
- [React Native] 인스타그램 UI 만들기 #1
- [React Native] 인스타그램 UI 만들기 #2
- [React Native] 인스타그램 UI 만들기 #3
- [React Native] 인스타그램 UI 만들기 #4
- [React Native] 인스타그램 UI 만들기 #5
Sponsored ( Powered by dclick )
눈이 많이 오던 날
올해는 눈이 많이 안 오네요. 겨울에는 눈이 펑펑 와야 겨울 같은데... 오라는 눈은 안 오고...
짱짱맨 호출에 응답하여 보팅하였습니다.
뭔지 몰라 읽지 못했네요! ㅎㅎ 좋은 오후 되세요^^
인스타그램앱을 따라 만드는 코딩 글입니다. 글 내용을 읽지않아도 사진만 보면 제가 뭘 만드는지 알 수 있을 꺼에요.
Hi @anpigon!
Your post was upvoted by @steem-ua, new Steem dApp, using UserAuthority for algorithmic post curation!
Your UA account score is currently 2.859 which ranks you at #11995 across all Steem accounts.
Your rank has improved 31 places in the last three days (old rank 12026).
In our last Algorithmic Curation Round, consisting of 214 contributions, your post is ranked at #119.
Evaluation of your UA score:
Feel free to join our @steem-ua Discord server
Congratulations @anpigon! You have completed the following achievement on the Steem blockchain and have been rewarded with new badge(s) :
Click here to view your Board
If you no longer want to receive notifications, reply to this comment with the word
STOPTo support your work, I also upvoted your post!