Basic Arduino Mega tutorial on How to Control LCD Module
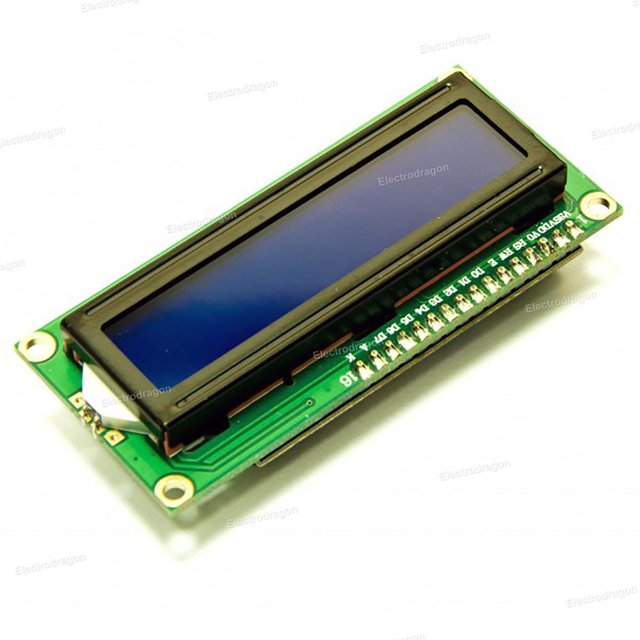
A Liquid Crystal Displace is a flat panel display that uses light modulating properties of liquid crystals.
To know more about arduino : Click here
What Will I Learn?
- You will learn on how to Control LCD module
- You will learn on how to use Arduino Mega
- You will learn on how to use LiquidCrystal Library
Requirements
- LCD Module
- Arduino Mega
- Breadboard
- Jumping wires
- 10k ohm Potentiometer
Difficulty
- Basic
Tutorial Contents
Step 1: Physical Connection
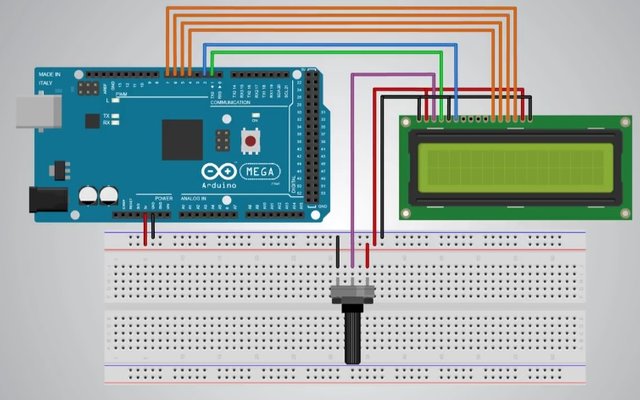
LCD Module Pin outs
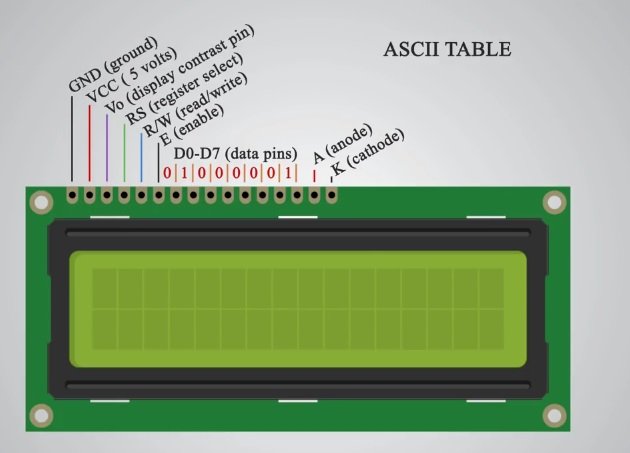
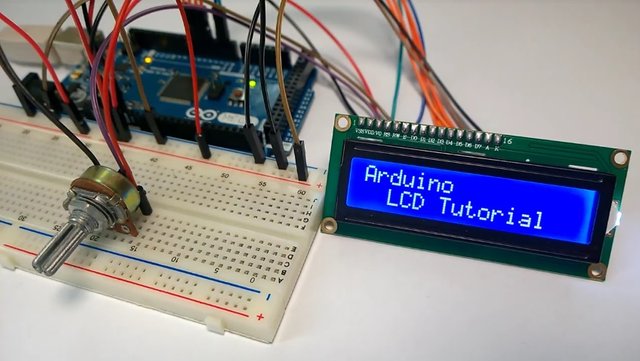
Connections :
- LCD pins 1,5, and 16 to the Ground
- LCD pins 2 and 15 to the VCC
- LCD pins 4,6,11,12,13 and 14 to digital pins of Arduino
- The middle pin of the Potentiometer to the LCD pin 3, others will be on VCC and Ground.
Step 2: Connection to IDE
Where to find the LiquidCrystal Library ?
go to Sketch > Include Library > then, find the LiquidCrystal Library.
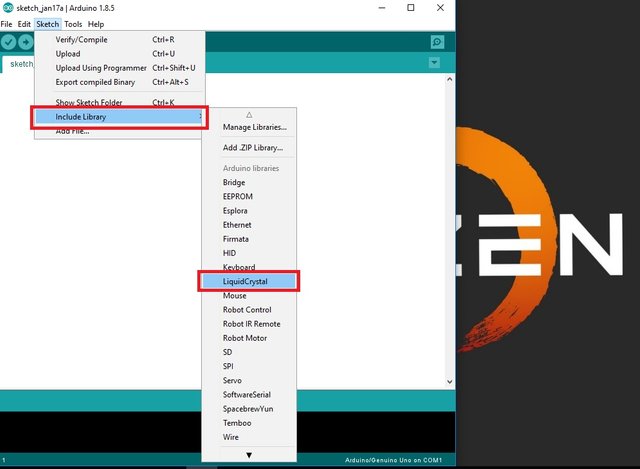
and now, the library is on the sketch after clicking.

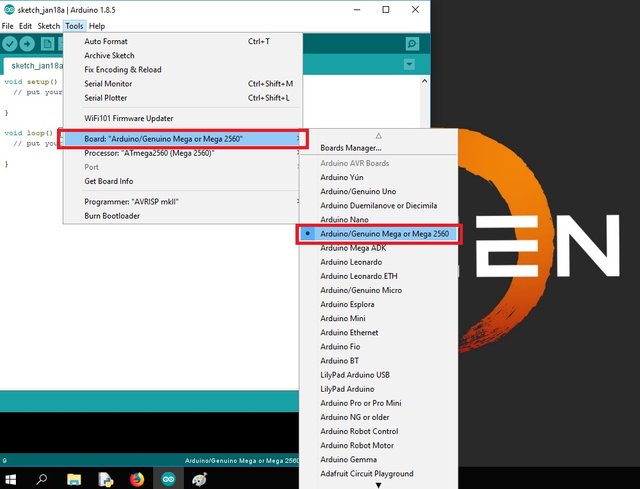
After that, you must select the board :
Open your IDE , go to Tools > Board > then choose Arduino/Genuino Mega or Mega 2560.
Step 3: Code
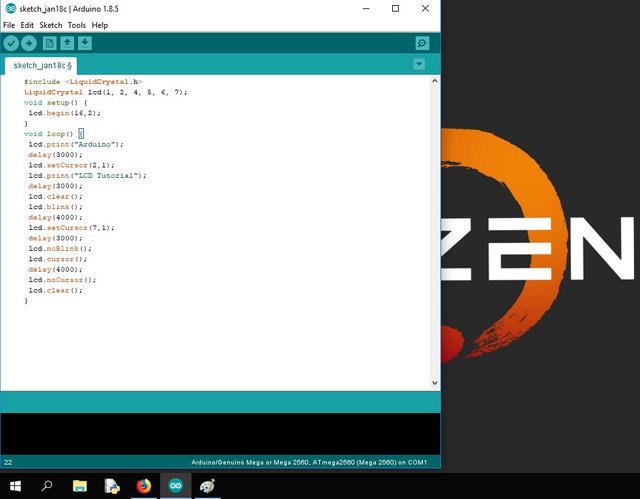
Code Block
    /*
    * Basic Arduino Mega Tutorial on how to Control LCD Module
   * Created by Loyd Stephen Jayme
    * https://utopian.io/@loydjayme25

    */
    #include <LiquidCrystal.h> // includes the LiquidCrystal Library
    LiquidCrystal lcd(1, 2, 4, 5, 6, 7); // Creates an LC object. Parameters: (rs, enable, d4, d5, d6, d7)
    void setup() {
     lcd.begin(16,2); // Initializes the interface to the LCD screen, and specifies the dimensions (width and height) of the display }
    }
    void loop() {
     lcd.print("Arduino"); // Prints "Arduino" on the LCD
     delay(3000); // 3 seconds delay
     lcd.setCursor(2,1); // Sets the location at which subsequent text written to the LCD will be displayed
     lcd.print("LCD Tutorial");
     delay(3000);
     lcd.clear(); // Clears the display
     lcd.blink(); //Displays the blinking LCD cursor
     delay(4000);
     lcd.setCursor(7,1);
     delay(3000);
     lcd.noBlink(); // Turns off the blinking LCD cursor
     lcd.cursor(); // Displays an underscore (line) at the position to which the next character will be written
     delay(4000);
     lcd.noCursor(); // Hides the LCD cursor
     lcd.clear(); // Clears the LCD screen
    }
Step 4: Compile and Run
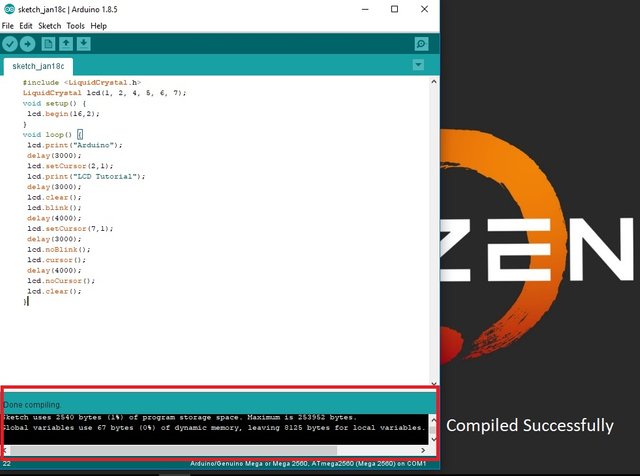
Output
Curriculum
You can also visit my other Tutorial/(s)
FAILURE is not a hindrance to success, yet FAILURE is a SUCCESS because you learn something from it.
Yours truly,
@loydjayme25
#steemit-engineering #steemph #cebu #philippines
Posted on Utopian.io - Rewarding Open Source Contributors
wow amazing
Your contribution cannot be approved because it does not follow the Utopian Rules, and is considered as plagiarism. Plagiarism is not allowed on Utopian, and posts that engage in plagiarism will be flagged and hidden forever.
source
You can contact us on Discord.
[utopian-moderator]