Assalamu'alaikum Everyone.
I am @kalidsyfulla , from #Bangladesh

My Dear friends, how are you all? Hope everyone is well by the grace of Allah Taala. Alhamdulillah I am fine too. Dear friends,Today I came to participate in the The 23rd season of Steemians Learning Club,SLC-Home Repair Club |S23W2 ,
@imranhassan ,
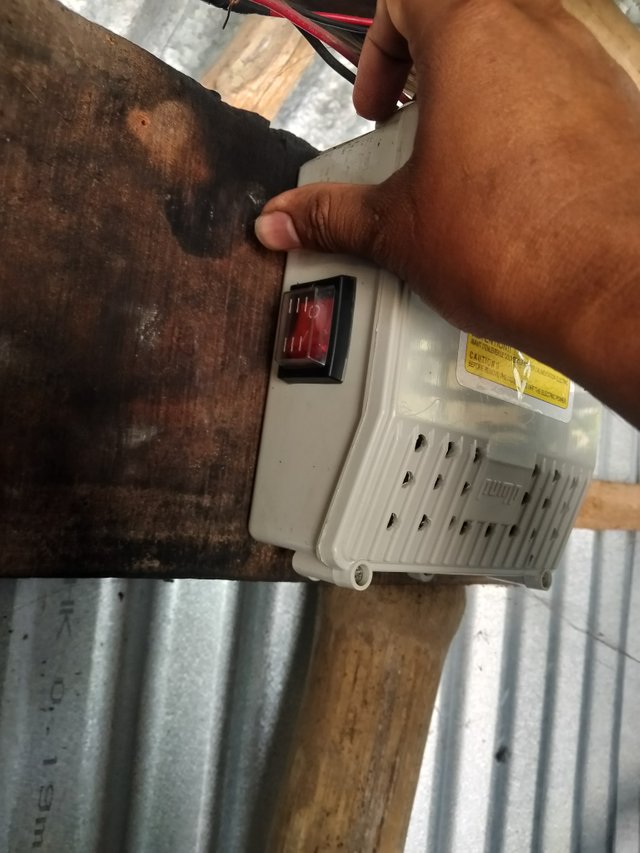
@rmm31 Sir is in charge of SLC Home Repair Club.They are both advising us on this.As suggested, Tried to participate.Today as my participation I repaired the control box of a submersible 1.5 HP motor.I will explain step by step how I fixed it.The submersible motor is my own.I installed this motor a year ago.A few days ago the control box completely burned out. Later I bought a new control box and installed it.Sometimes capacitors burn out.
Dear friends, now I will show you how to start the motor with a capacitor out removing the controller box of the submersible motor.Another reason to remove the control box is that the motor automatically shuts off after an hour or so of running.The voltage controller is not able to handle the load, it is going up.I consulted with a few people.They said that the voltage controller should be removed.My capacitor burned out a few days ago.I installed a new capacitor.Today I will start the motor directly through the capacitor. I will show you how to start it.And if any of you have a problem with your motor controller box, you can fix it like this:
| Necessary Materials👇 |
|---|
| 🟤Screwdriver |
| 🟤 Black tape |
| 🟤 Tester |
| 🟤 Capacitor |
STEP 1
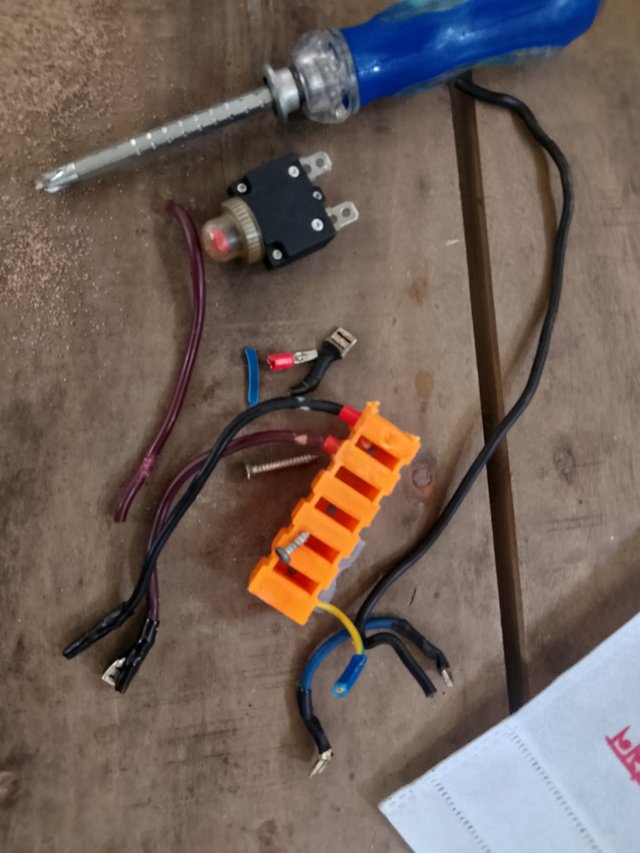
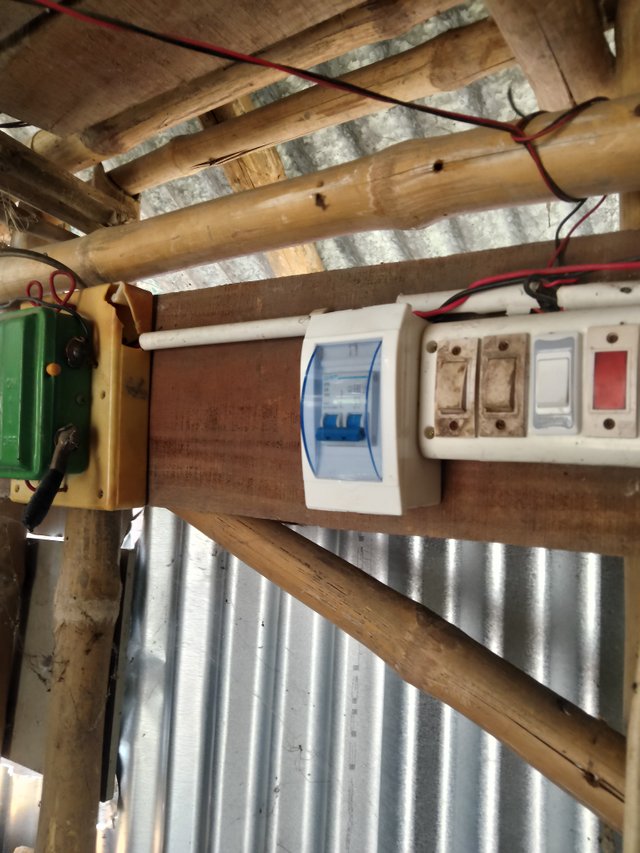
My motor keeps turning off, That's why I came here to start the motor with a direct capacitor instead of the controller box.Turn off the main power switch before opening the control box.Then open the pages of the control box with a screwdriver.And remove the switch voltage controller and its wire joining part inside.
STEP 2
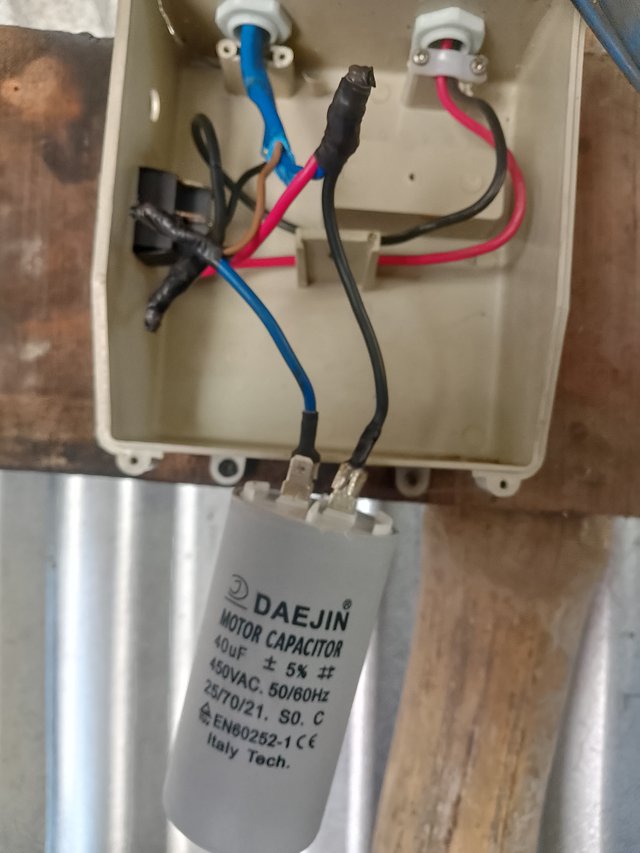
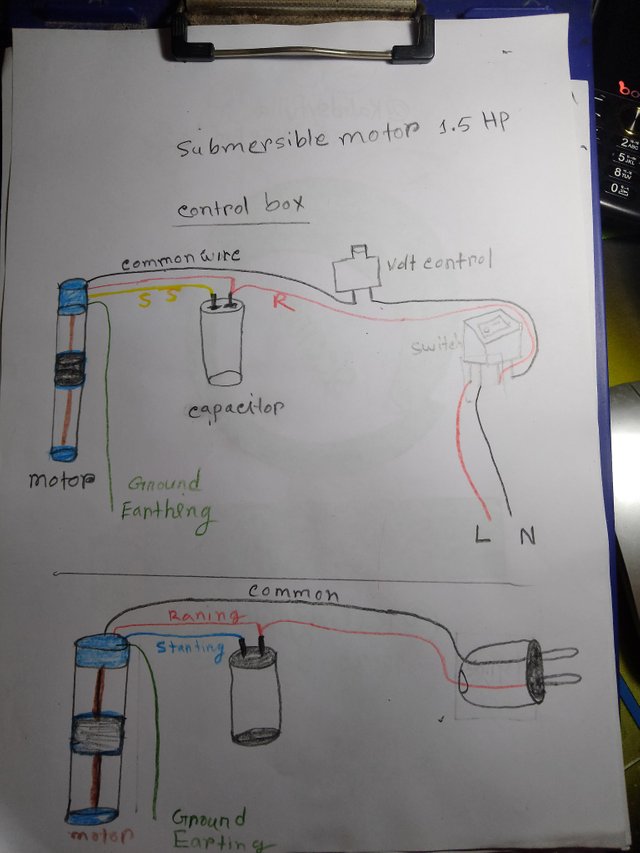
The line to the motor control box was provided through a breaker.The line was from the main switch to the breaker, then from the breaker to the motor control box.Submersible motors have four wires. One is starting, one is running, one is common, and one is ground earth.Bring the line and common wires from the breaker inside the control box. First connect the red wire of the line to the running wire of the motor. And another short wire is connected to it. The wire that will connect to the capacitor. Then connect the common wire of the motor to the black or negative wire coming from the breaker.On the other hand, connect a small wire to the motor's stud wire.It turns out that the wire I am holding in my hand will be connected to the capacitor.A total of two wires will be connected to the capacitor..
STEP 3
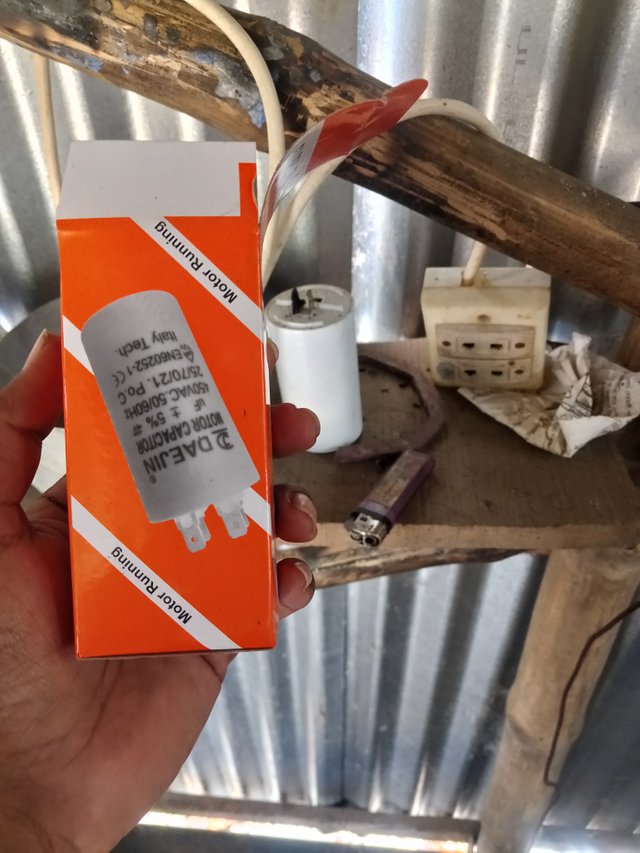
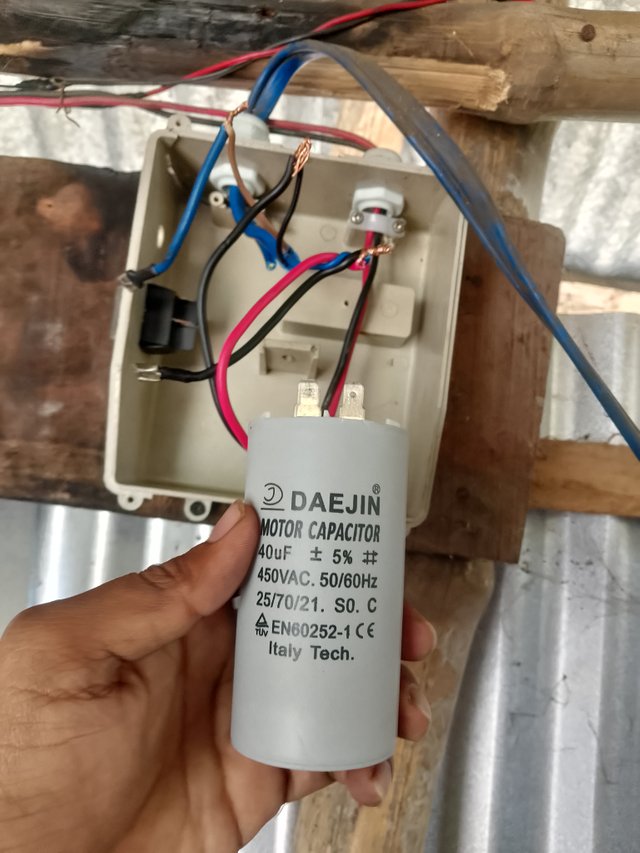
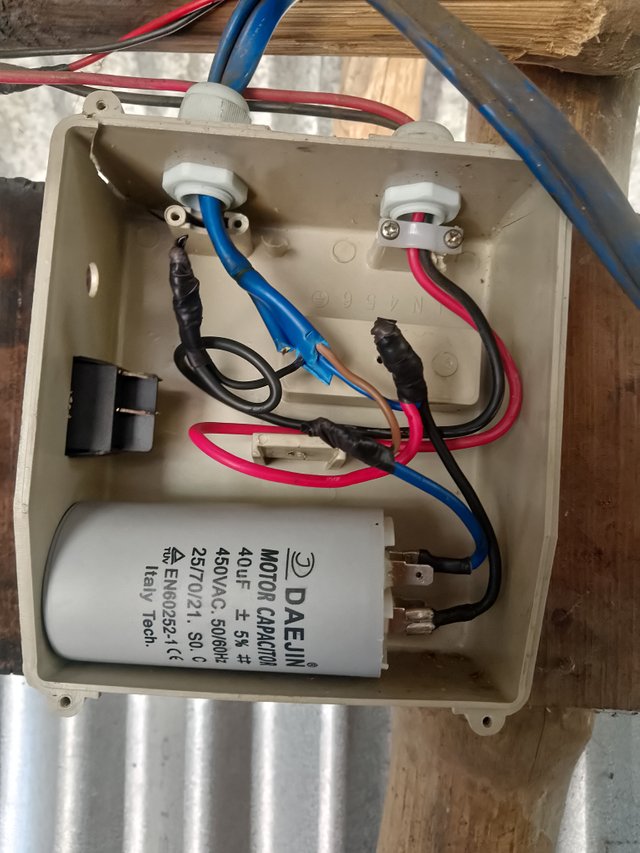
I'm getting a new capacitor if the previous capacitor in the motor burns out.Italy Tech Brand capacitor.The four terminals of the capacitor. After connecting the mainline wire to the motor wire and pulled out two wires at two points on both sides. I will attach them now., I connected the wire that I had left out with the running red wire to one point on one site of the capacitor.And I connected a small wire to the starting wire and connected that wire to another point of the capacitor. After connecting the wires, cover the connected parts neatly with black tape.So that the negative and positive are not connected
STEP 4
How to connect the control box of a submersible motor and start the motor,I tried to represent it through drawing.And I also showed how to start the motor by adding only a capacitor without the control box.Submersible motors have four wires.A wire for running a motor, A starting point, A common wire,A ground earthing wire We don't usually use ground earthing wires.However, we use them for large peas.
STEP 5
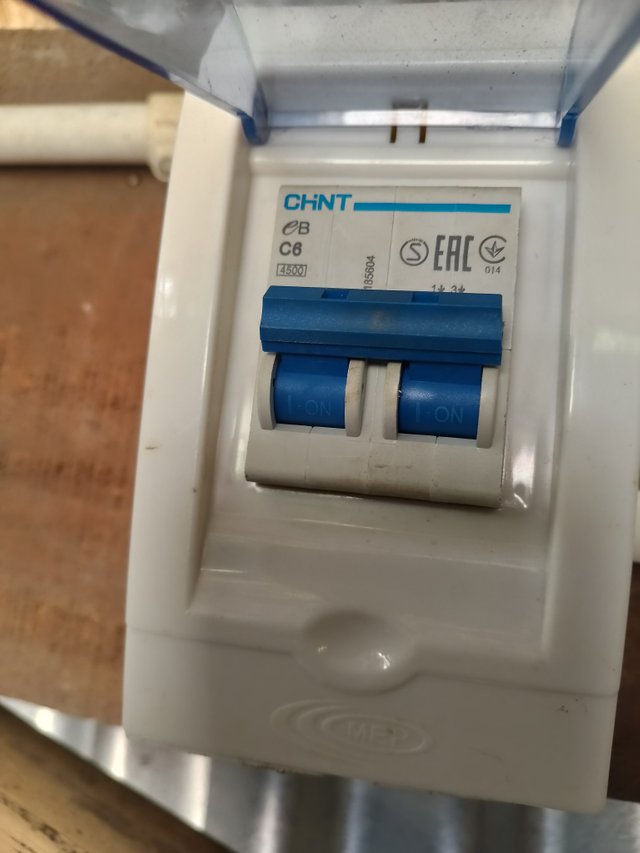
Once the wires are connected to the capacitor, the capacitor is then neatly placed inside the box.Then turn on the main power switch.The breaker was C6.If there is a problem with the motor, the car should fall off easily.That's why a low-power battery was installed,I installed the breaker as per the electrician's advice.Now the motor will start as soon as you turn on the breaker, it has been set that way.Once everything is complete, turn on the breaker and start the motor. Then the motor starts and the water starts rising.
STEP 6
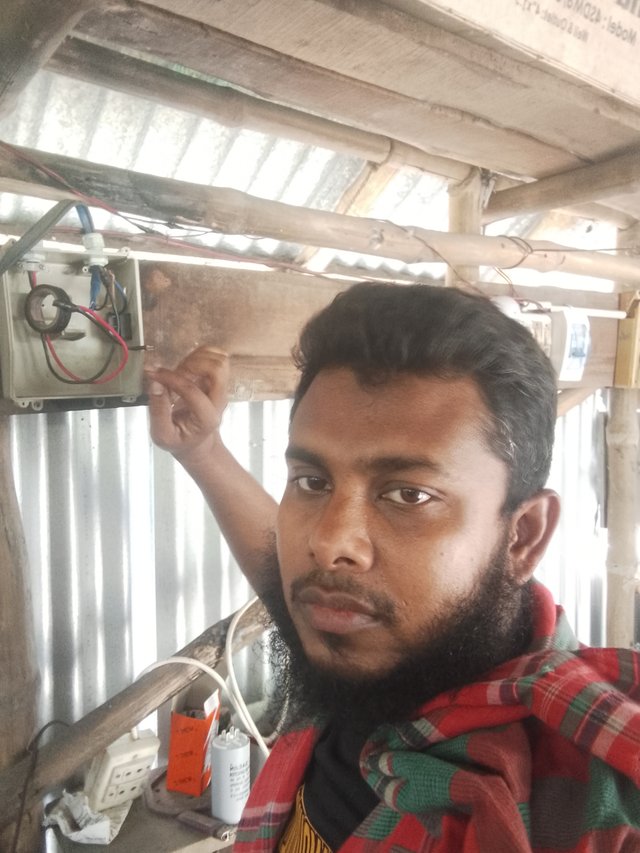
Apart from the submersible motor control box, there was no one to video when I was working on starting the motor directly through the capacitor.That's why when the work was complete, I recorded a short video before starting the motor.If you participate in the SLC Home Repair Club, you will have to submit a video. That's why I made a short video.Actually, to do these tasks, you need a partner.Still, I tried hard enough myself.I watched a few YouTube videos to help me perform these tasks clearly.So that I don't make any mistakes in my work.I'm trying to do better in the future and I'll try to do things in a way that people can learn from.


https://x.com/KalidSyful53290/status/1896243617167196174?t=wOQx7LcTRC8zyvPK_wCIFQ&s=19